- Home
- InDesign
- Discussions
- Re: Change width of objects via find/replace?
- Re: Change width of objects via find/replace?
Change width of objects via find/replace?
Copy link to clipboard
Copied
Hi. I have inherited a few brochures where every product has a price box. These are made up of coloured boxes and text frames. Not ideal I know but it's the hand I've been dealt for now! You will see that the purple and yellow boxes bleed a fraction beneath the white stroke that is around each price box. Sometimes these print, sometimes they don't. But I'd like to do something about them. As I said there are hundreds, all grouped together, and I was wondering if there was some way I could sort these out with a find/replace somehow? I did try to find yellow and purple boxes by width, then make them a fraction thinner, but it doesn't appear that you can find objects by size. I suppose I could change the thickness of the white stroke on the top in one hit.
Copy link to clipboard
Copied
It looks to me like this is really a positional problem. While I can't suggest an automation, if all the boxes have the same offset you can fix one, then select all the others on each page and use Transform > Tranform Again Individually to shift them the same amount.
Copy link to clipboard
Copied
The colour you can see beneath is not the image - it's the purple/yellow boxes. They are still there even when the pricebox is placed on white.
Copy link to clipboard
Copied
Hmmmm
I remember a bug something like this back around CS6 with image frames, though I don't recall the solution. Have you tried changing the stroke alignment?
Copy link to clipboard
Copied
I suspect the price boxes are using multiple shapes, some of which are the wrong size or position. The yellow shape on the right is apparently not the same yellow shape behind the text. I think your best option is to find each problematic shape, using select- next object below and fix it using transform again, (as Peter suggests), once fixed, you may need to snap the group of shapes to align it with the background image. Another option might be to slightly enlarge all pages, and add a white stroke outside the trim line (although exporting without bleed should eliminate the lines).
Copy link to clipboard
Copied
I was just playing with it—I think the yellow frame has a larger rounded corner which is why the color starts lower than expected.
But why not create an object style for one yellow frame, adjust the Width Only in Size and Position Options, then use Find/Change > Object to find the objects with the yellow fill and replace with the object style? Repeat for the purple frames.
~Barb
Copy link to clipboard
Copied
Some excellent suggestions here! I will look into these and try to implement them. Thank you all!
Copy link to clipboard
Copied
Hi Barb, I tried this, and was very hopeful but it doesn't find any frames matching my options. I've tried selecting all the frame options (text, unassigned, graphic) but it doesn't find anything. Other than being a specific colour in my swatches there is a 1.5 rounded edge on the bottom corners, but that's all there is to differentiate it. The object style was based on this, but with the width and height slightly smaller.
Copy link to clipboard
Copied
Did you see my screen shots, below? I assigned the default yellow to the frames—but any color will work—then searched for just that one criteria.
Also, make sure your Search is set to Document.
Edit: I added one more screen shot below to clarify how to define the search for the color.
~Barb
Copy link to clipboard
Copied
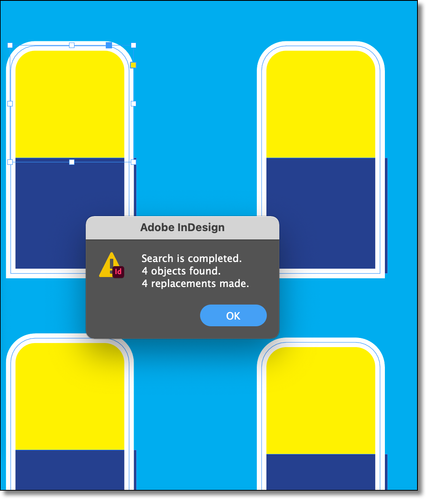
I just grabbed a few screen shots to show what I was thinking.
Define an object style to reduce the yellow frame width.
Find the yellow fill, replace with the object style.
Change all finds all occurences and updates the width.
~Barb
Copy link to clipboard
Copied
Hi Spenno,
could you show that group of objects in a spread where no other objects are placed?
Then open and expand the Layers panel, do a screenshot from that, so that we can see how exactly this is constructed.
Or share an InDesign document with that group of objects only.
Put it on Dropbox or a similar service and post the link.
That would it make easier to find a solution.
Thanks,
Uwe Laubender
( ACP )
Get ready! An upgraded Adobe Community experience is coming in January.
Learn more


