Participating Frequently
February 14, 2017
Answered

Clipping mask via placed illustrator file?

  • February 14, 2017
  • 3 replies
  • 3441 views

Hi,

I'm having an issue working out how to create a clipping mask with placed (not copy and pasted) illustrator artwork.

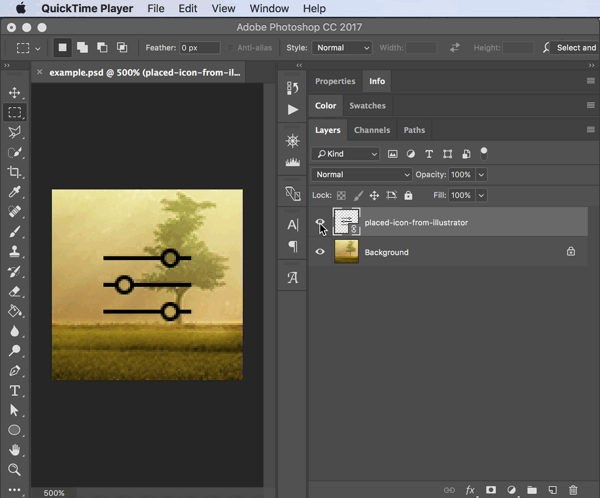
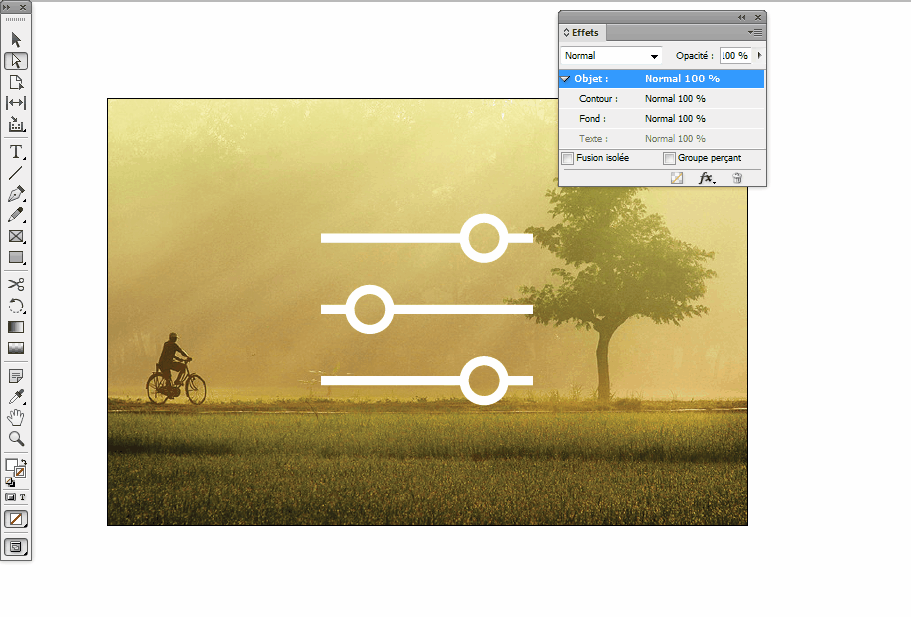
I have an icon set that I manage in illustrator. I create an artboard per icon and then place individual icons into InDesign via the 'place... > show import options' to select the artboard specific to the icon I want. I have a single layer enabled on the placed artboard which is a simple shape layer, black fill, no outlines, simplified as much as possible (all strokes outlined beforehand in illustrator and 'unionized').

The trouble I am having is applying colour plus blending modes to the icon. My current solution is to enable an inner-glow big enough that it acts in a similar way to a 'colour overlay' layer in Photoshop, but it feels a bit of a hack. Plus, it doesn't allow me to zero the opacity of the artwork if I want to screen blend the colour overlay for example.

Is there a way to do this? I know I can create an inverse of the desire effect by:

  1. Grouping the icon with a filled rectangle set to the desired colour/blend mode and placing it behind the icon
  2. Setting the icon opacity to 0%
  3. Setting the containing group to 'knockout group'

I would rather not simply copy and paste the artwork from illustrator as the icons are being modified frequently so it's a much smoother workflow to simply update links.

I've tried to set the layer in Illustrator to a clipping mask but couldn't seem to get this working. I feel I must be missing something simple but googling is bringing up nothing specific.

This topic has been closed for replies.
Correct answer vinny38

Thanks for taking the time to make that example Vinny!

Yes, I'm able to get as far as you have in your example. I'm able to set the tint of an icon to a fully opaque colour. However, in the last part of your example, notice as you bring down the opacity how the inner-glow mixes with the original black fill of the icon, until finally the icon completely disappears.

I would like the inner-glow to be at 100% opacity whilst the original black fill is completely translucent. This is to ensure the original black fill of the icon doesn't interfere with the colour, opacity and blending mode of the applied inner-glow effect.

Perhaps my example wasn't clear because I used a solid background fill. Sorry about that. I've used a photo as the background in this new example which hopefully makes it a bit clearer:

Video commentary:

  1. In the first part of the video I apply a 'colour overlay' effect (not blending mode) with maximum opacity and a 'normal' blending mode. More or less the same effect I get when using an inner glow with InDesign.
  2. Then in the second part, I set the blending mode of the colour overlay effect to 'overlay' keeping its opacity at 100%. You can see the icon goes back to black and the effect is rendered invisible. This is because the 'colour overlay' is blending with the original black of the icon rather than the background.
  3. I resolve this by setting the 'fill opacity' of the icon layer to 0%. This makes the black of the icon completely disappear whilst leaving the layer effects completely intact. You can see that the original black fill of the placed icon completely disappears and the colours of the background blend with the white icon set to the 'overlay' blending mode. Notice how the icon blends with the photo in the background.

Hope that makes sense. It doesn't help that 'colour overlay' and the the 'overlay blend mode' are two different things, and 'fill opacity' is different to 'layer opacity' but fingers-crossed the video makes it a little clearer.


Hi again.

So I slept well, my brain is back to normal but... I understand what you're saying, however I don't get what is the problem reproducing this in INDD?

If you apply a blending effect to the graphic, of course it will not work.

But if you apply it to the frame itself, it does what you want, doesn't it?

Same thing in Photoshop: in your demo, you applied blending to the effect instead of applying it to the layer itself...

I still feel like I'm missing something

3 replies

vinny38
Legend
February 16, 2017

Hi

Imo, using inner glow sure is a hack, but not a bad one really. I don't see any workaround that would be as fast and easy.

My only concern would be PDF rendering.... might be a bit dizzy...

That said, here are a couple a thoughts:

1- If you want to use the "knockout group" method, you can easily get rid of the hairline by applying a stroke to the icon frame (nb: you may want to consider using Objet style). Indd preview issue isn't an issue really, since it's just... a preview ^^. About Mac preview, I don't know about it, being a Windows user...

2- Another workaround: In Illustrator, export icons as TIFF files. Make sure Greyscale mode is selected and don't forget to check "Use artboards" in order to save a tiff file per icon. In INDD, you'll then be able to colorize the icon using direct selection tool. However, the remaining icon background might be a problem. If your icons are always placed on a 1-color background, then you can get back to Selection tool and change the icon background color applying same swatch than document background. If not, well... this just won't work.

Hope that helps

Vinny

Participating Frequently
February 16, 2017

Hi Vinny, thanks for the response – and yeah, I think you're right, the inner-glow is likely the simplest solution. I would have liked a way to set the opacity of the icon and the inner-glow independently, to allow for transparency/blending effects of the colourised inner-glow that show through to the background but I think I'll have to give up on that dream.

The 'knockout group' method does allow this, but I really miss the preview mode. I'm using InDesign for UI work and I'd miss just being able to hit shift-w to get a quick look of where I'm at. Exporting to PDF and then viewing on device via dropbox lengthens the workflow a little too much for my tastes.

If I'm desperate, maybe I'll try combining the two – setting some object styles for the layout workflow (inner-glow) which I then switch around for export (knockout group). Even then I need to export to PDF/X-3:2003 as that's the only way I can preview my design on an iOS device.

It's a shame, because despite this, I still think InDesign is the best tool for UI design and I've tried them all. Photoshop, Illustrator, Sketch, the new Adobe XD beta. I think Adobe built a great tool for layout in InDesign and it's strange to see that they've tried to replicate Sketch in XD whilst ignoring all the relevant pieces from InDesign.

Good to know about the stroke on the icon frame trick! Thanks again.

Community Expert
February 16, 2017

Huh, I'm having real hard time trying to figure out what you want...

If I understand correctly, you want to be able to control color AND opacity to both icon and background?

If that so, you can... Using either Selection tool to control background frame and Direct selection tool to control placed graphic.

Of course, inner glow is applied to the graphic, not the frame...

I feel I'm missing something obvious... maybe after a good night sleep ^^ 


Vinny, what screen capture utility are you using? Is it saving the screen capture directly as an animated GIF? Or, are you converting with another app?

BobLevine
Community Expert
Community Expert
February 15, 2017

You cannot edit Illustrator artwork in InDesign. Beyond that I'm not really sure from your description what you're trying to achieve and based on the lack of responses, I'm guessing that nobody else does either.

Lack of available information is one reason. In the future, version of InDesign, operating system and if you're having problems viewing a PDF, what reader you're using. Generally speaking, anything other than Acrobat or Reader is going to be a crapshoot and Mac Preview is horrible.

Participating Frequently
February 15, 2017

As suggested elsewhere, I have made an inverse of the artwork in illustrator as the first step in my workaround above, and whilst this is effective, the 'knockout group' has the unfortunate attribute of not exporting correctly to PDF. In Acrobat it displays a hairline artefact around the icon, and in Preview on Mac and the PDF renderer in iOS the 'knockout group' appears to have no effect.

Participating Frequently
February 15, 2017

To others who may face the same issue down the line, the PDF export issues are resolved to a large extent via selecting to export using the PDF/X-3:2003 standard in the export dialog.Ensure the transparency flattener is set to High Resolution under the 'advanced' tab in export. I also opted to set the compression for images to a multiple of 72 to avoid any anti-aliasing issues. (My PDFs are for viewing on a mobile device.) Some more obvious hairline visual artefacts remain when viewing in Mac Preview but are almost invisible on an iPhone.

Willi Adelberger
Community Expert
Community Expert
February 15, 2017

Your recommendation is terribly dangerous. If someone needs to place PDFs from Illustrator or InDesign, don't use PDF/X-1a or X-3, use only PDF/X-4 with Live transparency.