- Home
- InDesign
- Discussions
- Re: Clipping Path for Object Drawn With InDesign
- Re: Clipping Path for Object Drawn With InDesign
Copy link to clipboard
Copied
I created these two bookshelves using the rectangle tool in InDesign, I like how they turned out, but there is one problem. They have no clipping path options. I need InDesign to set/ activate/ recognize... whatever... a clipping path for this whole shape so that I can set a text wrap around it, and create a cast shadow for it, but I don't know how to get it to show up.


As you can see above, all of the clipping path options are grayed out. This is preventing me from being able to apply a text wrap to the shape rather than its bounding box, or creating a cast shadow. Sorry for the extra screen, I couldn't get a picture of the menu with just one screen because alt closes the menu lol. So how to I create or get InDesign to recognize a clipping path for this object?
 1 Correct answer
While everything above, what Barb said, is absolutely true...
Make copies of both shelves. Combine each shelf to a single object.

Select both, combine.

If needed, patch the „holes”: put any figure(s) on top

Select all and Combine again:

***
Barb, I waited for You patiently this time - You're the first ![]()
Copy link to clipboard
Copied
First of all, impressive use of the rectangle tool in InDesign! ![]()
Now, I think there is confusion on needing a clipping path. In InDesign, the Clipping Path dialog box is used for transparency. In text wrap, the clipping path option is used to access a clipping path coming from Photoshop as a way of handling text wrap. Same name, two very different applications.
This is preventing me from being able to apply a text wrap to the shape rather than its bounding box
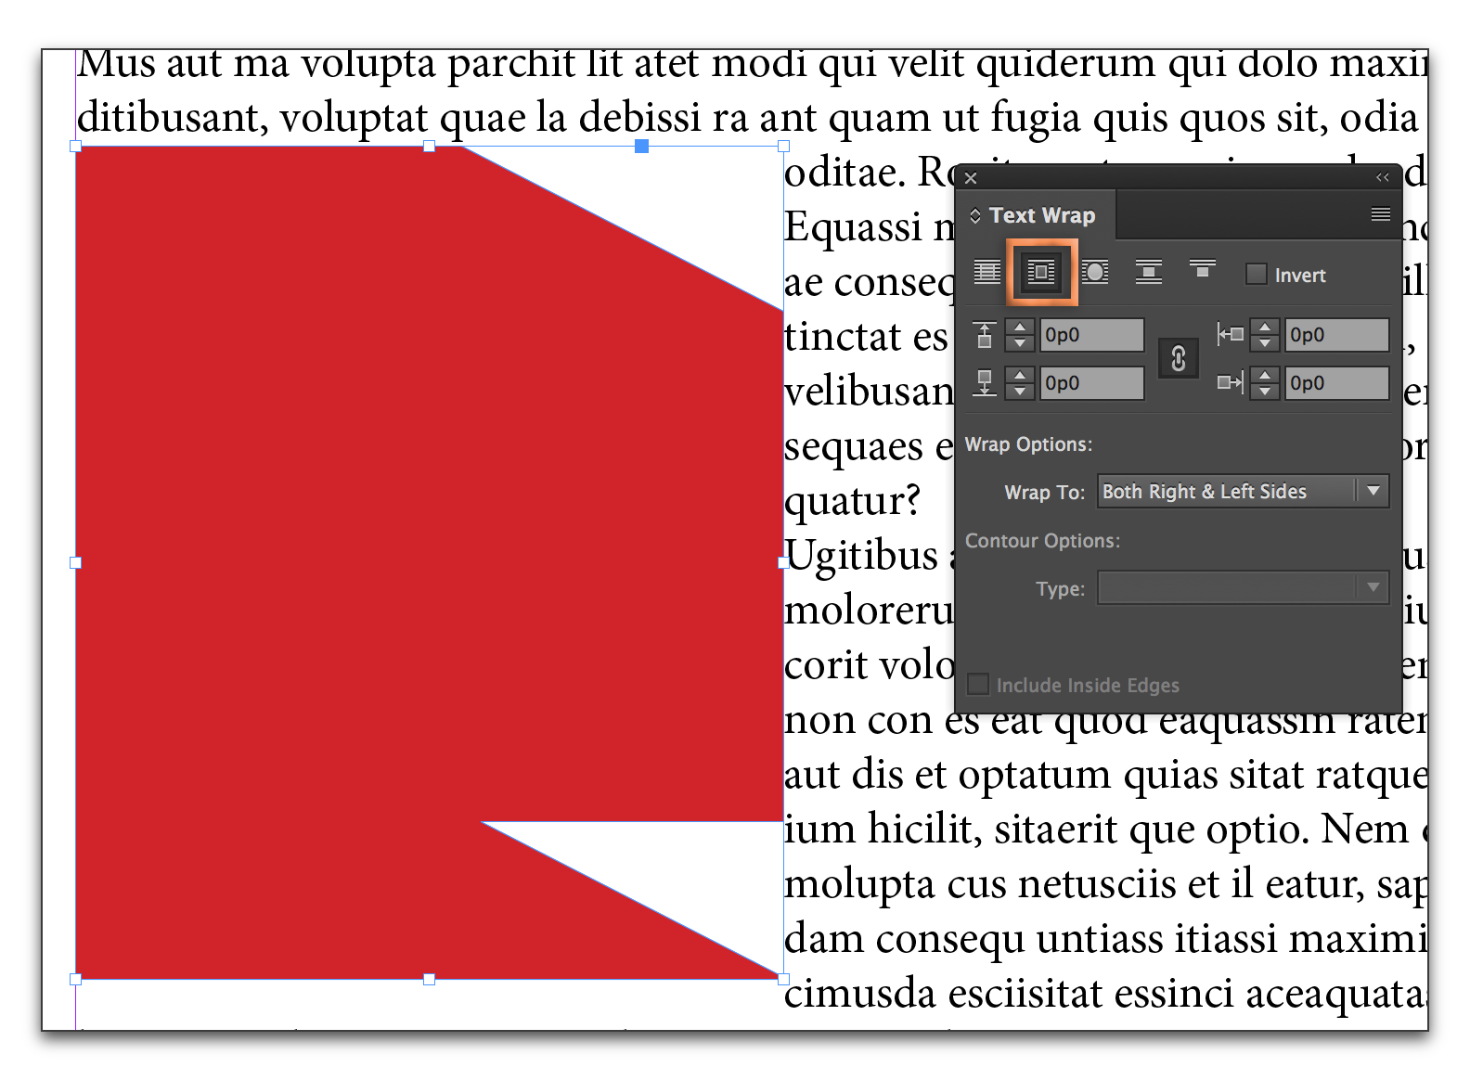
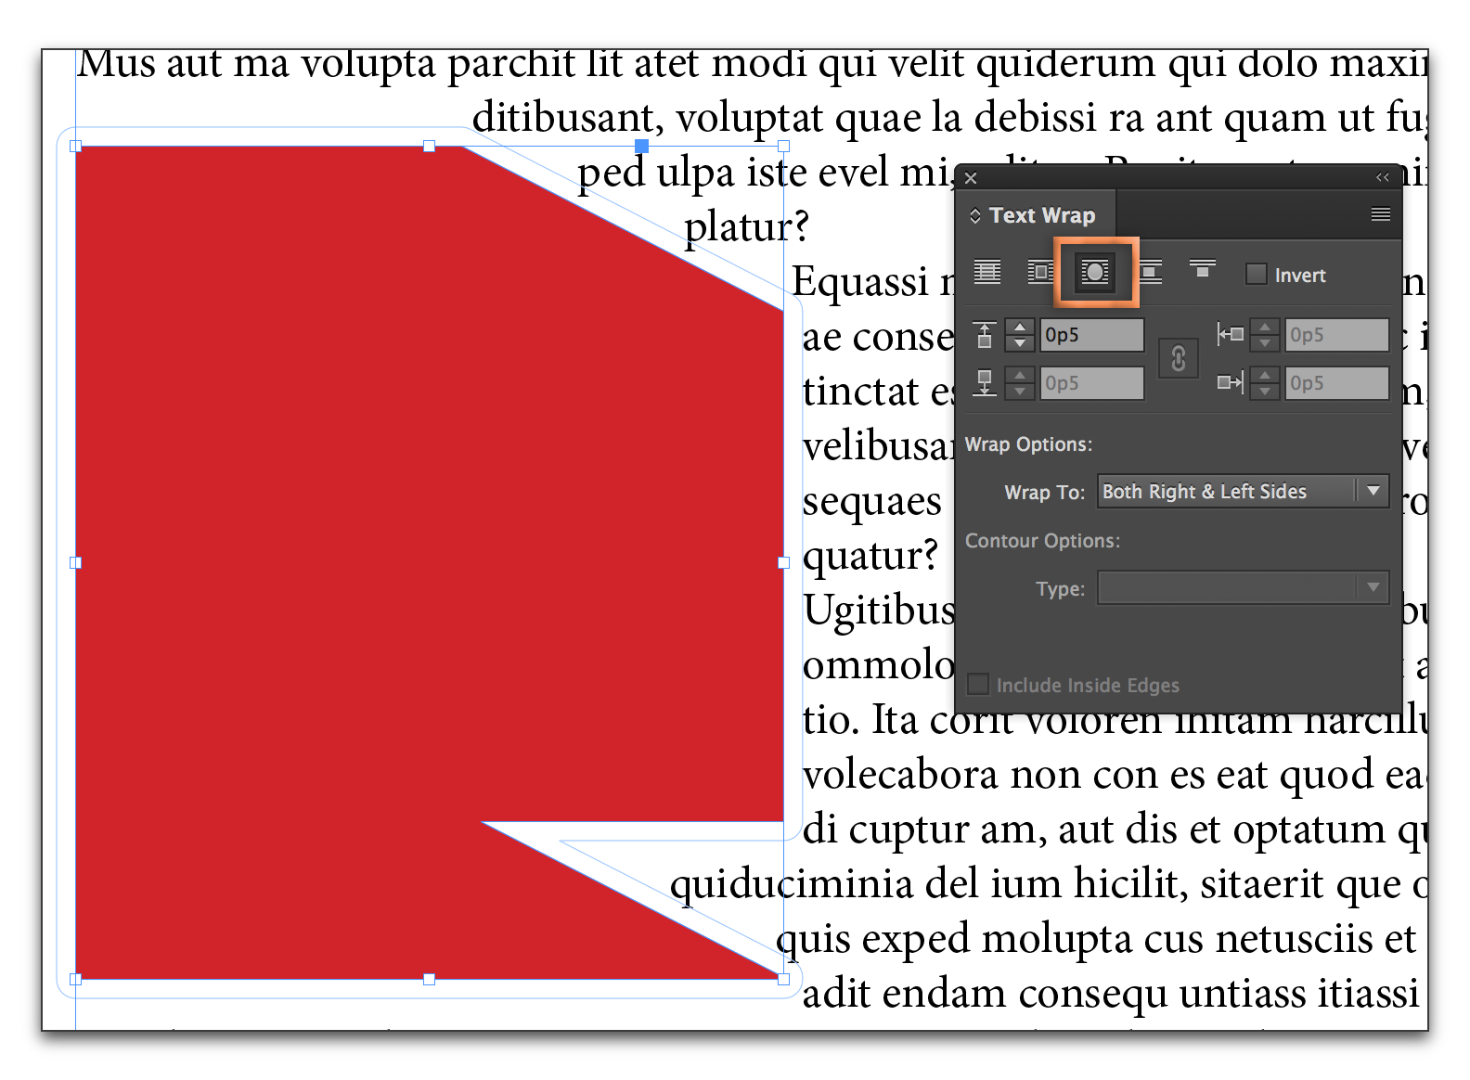
To apply text wrap to a bounding box, you know to choose button #2.

To apply text wrap to the object shape, choose button #3. It will follow your shape automatically.

If you want to further tweak the wrap, use the Pen tool and Direction Selection tool and for instructions see "Change the shape of a text wrap":
Copy link to clipboard
Copied
Thank you! Although I had already tried "wrap around shape" and was not getting the effect that I wanted. Because this large shape is made up of a lot of grouped smaller shapes, even the "wrap around shape" option does not wrap the text around each edge of the shape, instead, it wraps around the rectangle created around the whole when you group them all together. I should have used the "combine shapes" option in pathfinder rather than grouping, as Winterm suggested, that would have avoided this whole issue. However, I was able to achieve close enough to what I wanted by ungrouping 1 level (so that the single shape is now 3, both sets of shelves and the oval rug) and text wrapping each individually (which wraps around the curve of the oval because it is only one shape and not a group, and wraps the smaller rectangle around each shelf rather than the larger rectangle around all 3 shapes) then re-grouping the 3 back together. This way I didn't have to ungroup everything and tediously combine each shape. The cast shadow isn't important enough to go through all that lol.
Copy link to clipboard
Copied
Did you see the link I added at the very bottom? Using the Pen tool and Direct Selection tool you can make a custom text wrap do anything you want! IMHO, that was the quickest possible way to get where you wanted to go.
If you want to further tweak the wrap, use the Pen tool and Direction Selection tool and for instructions see "Change the shape of a text wrap":
Copy link to clipboard
Copied
No I had not seen that, thank you!

Copy link to clipboard
Copied
your information is correct
Copy link to clipboard
Copied
While everything above, what Barb said, is absolutely true...
Make copies of both shelves. Combine each shelf to a single object.

Select both, combine.

If needed, patch the „holes”: put any figure(s) on top

Select all and Combine again:

***
Barb, I waited for You patiently this time - You're the first ![]()
Copy link to clipboard
Copied
LOL ![]()
Copy link to clipboard
Copied
That is most definitely what I should have done to begin with. I will remember this in the future. I am not very experienced in InDesign and have largely taught myself, so a lot of the things I do are the hard way or don't make sense. Like grouping shapes instead of combining them. Good tools for the future, thank you!
Copy link to clipboard
Copied
Glad you're ready to go further ![]()
Grouping not always "doesn't make sense". Say, you can "ungroup" at any time, but you can't un-combine (only undo), so be sure you're working on a duplicate!
Also resulting figure gets attributes of the frontmost object, all others are gone. Combine won't work on grouped objects, too, so you must ungroup them first.
Another thing, often all those steps I showed can be skipped - if you need only the final result - just ungroup everything, patch holes (or leave it), select all, combine. Especially when the figures are simple.
And the last: there's even the script which does this job, but no need to bother for the one-time thing, I guess.
Copy link to clipboard
Copied
You don't need a clipping path for vector objects only. Makes no sense.
Copy link to clipboard
Copied
The point is that the text wrap options were not allowing me to tell it to detect the edges and wrap around the edges of the shape because it was a group of shapes instead of being combined into one single shape. I also had wanted to create a cast shadow for each shelf. The only way i know how to do that is by using a shapes clipping path to create an overlay shape with a black to white gradient. I am probably not asking correctly thought because I am very very new to InDesign. Thank you for your help all!
Find more inspiration, events, and resources on the new Adobe Community
Explore Now
