

- Home
- InDesign
- Discussions
- Re: Creating bleeds in an imported pdf document?
- Re: Creating bleeds in an imported pdf document?

Copy link to clipboard
Copied
So we have pdf documents that have multiple pages that we've imported into indesign using multiple page script.
I haven't been able to figure out to export the document with bleeds that are usable for print. When import the pdf's, it imports the whole page as a single object, so I can't transform anything without it messing up the text, etc.
Any ideas?
I've included an image of how it exports.


 1 Correct answer

Before you try it again, go to File > Document Setup > Bleed and Slug > Bleed and enter a bleed amount. an eighth-inch or 3 mm should be enough.
Then, when you export again, go to the Marks and Bleeds page of the Export PDF dialog and tick the Use Document Bleed Settings checkbox.
 9
Replies
9
9
Replies
9
Copy link to clipboard
Copied
There's no way to manufacture bleed from the placed PDF (images) which have none. I don't know if the example you showed is typical of all the pages, but to add bleed to the example:
- Determine what color green that is
- Make new elements (simple rectangles in this case) filled with that green and extend them into the bleed area
It would be great if the green is a known spot color and a reliable match meant you could put the new bleed-extended elements behind/under the placed PDF. But if that's not the case, a near-match could force you to put the new elements in front of/above the placed PDF, and you'll also have to replicate the numbering.
Copy link to clipboard
Copied
That's what I thought.
I had another idea of being able to scale the object to 101% - then "transform again" all the other pages.
The problem is I was unable to figure out how to center all the objects.
Would that work?
Copy link to clipboard
Copied
Well, it's debatable whether a mere 1% increase would provide enough bleed (it's only 0.5% on each side). More than that will also be moving your numbering closer to the trim. You'll have to judge for yourself how much is enough, and how much more is too much.
If you do decide to go that way with any amount, first set the reference point proxy in the Transform panel to the center:

Then with your first placed PDF selected, double-click the Scale tool, enter your %, and click OK. That should be all you need to do for the first one, then, Transform Again will work on the rest, scaling them around their centers, so they stay . . . centered on the page.
Copy link to clipboard
Copied
Thanks! Centering it made it so much easier!
I tried to export it but no matter the scale or percentage i put it in - it still cuts the bleed right at the crop mark. Am I exporting it wrong, or is there something I need to do to recognize the expanded object?

Copy link to clipboard
Copied
Before you try it again, go to File > Document Setup > Bleed and Slug > Bleed and enter a bleed amount. an eighth-inch or 3 mm should be enough.
Then, when you export again, go to the Marks and Bleeds page of the Export PDF dialog and tick the Use Document Bleed Settings checkbox.
Copy link to clipboard
Copied
It worked! You sir, are a god among men. Thanks for the help!

Copy link to clipboard
Copied
In addition to the good information above, I would ask for a new PDF, correctly exported with bleed, although in my experience the response is likely to be "can you please fix it"?
If you have PitStop, you can create bleed where none exists, or if the PDF was created in Illustrator, you may be able to safely open it and fix the bleed, if not, then John's suggestions are your best option.
Edit, you can also place a 2nd instance of the PDF on the page, slightly enlarged and cropped, to add bleed.

Copy link to clipboard
Copied
I agree with Luke's answers (either get the client to supply it correctly to your specs, or use Enfocus Pitstop to fix it).
The latest version of Enfocus Pitstop has an action within the action lists that does a really good job and would work in your example.
Before:

After:

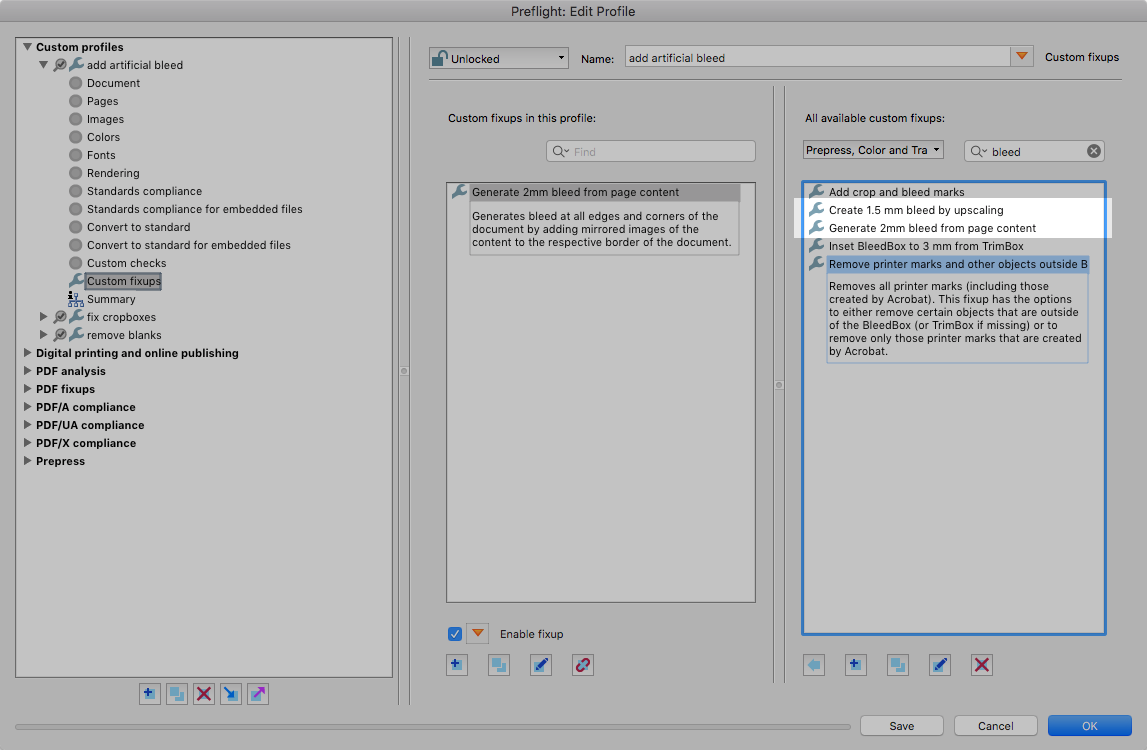
If you don't have the Enfocus Pitstop plug-in, you could try using a preflight within Adobe Acrobat's print production tools. There are two custom fixups that can add bleed, but when I tested them in the above example, both did not have the desired results. I think it is meant to work with raster images, and not vector graphics.
Copy link to clipboard
Copied
There is also this really cool script from Marc Autret from Indiscripts that could help you directly in InDesign too: Indiscripts :: FillBleed | Fix Image Frames so they Meet the Bleed Edge [Update]

Find more inspiration, events, and resources on the new Adobe Community
Explore Now
 AdChoices