Lorrieann
Inspiring
February 20, 2023
Answered

I need help figuring out how to make a top down (calendar style) fold where folds cascade

  • February 20, 2023
  • 2 replies
  • 2398 views

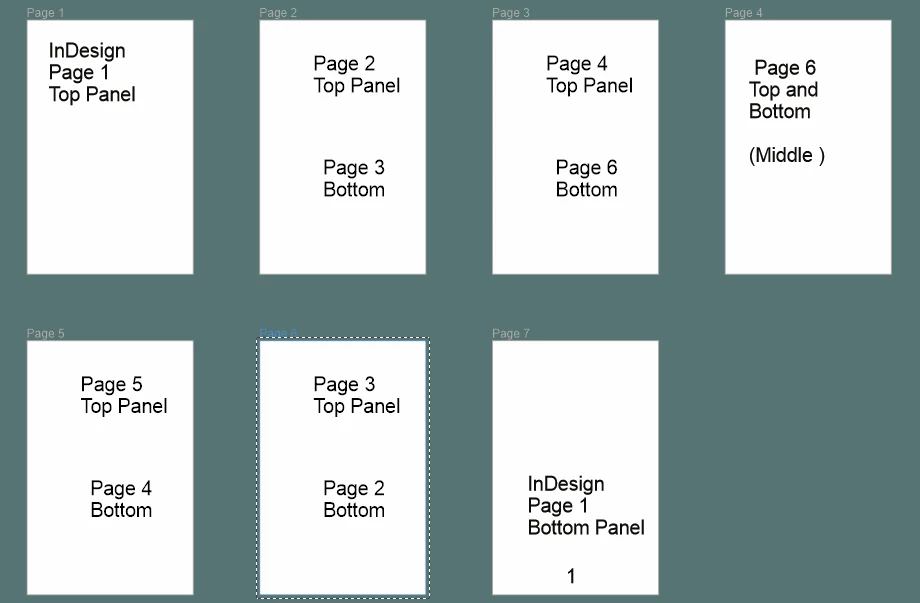
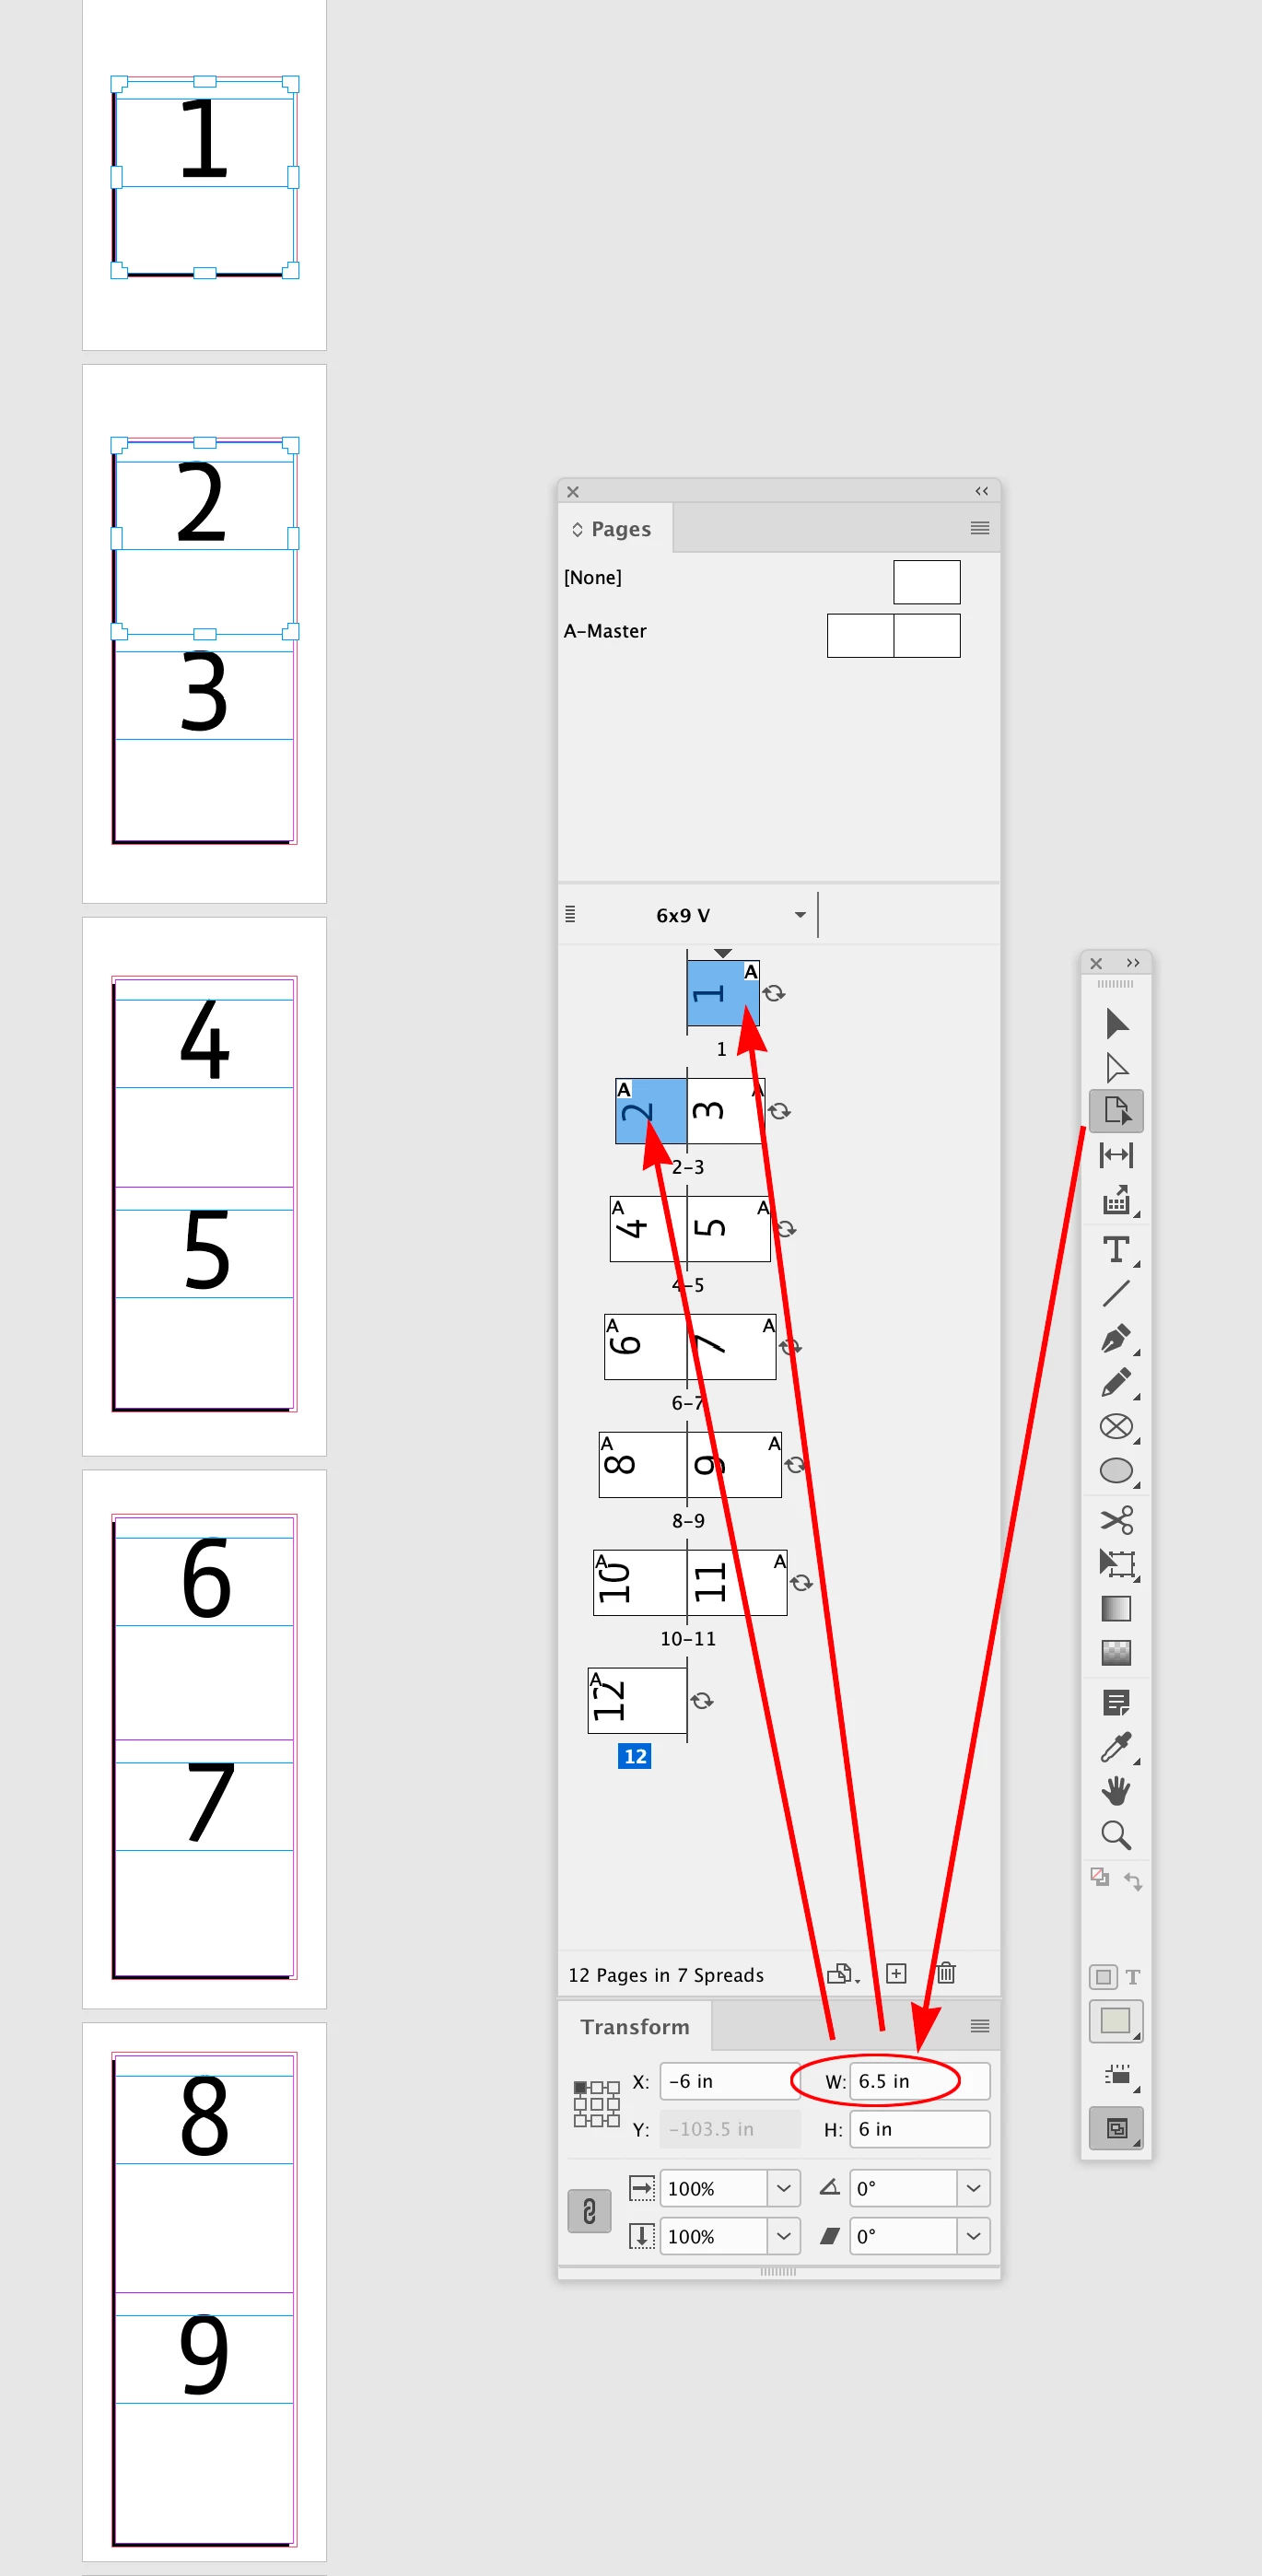
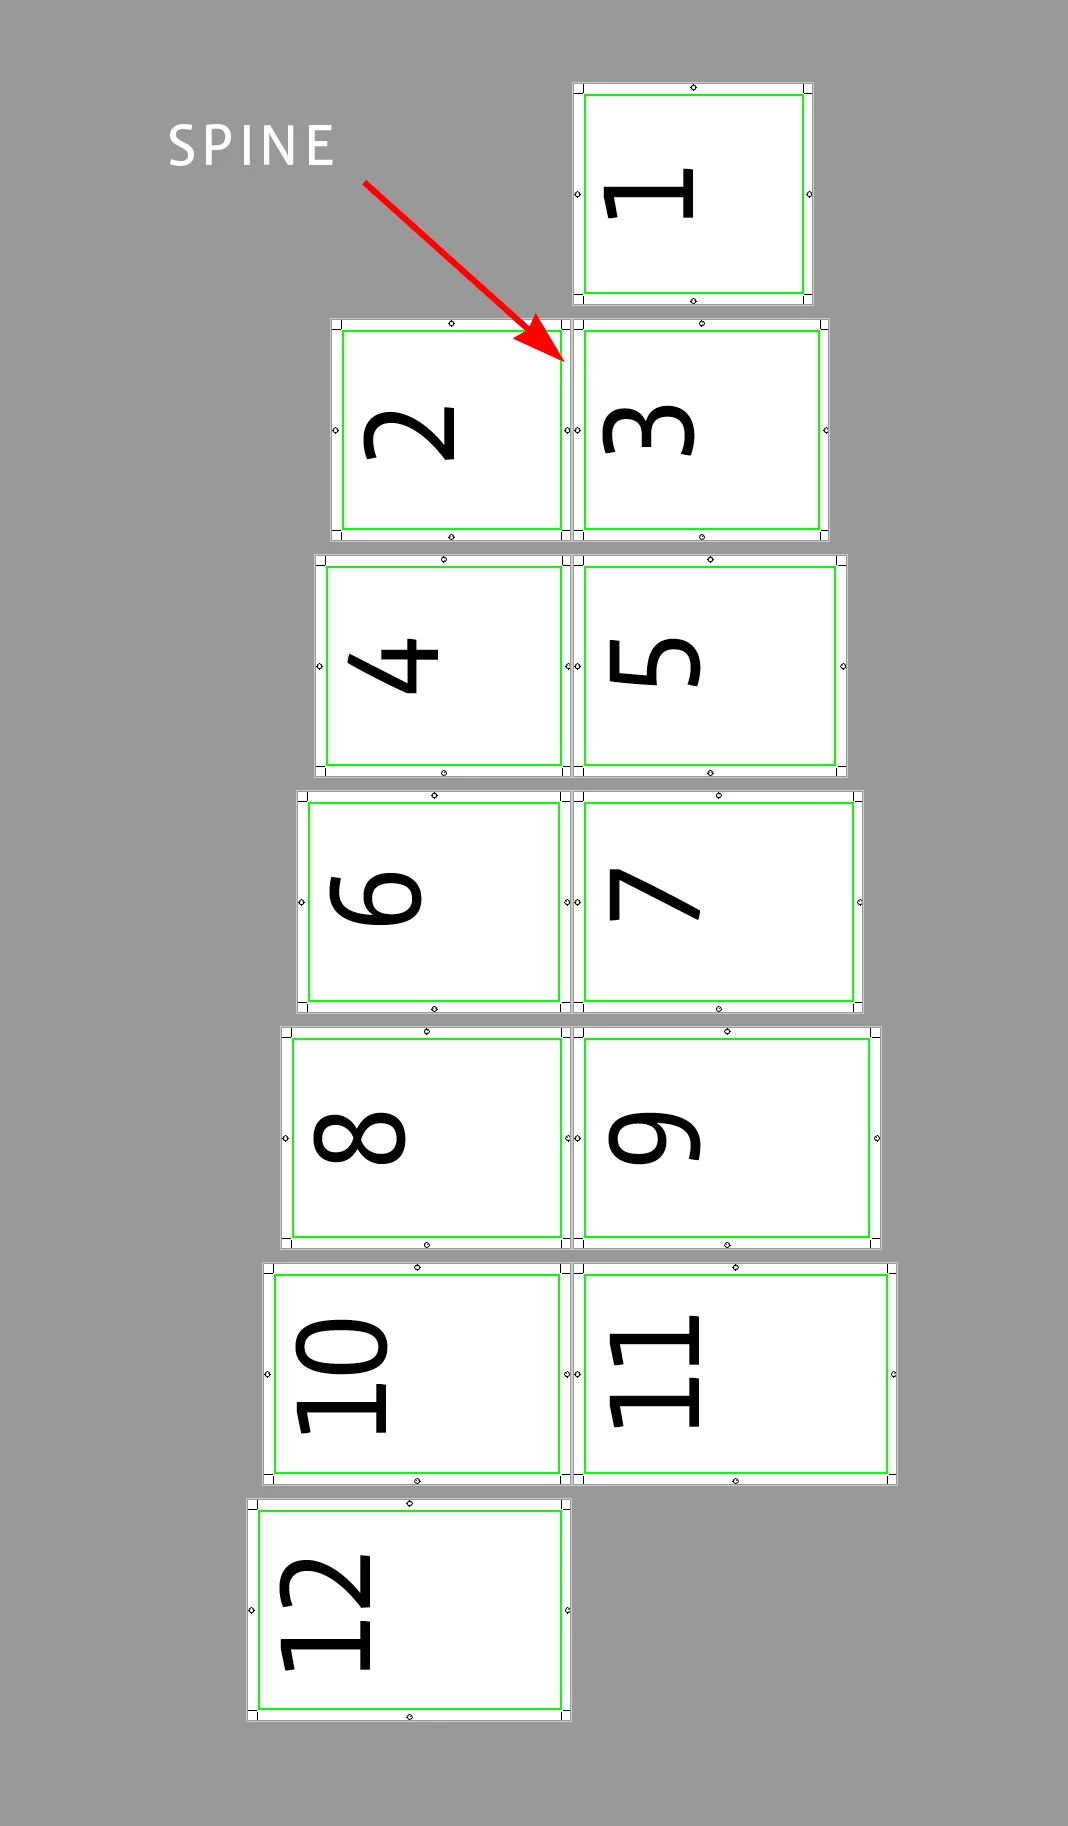
This is a little hard to explain.  I have  document that  has a cascading fold with staples at the top.  Illustrated here.

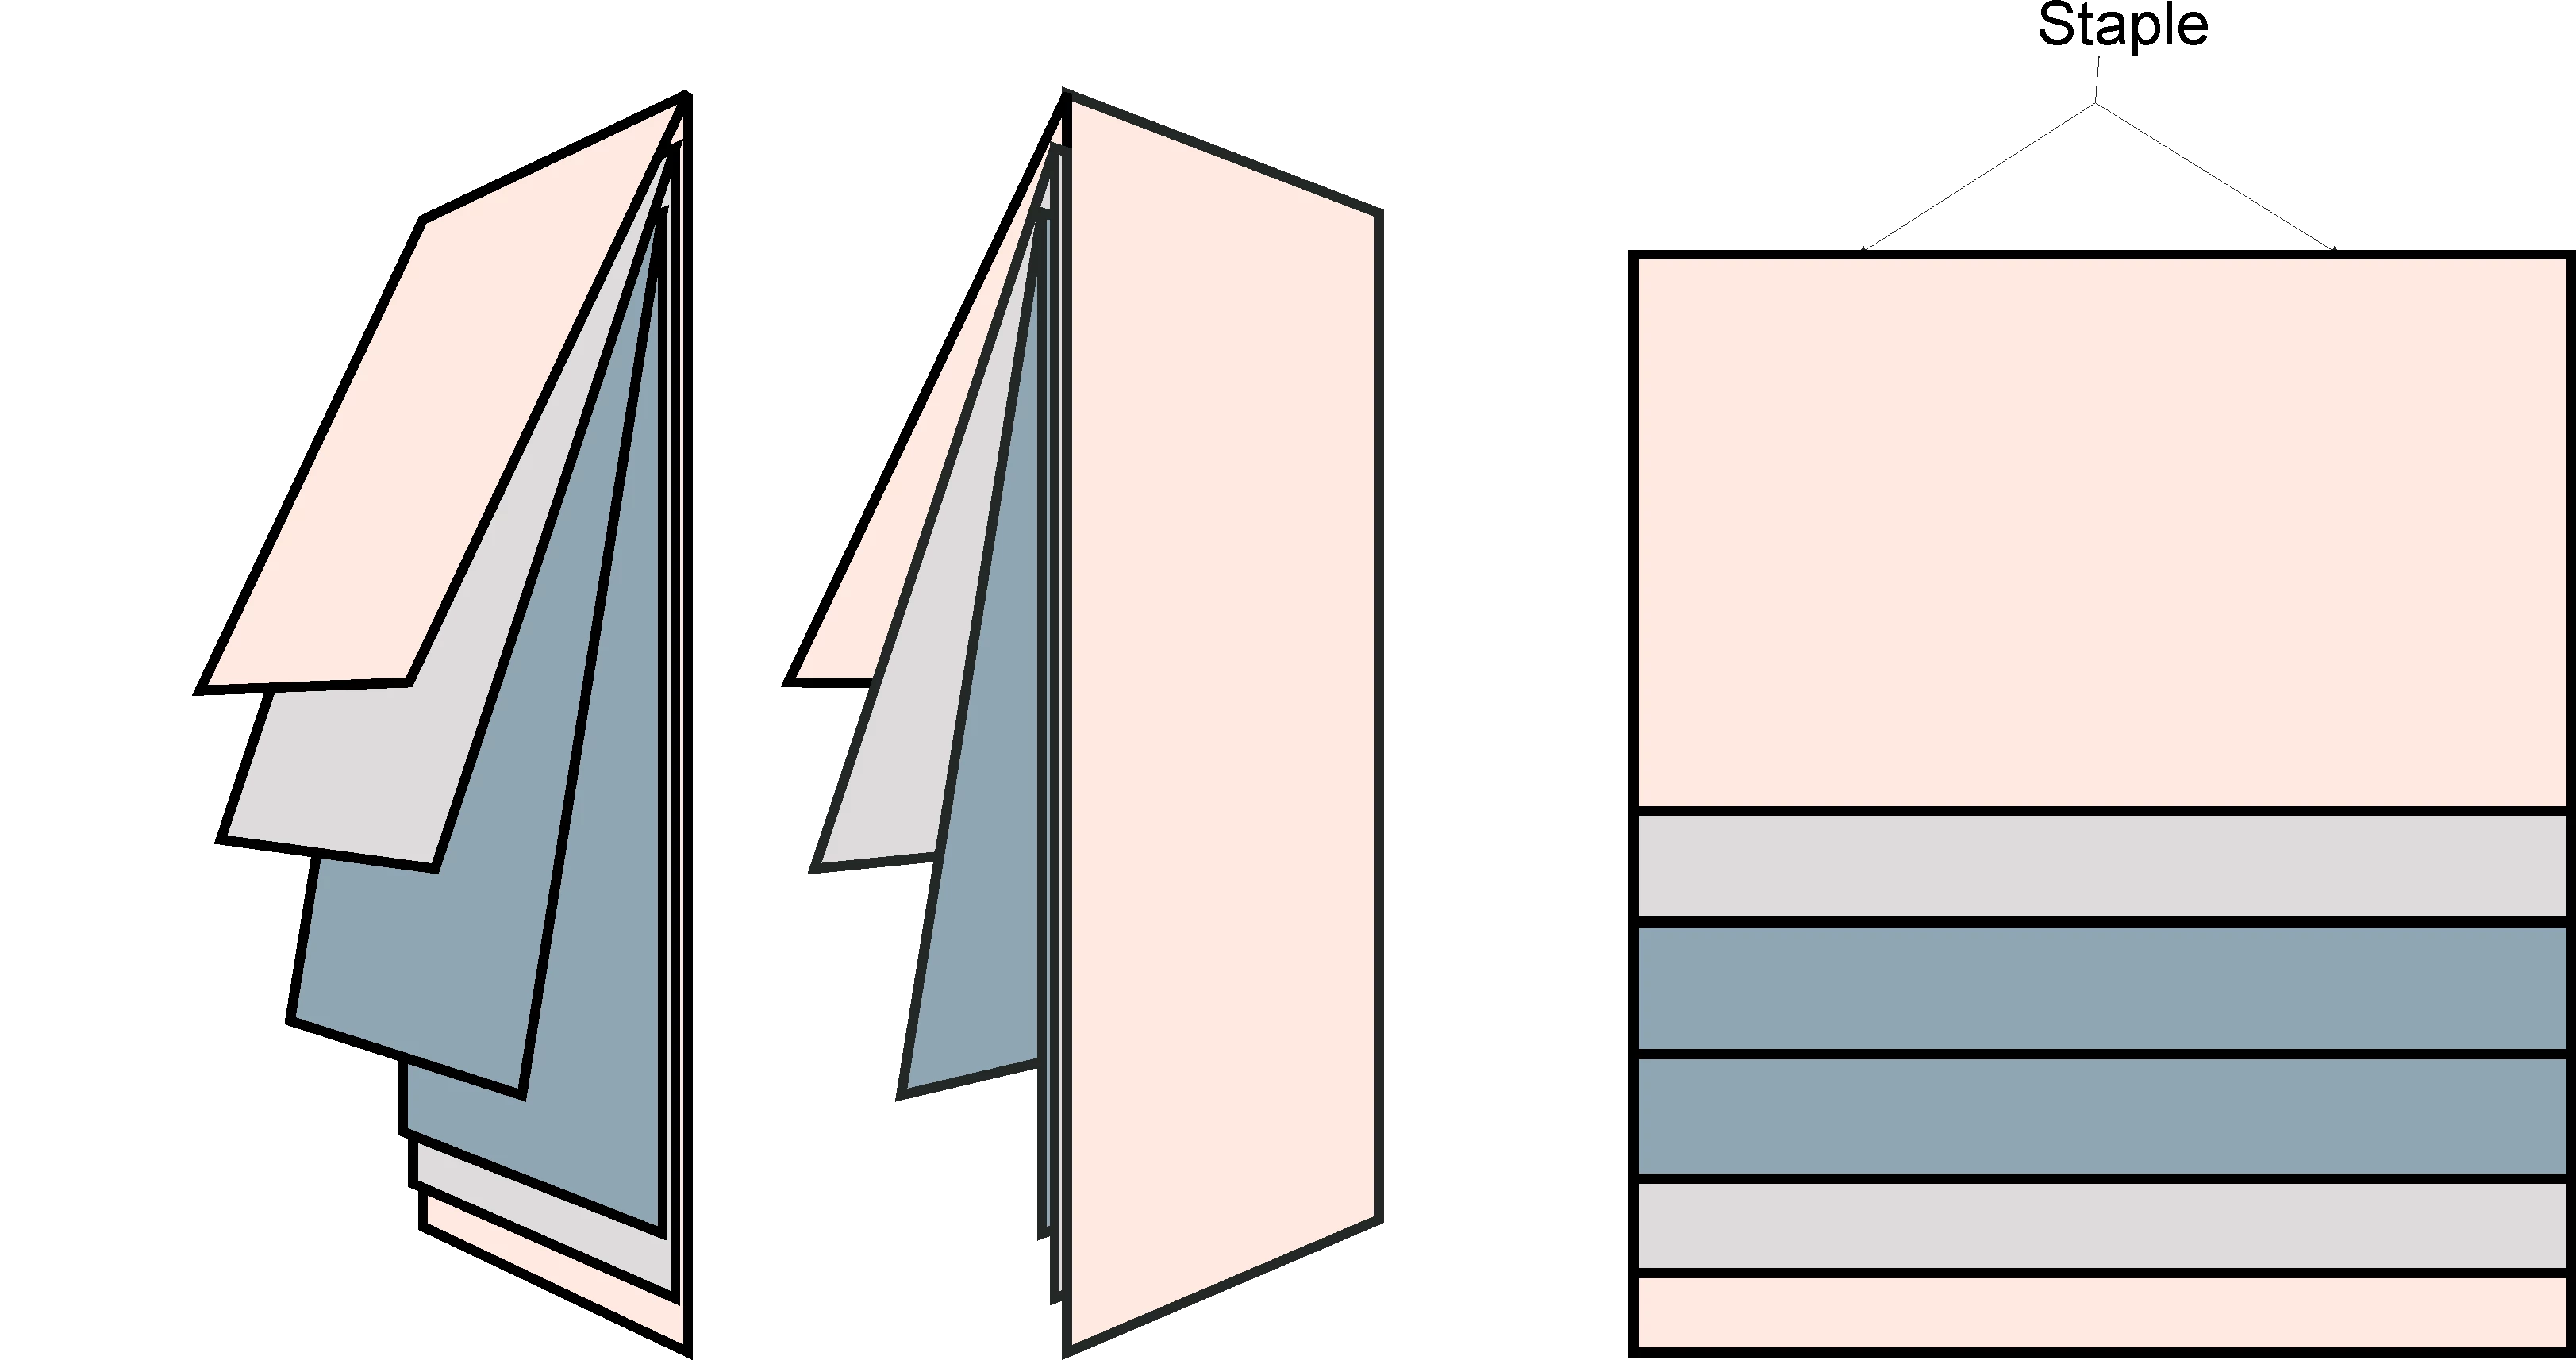
There are 3 physical sheets of paper, with printing on both sides.  The folds are at different positions on each sheet, so when they are folded and nested together, they cascade.  In order to print properly, some panels need to be upside down.   I have created the document so that it can print double sided, turned on the long edge, then folded and that works fine for the printer and they're fine with the file.   The problem is I am required to also create a readable format so the pages are in the correct order, and nothing upside down. . . For example: the way I created the  front flap, and the back flap (pink) the Indesign file has the front page upside down at the top, and the back page right side up on the bottom.  The rest of the panels are not in readable order.   The bottomf issustration shows how I have to shuffle the panels around to get a readable PDF.  Please someone tell me there is an easier way.  


This topic has been closed for replies.
Correct answer rob day

Hi @Lorrieann , An alternative would be to setup a facing page document, rotate the page view so the spine is at the top, and adjust the size of the pages that backup to each other with the Pages tool.


For example the intial setup of 12, 9x6 facing pages—the spine is at the center of the spread:


Select all of the pages and rotate the spreads’ views (a typical calendar view):


With the Pages tool you can select the pages that backup to each other, and adjust their sizes. Page 12 is the back cover, and page 11 is the inside back cover. Those two pages are left as 9" x 6".


Pages 10 and 9 backup to each other and are .5" shorter, so using the Pages tool I set them to 8.5" x 6"


Pages 8 and 7 would be 8" x 6", 6 and 5 would be 7.5" x 6", and so on, with 2 and 1 set to 6.5" x 8":


Exported to PDF/X-4 with crop marks:


2 replies

Robert at ID-Tasker
Legend
February 20, 2023

Or you can export PDF from the main document and then in a new INDD document - place and rotate pages from the PDF - similar solution to what @Rene Andritsch suggested - but then you are 100% sure that WYSIWYG from the original document.

And will work/display/open faster. 


Or you can even go for JPEGs 😉 


Rene Andritsch
Community Expert
Community Expert
February 20, 2023

Once you have set up your calendar, you could create a new file with the page order you need and place the already designed pages as you need them. You can place indd files like images. Of course you would have to turn rotate them as necessary, but this would be my first thought without messing with your original document. This way it would also update if you had to change something in the original.

Lorrieann
LorrieannAuthor
Inspiring
February 21, 2023

Thank you, this is essentially what I had to do.  The worry becomes there are now two documents that need to be kept up to date.  The text is no problem because I have the source linked, but there are certain elements, for security reasons, have to be embedded.    

rob day
Community Expert
rob dayCommunity ExpertCorrect answer
Community Expert
February 21, 2023

Hi @Lorrieann , An alternative would be to setup a facing page document, rotate the page view so the spine is at the top, and adjust the size of the pages that backup to each other with the Pages tool.


For example the intial setup of 12, 9x6 facing pages—the spine is at the center of the spread:


Select all of the pages and rotate the spreads’ views (a typical calendar view):


With the Pages tool you can select the pages that backup to each other, and adjust their sizes. Page 12 is the back cover, and page 11 is the inside back cover. Those two pages are left as 9" x 6".


Pages 10 and 9 backup to each other and are .5" shorter, so using the Pages tool I set them to 8.5" x 6"


Pages 8 and 7 would be 8" x 6", 6 and 5 would be 7.5" x 6", and so on, with 2 and 1 set to 6.5" x 8":


Exported to PDF/X-4 with crop marks: