- Home
- InDesign
- Discussions
- Re: indesign 6 on a mac bevel and emboss
- Re: indesign 6 on a mac bevel and emboss
indesign 6 on a mac bevel and emboss
Copy link to clipboard
Copied
How can I bevel and emboss on text in indesign without it affecting photos on that page? Can you put the text on a separate layer for the page and if so how?
Copy link to clipboard
Copied
I hope I have understood the question ...
In InDesign, you can apply effects to objects, regardless of the layer.
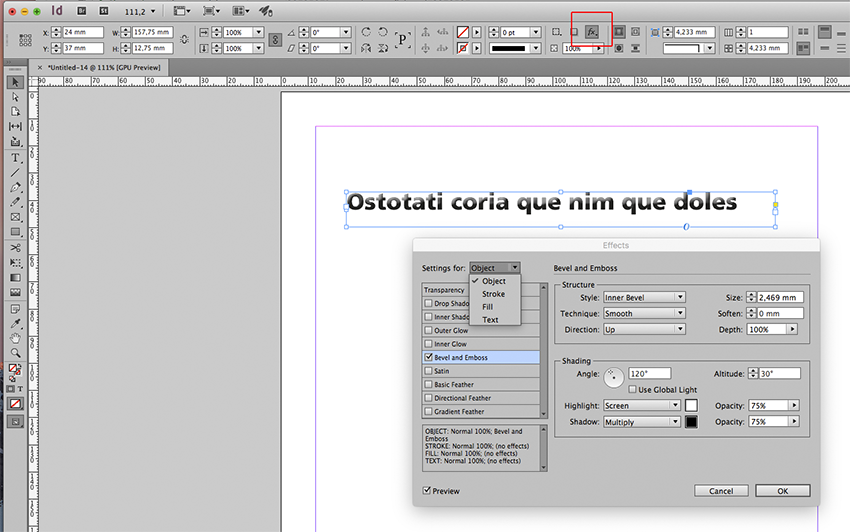
Select the text frame and choose Effects > Bevel and Emboss
You can also choose if to apply the effect to the object, or to the fill, stroke, or to text only
From the icon FX on control panel or from Effects panel (menu Window)
Copy link to clipboard
Copied
It does not matter what settings I choose in the Settings for: drop down. Once I put the effect on a text box it affects the colour of a photo which is another frame goes much lighter.
Copy link to clipboard
Copied
Can you please show a screenshot?
Copy link to clipboard
Copied
Cocoparra wrote
It does not matter what settings I choose in the Settings for: drop down. Once I put the effect on a text box it affects the colour of a photo which is another frame goes much lighter.
Hi,
I assume your images are in RGB and InDesign's transparency blending space options are set to Document CMYK.
So what you are seeing is a simulation of transparency interacting with other page items.
The pixels of your photo are still the same. However the preview can show different things according to several options set.
What the simulation is showing depends of various factors:
1. Blending Space options
2. View options
3. Document settings with color management
See this little experiment:
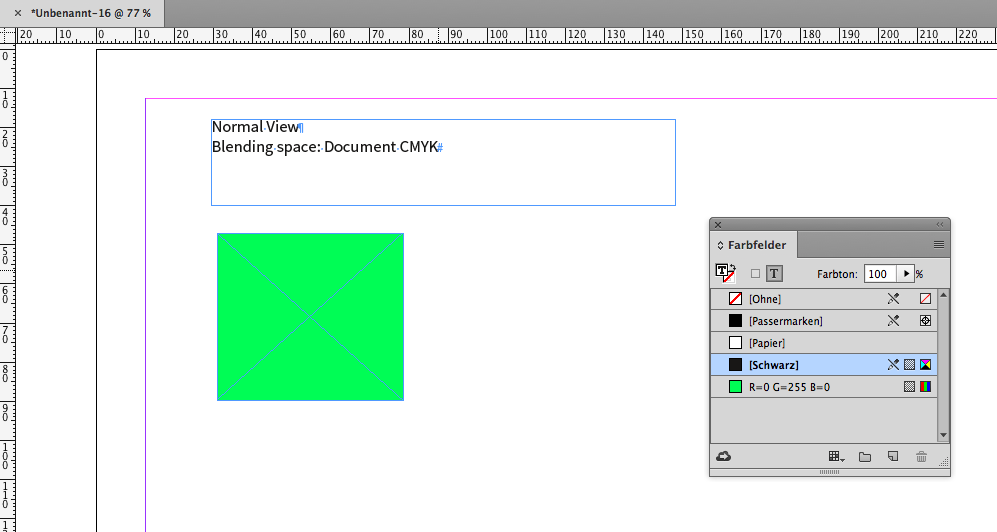
A rectangle on the page filled with RGB green, could be your placed RGB image.
Fast View, Blending space: Document CMYK, no transparency on the spread.

Let's change the view to Normal View.
Still the same visual experience.
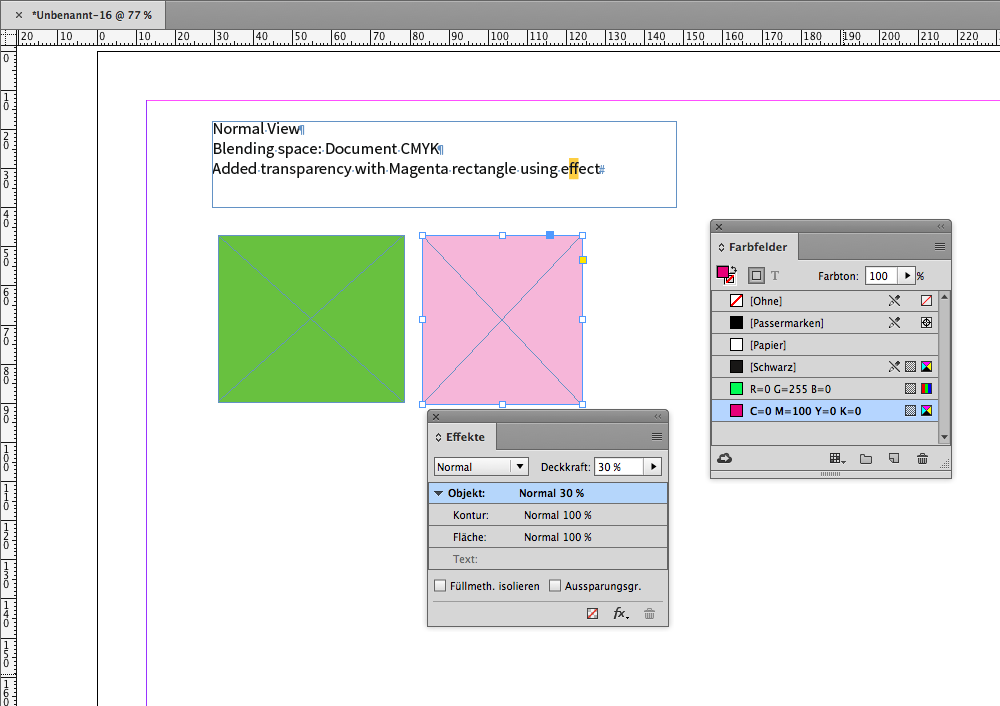
But then we add a rectangle where we set some transparency with the effects panel.
Bam. The simulation of the color of the green rectangle has changed.
Why? InDesign is trying to show the interaction of transparent objects with not transparent ones.
And for that we basically have to options: Document CMYK and Document RGB.
The same objects where blending space is changed to Document RGB :
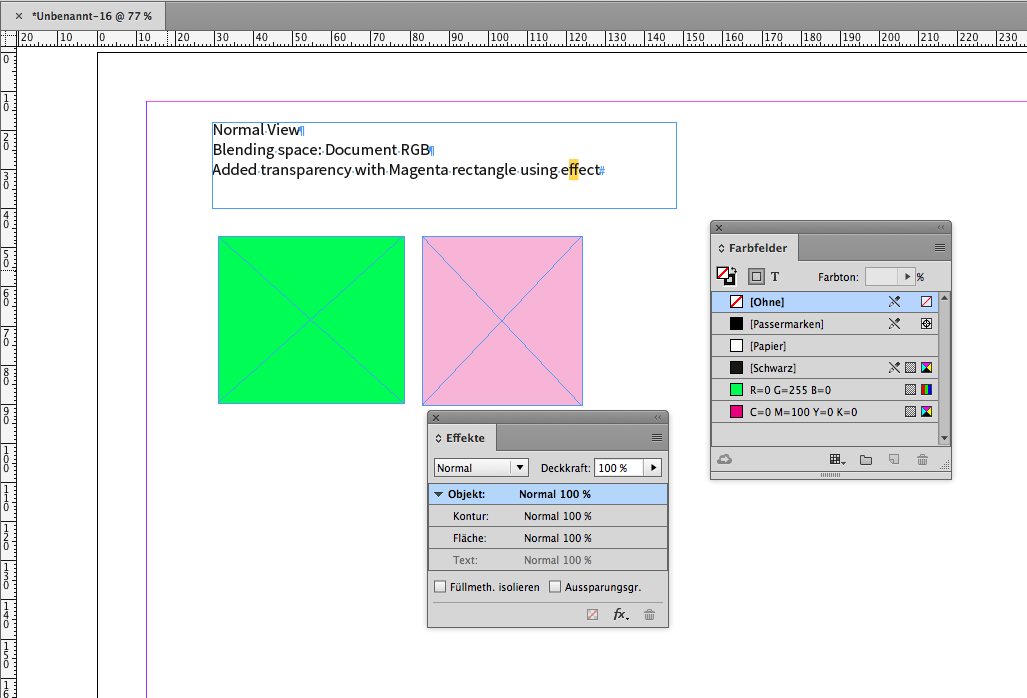
What is the right preview?
Depends on your workflow.
Here another screenshot with Separation Preview where Color Proof is disabled:
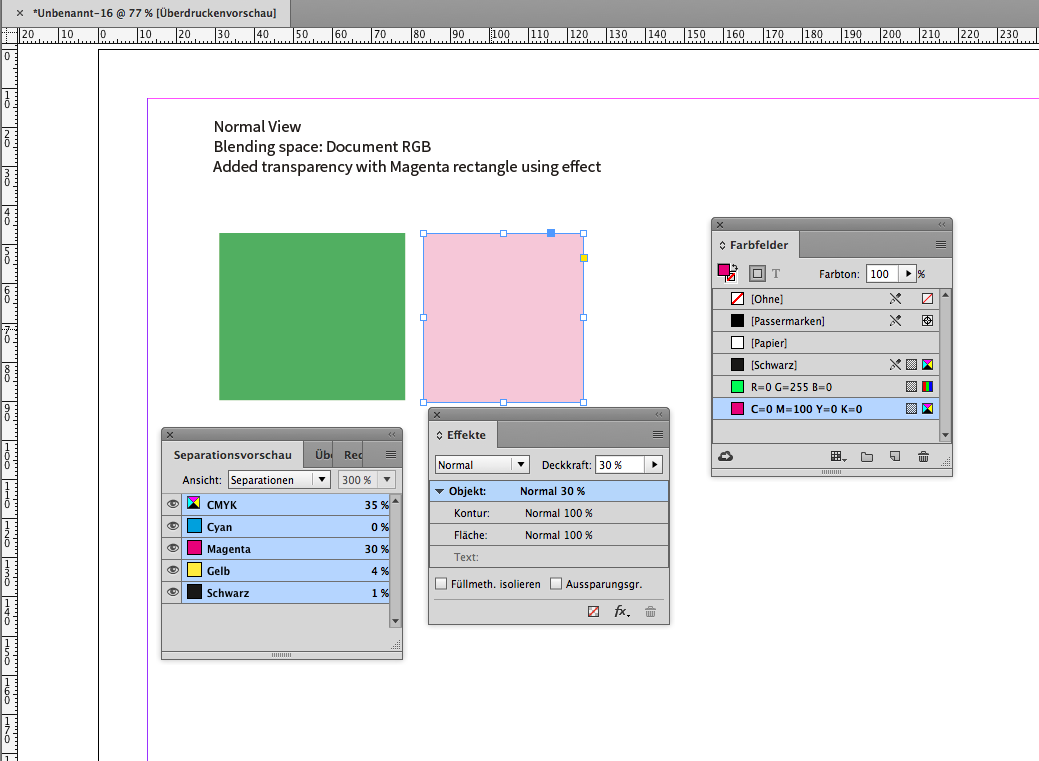
And yet another one:
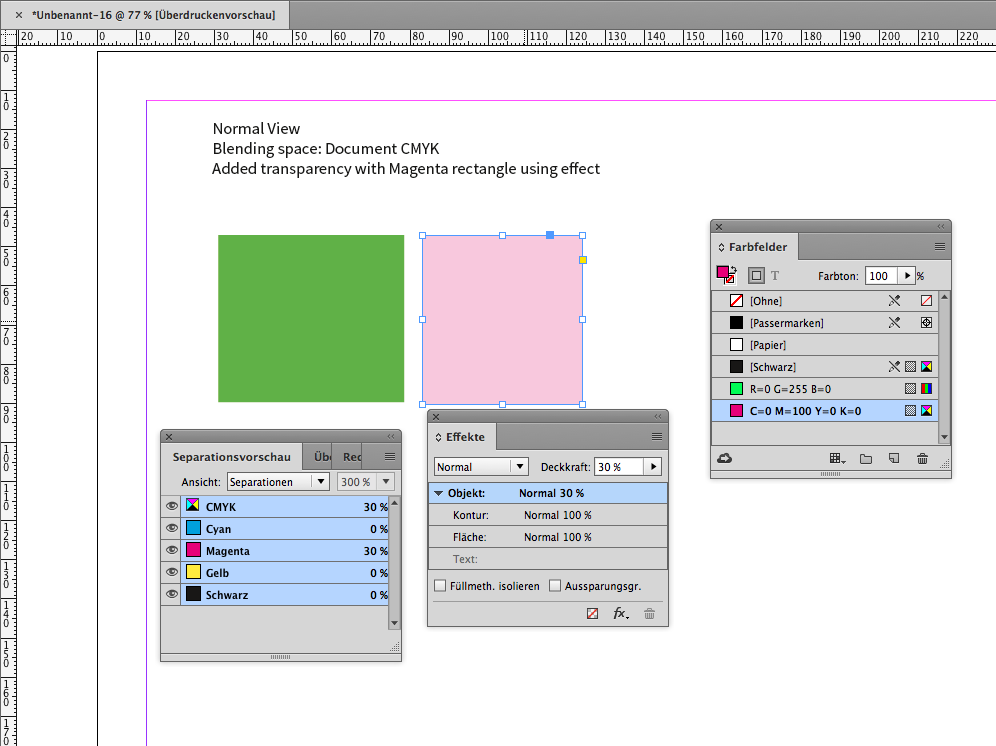
As you can see one can meassure different values with our Magenta rectangle.
Depending on the Transparency Blending Space used. So be careful what you do when it comes to color conversion at export.
E.g. if you output to PDF/X-1a.
FWIW and a bit off topic:
I found that the values Separation Preview is showing if blending space is Document RGB can be misleading.
In my screenshot where blending space is Document RGB the CMYK values shown with Separation View are:
0 30 4 1 CMYK.
After exporting to PDF/X-1a the values with Acrobat Pro DC are:
4 40 2 0 CMYK
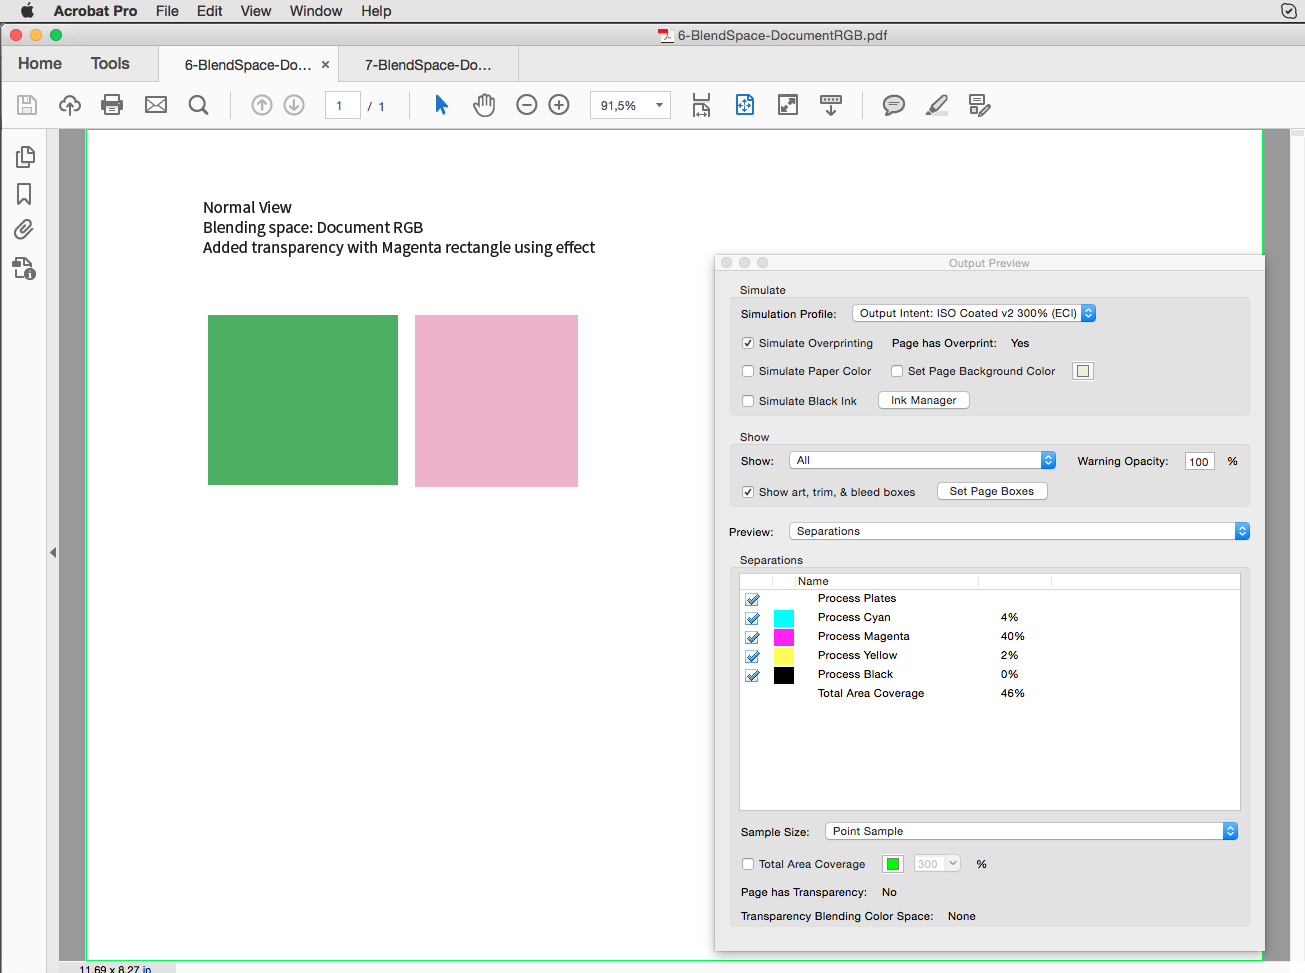
Maybe Rob Day can tell why that happens? A bug with InDesign's Separation Preview?
Export CMYK profile is the same as Document CMYK profile: ISO Coated v2 300%.
Rendering Intent is "Perceptive".
PDF Export options: Convert to target profile (Preserve numbers).
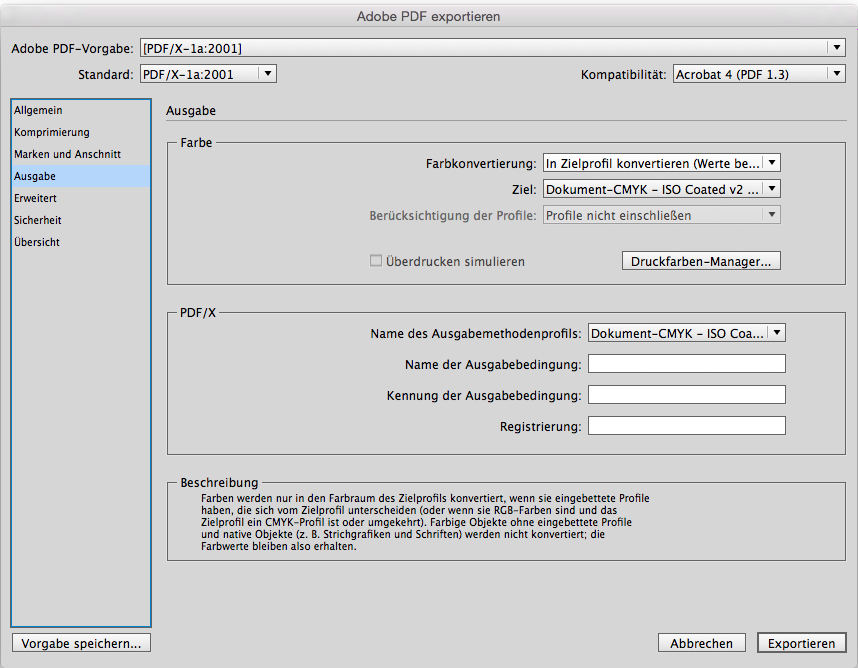
Working spaces, using priority of color settings:
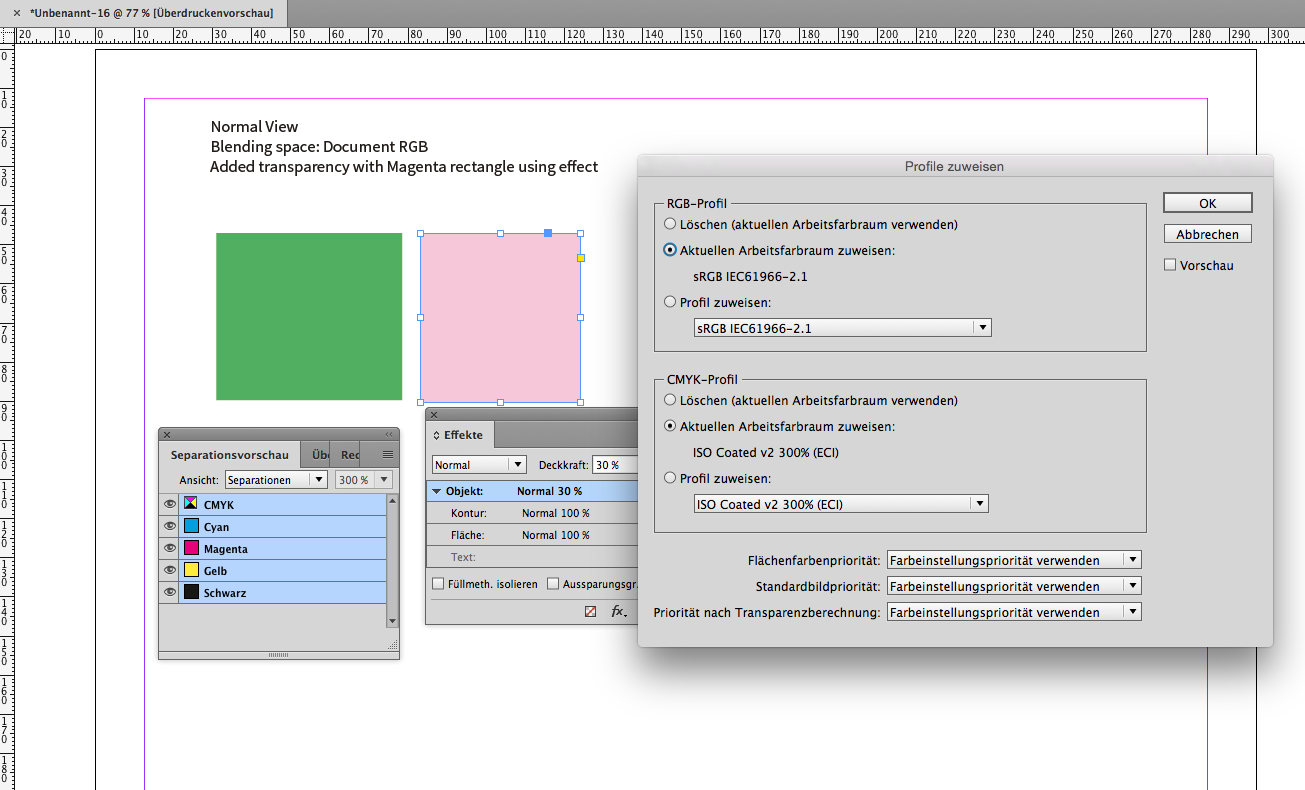
Color management settings:
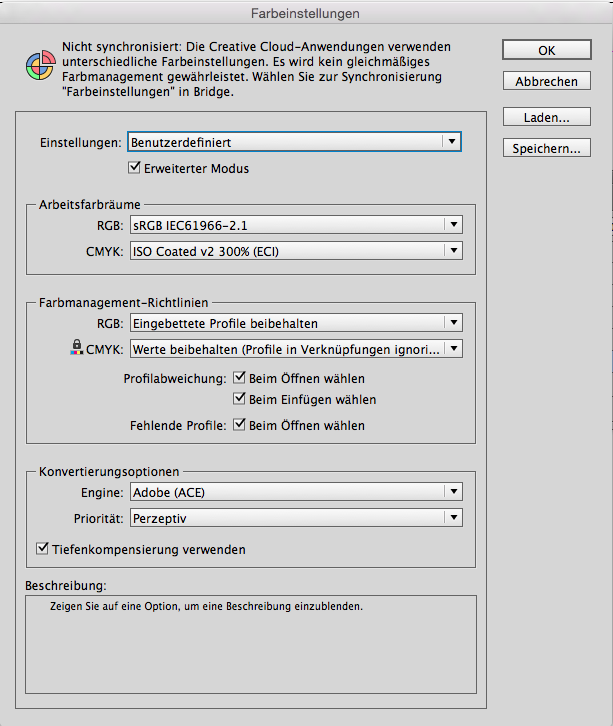
Proof is Document CMYK ISO Coated v2 300%:

And if I enable "Color Proof" in the menu Separation Preview is showing different values again for the Magenta rectangle:
0 29 3 0 CMYK
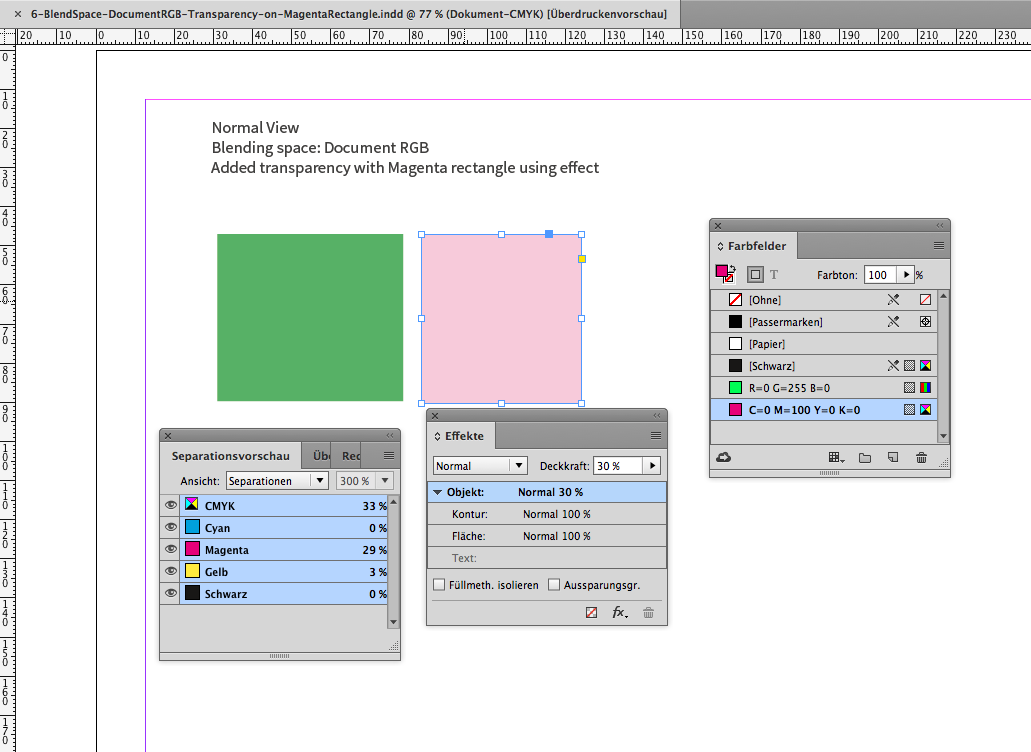
InDesign CC 2017 12.0.0.81 on Mac OSX 10.10.5.
Bottom line:
Use Blending Space Document CMYK if you intend to print your document and want accurate color values and preview.
Regards,
Uwe
