Participant
March 12, 2022
Question

InDesign Cutting off Graphic when I export to PDF

  • March 12, 2022
  • 3 replies
  • 3035 views

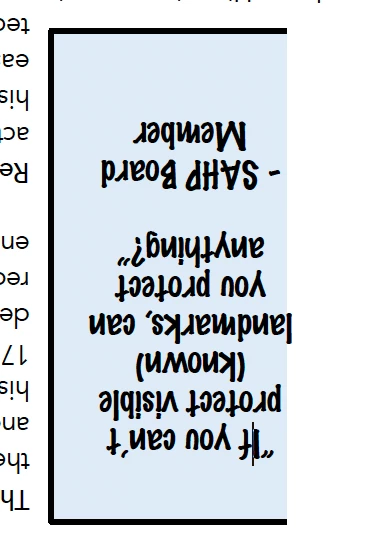
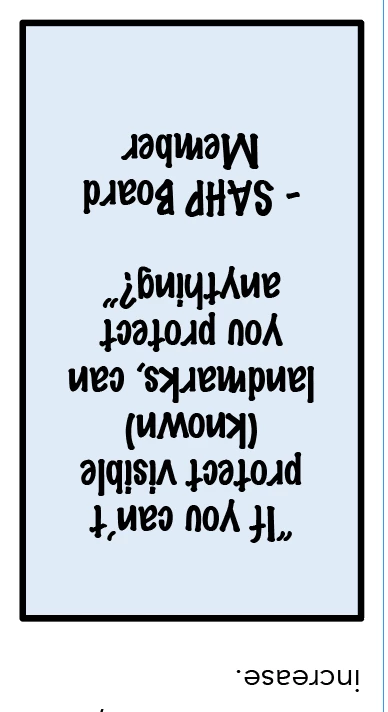
Rather strange thing keeps happening. I am simply placing a PDF into InDesign so I can print with a bleed. The first time worked great. I made a couple text changes to the PDF in Adobe Acrobat. I deleted the old vesion of the PDF and did File - Place to insert the new. It looks great in InDesign and I double checked to make sure it is within all margins. However, when I export to a PDF it randomly cut off one of the graphics. Seems like a gliche. Anyone have experience or ideas to try? 


Screen shot of what happens when I export to PDF and what I see in InDesign. 


This topic has been closed for replies.

3 replies

Luke Jennings3
Community Expert
Community Expert
March 12, 2022

What program created the original pdf? If your pdf is from Word or Publisher, there could be odd clipping mask causing problems. Do you see the same issue when you place the edited pdf into a new InDesign file and export to pdf? If not, place the exported pdf into the original InDesign file. Other possible fixes might be to open the edited pdf in Illustrator, find and fix the clipping mask, and save as a new pdf, or export the edited pdf as a high res image from Acrobat and place that into InDesign, or set all of the type in InDesign.

How does the exported pdf look in a browser or non-Adobe pdf viewer?


Participant
March 12, 2022

Hi Luke, I believe it was created in Word. I've been messing with the settings and somehow fixed the issue of the graphic but now the bleed I have setup won't work. BOTH bleed and graphic worked the first time I did this. Was a quick 5 min project. Now it seems I can have one or the other but not both! Any ideas to fix the bleed? I have the document setup with a .125 bleed. It worked perfectly for awhile and now won't. I did select PDF for High Quality Print the second time. Could this be causing issues? I can't tell if these are new user issues or InDesign quirks. Thanks!

Participant
March 12, 2022

This fixed my bleed problem:

Solution 1: Specify the Bleed and Slug settings manually

  • In the PDF Export dialog box, go to Marks And Bleeds.
  • In the Bleeds And Slug section, deselect Use Document Bleed And Slug Settings.
  • Enter values for Bleed and Slug.
  • Specify other export settings as desired.
  • Click Export.
Willi Adelberger
Community Expert
Community Expert
March 12, 2022

In InDesign you should place PDF/X-4. Make changes always in the original app and export a new PDF/X-4.

If you don't have the original file and have to do it in Acrobat Pro, check with the prefilight against print standards.

James Gifford—NitroPress
Legend
March 12, 2022

I can't tell if this applies from your description of your workflow, but many times when I update, relink or replace graphics, I have to adjust the Fitting to make sure it's positioned, sized and cropped as I want.


Even if the ID layout looks right, try Fitting | Fit Content Proportionally and Fitting | Fit Frame to Content, and adjust size and position from there.


(I've also learned to be wary of placing PDFs as graphics, as contrarian as that might sound... they either work perfectly as a native graphic or do weird things...)