


Copy link to clipboard
Copied
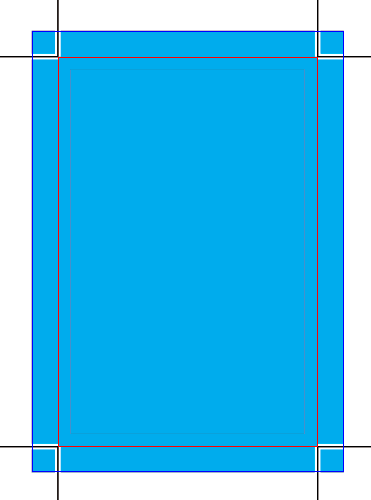
Every time I export a layout and select the option to include crop marks...
I get the same style of crop mark: 2 small lines at a 90 degree angle to one another in each corner of the page that DO NOT come to a point or intersect one another, and that (if continued) would come to a point that faces in towards the center of the document, as pictured below.
Top

Bottom

The issue I keep running into is this: no matter what order I trim the sides in, trimming any 2 sides cuts-off the marks indicating the edge of the other 2 sides. This problem would be fixed if...
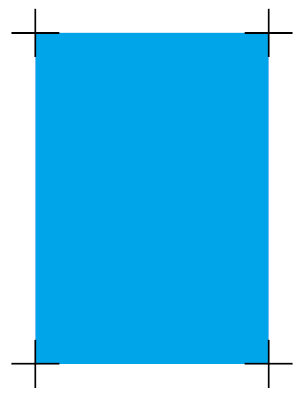
A. The lines intersected and continued into an X shape.
B. The point where they would intersect faced out towards the edge of the page.
Basically, if you imagine both lines continue until they form an X, it is giving me the top of the X and I need the bottom. Is there a different option or setting I should be selecting to accomplish crop marks that will allow me to trim all 4 sides without cutting off the mark for an adjacent side?


 1 Correct answer
FWIW: crop marks can come to a point, just set Offset to zero in PDF Export dialog Marks section.
If you want to intersect them, try CropMarks script, which is bundled with InDesign. It allows you to set negative Offset value, what effectively makes crop marks intersected:
 31
Replies
31
31
Replies
31

Copy link to clipboard
Copied
Well, if you come up with something idiot proof, I can assure you the world will supply you with a much better idiot.
If you think a professional is expensive, wait until you hire an amateur.
Copy link to clipboard
Copied
Bob Levine, story of my professional life! But it's not my call.

Copy link to clipboard
Copied
by a small and only moderately trained production staff and for lack of a better word it needs to be idiot proof.
But you are really creating a new problem with intersecting crop marks. No matter what the skill level of the printer, they won't be able to jog a stack of sheets so that all of the marks are perfectly aligned throughout the stack (if they could there would be no need for bleeds). That means, unless they trim to a smaller dimension than the marks indicate, some of the marks will show on the finished sheets. Offset marks are the default for that reason.
Copy link to clipboard
Copied
Don't know what to tell you there. The machine that we use to cut does a pretty decent job of lining everything up if you take your time. You can't cut more than about 20-30 at a time depending on the weight of the paper, but there is an arm in place to hold the paper down and prevent it from moving and it butts-up against a guide that keeps them aligned. There is a laser guide for the blade and as long as you make sure everything is squared up before you cut and align the laser to the inside edge of the crop mark it seems to do just fine. There may be a small sliver here and there that goes unnoticed but I have always made my custom intersecting crop marks very light grey and thin, and we are not a professional printer so it works just fine for our purposes.
Copy link to clipboard
Copied
There may be a small sliver here and there that goes unnoticed but I have always made my custom intersecting crop marks very light grey and thin, and we are not a professional printer so it works just fine for our purposes.
Right that's why a professional finishing department will want offset marks—not all of their clients would be ok with random trim marks showing on the sheets.
They are not going to have the problem you are describing. If the cutter isn't programmable, they would very likely rule up the top sheet for their cut guide, and still rotate the stack.
They wouldn't have your 20-30 sheet limit:
Copy link to clipboard
Copied
Yeah, I get it... I do understand the difference now, it's been explained several times. The intersecting marks just work better for my unique situation. Since we are not dealing with a professional printer I am just going to keep using the method that results in the fewest errors from our team.

Copy link to clipboard
Copied
I think the secret for the use case of cutting tens of pages with a mechanical guillotine, is to print the standard crop marks, align to the appropriate guillotine edge (side or end), cut one edge and rotate 90 degrees and repeat until complete.
I originally suffered the OP's problem, due to cutting the short edges first (to reduce the cutting length and therefore manual force required by a large guillotine) which meant the marks for the other 2 sides had already been removed.
-
- 1
- 2

 AdChoices