

JPG not placing at proper dimensions

Copy link to clipboard
Copied
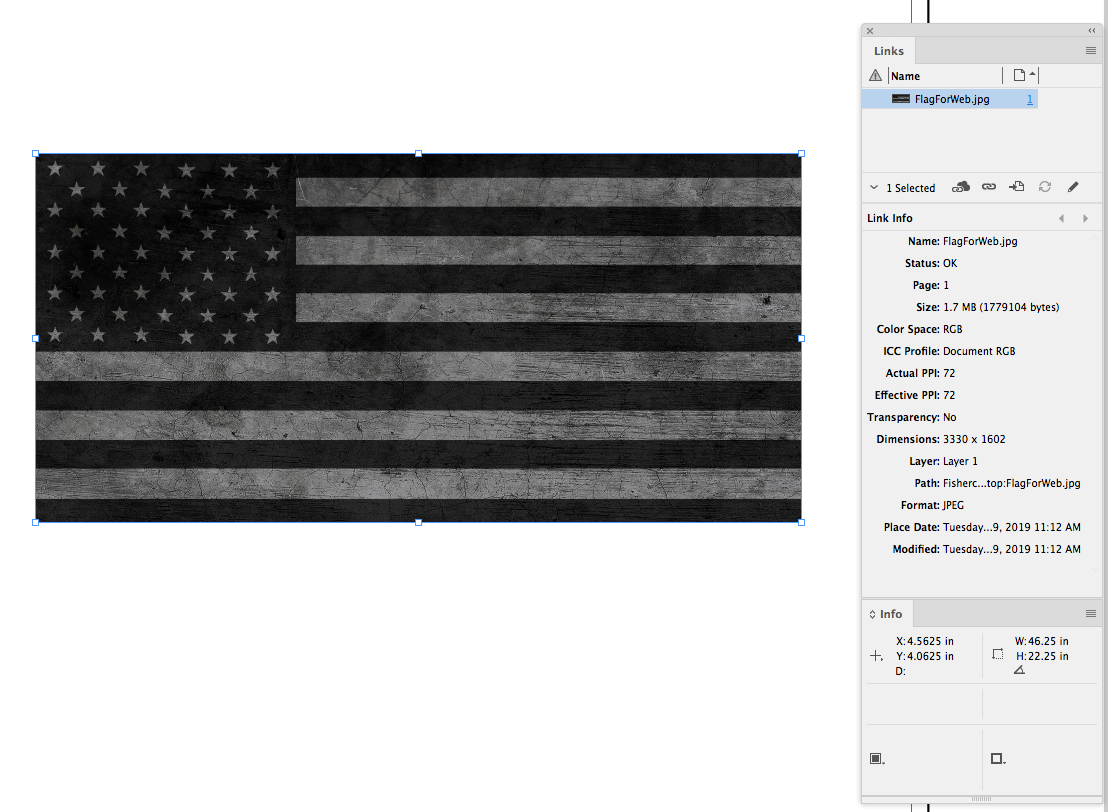
I just performed the latest update to 14.02. Now when I place a jpg link, it is not placing at the full dimension. It is scaled down (I presume because of the 72ppi resolution). We are a large format printer. The resolution we work with always 125ppi or less. Is there a setting I can change back to always have them place at full dimension?


 74
Replies
74
74
Replies
74

Copy link to clipboard
Copied
There could well be other dimensions that cause this issue, until someone uses it and realises, it will go unnoticed.
These applications are huge, I have no idea how big the dev teams are on them and the amount of code involved, there are always going to be bugs, some bigger than others, some affecting more people more obviously.
Perhaps saving your files for web as jpegs in future is the way forward, the format is the same but they will place at the correct size, the other option is to continue and check each time you place a file that it has placed at the correct dimensions.
Sadly, finding the fault on this user forum won't get the problem fixed, the majority of people here are users like you and me, although sometimes Adobe staff check on the forums.
Best bet is to use this link Feature Request/Bug Report Form explain the problem, include a link to this forum post so whoever looks into it can see that the problem is reproducible on other systems by other users and hope Adobe fix it soon.

Copy link to clipboard
Copied
Perhaps saving your files for web as jpegs in future is the way forward
That has its own problems. Works if the res is 72ppi, but not with other resolutions. So here my image output size is 11.1" x 5.34" at 300ppi
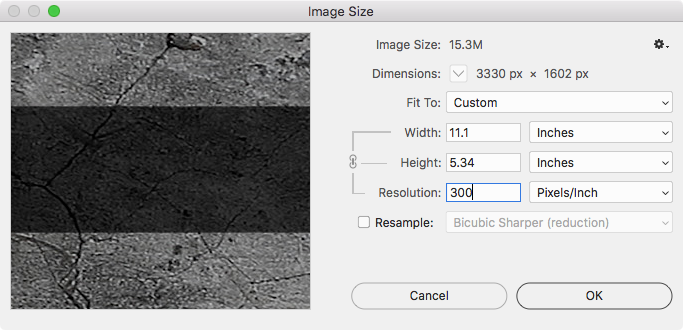
If I use Save For Web the output dimensions get resized to 46.25" x 22.25"—Save For Web strips the print output dimensions.
With disk space running less than 20 cents a GB, I would give up on JPEG.
Copy link to clipboard
Copied
TIF gives lossless file compression so better image quality, I have been using .eps files for 20+ years and we have a consistent colour workflow for internal and externally printed files. I only use jpegs for web, but I know lots of people use different workflows.
Copy link to clipboard
Copied
Thanks all for testing these things out.
Only a small percentage of the files are built in house. Unfortunately, we cannot control the way clients save their images. We provide specs but it doesn't dictate what we receive. And we process thousands of files a week. Thus the dilemma. Reprocessing murders our workflow.
Copy link to clipboard
Copied
I can understand that, one thing you could do though is to create a PSD action to convert any image file to an image format/spec of your choosing, you could even make that action operate on a folder of images.
The action could
1. open the file
2. convert to cmyk
3. apply colour profile
4. resave image in whatever format you prefer
5. close file
then move onto the next image in the folder, automatically or by an assigned key press, command+F5 for instance.
That is what I do to process any RGB files that come to me, after any processing, we convert to cmyk/save as .eps with a colour profile/close the file. My files are always exactly what I expect then and it doesn't really take much time.
Copy link to clipboard
Copied
Yes we use actions all the time.
Even with an action. It is still a massive time suck. Guess we don't have much of a choice.
Copy link to clipboard
Copied
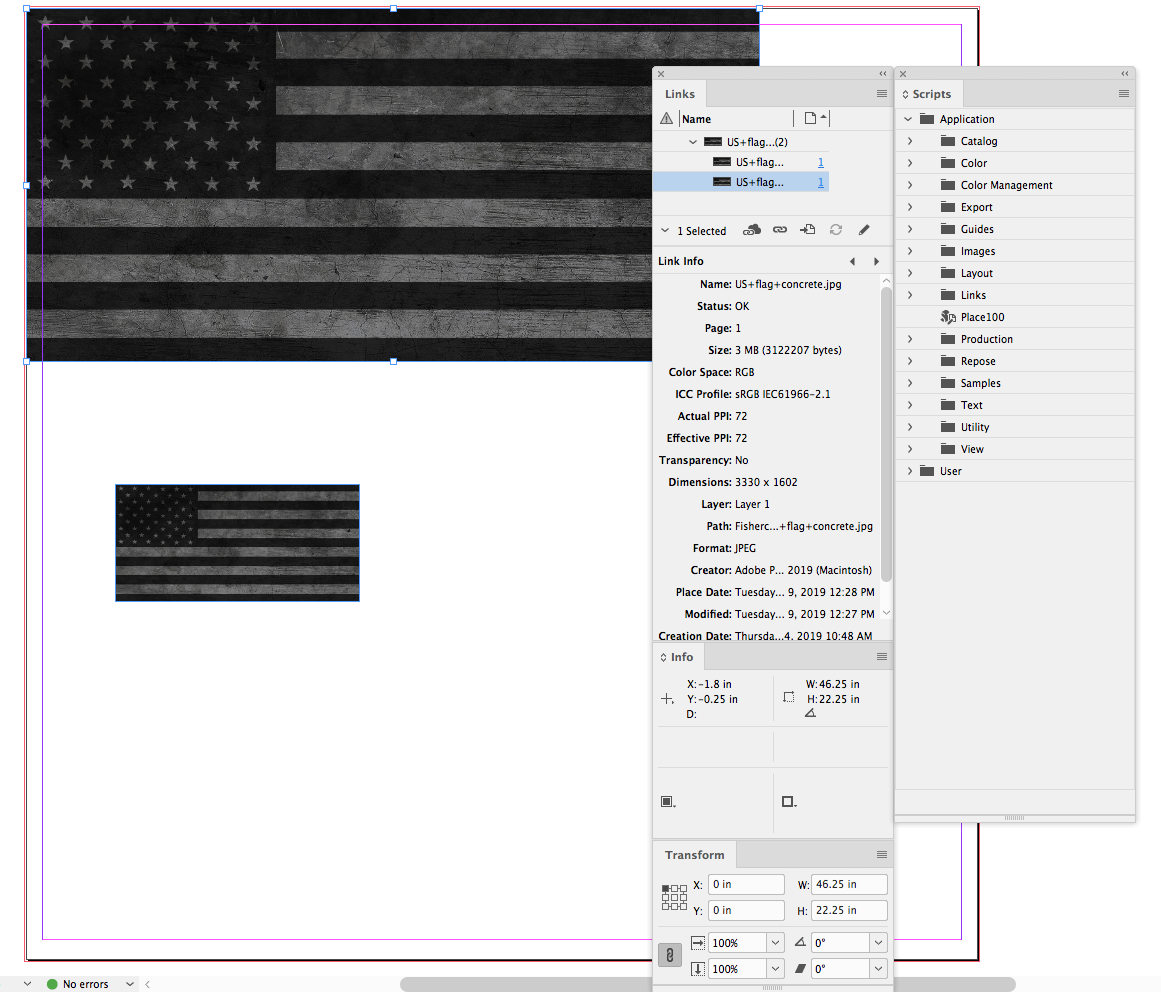
Here I used the script (named Place100 in my panel) to place the top version vs. using the regular Place command for the bottom version:

Copy link to clipboard
Copied
This appears to be metadata related. I used ExifTool to remove all metadata and the image placed at 100% scale.
I’ll post back once I find the conflicting/offending metadata group from the 3 sets of resolution metadata in the flag file:
[IFD0] XResolution : 72[IFD0] YResolution : 72
[IFD0] ResolutionUnit : inches
[IFD1] XResolution : 72
[IFD1] YResolution : 72
[IFD1] ResolutionUnit : inches
[Photoshop] XResolution : 72
[Photoshop] DisplayedUnitsX : inches
[Photoshop] YResolution : 72
[Photoshop] DisplayedUnitsY : inches
Copy link to clipboard
Copied
I believe that the following metadata tags are the problem:
[IFD0] XResolution : 72
[IFD0] YResolution : 72
[IFD0] ResolutionUnit : inches
[IFD1] XResolution : 72
[IFD1] YResolution : 72
[IFD1] ResolutionUnit : inches
When I remove these tags, the file places correctly.
The ExifTool command used was:
exiftool -IFD0:XResolution= -IFD0:YResolution= -IFD0:ResolutionUnit= -IFD1:XResolution= -IFD1:YResolution= -IFD1:ResolutionUnit= FILE
You can download a sample of the original image here:
Such ExifTool commands are easy to place into a drag-n-drop utility to batch process files or folders of files without needing to use a CLI.
Further explorations are likely required...
Copy link to clipboard
Copied
Hi Stephen, excuse my ignorance, but surely that metadata would appear in any jpeg file that contains metadata where the resolution is 72dpi, if so, why does this problem not occur in every other jpeg with 72dpi resolution that's imported to InDesign?
I've just created a 100x100mm square at 72dpi in photoshop, saved as a jpeg and it has imported at 100%
Link to jpeg is attached, Dropbox - square.jpg is the exif data the same?
Copy link to clipboard
Copied
Hi ed.jones.kk42, did you read/follow the entire topic thread? This appears to be related to a “perfect storm” of the file having a specific pixel width/height and or ratio – plus being in JPEG format.
Have you placed the original flag image from post #17 and the version from post #44? Have you tried making the original image 1 pixel smaller in height?
As I said, this needs deeper exploration, when it was mentioned earlier in the thread that save for web did not display this problem, it was an “obvious clue” to me that this could be metadata related.
ExifTool does not decompress/recompress the binary image data and would be preferred over opening and resaving the JPEG files from Photoshop.
Copy link to clipboard
Copied
Hi Stephen,
Yes I have read the whole thread, my query/question was with your point that it was particular exif data that was causing the problem, surely that same exif data was in all jpegs. That was why I had linked a jpeg file that would place at 100% to see if that had the same exif data in it that prevented the flag file from placing at 100%.
Copy link to clipboard
Copied
I’ll download your image and test...
EDIT: OK, as expected, your image has the same resolution metadata as the problem image – however as the pixel size or aspect ratio does not trigger this bug there is no difference in placing the original vs. one that has been passed through ExifTool to remove the resolution metadata…. So no “perfect storm”! It appears to be a combination of a specific pixel dimensions and or aspect ratio and the combination of metadata and JPEG format that create the “perfect storm”.
Copy link to clipboard
Copied
Thanks for that Stephen,
It seems to be just that, aspect ratio, resolution and image format.
Yesterday I tried rotating the flag image by 90 degrees and it still placed at 33%, then after Rob Days post #32 I tried resizing the image but keeping proportions the same, it still placed at 33% unless you changed the image format or saved for web.

Copy link to clipboard
Copied
Stephen_A_Marsh wrote
I believe that the following metadata tags are the problem:
[IFD0] XResolution : 72
[IFD0] YResolution : 72
[IFD0] ResolutionUnit : inches
[IFD1] XResolution : 72
[IFD1] YResolution : 72
[IFD1] ResolutionUnit : inches
When I remove these tags, the file places correctly.…
Hi Stephen,
but I guess, if you remove those tags the PhotoShop tags must be in place.
And you never know, if a particular file was saved at least one time with PhotoShop.
( Just thinking… )
Regards,
Uwe
PS: Argh. Jive's quoting mechanism was reacting very strange.
Copy link to clipboard
Copied
but I guess, if you remove those tags the PhotoShop tags must be in place.
Hi Uwe,
Only if resolution metadata is required. :]
My initial test was to remove all metadata, so all three groups of resolution related metadata were removed. This fixed the problem.
So I then used trial and error to remove each group and combinations of groups in an attempt to find which was the “offending” metadata.
So if one was willing to strip all resolution metadata from all incoming files, then all files “should” in theory behave the same.
Copy link to clipboard
Copied
Reprocessing murders our workflow.
What OS are you using? The AppleScript I posted works and could be assigned a key command, and the translation to Javascript would be fairly easy.
Copy link to clipboard
Copied
10.14.3
Copy link to clipboard
Copied
Copy the code I posted in #15 and paste in to a Script Editor doc. Save as Script Format into your InDesign Scripts folder, and it should show in your Scripts panel. Assign a key command via Keyboard Shortcuts>Scripts.

Copy link to clipboard
Copied
Hi Rob,
Nice script. Another approach might be to have a start up script that patches after place, detect the scale. If it is not 100% alert the user and offer to rescale the image to 100%. If the image was placed at 100% the script would stay quite.
P.
Copy link to clipboard
Copied
Another approach might be to have a start up script that patches after place, detect the scale. If it is not 100% alert the user and offer to rescale the image to 100%. If the image was placed at 100% the script would stay quite.
With AppleScript the AfterPlace listener runs before the placed object is selected, so I don‘t know how to get at the placed object. Might be easier with JS. Also you might not always want the scale to be 100% i.e, dragging while placing.
Copy link to clipboard
Copied
I took another look at the AfterPlace listener and this seems to work, but it also disables the drag sizing feature, which could be frustrating to a user who isn’t aware of the startup script. I think I would still prefer the alternate place script attached to a key command.
tell application "Adobe InDesign CC 2018"
make event listener with properties {event type:"afterPlace", handler:my myPlace}
end tell
on myPlace()
tell application "Adobe InDesign CC 2018"
if selection is [] then
set ag to all graphics of parent of evt
set i to item 1 of ag
else
set i to parent of evt
end if
set vertical scale of i to 100
set horizontal scale of i to 100
fit parent of i given frame to content
end tell
end myPlace
Copy link to clipboard
Copied
Hi Rob,
JS doesn't seem to have these restrictions.
//DESCRIPTION: AfterPlaceSetScale. V1.0.0
//2019 kerntiff.co.uk
//startup script
#targetengine "session"
main();
function main()
{
var myEventListener = app.eventListeners.add("afterPlace", ourAfterPlace );
}
function ourAfterPlace(evt)
{
var theImage = evt.parent;
if (( theImage.constructor.name == "GraphicLine" ) ||
( theImage.constructor.name == "Oval" ) ||
( theImage.constructor.name == "Polygon" ) ||
( theImage.constructor.name == "Rectangle" ))
;
else
{
theImage = theImage.parent;
}
try
{
if (( theImage.images[0].horizontalScale != 100 ) ||
( theImage.images[0].verticalScale != 100 ))
{
if ( confirm ( "Make 100% ?" ))
{
theImage.images[0].horizontalScale = 100;
theImage.images[0].verticalScale = 100;
theImage.fit ( FitOptions.FRAME_TO_CONTENT );
}
}
} catch (e)
{
return ( alert ( e ));
}
}
Copy link to clipboard
Copied
The AS in my last post also works via the evt parameter.
Copy link to clipboard
Copied
After a bit more looking at this. Do not use this script. It breaks too many things.
P.

 AdChoices