Participant
August 16, 2013
Question

Lose bleed when exporting to PDF

  • August 16, 2013
  • 4 replies
  • 27653 views

Hi,

Everytime I export my document to PDF, the area outside of my bleed stays white. And the PDF-file shows my whole image inside of the bleedmarks, even the parts that fall out of my page into the bleed in the Indesign document..
The bleedmarks don't show up on the place they belong, but outside my image.

I've read tons of discussions about this problem, tried every solution given, but nothing works.

I'll add some printscreens to make my problem more clear.


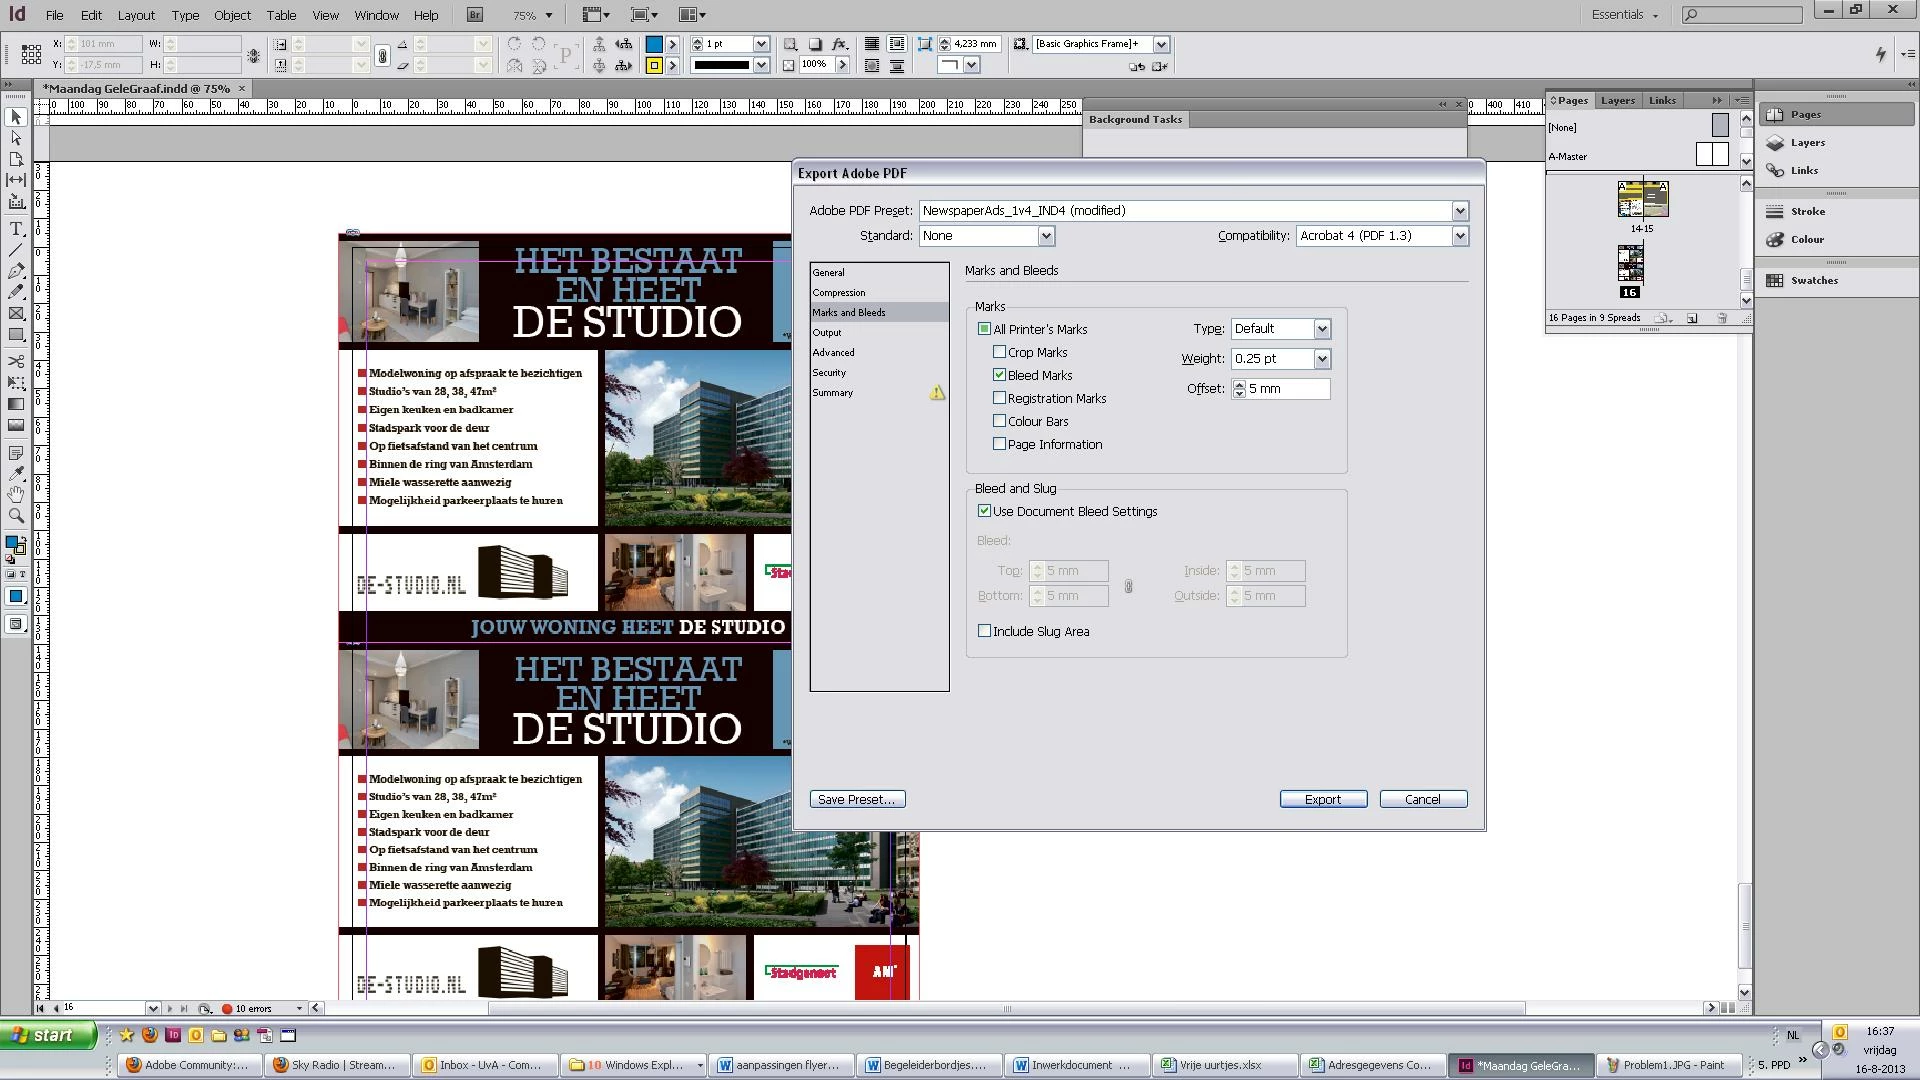
You can see my settings above, and you can also see my bleed (red line). On the printscreen below you can see it placed everything inside of my bleedmarks.

I'm getting a bit desperate right now. Can someone please help me? Thanks a lot!

This topic has been closed for replies.

4 replies

jackiek18362279
Participant
November 22, 2016

Your bleed marks are there, but when exporting, make sure you click the box "Use Document Bleed Settings". The default setting is an unchecked box which will export the doc without the bleed marks you created in the source file. Hope this answers your question!

Sandee Cohen
Legend
August 16, 2013

The way you have your document set up, you have a bleed and no objects/images extend past the bleed. Therefore there shouldn't be anything outside the bleed.  The way you have your PDF options set up, you have only bleed marks indicated. Therefore when you open the PDF you see the Bleed marks and the images extending into them.  This is exactly what a bleed is supposed to do.  I think you are confused because you don't see the crop marks which would show how the images extend out of the trim into the bleed.  But that's because you haven't checked Crop Marks in the PDF output.  Everything is working as designed.

MW Design
Inspiring
August 16, 2013

In the document set up, are bleeds set? In the export options, uncheck use document bleeds--5 mm is filled in already. Try that.

Mike

John Mensinger
Community Expert
Community Expert
August 16, 2013

The 2nd screen shot shows the correct result for the settings shown in the 1st screen shot. Nina is selecting bleed marks, and expecting crop marks.

Legend
August 16, 2013

Are you sure?
Because when I set my view to overprint preview, parts are cut of.

These parts will not be cut off in the PDF-file. Don't know if it's clear what I mean..

Also, I've done this before and then it all looked the way I wanted to. You can see this below. These are bleed marks, not crop marks.


It's all working properly, but your document is set up wrong.

In your first screenshot you have three visible boxes. The outer one (red) is the bleed box, which shows the limit for page objects that have to print right up to the edge of the paper. The bleed area gives the printer some leeway in their cutting machine. The middle one (black) is the page box, which is where the paper will be cut if the machine is working perfectly. The inner one (magenta) is the margin area as defined by your layout options, and should indicate the area where your non-bled page content can go (text, etc.) so it's not too close to the knife.

  • Crop marks align with the corners of the page box, as they show where the paper will be cut or trimmed. You have never turned these on, but for 99% of print jobs where one page is printed on one sheet of paper, those are what people want to see. When you activate preview mode in InDesign it's showing you the trimmed page - i.e. the black box.
  • Bleed marks align with the corners of the bleed box, and are used for imposition. There should never be anything of value outside the bleed box, so a printer can crop to the bleed box when arranging multiple pages onto a single sheet. That's all anyone uses them for these days.

In your case you've constructed the page using the bleed box as the edge of the 'live' design, which is wrong. Look at the top of the page - that black line above the title and corner photos will never appear in the printed version as it's outside of the page box. It's why in the preview mode you're complaining that "parts are cut off". You need to rescale the entire page to fit inside the BLACK page box, then extend the elements around the edge of the page so they reach as far as the red bleed box.

p.s. Remember you can turn on visible page boxes in Acrobat too.

John Mensinger
Community Expert
Community Expert
August 16, 2013

Bleed marks should appear at the edge of the bleed, according to the bleed values assigned to the document. If you're looking for marks that are exceeded by your bleeds, (marking the trim size), you want Crop marks.