• Global community
    • Language:
      • Deutsch
      • English
      • Español
      • Français
      • Português
  • 日本語コミュニティ
    Dedicated community for Japanese speakers
  • 한국 커뮤니티
    Dedicated community for Korean speakers
Exit
4

Screen record an issue on Windows & macOS for sharing

Adobe Employee ,
May 26, 2022 May 26, 2022

Copy link to clipboard

Copied

Hello,


Please follow the following procedure to record an issue for sharing.


Note: Before you proceed with the recording, ensure that you hide or remove all confidential information on your computer or anything that you consider private information.


Windows 10 & 11:
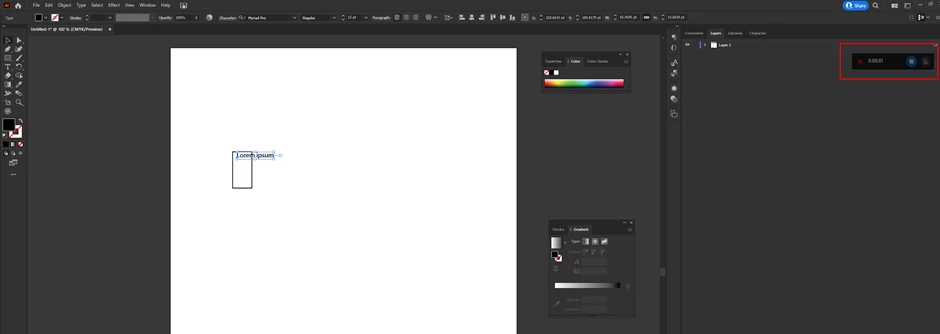
1. Open the Adobe application that you want to record in full screen.
2. Press Windows Key + Alt + R simultaneously to start the screen recording.
3. A floating window appears in the top right corner.
Perform the actions you want and use your microphone to record audio (optional). You can also mute the mic if you don't want to capture any sound.

Anshul_Saini_6-1653586087319.png


4. Press Windows Key + Alt + R keys simultaneously again to stop the screen recording.
5. Recorded video will be saved in the C:\Users\<Your UserName>\Videos\Captures folder.
6. Upload the video on Creative Cloud/ Google Drive or any similar service and share the download link. For sharing through Creative Cloud, see this community post.


macOS:

  1. Open QuickTime Player from your Applications folder, then choose File > New Screen Recording from the menu bar.

Anshul_Saini_8-1653586087330.jpeg


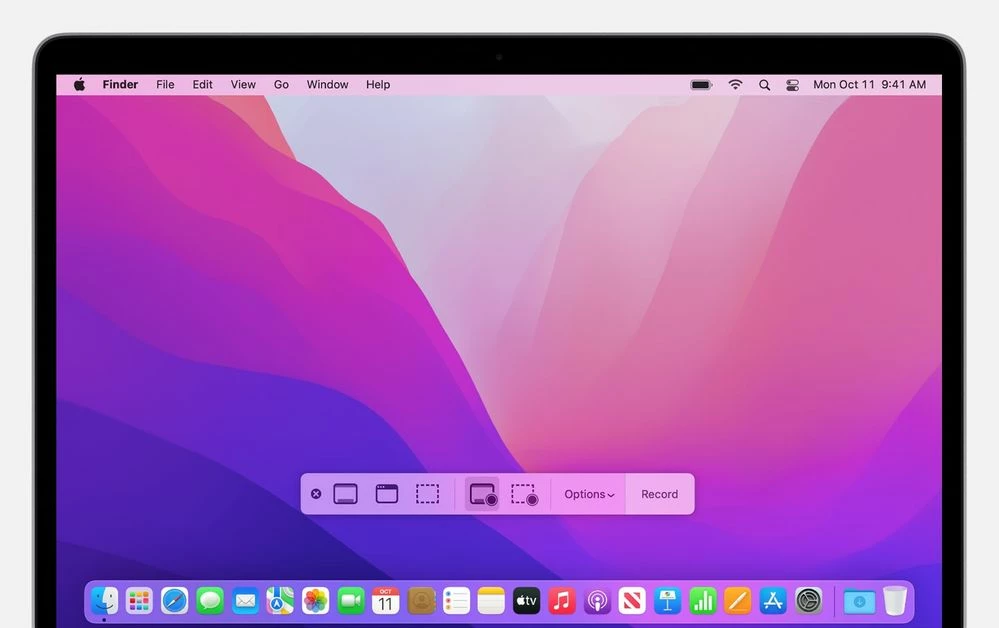
  1. Select the entire screen option and then press the record button.
  2. To stop the recording, press the stop button in the Menu bar.

Anshul_Saini_10-1653586087344.png

  1. After you stop recording, QuickTime Player automatically saves it to Desktop by default.
  2. Upload the recorded video on Creative Cloud/ Google Drive or any similar service and share the download link. For sharing through Creative Cloud, see this community post.


Don't want to share the link in a public post? DM it.

If you want to share the link over a direct message (DM), click the profile picture of the person that you want to share it with and use the direct messaging option to exclusively share it with them. 


Please feel free to reach out to me if you need further assistance recording an issue for sharing. I'd be happy to help.


Thanks & Regards,
Anshul Saini

TOPICS
How to

Views

356

Translate

Translate

Report

Report
Community guidelines
Be kind and respectful, give credit to the original source of content, and search for duplicates before posting. Learn more
community guidelines
Community Expert ,
Sep 12, 2022 Sep 12, 2022

Copy link to clipboard

Copied

Hi Anshul,

thank you for that advice.

Tested with Windows 10. Unfortunately it seems that this method can only record single windows.

I could be wrong, but I do not think, that could be changed.


Currently I'm testing different apps to record my screen.

Especially Zoom does what I want and the videos resulted in very efficient file sizes.


Regards,
Uwe Laubender
( Adobe Community Professional )

Votes

Translate

Translate

Report

Report
Community guidelines
Be kind and respectful, give credit to the original source of content, and search for duplicates before posting. Learn more
community guidelines
Community Expert ,
Nov 12, 2022 Nov 12, 2022

Copy link to clipboard

Copied

LATEST

There are a few (other) options for achieving similar or extended results in both OS:

Windows

Third-Party Tools

  • You can use ShareX or other free third-party software for additional features. If you want to record regularly, this is probably the best option.

GameBar

  • Use the built-in GameBar tool by enabling via Start > Settings > GamingToggle Record game clips, screenshots, and broadcast. You can add/remove widgets from the screen in the top bar of the GameBar.
  • Press Windows + G and select Record in the Capture screen. A floating window will show you the active recording and a stop button. When you’re finished click the stop icon; a notive will appear and if you click on it, you’ll see your recorded file in the Explorer.
  • This can only record apps, not the entire screen, not Explorer windows.

PowerPoint

  • If you have PowerPoint installed, this gives you a recording tool with screen recording possibilities.
  • Create a new document, then go to Insert > Screen Recording.
  • You can now define an area to capture or record the entire screen. Also set whether the mouse cursor should be visible or not, and if you want to record Audio with it. Then press Record.
  • The widget will disappear during record but you can bring it back by moving the cursor to the center top of your screen. The widget now gives you the option to pause or finish your recording.
  • Once finished, the recording will be inserted into your presentation. Now right click on the recording and select Save Media as to save it to your file system.


macOS

Press cmd + shift + 5 to enter the record app, then select the area you want to record (there’s also the option for entire screen), then decide whether you want a screenshot or screen-recording, select options (where to save, set a timer, mouse pointer on/off) and start.


A recording is stopped by clicking the stop icon in the right corner of the top menu bar.


Alternatively, you can press cmd + shift + 5 again and stop there which may have the advantage of the mouse coursor not being visible if you only selected a portion of the screen.

Votes

Translate

Translate

Report

Report
Community guidelines
Be kind and respectful, give credit to the original source of content, and search for duplicates before posting. Learn more
community guidelines