Participant
July 10, 2018
Beantwortet

Yucky Discoloured Box Syndrome when exporting to Grayscale PDF

  • July 10, 2018
  • 3 Antworten
  • 3473 Ansichten

Hello!

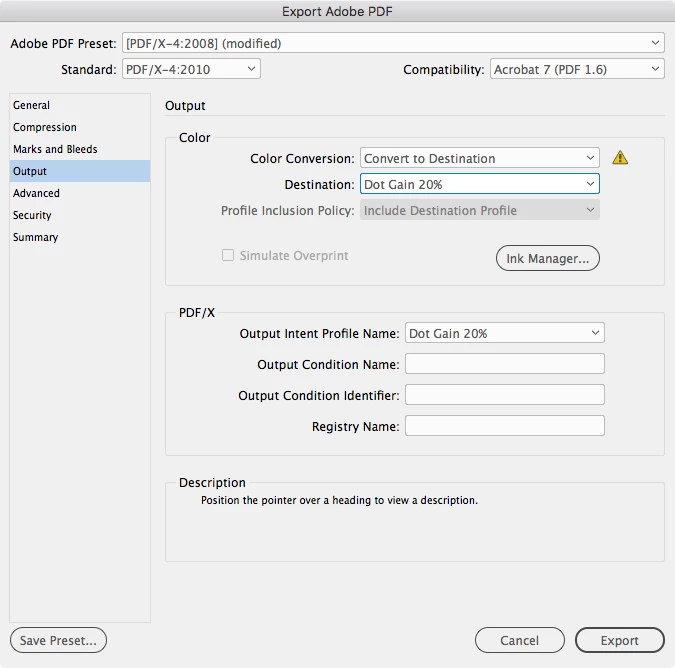
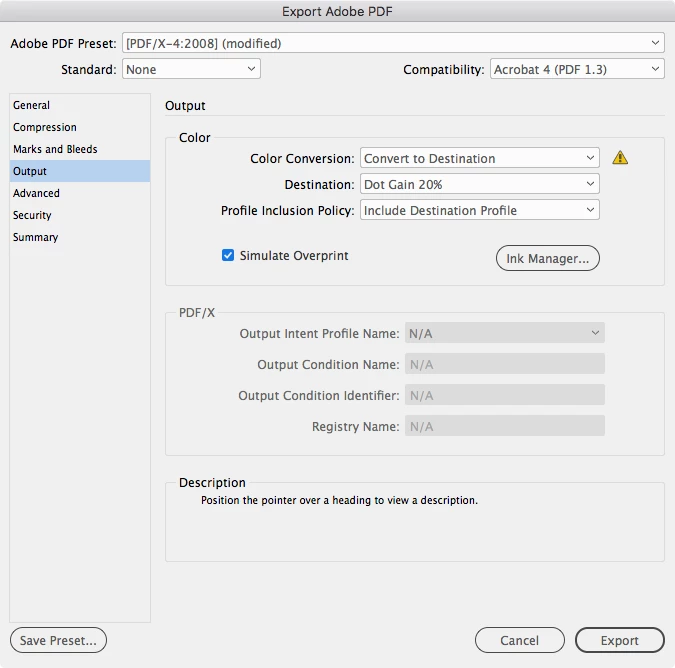
I have an in-house work document that I have created in InDesign. It has 3 transparent images in it. I need to be able to export it in grayscale to have it distributed to the wider business. It will be printed and displayed on local MFP's.

I have tried so many combinations of exporting to PDF but each and every time it is giving me Yucky Discoloured Box Syndrome. For such an easy 1-pager I've spent way too much time trying to convert it properly. I have also tried having my transparent images as PSD's and PNG's, and alas no solution.

The document background is using a 10% tint of the default black CMYK swatch in InDesign.

(FYI - the reason for grayscale conversion is that the poster is encouraging staff to print in mono rather than colour to save costs. So I can't put it in colour unfortunately!)

Is there some magic combination that will prevent this from happening?

Thanks,

Katherine

Dieses Thema wurde für Antworten geschlossen.
Beste Antwort von rob day

I have tried so many combinations of exporting to PDF but each and every time it is giving me Yucky Discoloured Box Syndrome.

What application are you viewing the grayscale PDF in, Acrobat Reader or Pro?

Have you tried PDF/X-4 with the destination set to a gray profile:

If you need the PDF to be read in a browser or less capable PDF reader try using the same preset but flatten the transparency by setting the Compatability to Acrobat 4 and the Standard to None:

If neither of these work can you show us a screen capture of the problem

3 Antworten

Randy Hagan
Community Expert
Community Expert
July 10, 2018

Rather than keep trying to rework this through InDesign, may I suggest working with the original image in Photoshop?

I used a client portrait to create a grayscale image with a knockout/alpha channel to eliminate the background:

1) Convert CMYK image to grayscale

2) Used my Quick Selection Tool to select the background, then used the Select and Mask options to refine the edges of the selection. Inverted the selection to include the subject and not the background, then saved the knockout/alpha channel.

3) Saved the PSD with the alpha channel.

I didn't do any refinements to "ghost" the image, but in this case any image alteration would transfer the same way as illustrated below.

4) Relinked the original color image with the re-placed grayscale with alpha channel.

5) Created a PDF from InDesign with the PDF/X 4:2008 PDF preset.

This is a screen capture of the resulting PDF:

Does this work for you?

If so, do this with your current InDesign file, and use the File>Save As... menu command to save your grayscale version separate from the original so you can edit/modify the grayscale versions as you like, and you'll be past your troubles.

Good luck,

Randy

rob day
Community Expert
Community Expert
July 10, 2018

1) Convert CMYK image to grayscale

Hi Randy, it is possible to make the same conversion to grayscale on an ID export, so I'm not sure if converting over in Photoshop solves the yucky syndrome, which is usually introduced by the print driver or a low end PDF viewer (i.e., a browser).

Here I've placed an RGB and RGB>Dot Gain 20% converted image with transparency on a page. Exporting the page to PDF/X-4 also with 20% Dot Gain set as the destination produces the same grayscale values:

Randy Hagan
Community Expert
Community Expert
July 10, 2018

I'm sure there are other workflows, Rob, but my thought was that editing in Photoshop lets you quickly experiment with changes/results using that handy Edit>Edit Original command until you get what you want. Especially when it comes to adjusting ghosted images, which are pain to get right. Doing that conversion at the front end, and then fine-tuning the image in Photoshop before outputting the InDesign file to paper/film/plate/PDF offers more granular controls for quickly getting ghosted images the way you want them. It's absolutely true that you can alter that by juggling color settings, but the gap between trial to error/correction gets a lot larger. 

And FWIW, my guess is a clean background knockout by selection/clipping path/alpha channel is the secret to eliminating dirty edges, and is a faster and more sure way to eliminate background noise than trial and error with image adjustments or color settings. In short, if there ain't no box, there ain't no dirty box edges.

But I'm down with whatever works. While I feel it may be a little more than a po-ta-to/poh-tah-to difference, I'm not pig-headed enough to believe my way is the only right way. I'm just suggesting it's one right way, and wide open to finding others. I learn far more about the tools of the trade here than I ever offer in how to use them. And I truly thank you for keeping me honest on how others may work just as well.

Heck, we're all learning here – if we're smart enough to consider it. I constantly find that there are not only other ways to do what I do, there are often better ways as well.

Thanks for keeping me thinking,

Randy

rob day
Community Expert
rob dayCommunity ExpertAntwort
Community Expert
July 10, 2018

I have tried so many combinations of exporting to PDF but each and every time it is giving me Yucky Discoloured Box Syndrome.

What application are you viewing the grayscale PDF in, Acrobat Reader or Pro?

Have you tried PDF/X-4 with the destination set to a gray profile:

If you need the PDF to be read in a browser or less capable PDF reader try using the same preset but flatten the transparency by setting the Compatability to Acrobat 4 and the Standard to None:

If neither of these work can you show us a screen capture of the problem

Willi Adelberger
Community Expert
Community Expert
July 10, 2018

Sometimes it helps to add a clipping path to the image and use that additionally to transparency. Use PSD only, PNG is not so good.