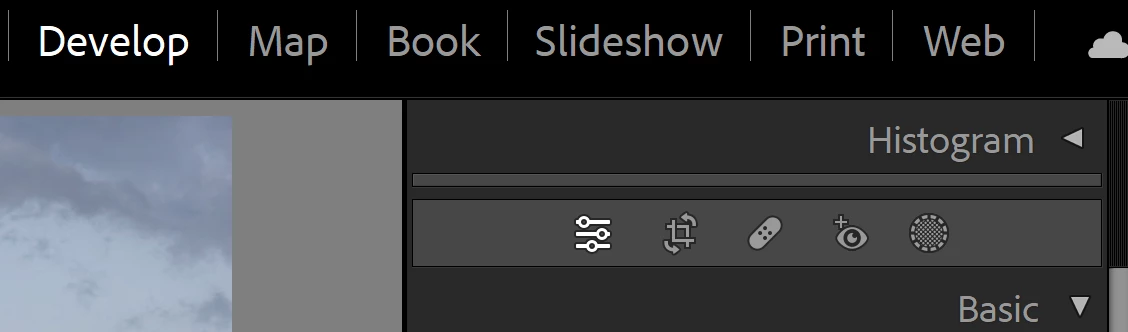
To help explain this, here are the associations between the former version icons, and the latest ones, colour coded:
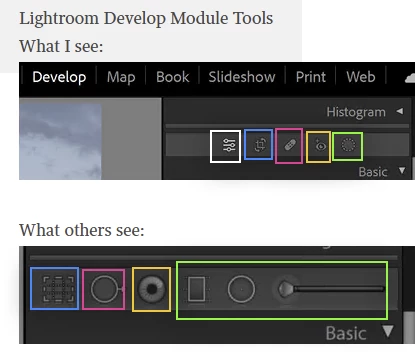
White: this is a new icon denoting normal editing. When you exit use of one of the specific tools, you return to this by default - these adjustments have continued to be available too BTW, even while using other tools. This new button actively shows that you are not in any other tool, and if clicked, closes whatever tool may be open.
Blue is for cropping: just with a changed icon that shows you can also rotate crop.
Pink is a changed icon for spot healing, which can also do spot cloning - and this is no longer limited to circular spots, but can be painted as an irregular shape instead.
Yellow is a changed icon for flash red-eye (or green pet-eye) reduction.
Green is local adjustments: formerly a few different ways of localising adjustments had their separate icons. Now this is completely redesigned as a new Masking mode. That opens up in a separate window within which these prior ways of localising adjustments, as well as lots of new ones, are presented. You are best off IMO learning Masking from scratch using a more recent help resource which explains the new mode specifically. Any tutorial that demonstrates the old interface will be actively confusing, also will not show you anywhere close to what possibilities now exist.