Known Participant
August 31, 2021
Answered

Highlight clipping different between NEF and TIFF

  • August 31, 2021
  • 6 replies
  • 1664 views

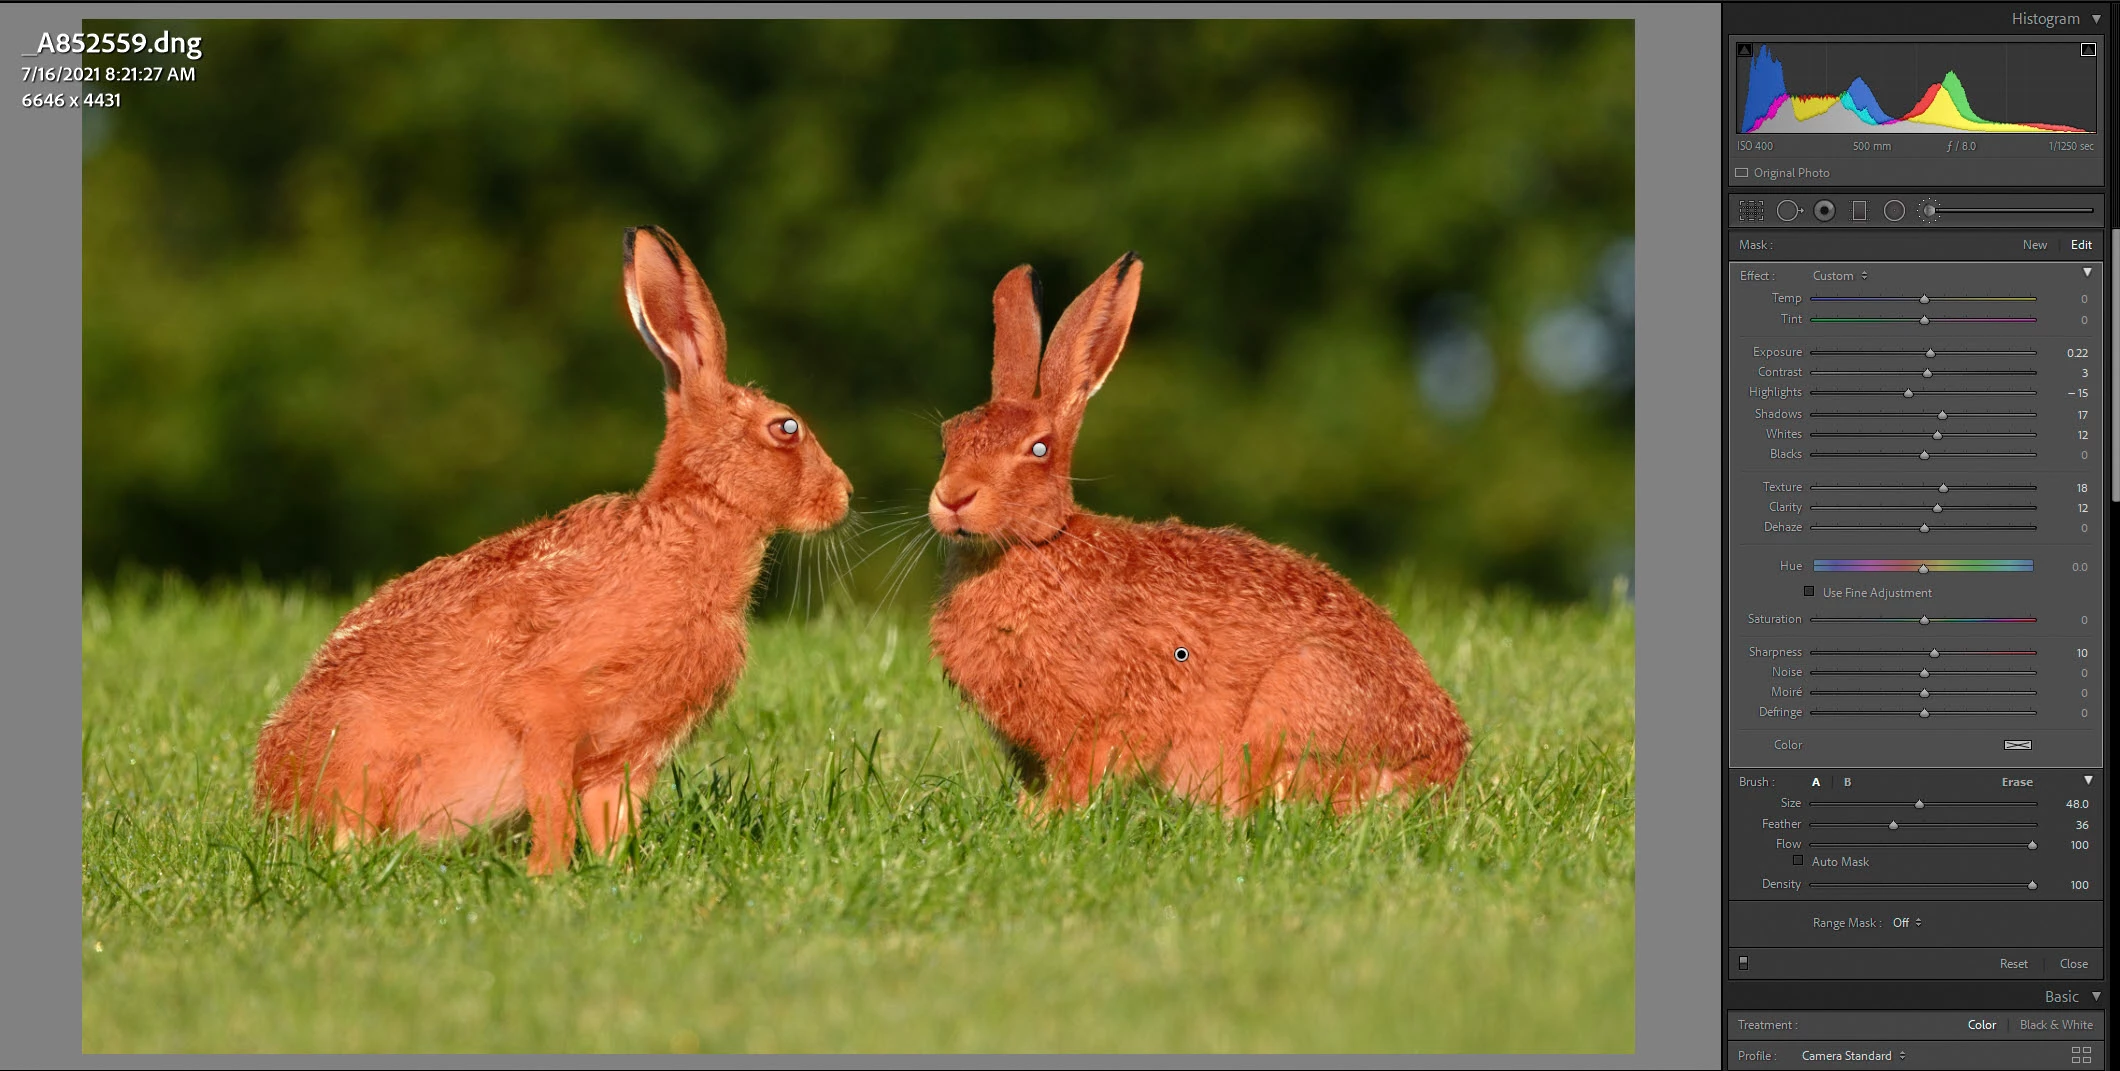
Today I noticed that a NEF converted to a TIFF behaved completely differently on the highlight clipping on the histogram in Develop.  Adding 0.5 to exposure in each  (NEF was +0.2 before conversion) showed different amounts of red highlight burning on the image (NEF more), but dramatically different on the histogram. I had to add almost 1.5 stops to the TIFF before the histrogram flashed overexposed.   The histograms look identical on first conversion, but you can see the red chaneel on the NEF is a lot more pronounced with the +0.5 and highlight warning is flashing. 


Can someone explain this as not something I have seen or noticed before, but quite suprising.  Basically the highlight warning on the TIFF is way out

Thanks for any advice. 

Mike

This topic has been closed for replies.
Correct answer Todd Shaner

Here you go


https://www.dropbox.com/sh/2l0fnfqs78t26d8/AAAPXPwf-QQrbE16BMz57WmGa?dl=0 


Thanks


I checked your DNG file with your Camera Standard setting and with Adobe Standard and the clipping level differences were about the same. So we can rule out Camera Standard profile as the cause. Checking the DNG file further I see that you have a Local Adjustment Brush applied as below. Again this changes the settings adaption characteristics, which is causing the difference you are seeing between the NEF and TIFF White clipping level. With the Adjustment Brush removed the White clipping point for the DNG (i.e. NEF) file is Exposure +2.23 and for the TIFF +2.73. So much closer to the same. This is expected behavior and nothing to worry about. Enjoy!


6 replies

Community Expert
September 3, 2021

This is likely caused by an interaction with the raw rendering profile and where in the rendering chain the profile (and any tone curves and lookup tables in the profile) are applied vs the exposure compensation. The exposure compensation is done very early in the rendering chain, so I wouldn't be surpried if the profile and its built-in curves and lookup table are applied after the exposure compensation. In fact I know this is true as you can often see subtle tone shifts especially when using camera matching profiles when you use the exposure compensation. There is a trick to make these profiles 'untwisted' so they don't do this anymore: https://sites.google.com/site/chromasoft/dcpTool . You used camera standard here so that would be consistent as the camera matching profiles are known to not be hue invariate. When you apply exposure compensation to a tiff, nothing like that happens. The source color space of the tiff is completely irrelevant. Camera raw/Lightroom simply converts the image to its internal linear prophoto and applies the exposure compensation and other slider settings. 

TheDigitalDog
Inspiring
September 2, 2021

The TIFF is rendered in what color space? 

It isn't the same as the raw, that's for sure. That and the Tone Response isn't the same. 

Author “Color Management for Photographers" & "Photoshop CC Color Management/pluralsight"
Todd Shaner
Legend
September 1, 2021
Todd Shaner
Legend
September 1, 2021

The LrC Basic panel controls are image adaptive. The Highlights and Shadows controls when set to 0 apply a small amount of black and white clipping recovery. Because of this a TIFF file created with all controls set to 0 the image data will be different than the NEF file's raw data. In fact a raw file will often display Whites and Black clipping with all controls set to 0 that can be fully recovered using the Highlights and Shadows controls. A TIFF created from such a file (with 0 settings)will have that clipping permanently applied to its image data, which is NOT recoverable.


Also make sure you are exporting to ProPhoto RGB profile and 16 bit, which is what LrC uses internally.

masplinAuthor
Known Participant
September 2, 2021

Ah seems you are saying the distribution of pixels in the TIFF has already been truncated so less extreme values. Therefore requires a bigger movmeent in expsoure to hit the clipping warning. 


So my TIFF images looks supper bright, but there is no highlight clipping so does that mean its bright, but not actually burnt out? 


Thanks for link very useful

masplinAuthor
Known Participant
September 2, 2021

@masplin wrote:

Ah seems you are saying the distribution of pixels in the TIFF has already been truncated so less extreme values. Therefore requires a bigger movmeent in expsoure to hit the clipping warning. 


Again, a it can depend on the color space (and it's gamut/encoding) of the TIFF which differs from the raw. What color space was used to create that TIFF? 

The current rendering of a raw shows pixels that are burned out indeed, with that rendering. It doesn't tell us if the pixels are actually burned out (over exposed). 

To produce a TIFF with the identical color space as the raw being shown to you, you'd need to create an ICC profile using ProPhoto RGB with a 1.0 TRC, something that can easily be created using Photoshop. 


Hi Todd. I'm using the RGBPro and 16 bit as the coversion. Yes when I bring the TIFF back into LR the histograms look identical.  Its just when you start to move the exposure they change quite differently with the NEF flashing highlights much earlier (+0.5) then the TIFF (+1.5).


Thanks

GoldingD
Legend
September 1, 2021

Zoom in to at least 1:1

I suspect Smart Preview is getting in the way


although, histogram indicates, in both, that you are viewing original.


selondon
Community Expert
Community Expert
September 1, 2021

{Moved from Lightroom Cloud to Lightroom Classic Forum}