- Home
- Lightroom Classic
- Discussions
- Re: Troubleshooting a weird texture once the image...
- Re: Troubleshooting a weird texture once the image...
Copy link to clipboard
Copied
Hey friends, I want to apologize in adavance, I don't know what this issue is called so I'm lost when I'm trying to look up the issue. So any advice that can help solve this or even just educating me on the proper terminology woudl be so greatly apprecitaed.
I have this set I shot with colored lights, when I first click on the image, the lighting looks pretty good but suddenly LR finishes loading and there appears some horrible "crunchy" texture in the blues on her face. (I'm attaching images, the second one is the one that illustartes the problem). The entire set looks like this. Please help 🥲
I am using Lightroom Classic 11.1 on MacOS Monterey 12.2
 3 Correct answers
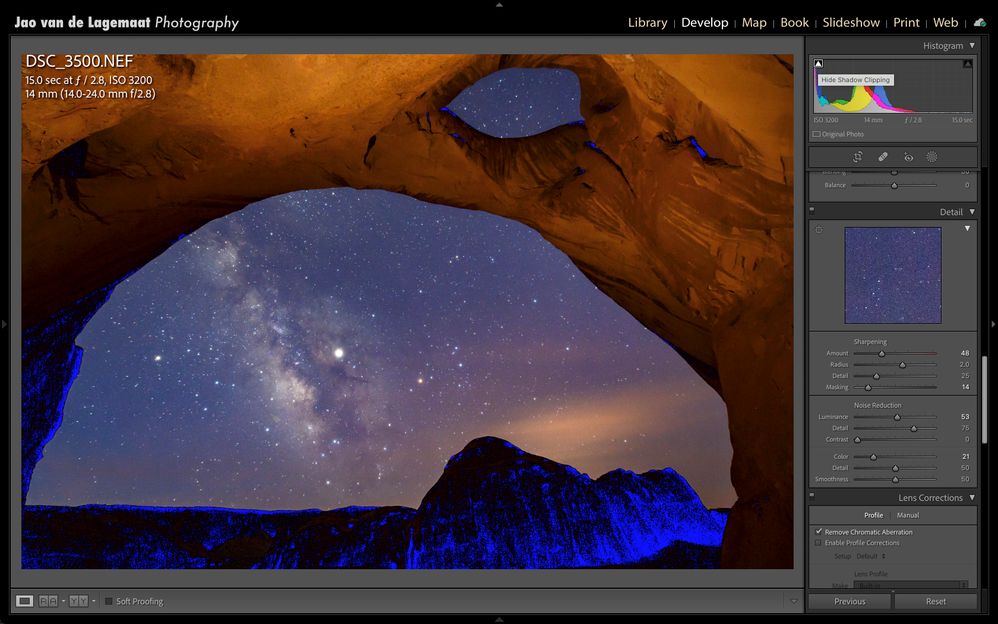
This might be the underexposure warning. It is by default a blue color. See here for the effect and where to turn it on/off (the little triangle top left of the histogram)
If this warning is not turned on, the problem is very likely the profile you selected. Try using camera standard or Adobe standard for example:
This is a known issue when using blue-purple lighting in the ultraviolet color spectrum.
As @Jao vdL mentions try using the 'Camera' named profiles.
The post with Adobe Engineer Eric Chan's comments on this issue has been deleted due to the PS & LR forum consolidation. Fortunately, I archved his reply as shown below that explains the cause and some suggestions he provided.
Aug 9, 2013 9:19 AM (in response to Othmar Atzor)
Sorry for joining this thread late.
https://forums.adobe.com/message/5558392#5558392
Unfortunately this is a limitation of our current color profile process. This limitation actually applies to all of
...Copy link to clipboard
Copied
Is it just this shoot? When looking at the second image it appears to have some edits applied. Can you post a screen shot if this in the develop module with your Basic panel open? You could try to 'Reset' the image and ensure there are no presets being applied.
Copy link to clipboard
Copied
No edits had been applied; first image is inital preview, second image was after Lr finished loading to show me the full preview. This was actually a clipping issue due to the LEDs. Thank you for your reply.
Copy link to clipboard
Copied
The initial preview is the embedded JPEG, then LR must create its own preview which explains the change.
That change and issue could be due to an import preset, the camera profile or some issue with the GPU, we can't say until we see the original which hopefully you could upload to something like Dropbox.
Also, the only accurate way to view this is in Develop at 1:1 or greater, not zoomed out, not in other modules.
Copy link to clipboard
Copied
Adjusting the camera profile helped loads! Turns out this was a clipping issue due to the LED's
Copy link to clipboard
Copied
This might be the underexposure warning. It is by default a blue color. See here for the effect and where to turn it on/off (the little triangle top left of the histogram)
If this warning is not turned on, the problem is very likely the profile you selected. Try using camera standard or Adobe standard for example:
Copy link to clipboard
Copied
This is a known issue when using blue-purple lighting in the ultraviolet color spectrum.
As @Jao vdL mentions try using the 'Camera' named profiles.
Copy link to clipboard
Copied
I knew this was an old issue but didn't rrealize it was that old! I've seen this before myself on blue/purple lighting such as neon or stage lighting. It is very profile specific indeed.
Copy link to clipboard
Copied
The post with Adobe Engineer Eric Chan's comments on this issue has been deleted due to the PS & LR forum consolidation. Fortunately, I archved his reply as shown below that explains the cause and some suggestions he provided.
Aug 9, 2013 9:19 AM (in response to Othmar Atzor)
Sorry for joining this thread late.
https://forums.adobe.com/message/5558392#5558392
Unfortunately this is a limitation of our current color profile process. This limitation actually applies to all of our camera models that we support, not just Panasonic. What is happening is that the color transform we've built is optimized mainly for daylight and incandescent light conditions, but when applied to scenes with bright light sources (especially neon lights, and especially blue/purple lights), the transform will tend to oversaturate and clip those colors.
My team is investigating how to build better profiles going forward, but in the meantime, my main suggestion is to try reducing the Red/Green/Blue Saturation sliders in the Camera Calibration panel (not the HSL tab, and not in the Basic panel). This will help to reduce the oversaturation and clipping, and will give you a better starting point for further edits (Exposure, Contrast, etc.). As a shortcut, you can store your Red/Green/Blue Saturation slider adjustments as a preset that you can then apply quickly to other images you have that show the same issue.
Copy link to clipboard
Copied
This was a huge help. Thank you for your thoughtful reply!
Find more inspiration, events, and resources on the new Adobe Community
Explore Now


