Participant
October 1, 2018
Question

Why does my image look different in Lightroom vs what it looks like after exporting to a folder.

  • October 1, 2018
  • 3 replies
  • 6163 views

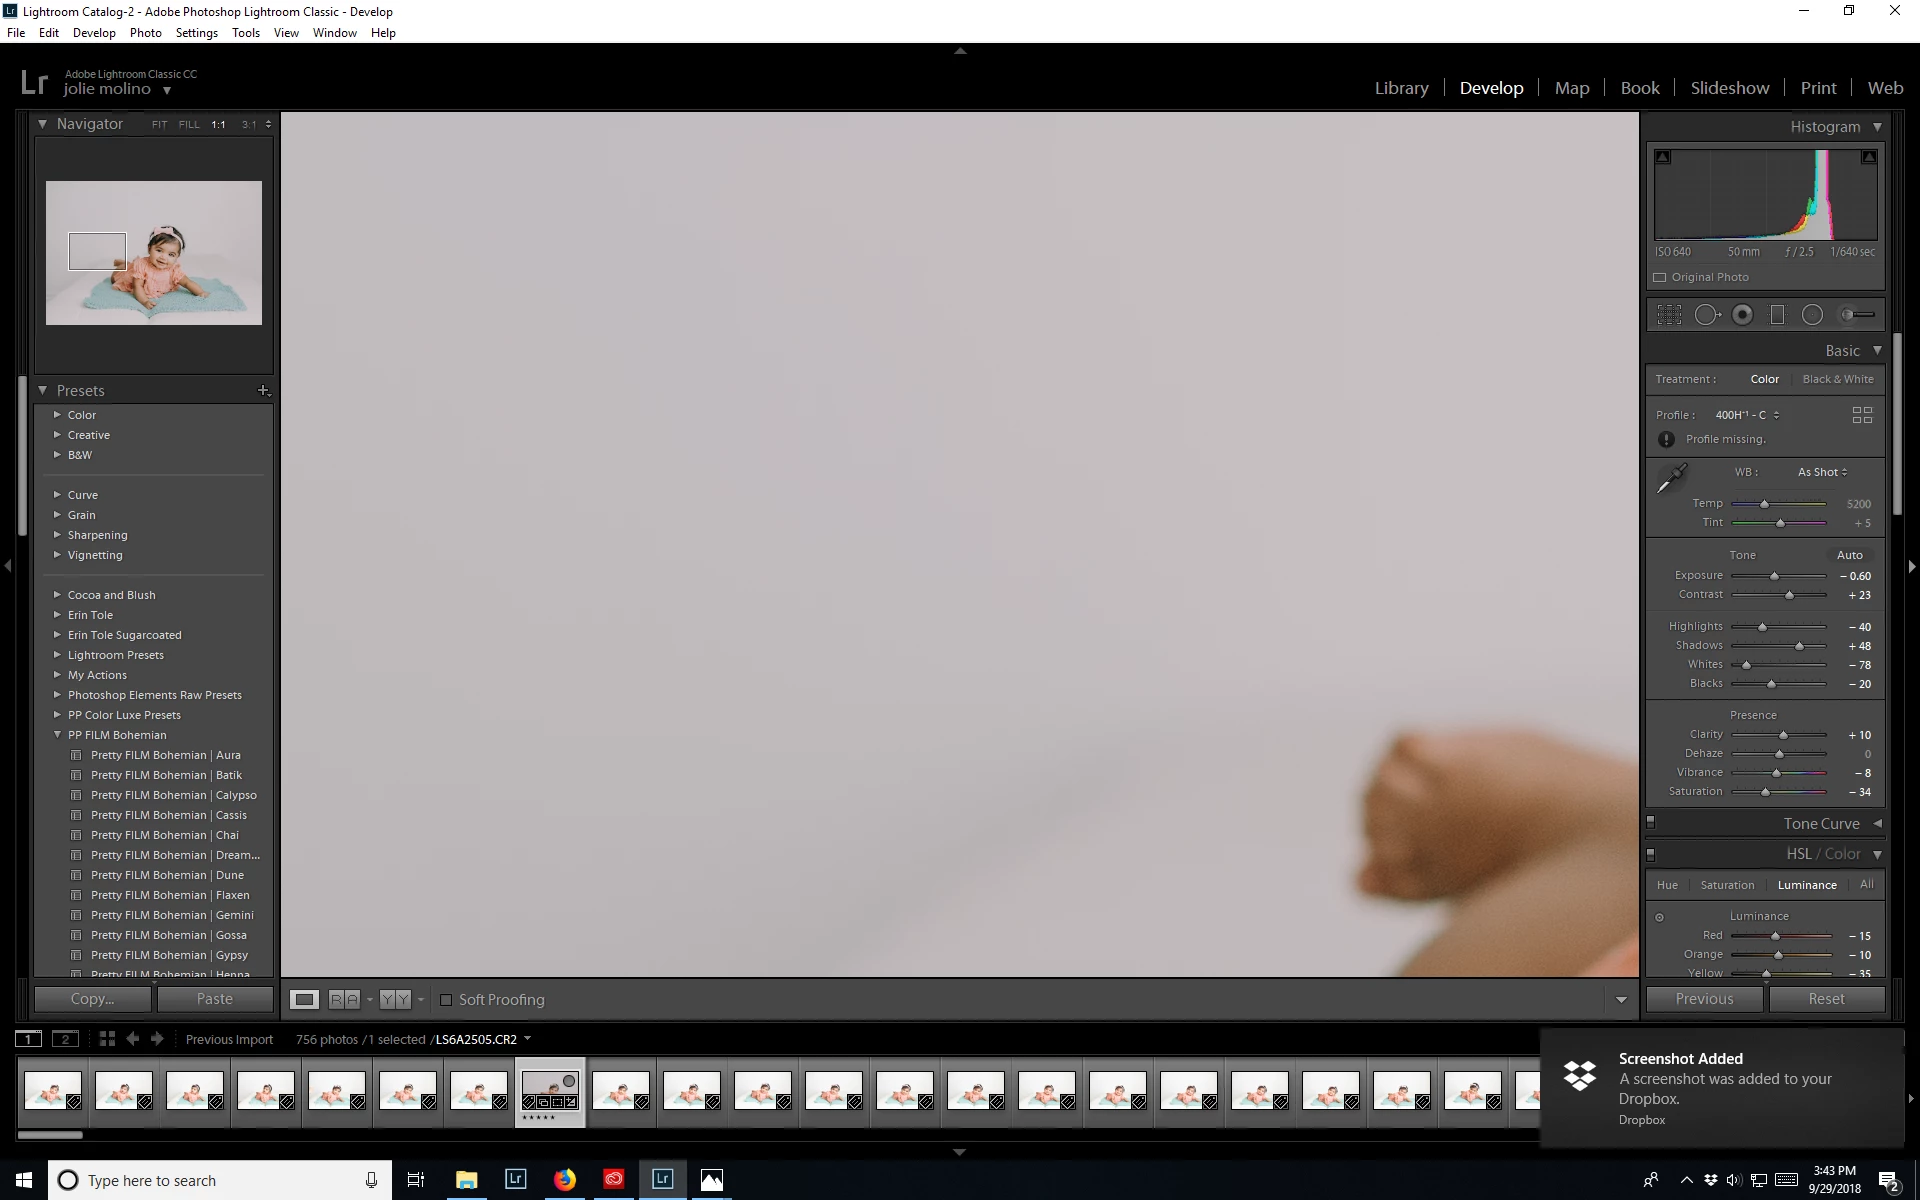
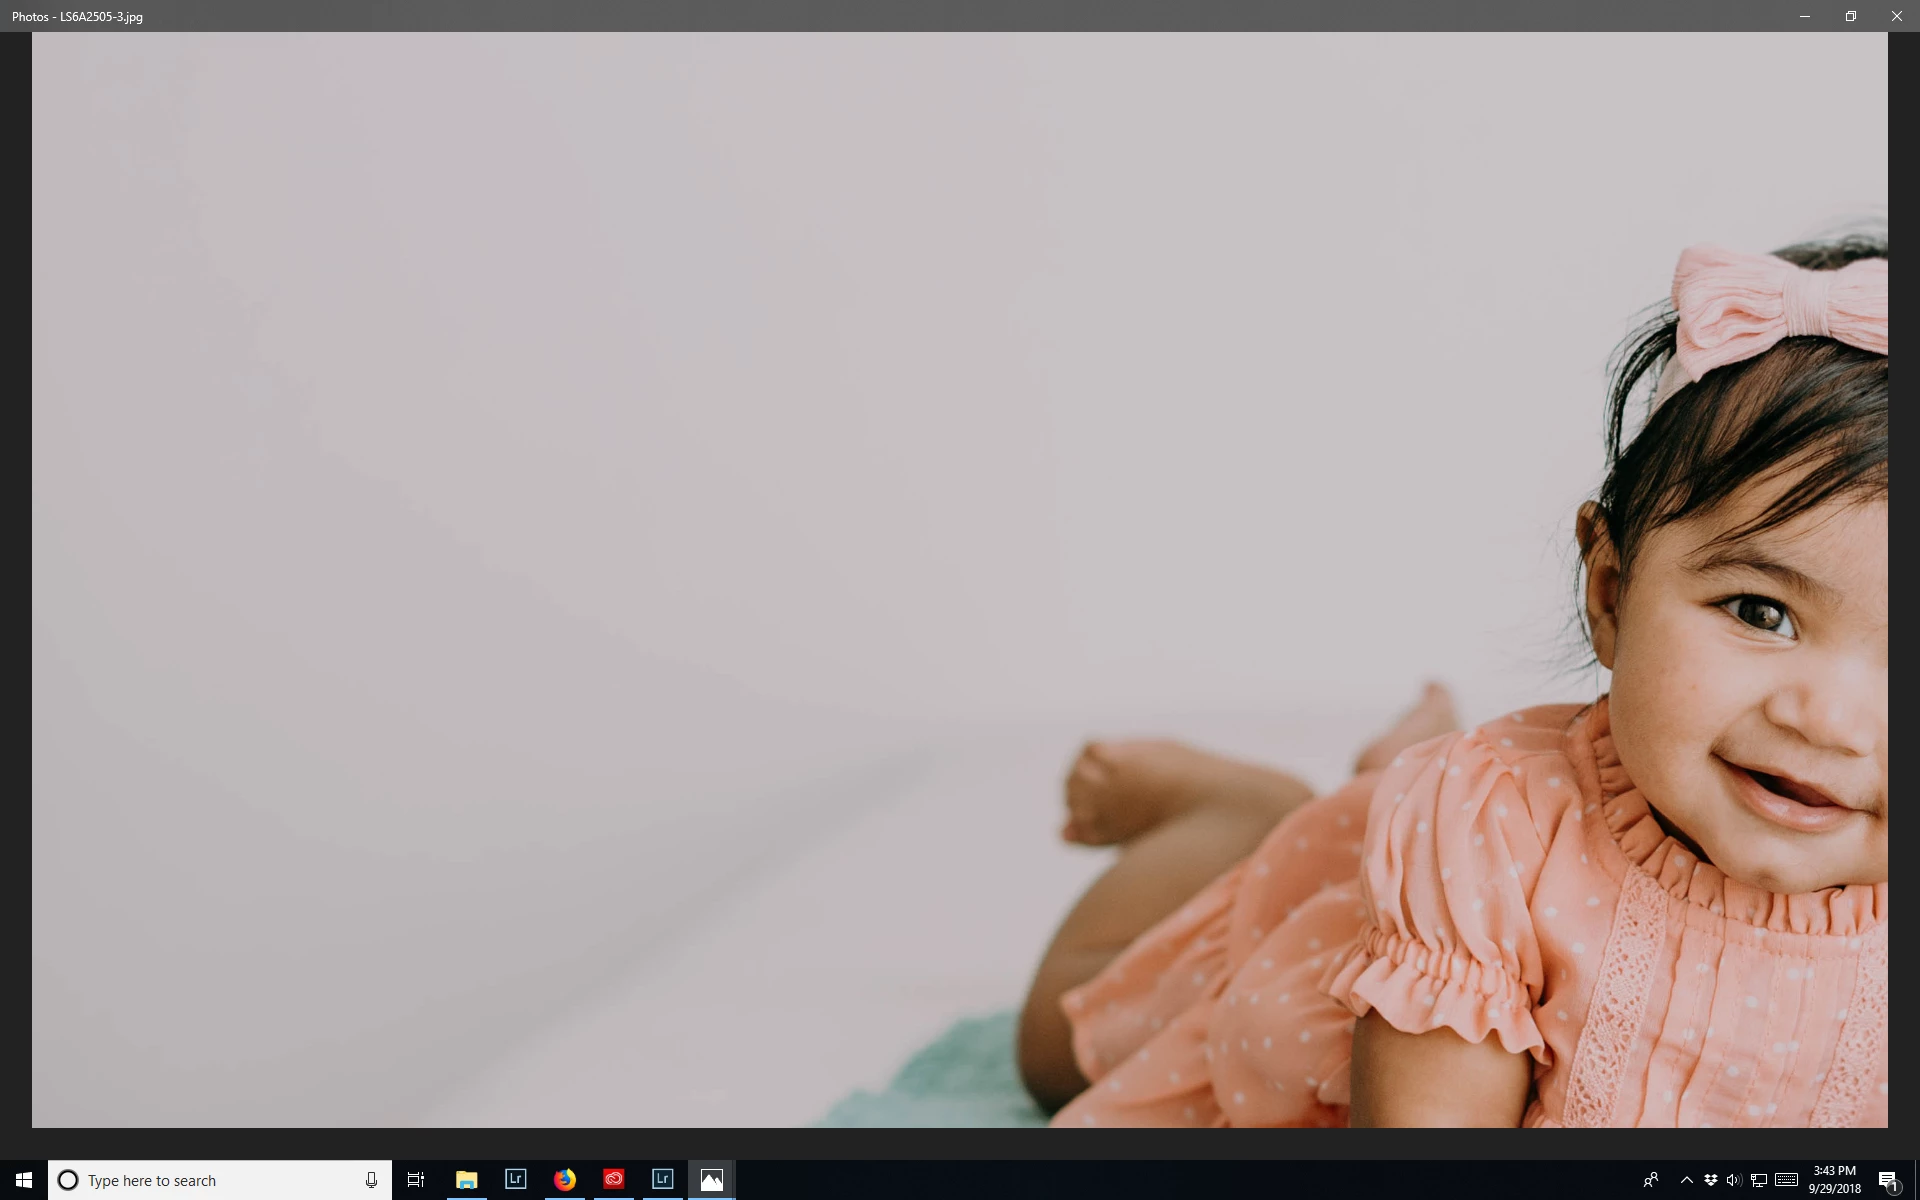
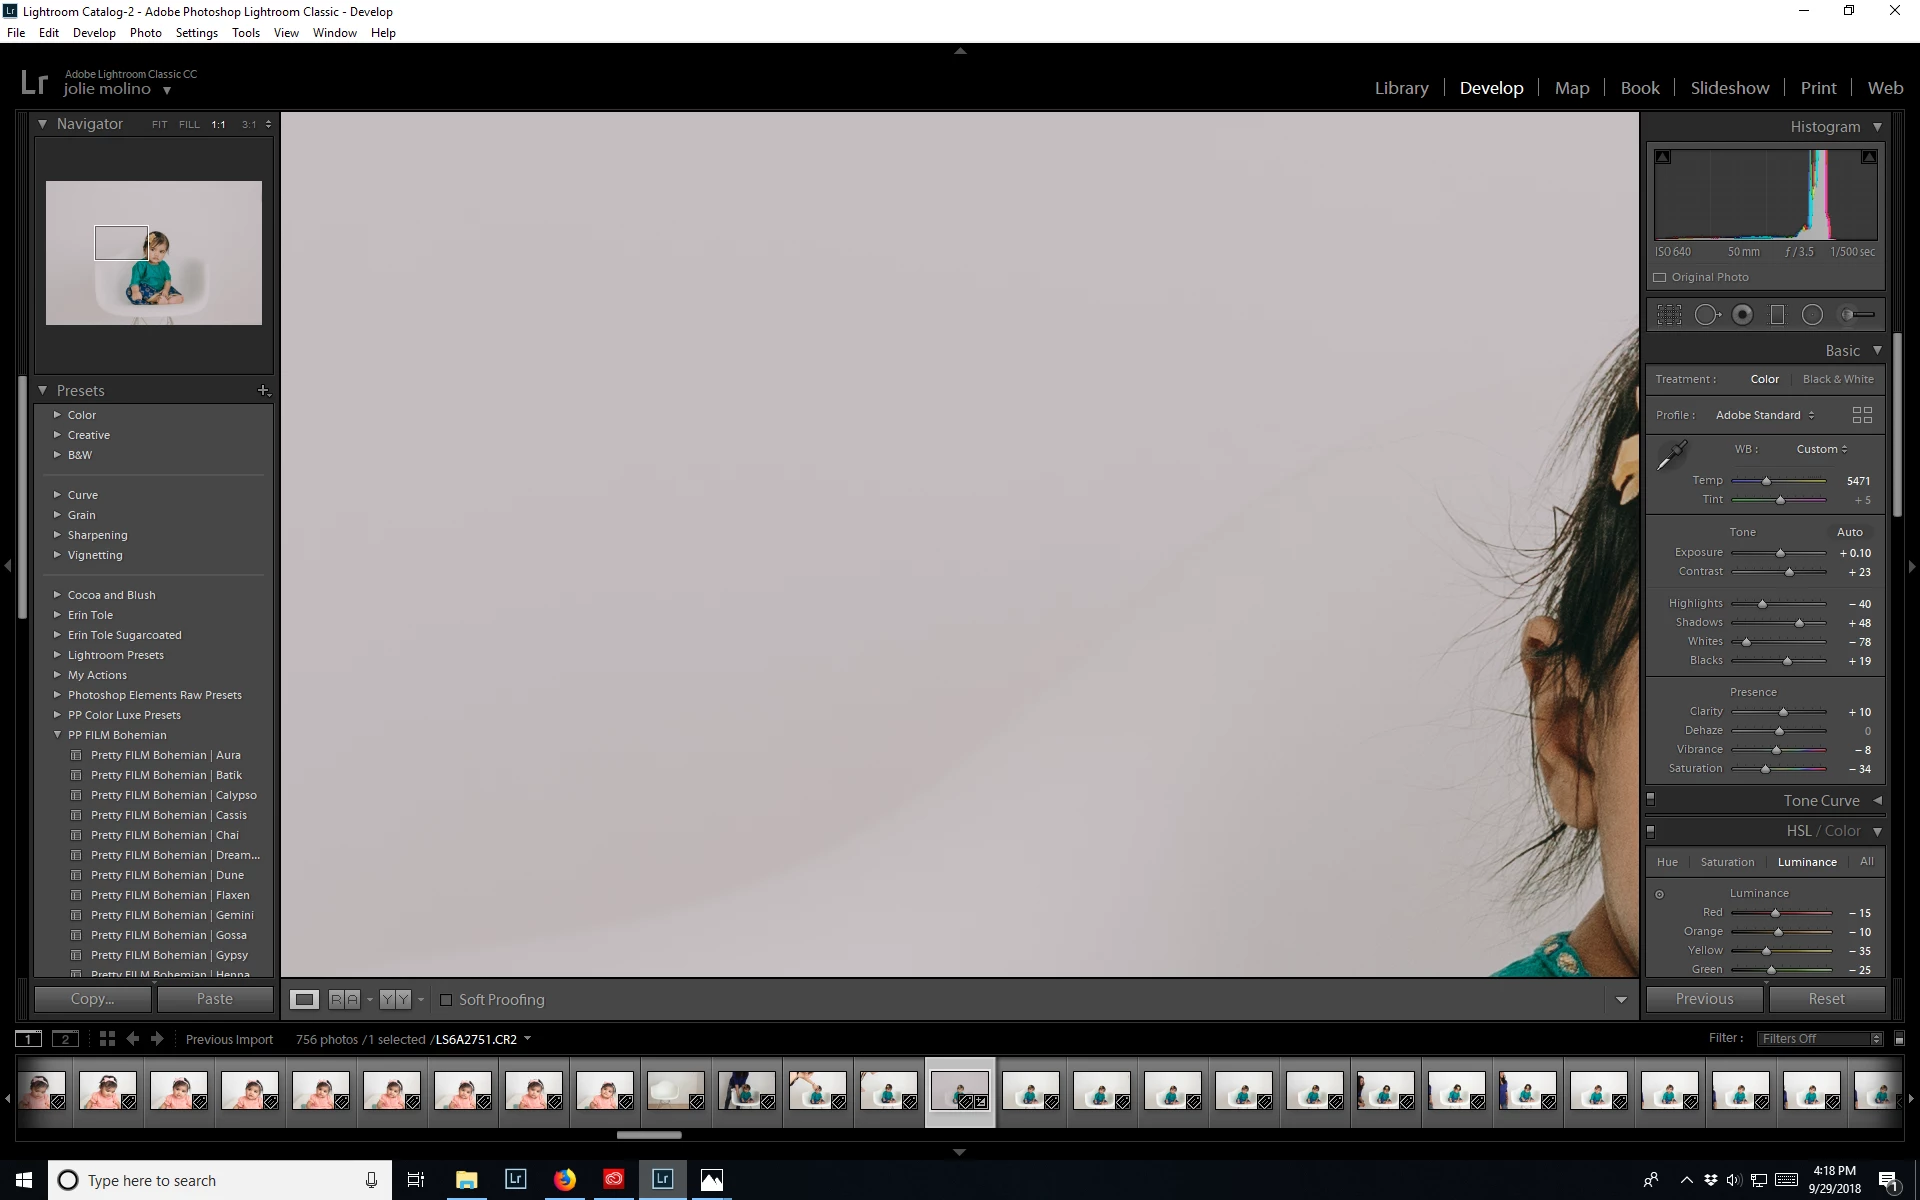
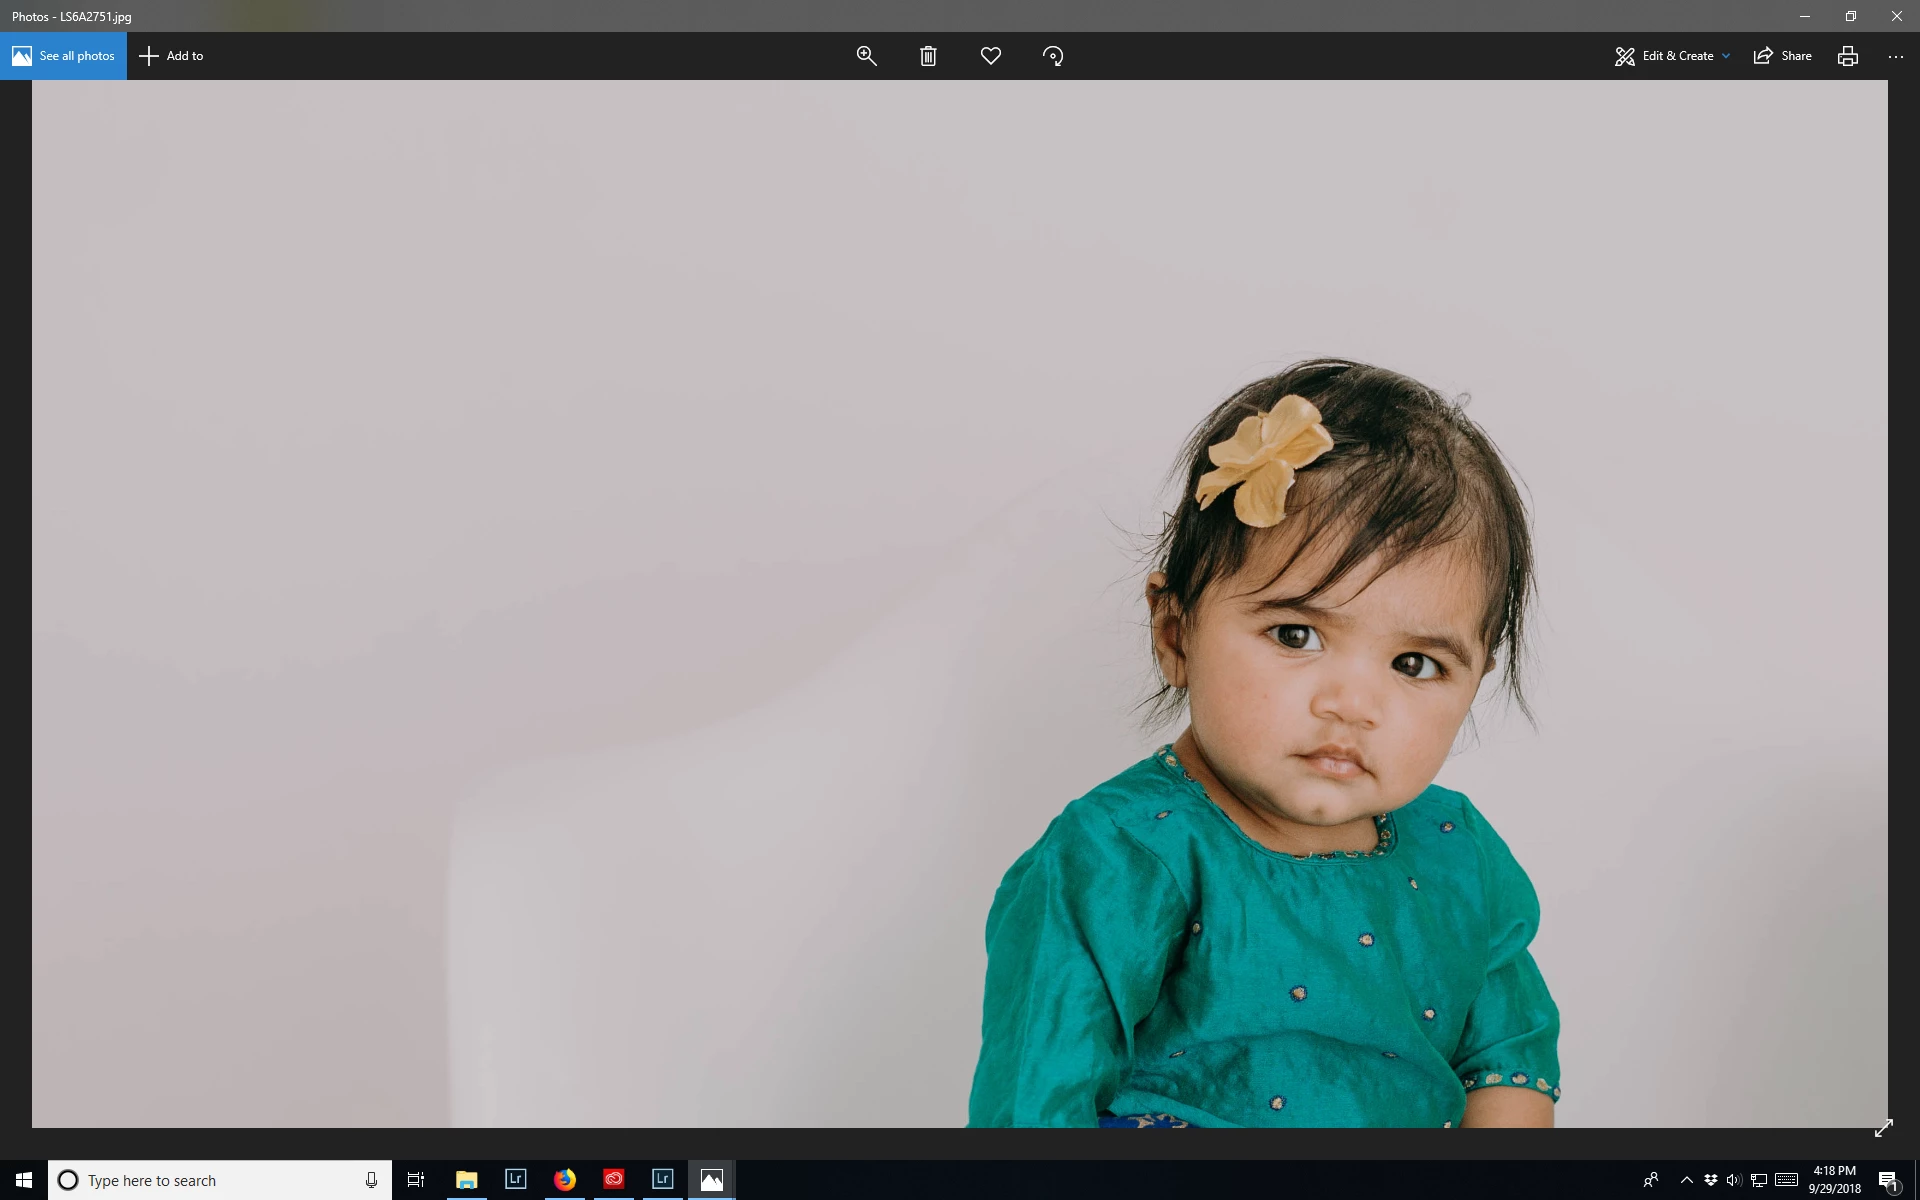
I am currently using Lightroom classic cc (although I have the same issue with the standalone Lightroom). My image looks great in Lightroom but once I export and view it in the folder I have placed it in on my harddrive the image looks different. This is mostly with images in my studio. I need to get this issue fixed, I am so tired of spending hour editing out all the weird lines or striations I am seeing.

Here is a zoomed in portion in lightroom (the first image of each) and the zoomed in portion from the folder I export it too. Note that when I also take that same same and place it in Elements to finish up a few edits the same problem is there as well.

I use Huey Pro to calibrate my monitor.

This topic has been closed for replies.

3 replies

Participant
January 24, 2019

I'm not sure if your problem is the same as mine but after days of searching, I found a solution that fixed my problem. I will copy and paste it below.

After running across an article (http://blogs.adobe.com/jkost/2018/04/lightroom-cc.html) I have come to the conclusion that the default profile for raw is now “adobe color” which for me adds a terrible looking orange tone to my photos. So… to fix this I now have to take some extra steps. I open raw files from Lightroom by right clicking the photo > Edit in > Open As smart object in Photoshop. Then, the photo will opened in Photoshop with the terrible orange tint. Now, double click on the background image to open the raw file. Change the profile to “Adobe Standard” and press “OK”. I was so frustrated with. If anyone knows how to make the profile always “adobe standard” I would be a happy camper!

Community Expert
January 24, 2019

It is really simple to do that. Go into Classic on a just imported image.

Go to the Develop module on it. Change the profile to Adobe Standard (it is

at the top of the module by default nowadays). Then hold the alt/option key

and the Reset button will turn into Set default. Click it and set the new

default for raw files from this camera

Community Expert
October 4, 2018

I can't see in the screenshots what you are talking about. What color differences are a problem? Please explain.

Otherwise, it was already explained. Windows photo viewer does NOT use the monitor calibration file. You cannot use it to judge the color in your exported files. Internet explorer similarly does not use the monitor calibration. If your monitor is correctly calibrated and the monitor profile is correct, you will see the same color in Lightroom as in Photoshop since they are both color managed.

Lastly, if your monitor is a wide gamut one, a Huey Pro will not work. It can't calibrate wide gamut monitors at all. There are many trade names for such monitors and there are many out there now so that is not so unlikely.

Participant
October 4, 2018

Got on live chat with Adobe and it had nothing to do with a monitor and it is now fixed! But thank you for your ideas. Stands to reason if I am looking at an image in Lightroom on my monitor that the image would look the same on my monitor in a folder...

Per Berntsen
Community Expert
Community Expert
October 4, 2018

Would you mind sharing with us what the problem was, and how it got fixed?

https://forums.adobe.com/people/Jao%20vdL  wrote:

Windows photo viewer does NOT use the monitor calibration file.

For the record, the Windows Photo Viewer is color managed.

The Photos app is not.

Per Berntsen
Community Expert
Community Expert
October 1, 2018

It's not easy to spot any difference in the screenshots, especially since you are using different parts of the image, and at different magnifications.

However, the Windows Photos app is not color managed, and can not be expected to display the same colors as Lightroom. If you want to see correct colors, only use color managed applications to view your work. (like the Windows Photo viewer, Bridge, or the free Irfanview image viewer)

Also, Windows 10 is known to install low quality monitor profiles when doing updates, so go to Control panel > Color management, and verify that the profile you created when calibrating is set to default. If not, change it to the correct profile, and see if it makes any difference. You will have to restart Lightroom and Elements so that they can become aware of the changed profile.

Participant
October 1, 2018

I do have the Huey Pro set as my default on my monitor as well. So how can I go about getting my image in Lightroom to still look like that image even in elements? The image in Elements looks just like the one in my image folder. I am just super frustrated. There has to be a way that the image I produce in Lightroom stays the same? I wish I had a phone number of someone at Adobe to help with this.

Here are the images at the same zoom. First one is in Lightroom and 2nd Elements. They are not the same. The Lightroom one requires no further cloning on the white background to fix the image but once I am in Elements I have to fix the background before handing it over to print.

Per Berntsen
Community Expert
Community Expert
October 1, 2018

I'm still having a hard time seeing a difference in colors.

If you're talking about the blocky shadow, this is caused by jpg compression, and should be fixed by exporting at 100 quality (although very smooth gradients like this can be tough to render in a jpg).

But if you want to edit an image in Elements you should not export it (and definitely not as jpg), but use Edit in Elements in Lightroom, which will return a tiff or psd (depending on what you have chosen in LR's preferences under External editing) to Lightroom with the edits you did in elements. To edit in Elements, press Ctr+E, or go to Photo > Edit in.