Known Participant
May 6, 2019
Question

guided upright vs rotation

  • May 6, 2019
  • 2 replies
  • 3138 views

Hi there,

I'm writing because I have a question regarding the guided upright tool, maybe someone has an answer to this.

I'm often documenting in an art- and architectural context. many of my photos are taken without tripod, as quickly as possible. that's why often my images are not very straight, but for sure I want the result to be straight.

Usually I do that with the "guided upright"-tool, but there's something that's really bugging me: when i only use "guided upright" then the images often end up being distorted. the better way to do it is to first rotate the image, then export the image, then use the "guided upright"-tool.

To illustrate what I mean, here's some examples (sorry, not the best photo, but it illustrates the point):
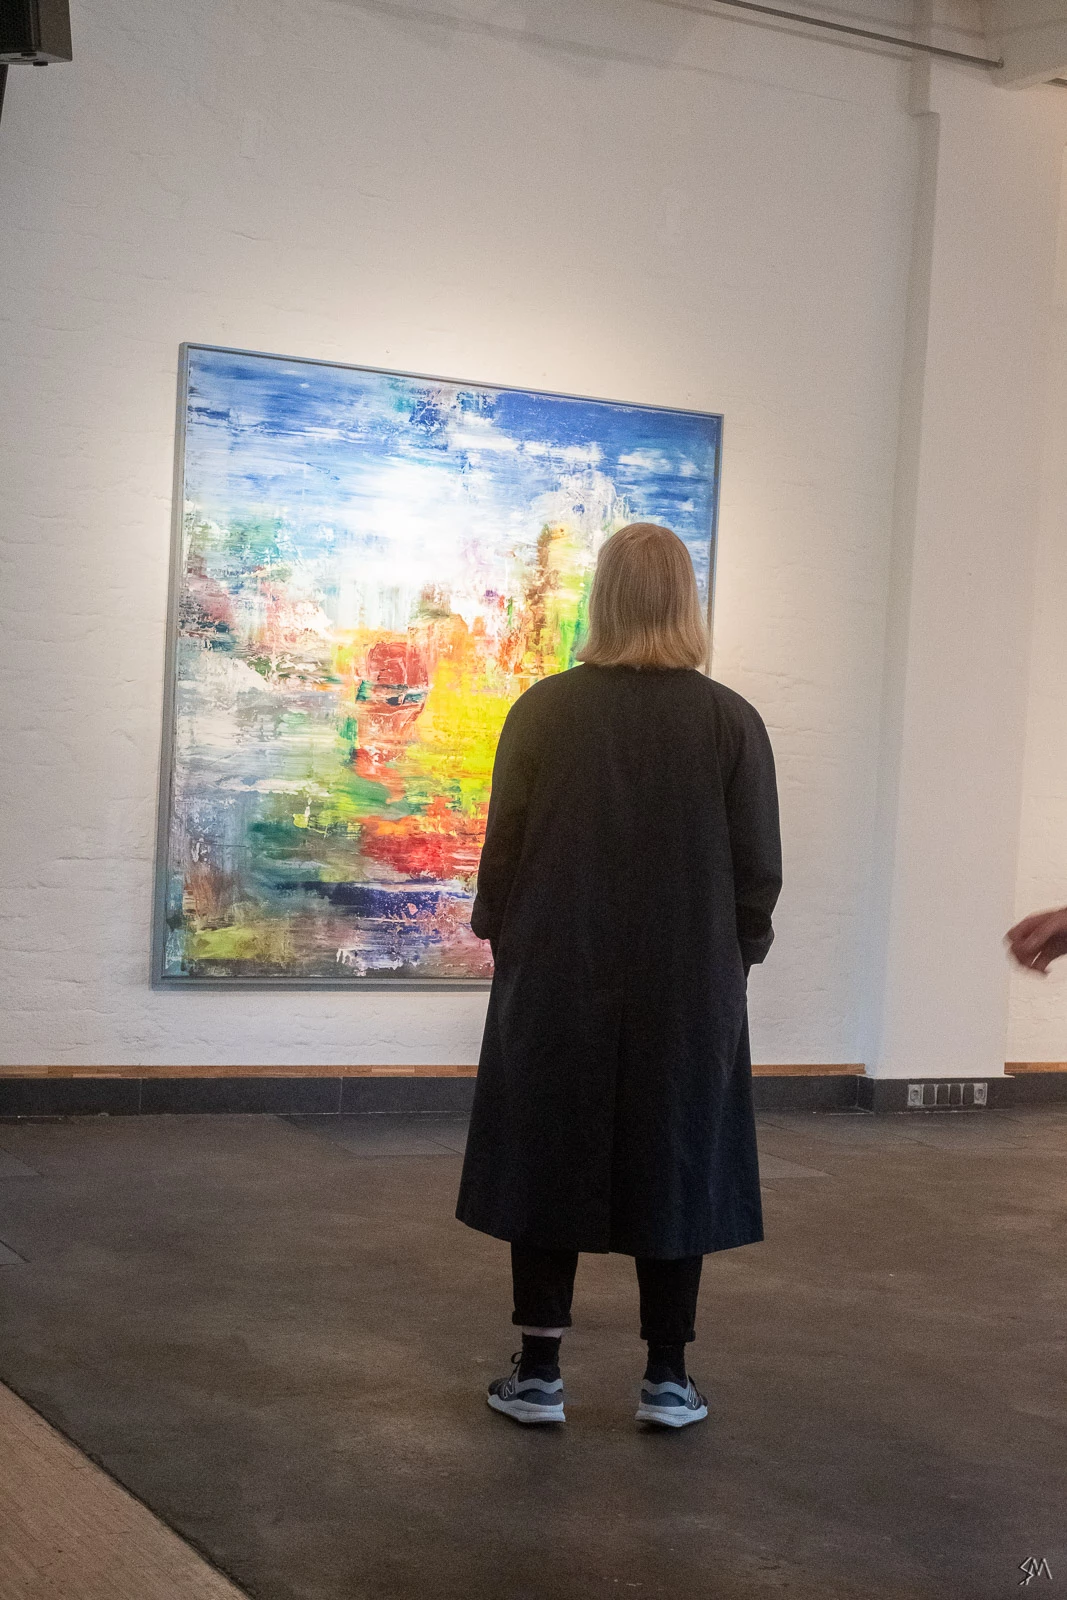
1) original image

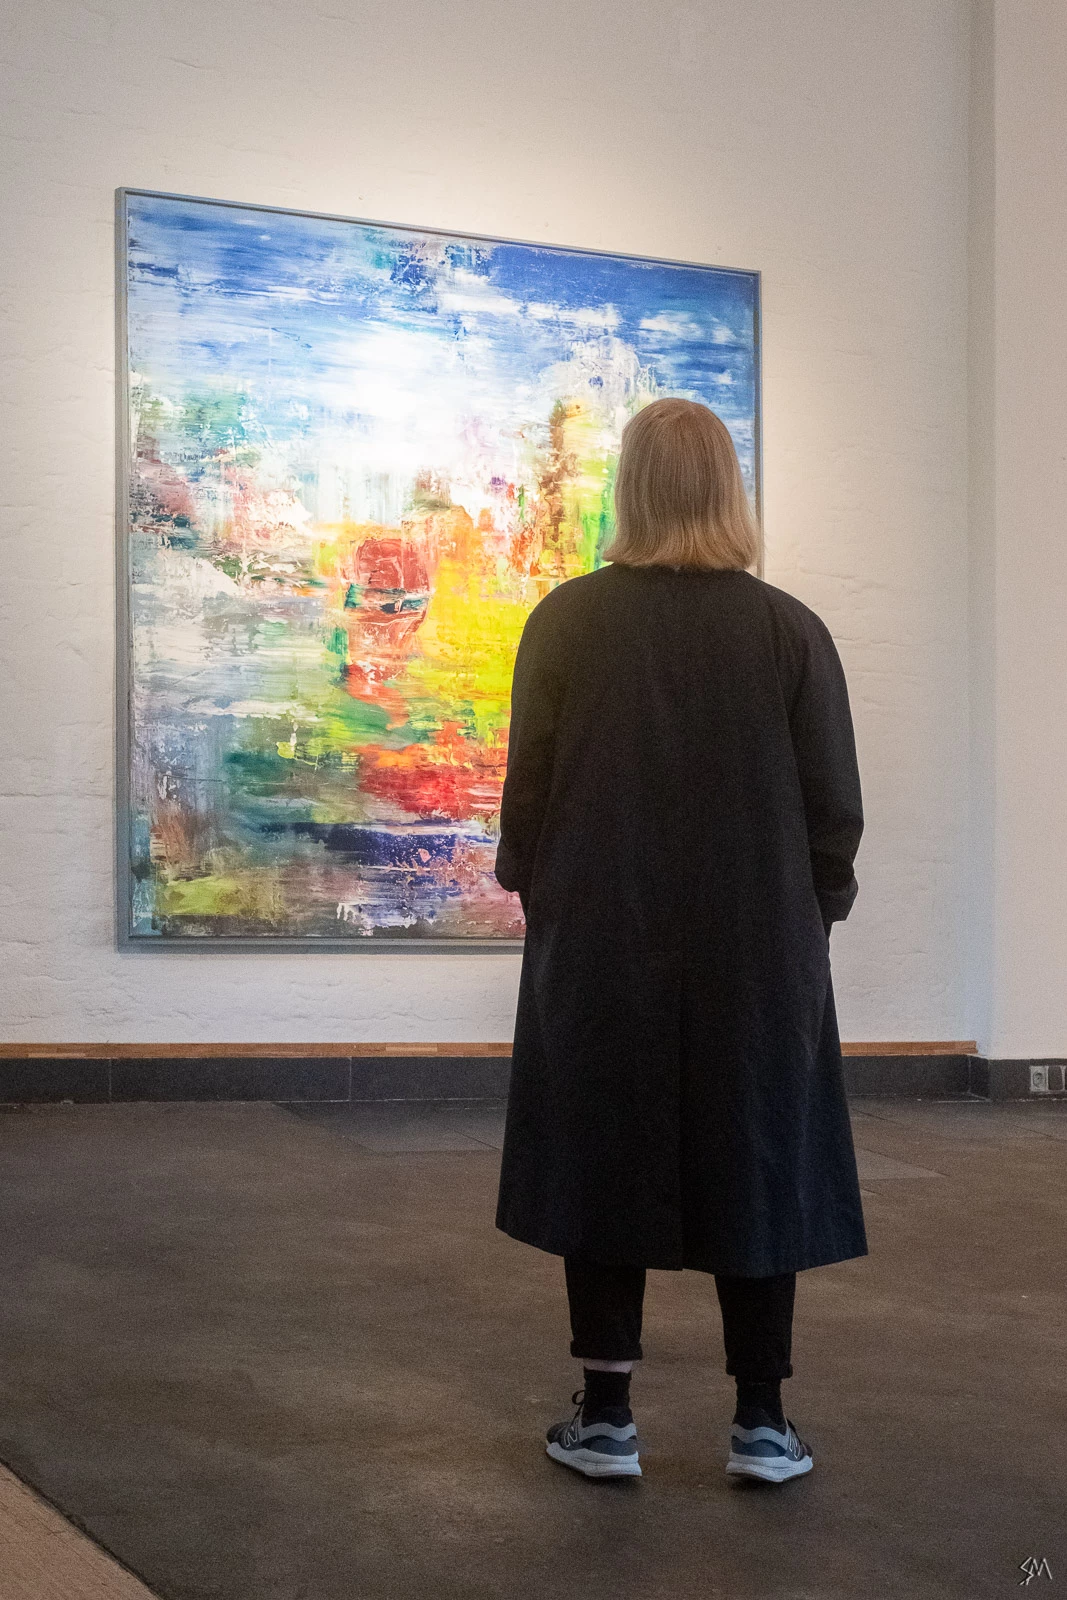
2) straightening using only "guided upright"-tool

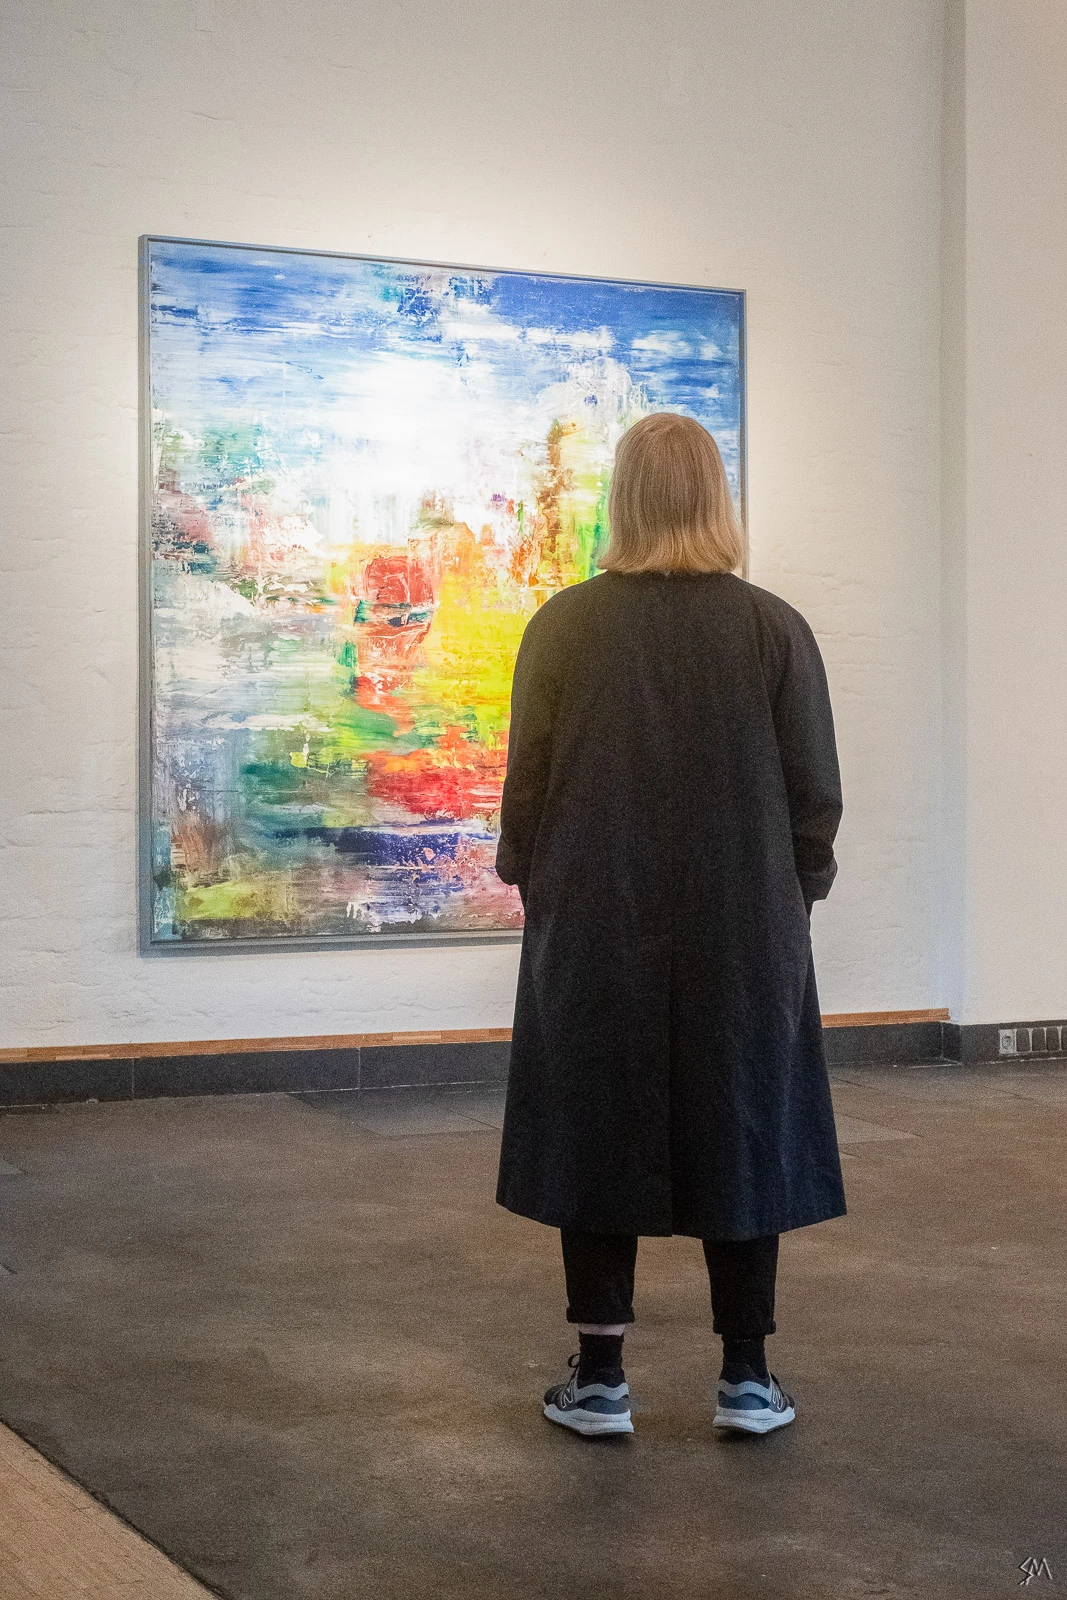
3) straightened by first rotating, then exporting and re-importing, then "guided upright"-tool

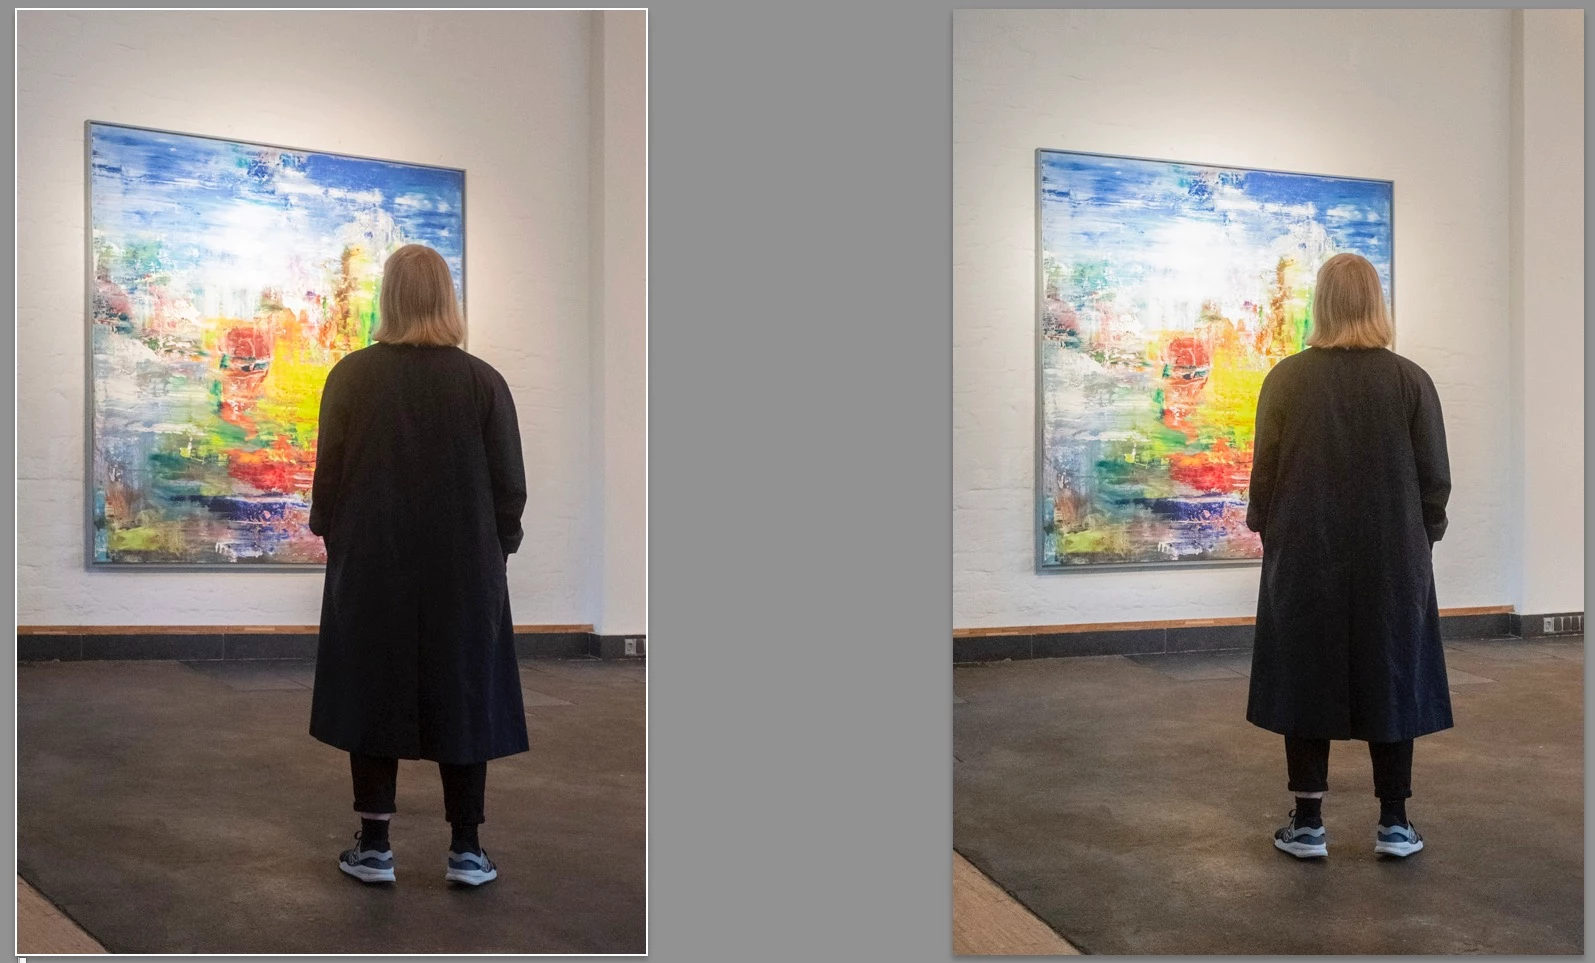
As one can see, there's a significant difference between the results. Here's the two last results again for easier comparison:

Usually the "guided upright"-tool is resetting any rotation of the image (resulting in a distorted image). There's also the option to press the "option-key" while using the "guided upright"-tool, so the rotation is not being reset. Problem is: that doesn't work at all, it gives me the same result as without resetting the rotation.

My only workaround is to first rotate the image, then export and re-import, then use the "guided upright"-tool.

My question is:

- is this a bug in the application? "Guided Upright" should work in the way that the image is being less distorted not more, shouldn't it? Is it maybe just sloppy programming?

- Why does the pressed "option-key" result in the same distorted image as when i don't press it?

Any feedback would be really helpful, because all that exporting, re-importing is just a waste of time and storage...

Thanks,

Sebastian

This topic has been closed for replies.

2 replies

Just Shoot Me
Legend
May 6, 2019

Maybe if you got permission from the art gallery, painter, artist, owner of the art you wouldn't need to be so quick with your shots and you could compose them better.

Known Participant
May 6, 2019

that's a very constructive response, thank you.

i am photographing with permission, not sure why that's a point here. as i said: on openings sometimes i have to shoot quickly, out of my hand, because some motives just disappear too quickly. it's better to get a good shot that's not straight than miss a shot but have straight lines.

Known Participant
May 6, 2019

I think programming-wise the "guided upright"-tool should not only be about the perspective correction, but rotate the image first by the median value between the two guidelines. Everything else leads to distorted results.

Example: if the left guideline is at an angle of let's say 10 degrees, and the right one is at 20 degrees, then it would make sense to first rotate the image by (10+20)/2=15 degrees, and then do the perspective correction as indicated by the guidelines.

Hope someone can follow me here...

Cheers, S

Known Participant
May 6, 2019

to illustrate my point once more i just made a black square that i rotated in photoshop:

I did not distort the square any further (to keep it as simple as possible), but if I'm using the "upright"-tool on the left and right sides then following thing happens:

I understand that the tool is for correcting perspective distortions, but the tool should incorporate an option to rotate the image first, before correcting the distortion, otherwise it's unusable because it's resulting in images that are MORE distorted than without the correction.

The only work-around is - as stated above - rotating the image first, exporting and re-importing, then use the guidelines.

Maybe the Adobe-team could find a solution for that? Would be really helpful.

Cheers, S

Bob Somrak
Legend
May 6, 2019

Hi Todd,

yes I think we were cross-posting, I'll try to explain it once more from the beginning. Thanks for your interest to help again, but the more I'm thinking about it the more I'm convinced that it's either sloppy programming or a bug... I'll try to explain in detail.

1) Uncorrected Image

That's the image I have and I want the vertical lines (as indicated by the red lines that I added to make it more visible) to be straight.

2) My first step would be to rotate the image by using the crop-tool. I'm adjusting to the left line with the ruler.

It's obvious that there's a little bit of perspective distortion in the image (the right line is not straight):

3) My next step would be a perspective correction, but Lightroom is resetting the rotation as soon as I choose the "guided upright"-tool. When I set the guidelines on the left and the right LR is correcting the lines, but distorting the image:

4) Lightroom is giving me an option that if I'm keeping the "option-key" pressed, then it would not reset the crop-angle:

... but either way (Option-key pressed or not pressed doesn't matter) it always gives me the same distorted result (as the example I've shown in number 3)

I'm guessing this is a bug or sloppy programming, because LR should actually keep the rotation, and then put the perspective correction by the guidelines on top of that rotation. The image should then look like...

5) ... this image, which I rotated and then exported and reimported and then corrected using "guided upright":

///

To illustrate the point once more, because the differences are not very obvious, I've put the result of "guided upright"-tool (as in number 3) and the result as it should be next to each other:

I know this is only marginal, and most people will not be able to tell the difference. Either way: I've processed some thousands of images - architectural or art-context - and it's bugging me for two years already. I'm sure not many people can see it, but I can see the distortion in the left image, and it annoys me, because it's an amateurish understanding of perspective correction: it must be possible inside Lightroom to lock an image into rotation and then put the perspective correction on top of that, otherwise it's not usable if you're aiming to be working professionally.

So I wanted to mention that, so maybe someone at the Adobe-team could have a look into this.

/// Possible solutions for Adobe / the programmers

a) one way to resolve that is - as I mentioned above somewhere - to take the median angle between the guidelines and apply an automatic image-rotation automatically to the image before actually distorting it.

b) the other way to resolve that problem would be to make it possible to lock the crop-rotation of the image before applying the perspective correction. There's that message in Lightroom that a pressed "Option-key" would keep the image-rotation locked-in, but it's not working. In my version of Lightroom (newest one Classic CC 8.2.1. and all other versions before) the option-key does not have any effect at all. It's not locking in the crop-rotation. It's obviously a bug, because it's leading to the same distorted result.

Can anyone understand what I mean now? Anyone else has this problem?

Anyway: hope someone can resolve that sooner or later...

Thanks, S


aeiou112358  wrote

b) the other way would be to make that message in Lightroom that a pressed "Option-key" would keep the image-rotation valid. In my version of Lightroom (newest one Classic CC 8.2.1.) the option-key does not have any effect at all. It's not locking in the crop-rotation. It's obviously a bug.

The option key seems to preserve the "crop angle" for all the options except GUIDED. 

M4 Pro Mac Mini. 48GB