
Lightroom to Photoshop - Stack for Landscape Photography
Stacks can help to create landscape images for when shooting conditions aren't ideal

It happens sometimes; usually for landscape photography the photographer will carry a polariser, tripod and ND filter - but on occasions, for some reason, we might be found with only a camera.
In such a case, it is possible to create something of a long exposure image with a sequence of shots, preferably taken on a tripod or with the camera perched on something solid.
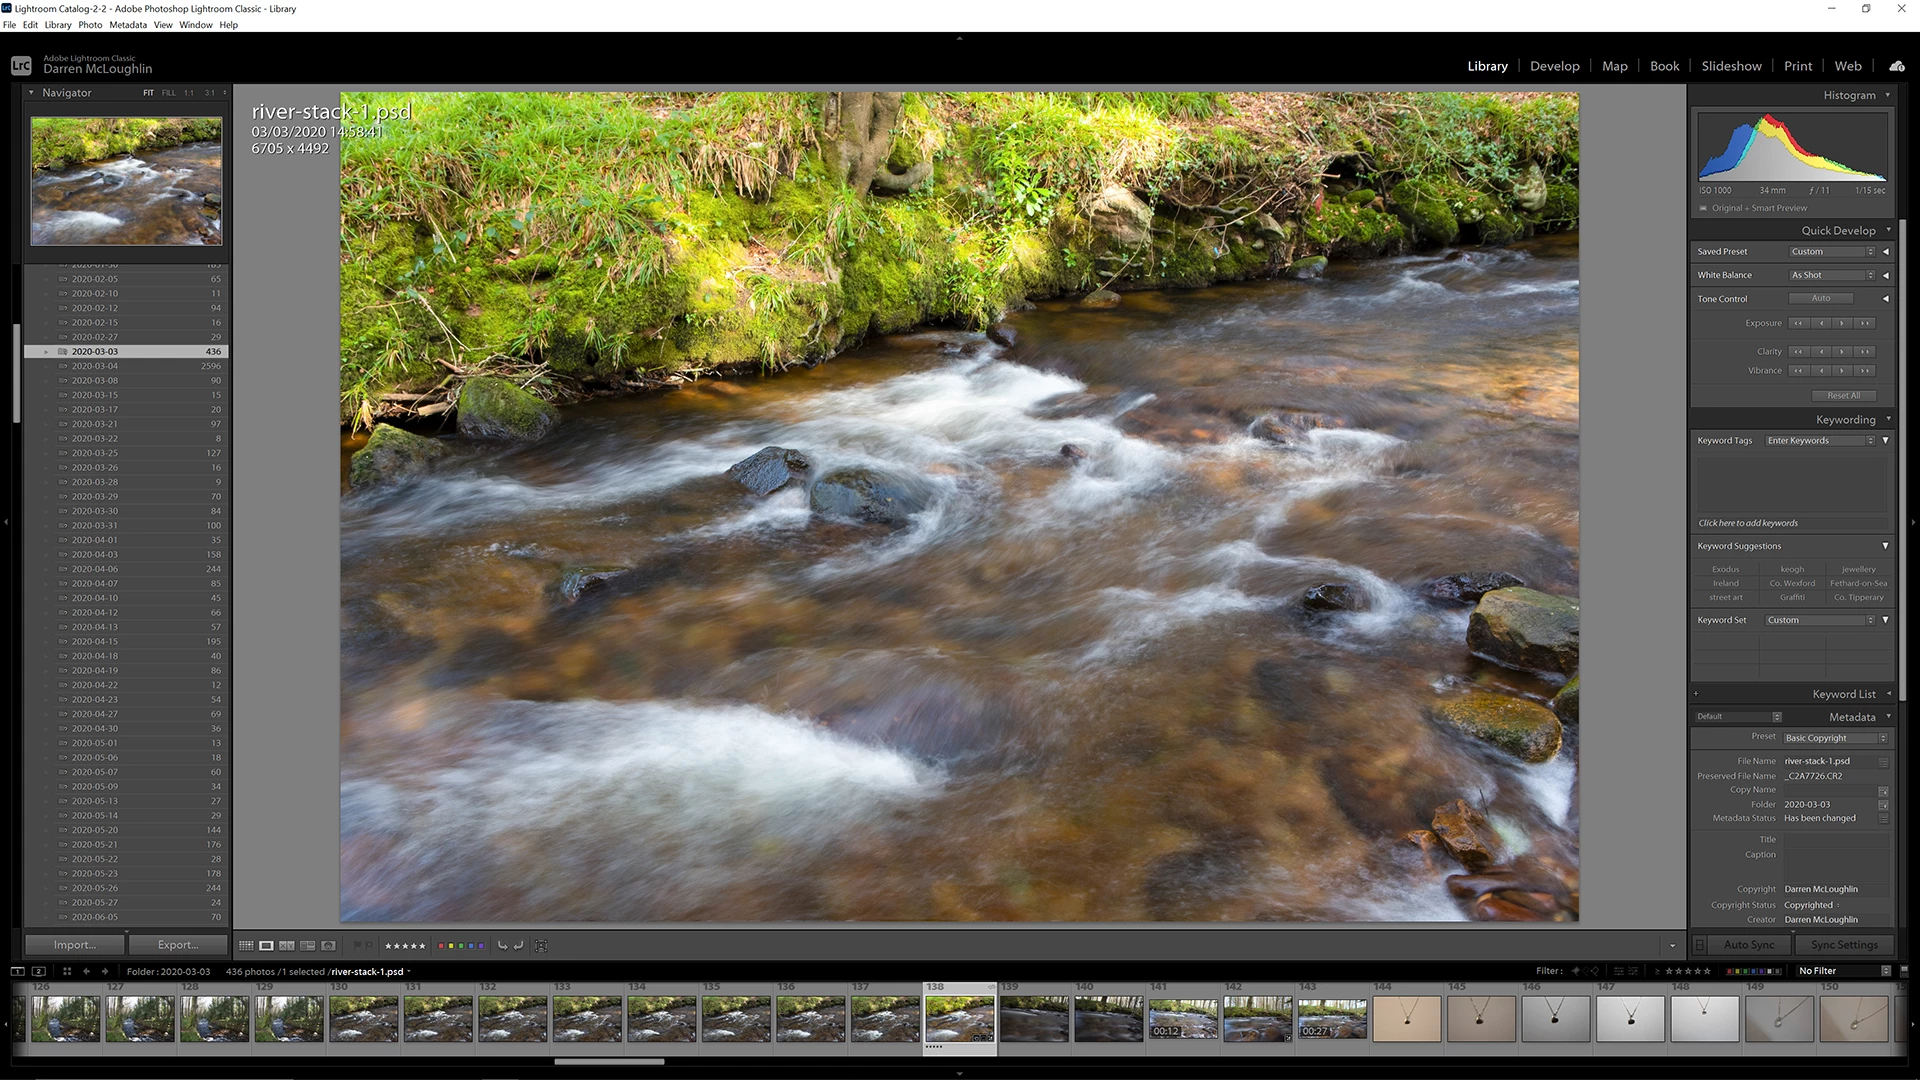
Here was one such occasion from the days before lockdown in Ireland back in March, when I didn't even have a tripod with me.
I took a sequence of images, with a high ISO of 1000, at f11 with 1/15th on the shutter. With a tripod I would have been able to get a longer exposure by using a lower ISO and a smaller aperture of f16 or f22.
I knew that I could combine these images, if held relatively steady between frames, into a stack in Photoshop.
So here is the method:
❶ Select the images in Lightroom
- I have one or two extra but clicking between them shows too much movement so I pick those that are most similar. In this case there are seven so processing shouldn't take too long or be too taxing on the system.
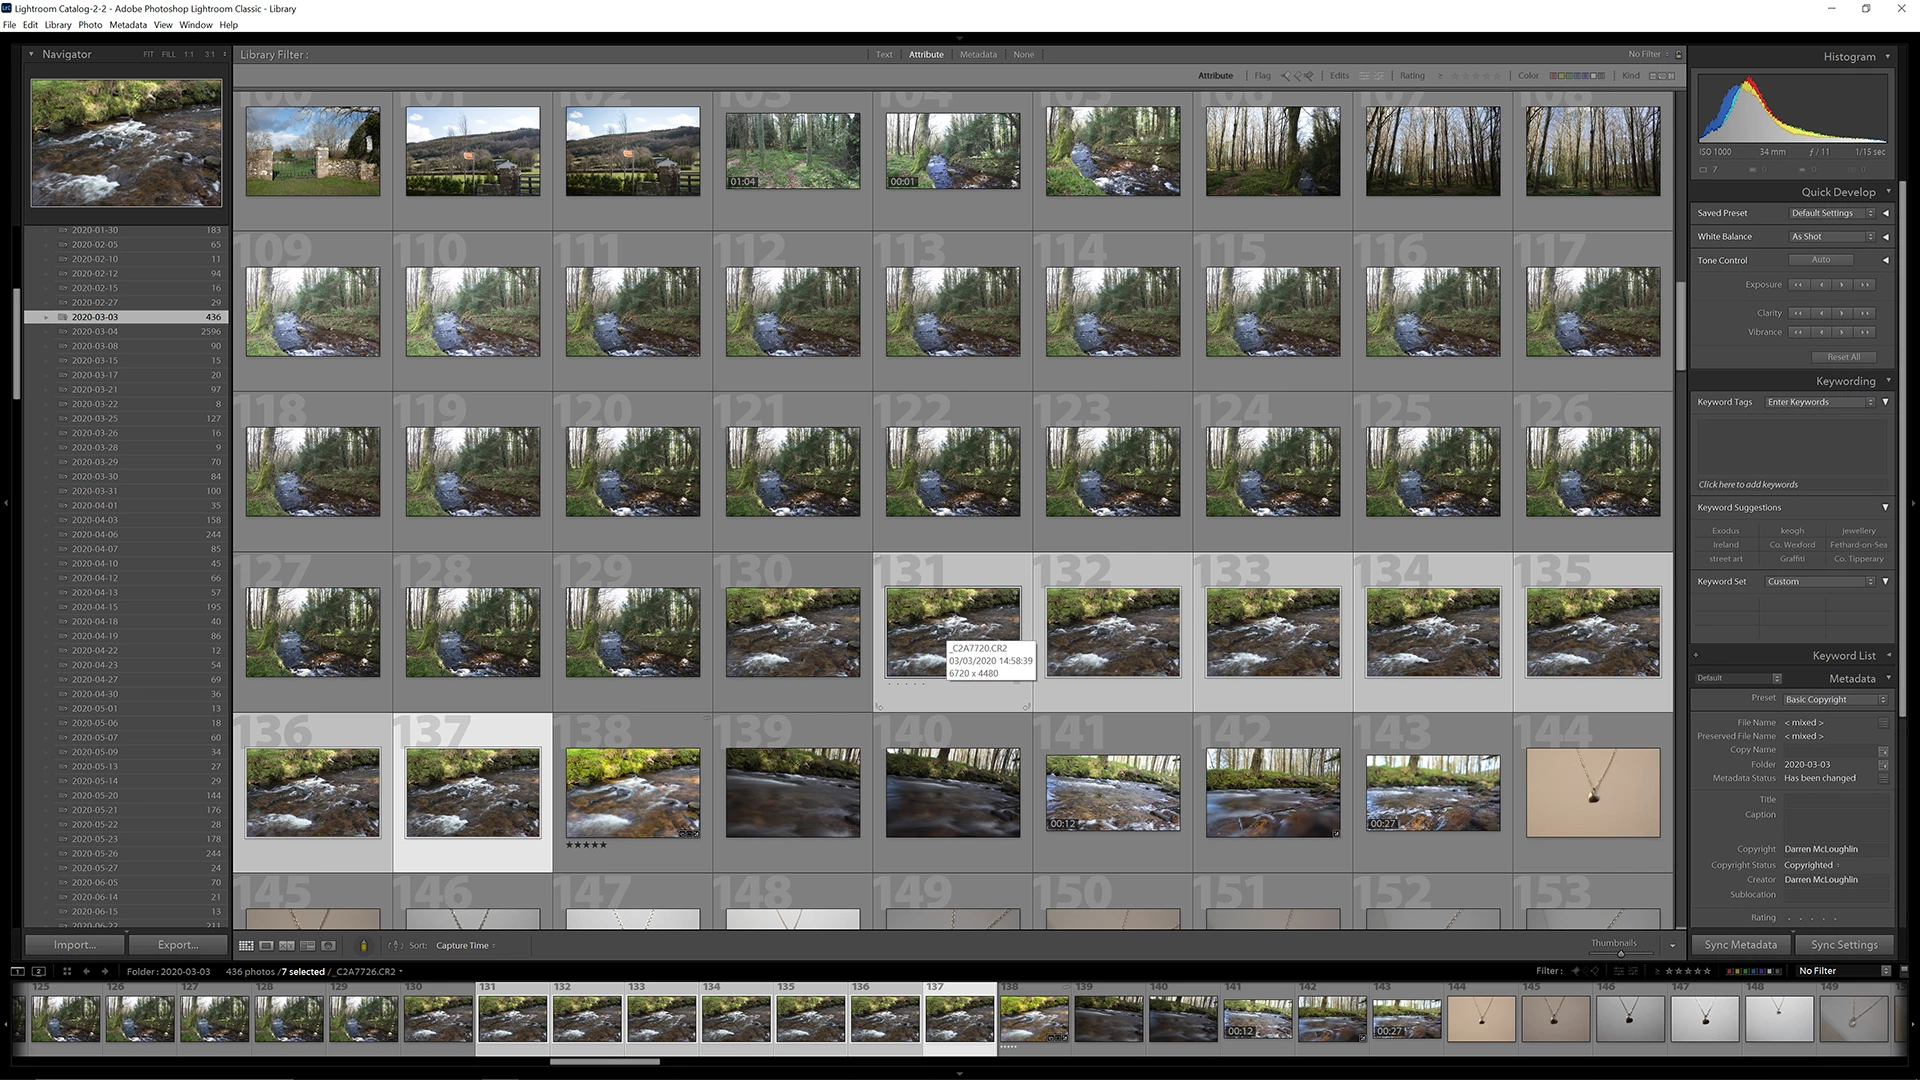
- Right click on the selected images and choose Edit In>Edit in Adobe Photoshop 2020...
❷ Load images into a stack in Photoshop
- Once in Photoshop go to File>Scripts>Load Files into Stack...
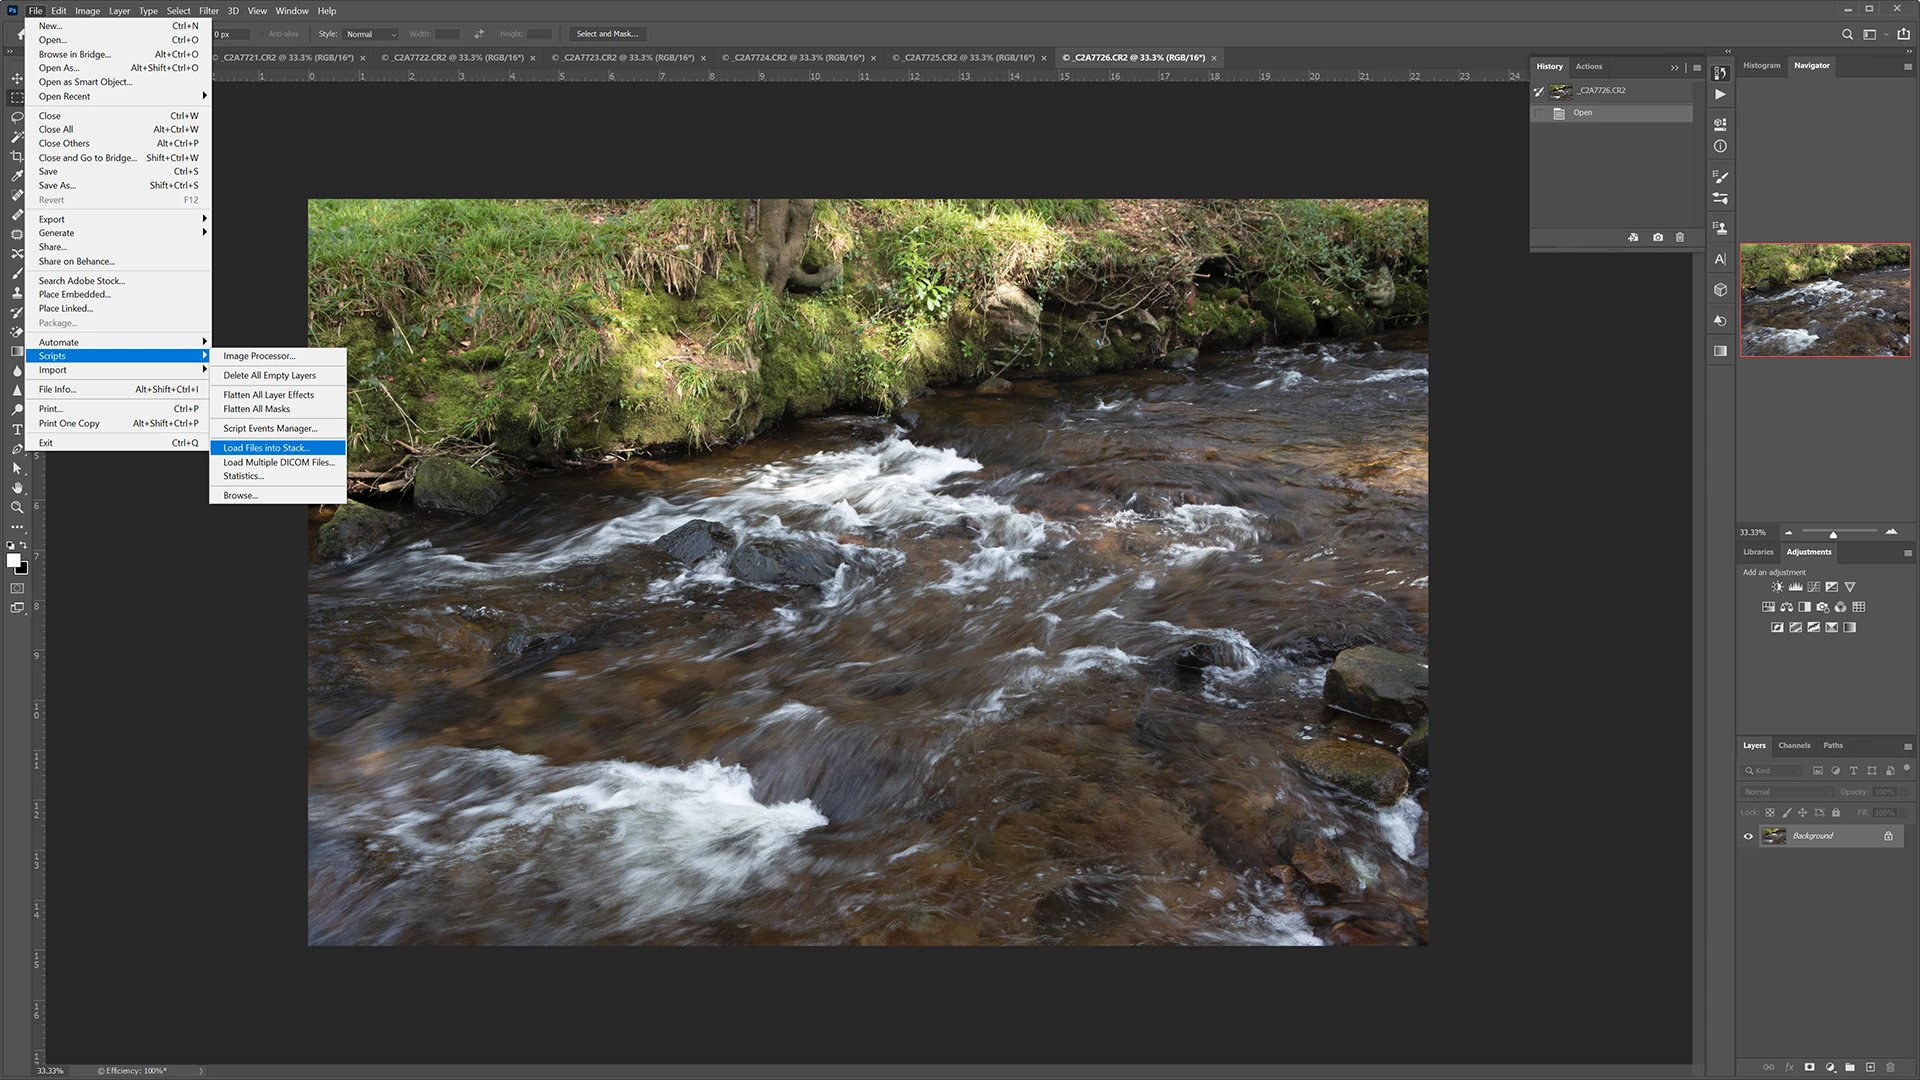
- Choose Add Open Files to add all of those open.

- Check Attempt to Automatically Align Source Images and Create Smart Object after Loading Layers

- There is no need to align source images if you have used a tripod but because I took these handheld I know there will be movement, and flicking through the images in Lightroom does show that there is a slight variation in the sequence.
- Then OK, wait for the Progress bar to finish then close the original seven files.
❸ Set Stack Mode
- On the Smart Object file go to Layer>Smart Objects>Stack Mode and choose from one of the options.
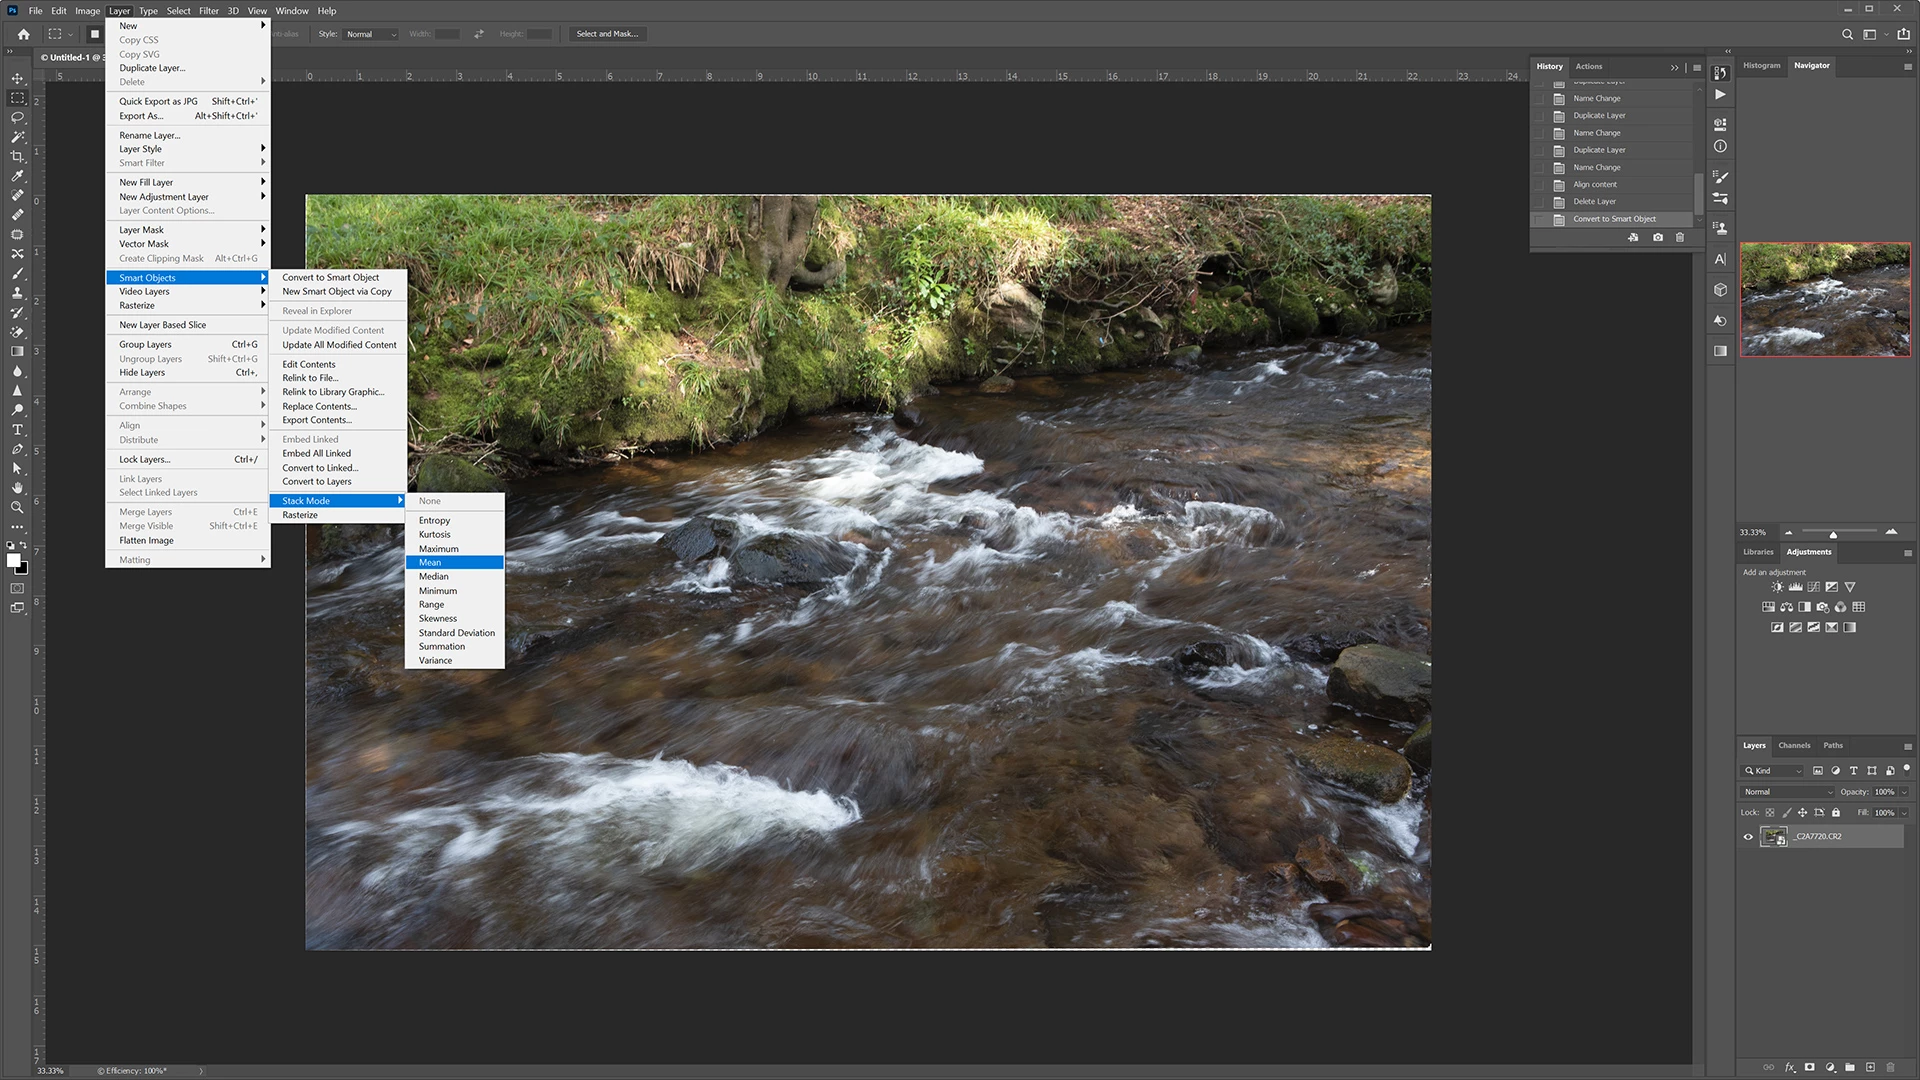
- Usually here Mean will work best, but play around with the options to see what effects you get.
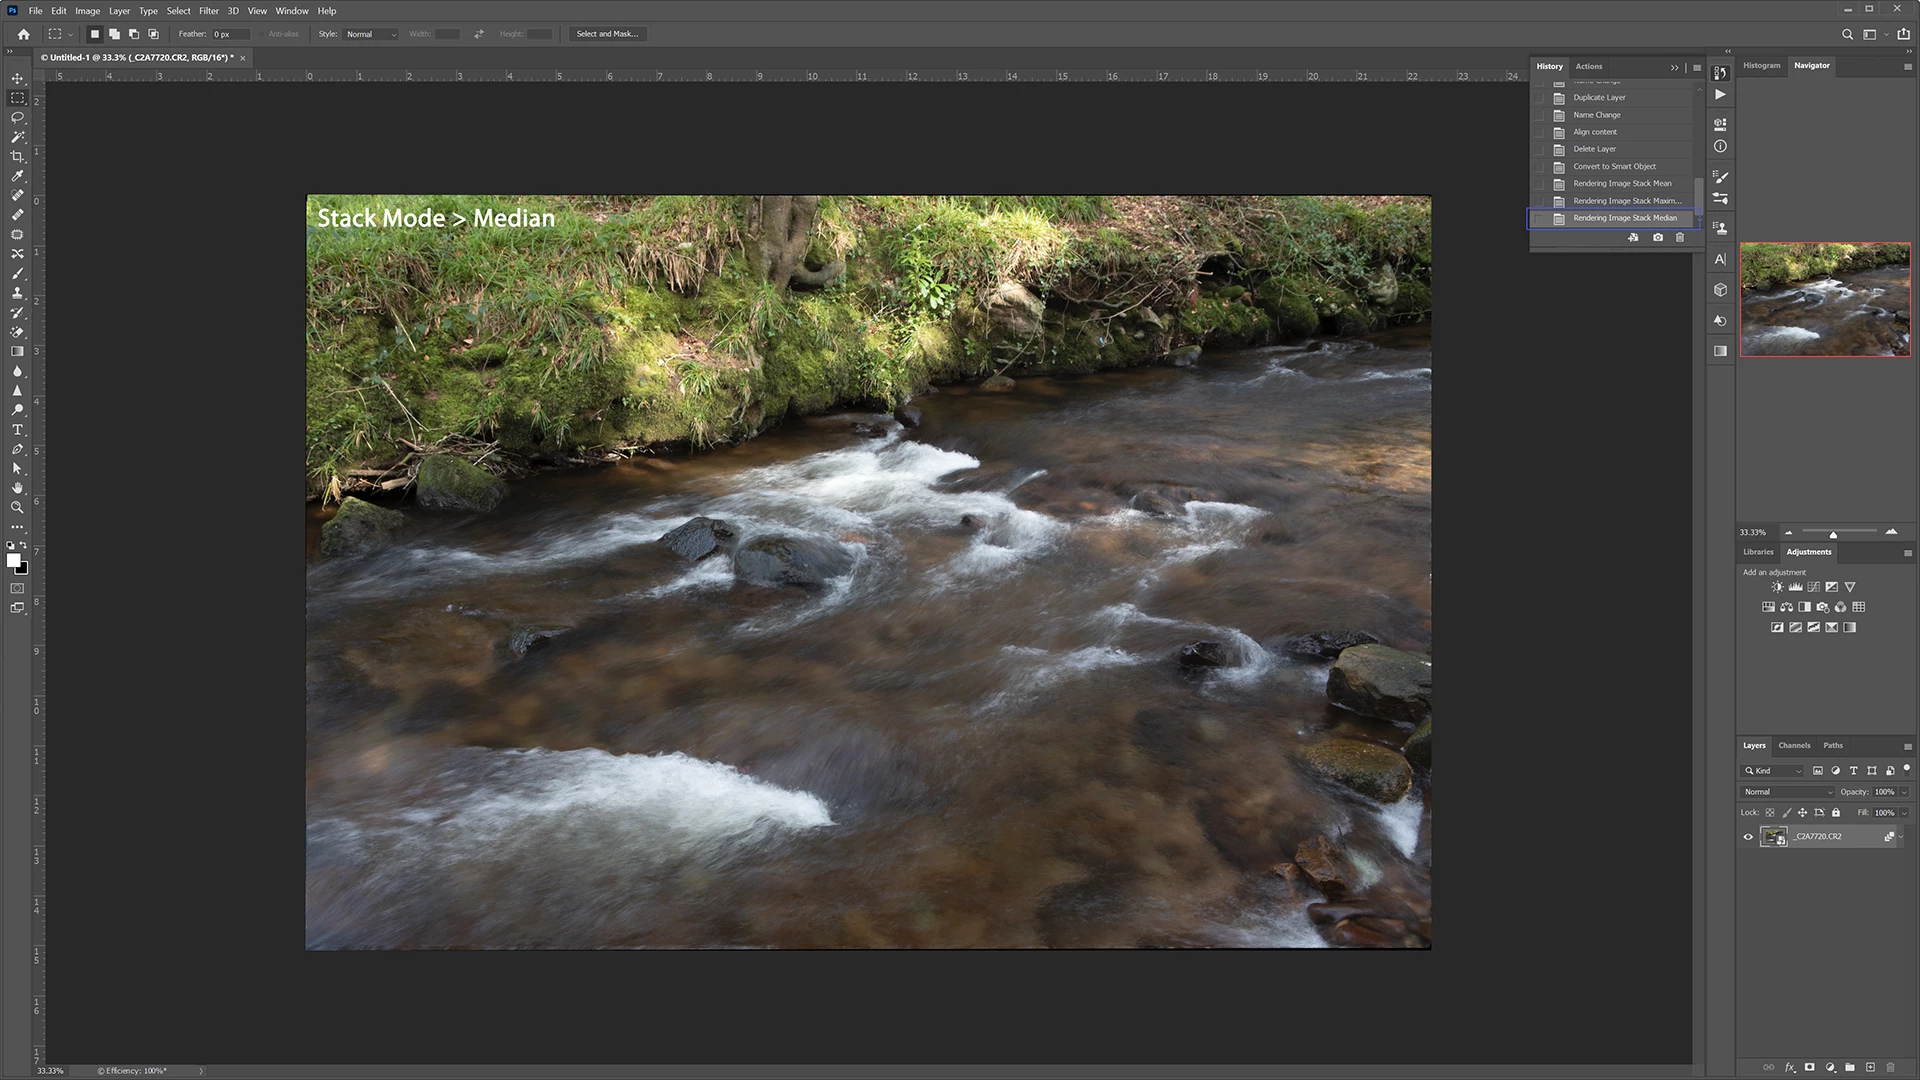
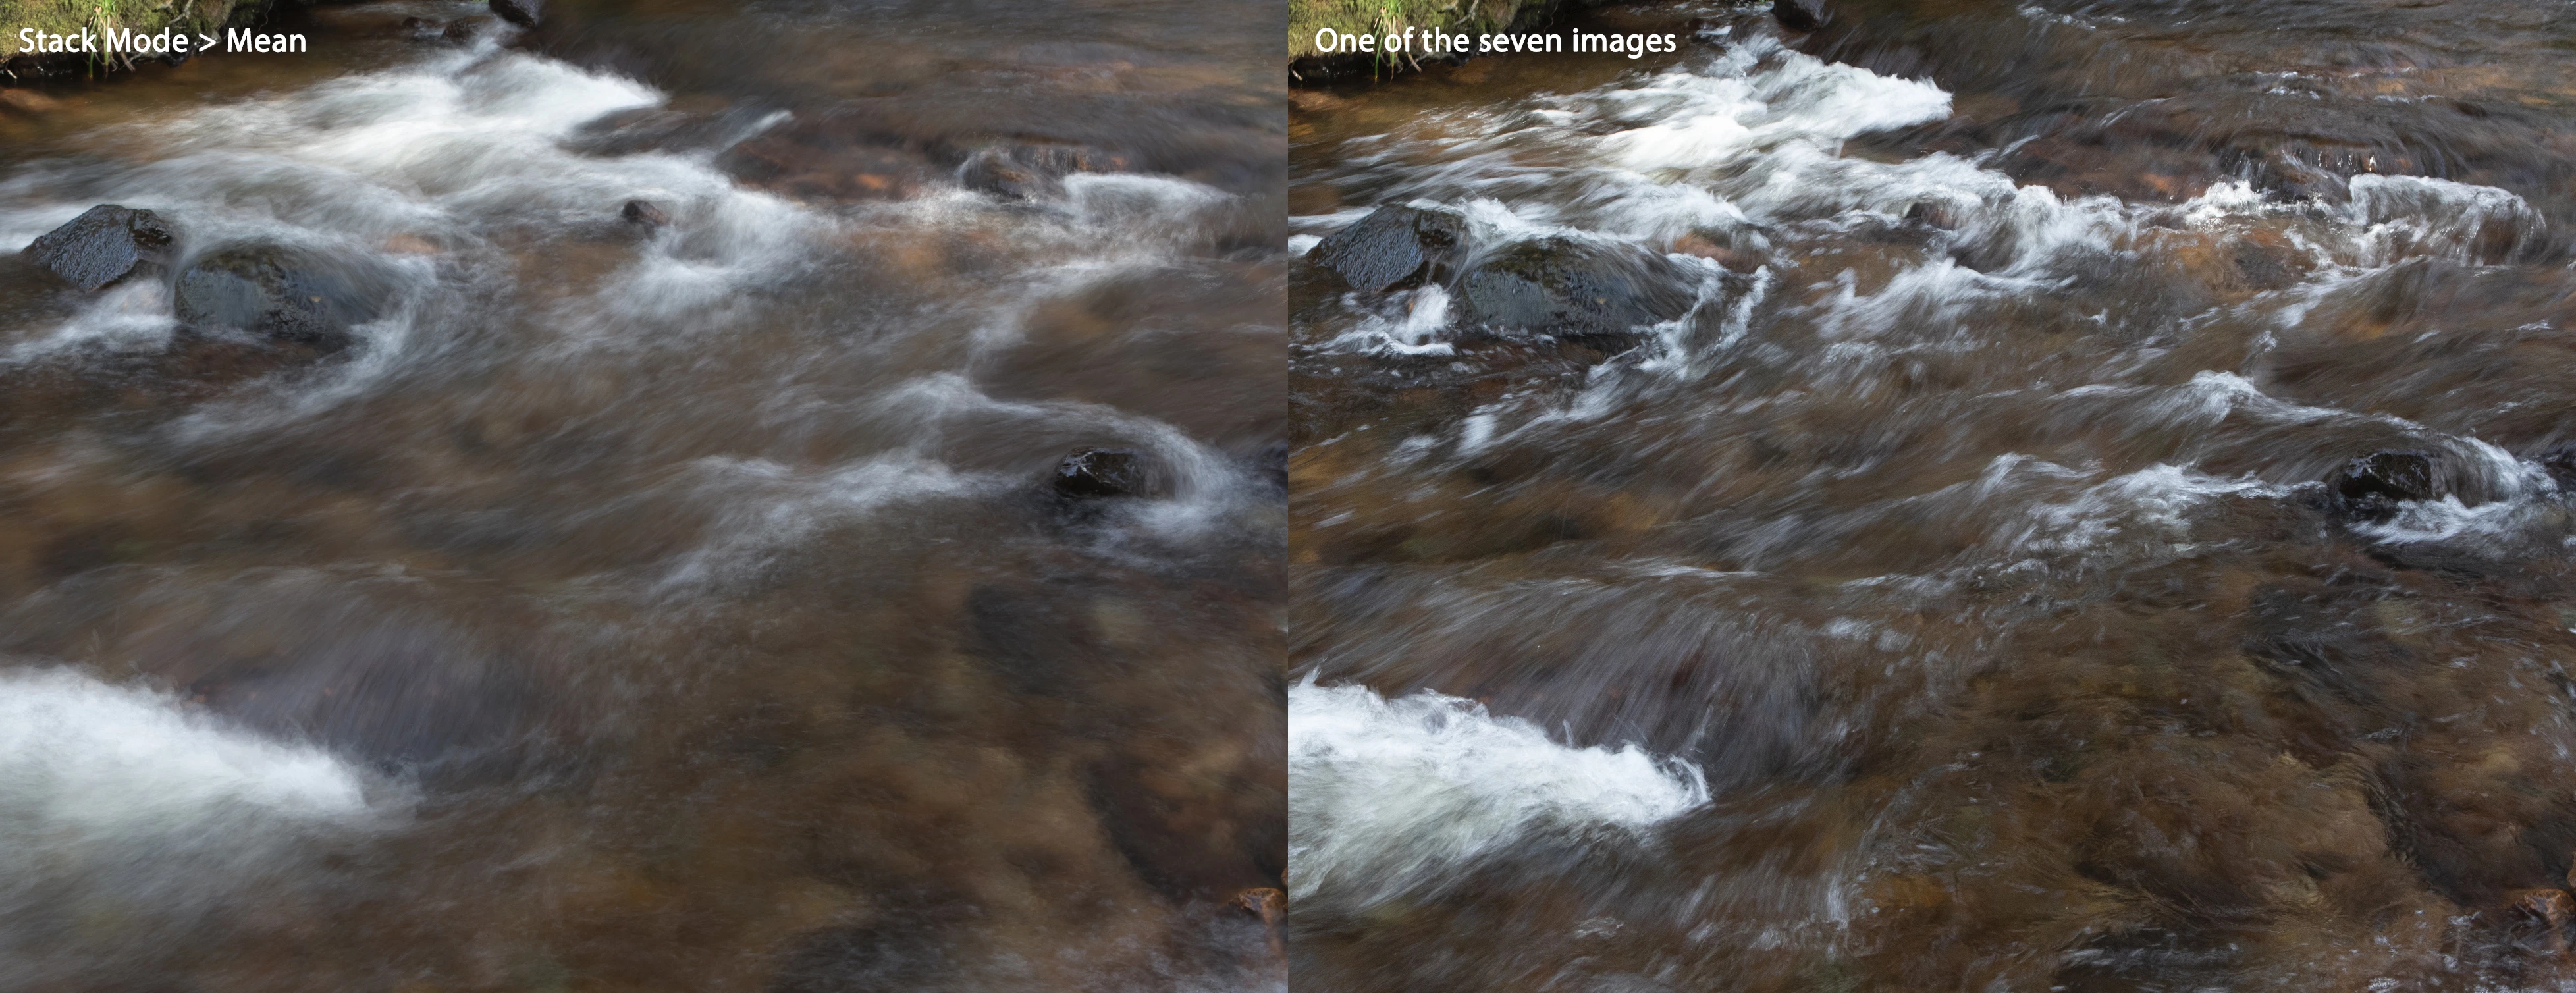
- Here is how Median looks, it is closer to a single image from the sequence, there is less softening of the white water.
- And here is a comparison of the Mean stack vs one of the original seven images.
❹ Finish with usual edits - crop, saturation etc.
- I have finished up with some edits to the Mean Stack, including cropping - (important to check if aligning images has taken place), contrast, saturation.
Using stacks can be a good option to gain a little from not ideal conditions. As long as you have more than one image and these are closely aligned then using stacks in Photoshop can deliver a finished image that is more than just a snapshot.