Learn how to import and use DNG presets in Lightroom mobile
When you get presets for the free version of Lightroom mobile, they are typically in DNG format. If you get a group of presets, rather than a single one, it downloads to your computer or mobile phone as a zipped folder. Follow this tutorial to learn how to unzip the folder and save presets from the DNG files so you can use them over and over on other photos.
❶ Unzip the Files
The first thing you need to do is unzip the downloaded folder to extract the presets you acquired. You can either do this on your computer or on your phone itself.
WINDOWS:
- Right-click on the zipped folder
- Choose "Extract All" from the menu.
MAC
- Double-click the zipped file
- The Mac unzip utility will automatically do the rest for you
MOBILE PHONE
- Download an app to your phone that can allow you to unzip the downloaded folder
- Open the unzip app on your phone
- Locate the zip file on your device
- Unzip the file
- The steps may vary depending on which app you select
❷ Save the Presets
If you unzip the preset folder on your computer, you need to move contents to your phone once they are unzipped. You can use any cloud storage service you have access to on your phone and computer or you can connect your phone to your computer and move the files to it manually.
If you do this process on your mobile phone, make sure you save the unzipped presets to your phone.
❸ Add the DNG files to Lightroom mobile
After you transfer the DNG files to your phone from the computer or extract them from the zipped folder on your mobile phone, you need add the photos to the app.
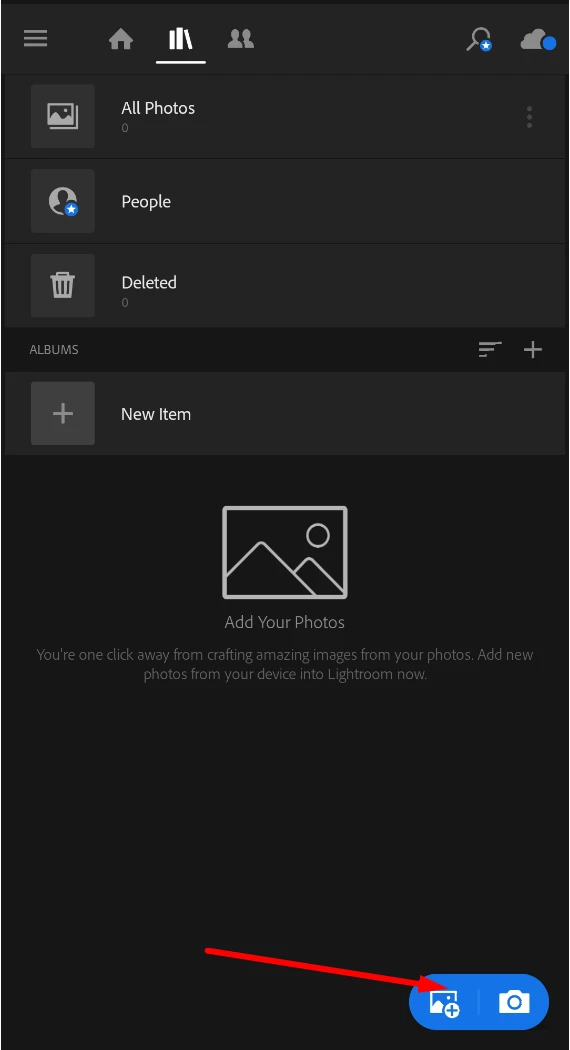
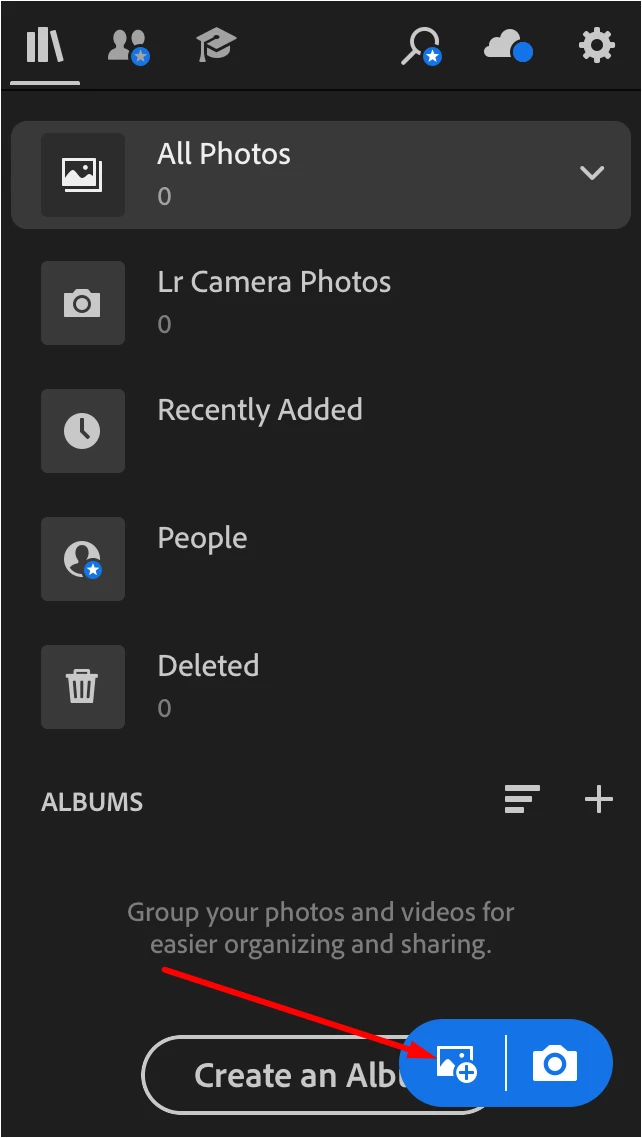
- Open the Lightroom app
- Tap the Add Photos option.
- Navigate to the location where you saved the DNG files on your phone
- Choose “From Camera Roll” (for iPhones) or the folder/gallery of your phone (for Android)
- If you saved them to cloud storage, choose “From Files” (for iPhones) or the Cloud storage folder (for Android)
- Select the DNG files you want to import.
- This step may be a little different fodr each model of mobile phone, however most offer a way to select multiple files
NOTE: Preset files are DNG files. When you initially open the image, you may get an error that says, “Cannot Load File”. This is normal. Press the check mark in the corner anyway.
❹ Create presets from DNG Files
- Click on one of the newly imported files to open it
- Next, click on the three dots icon (three dots in a small circle for iPhones and 3 vertical dots for Android devices) in the upper right-hand corner of the screen
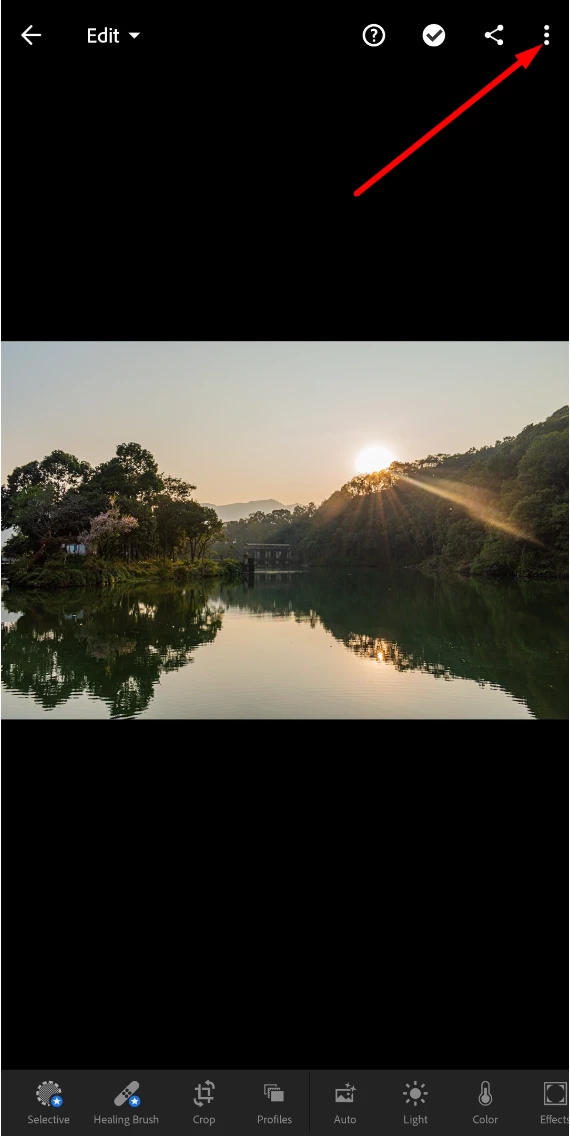

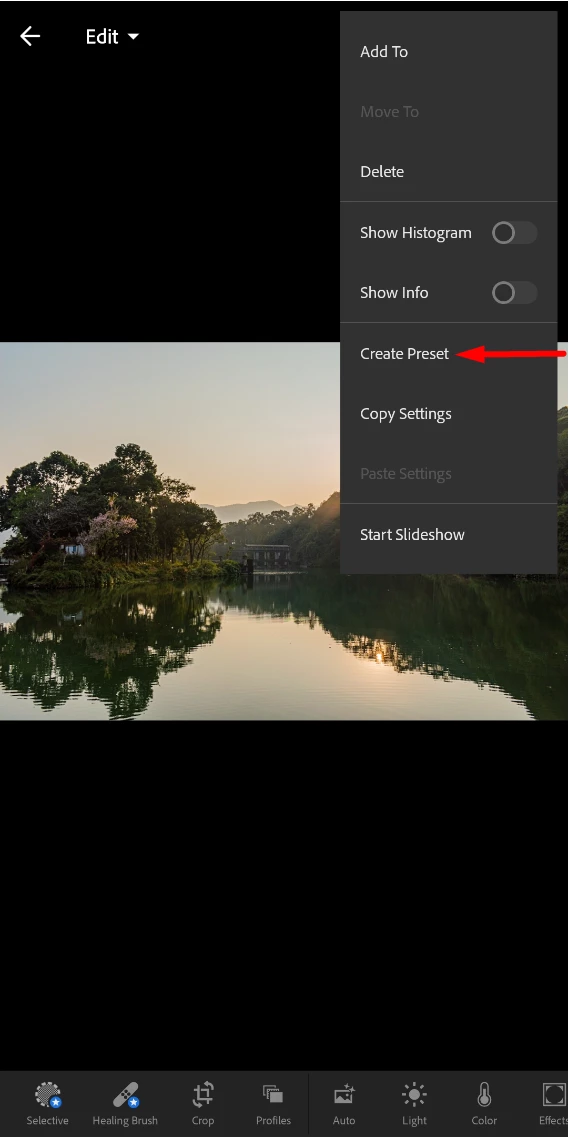
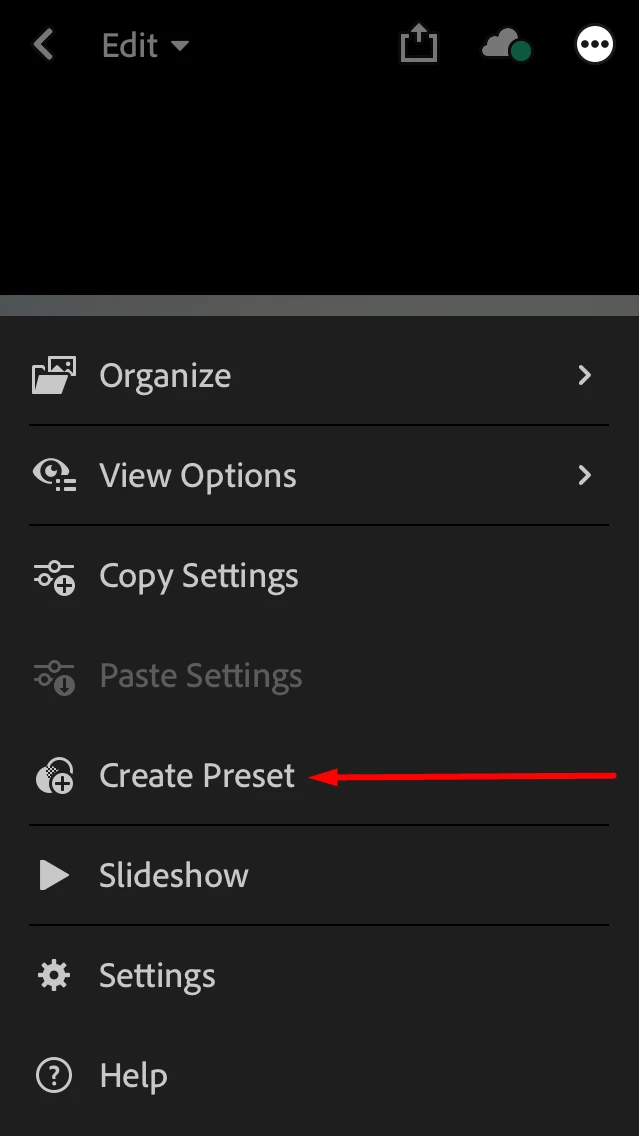
- From there, choose “Create Preset” from the menu that appears
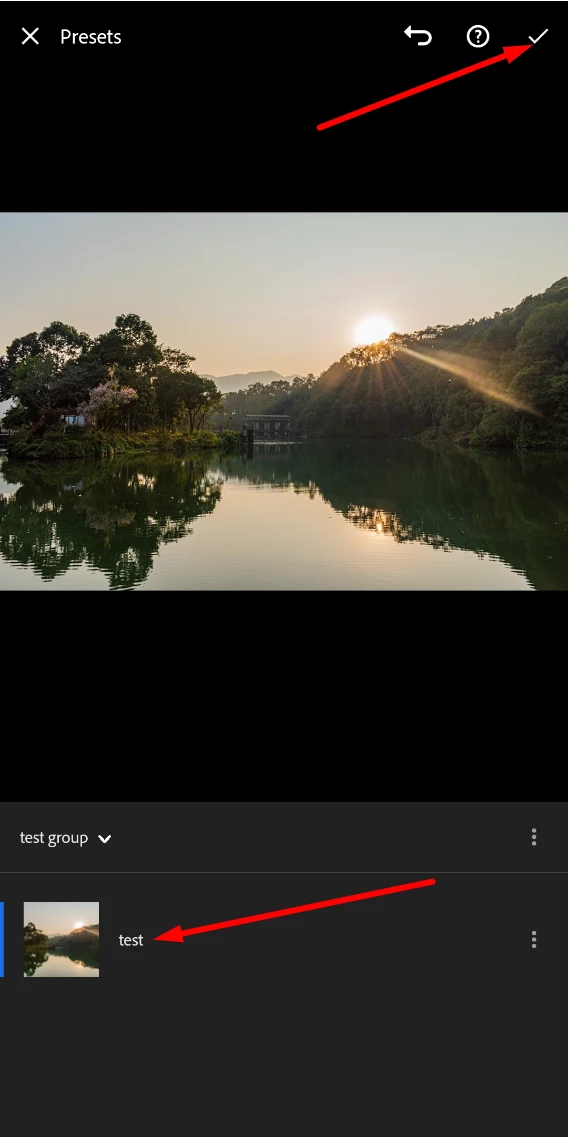
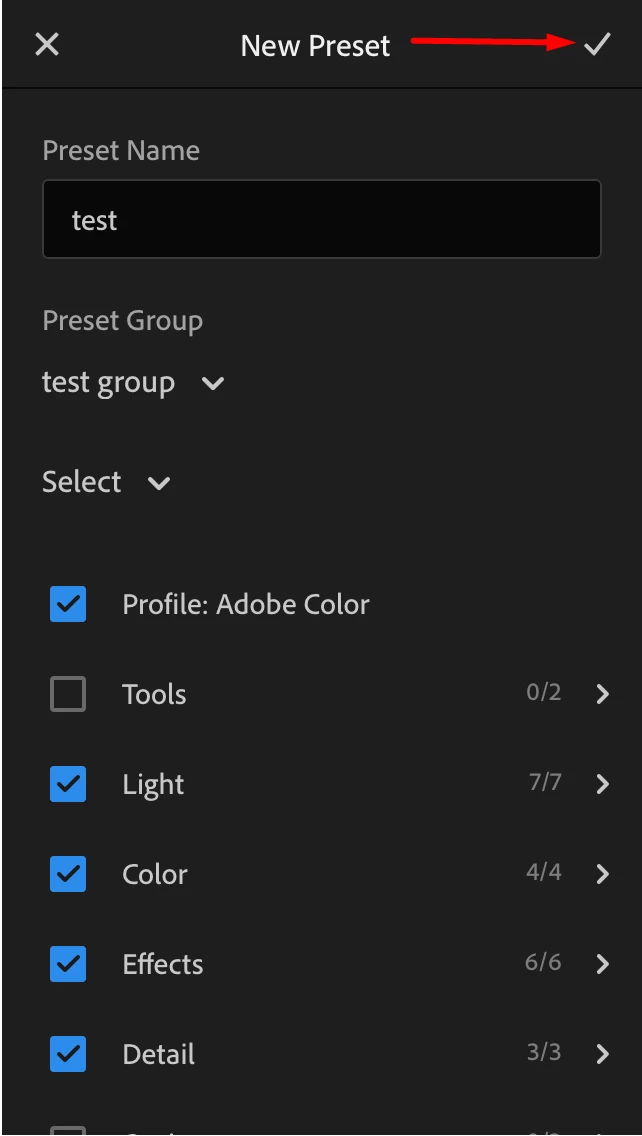
- Give your preset a name
- It can be the type of effect the preset applies to the image or any custom name you wish to assign to the preset
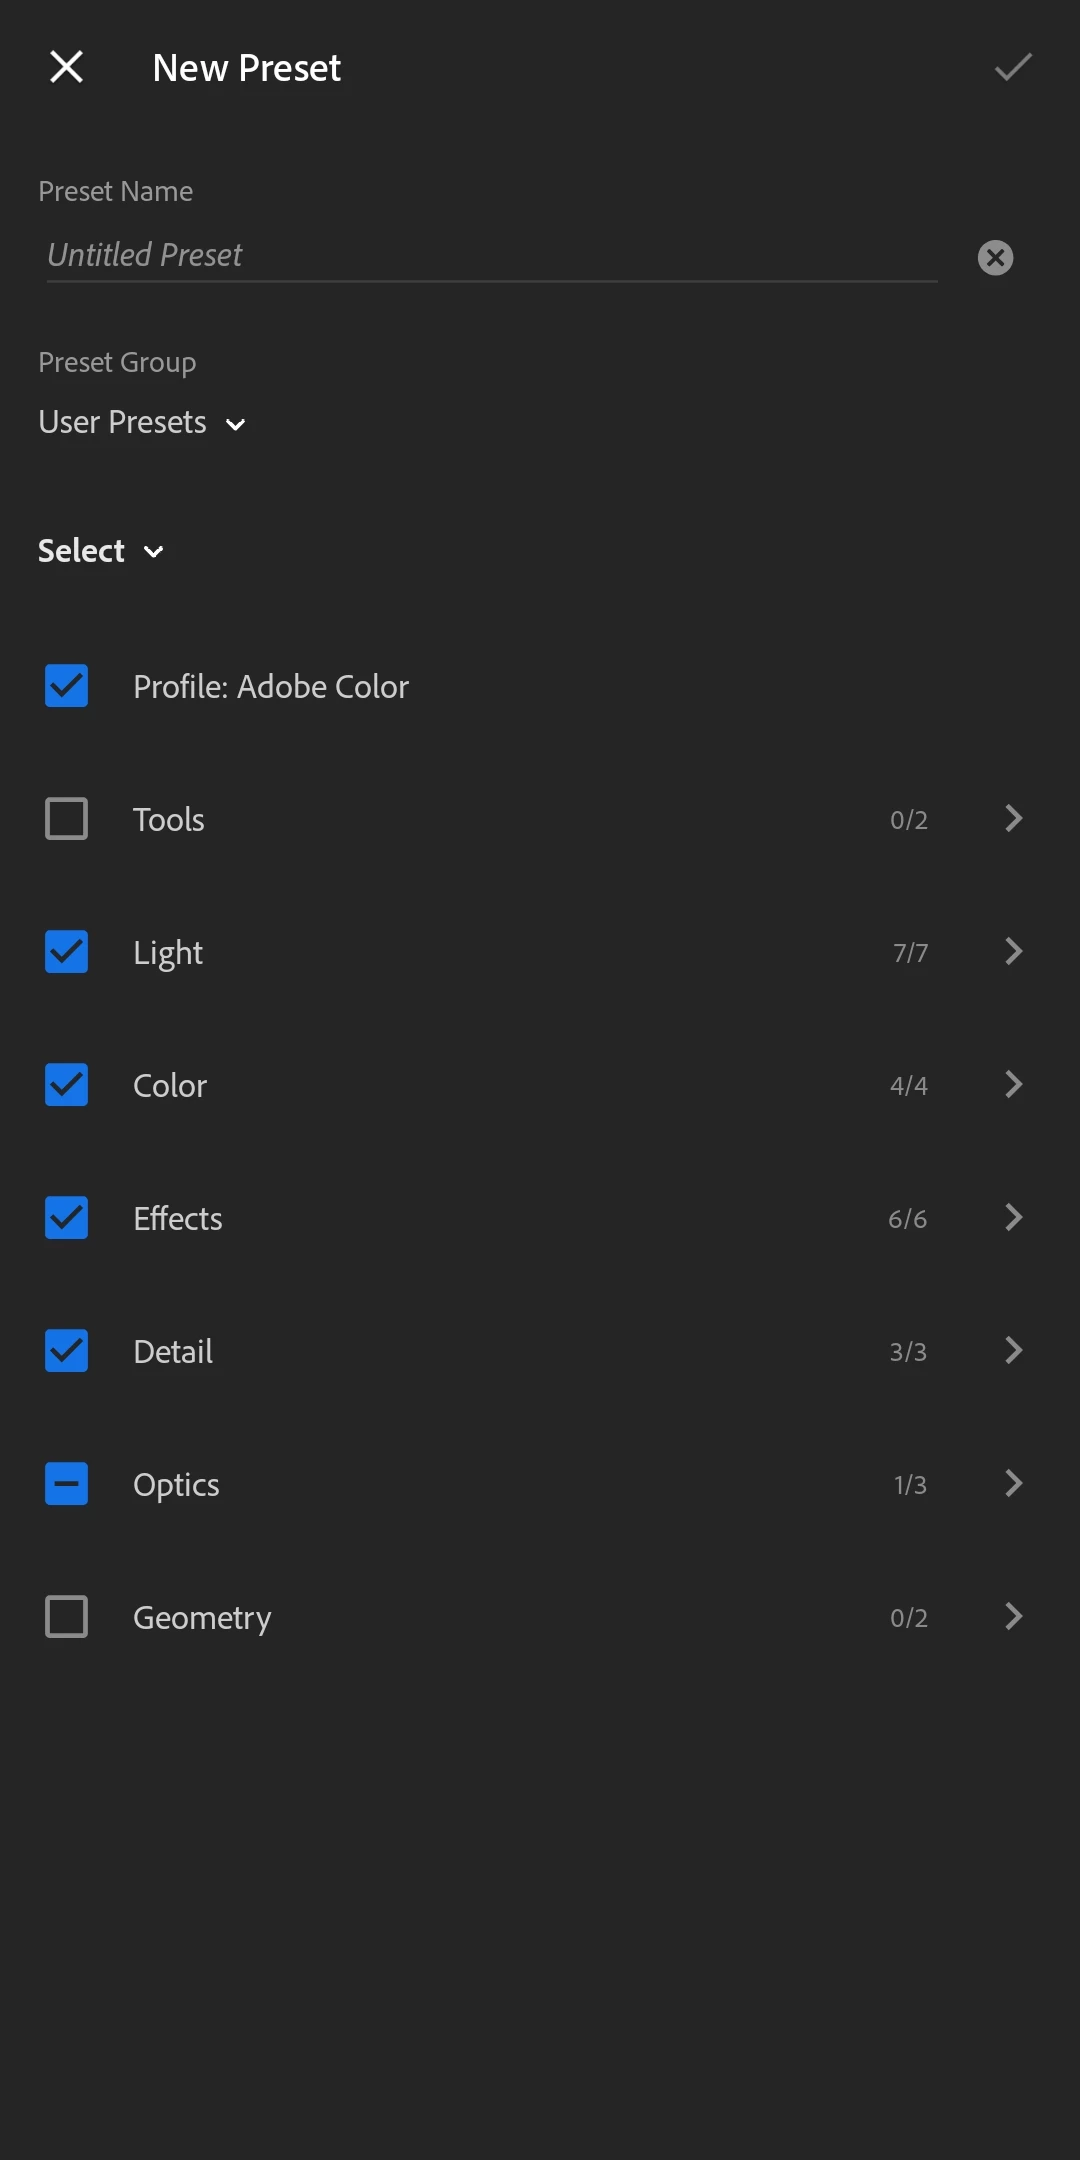
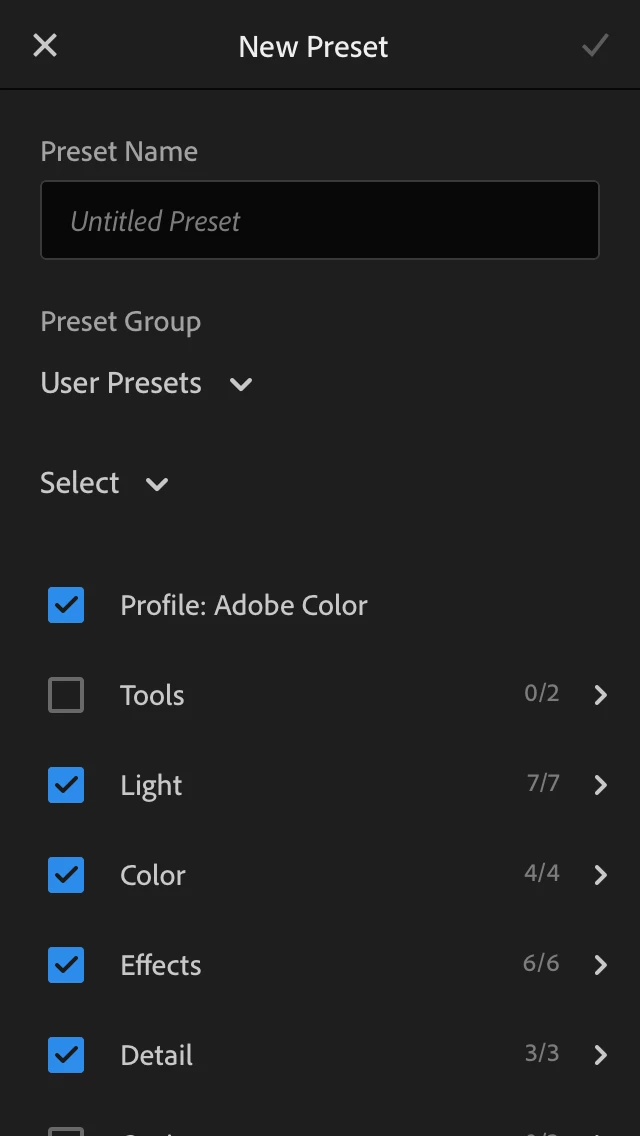
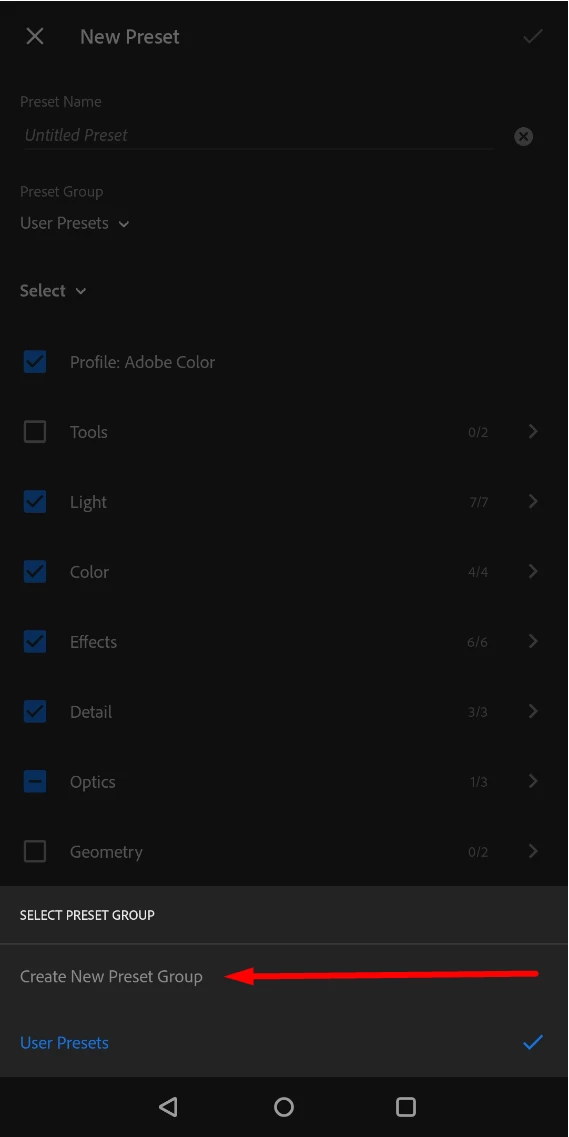
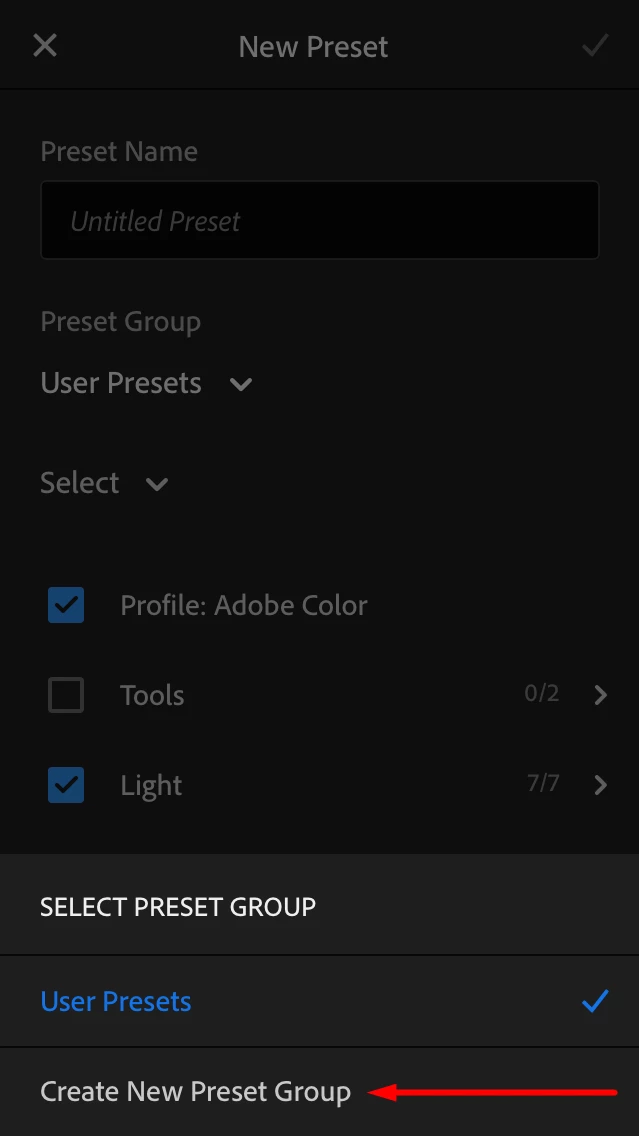
- You can also put the preset in a Preset Group
- By default, it will be in the User Presets group
- To make it easier to find related presets, create a new group to contain all the related presets you are importing
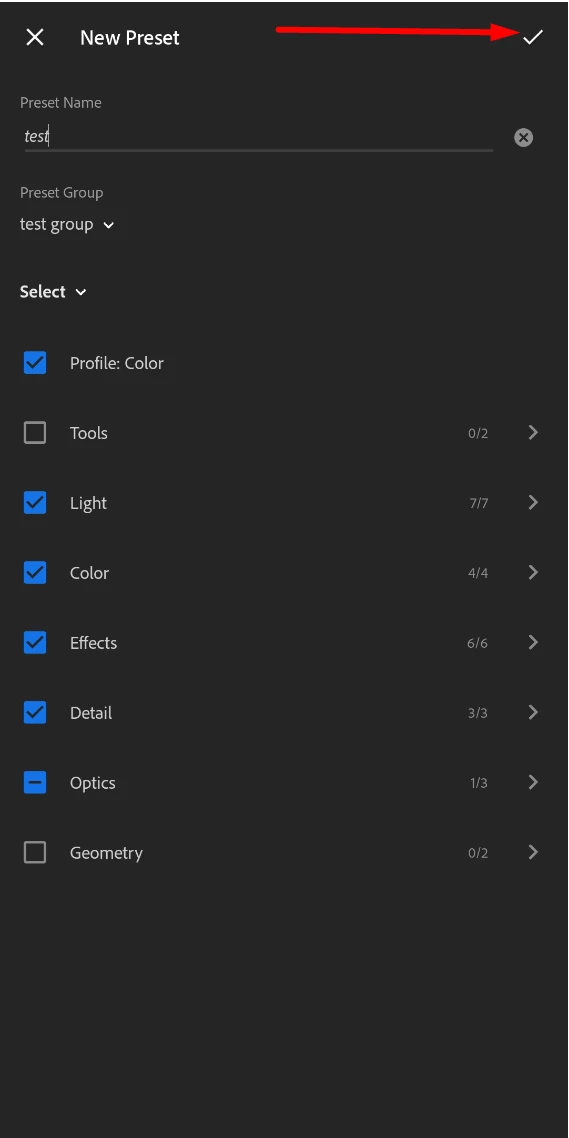
- After entering the name of the preset and assigning a group to it, tap the check mark on the top right to commit and save the preset.
- Repeat the steps above for each DNG/preset file and add it to the appropriate group
❹ Use the new presets
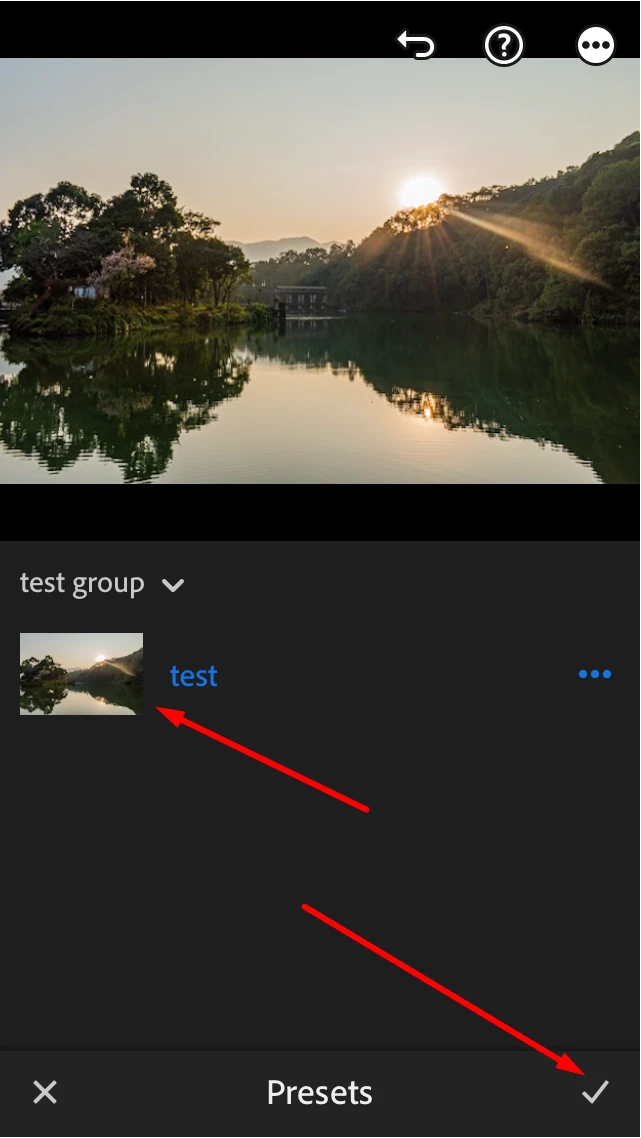
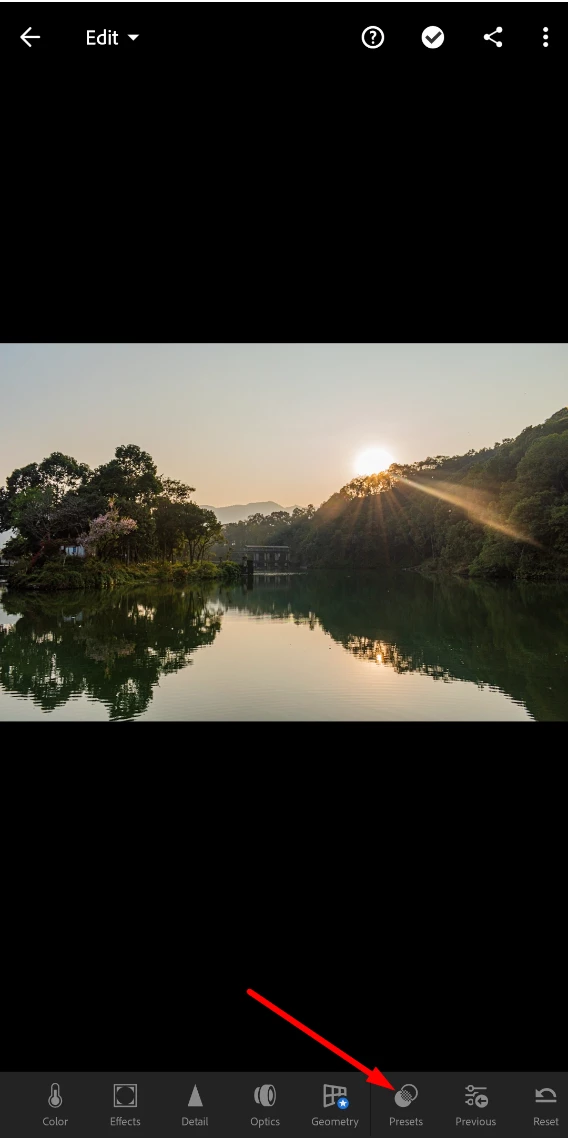
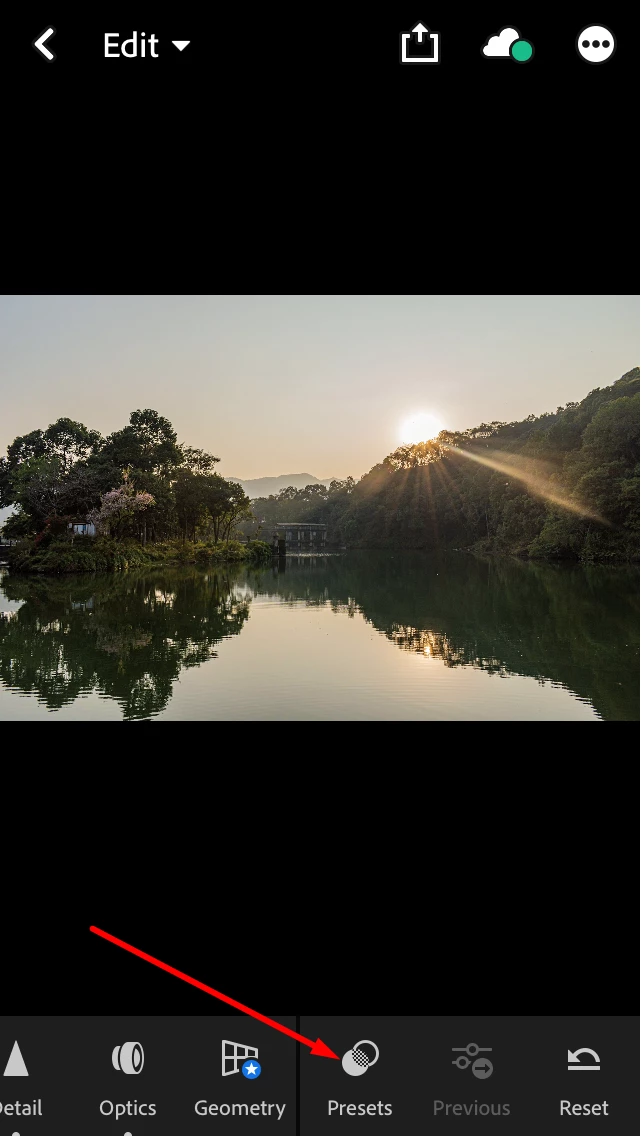
- Select the image to which you wish to apply the preset and select Preset option from the bar at the bottom
- Tap on the drop down next to the group name and select the group in which the preset is saved

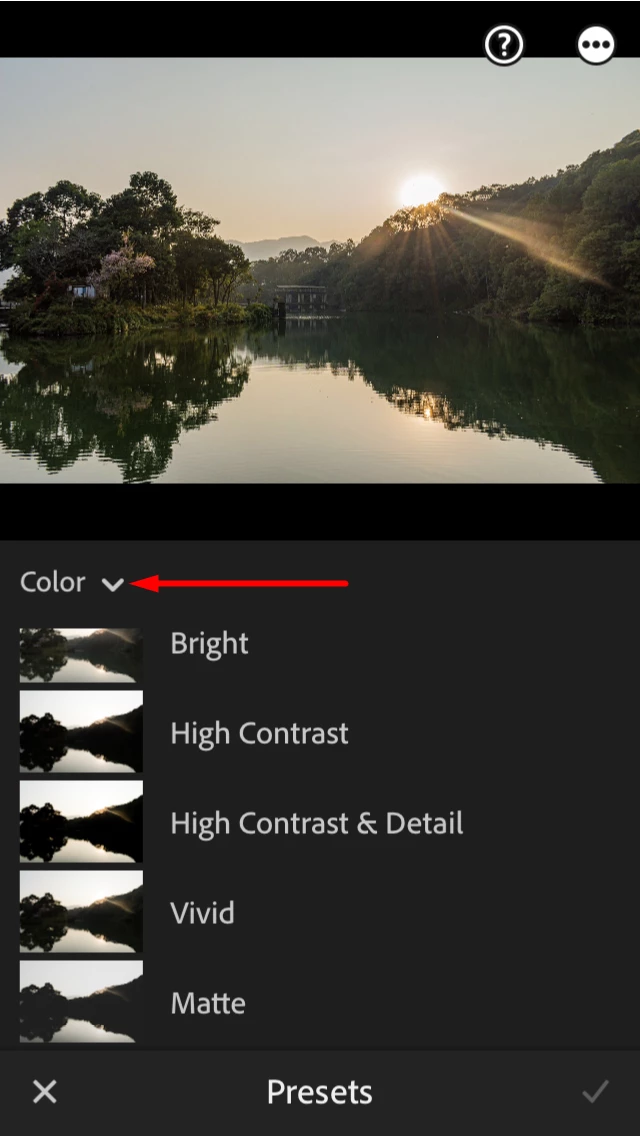
- Select the preset and then tap on the check mark (on the bottom right for IOS and top right for Android) to apply it to the image.