 Adobe Community
- Home
- Photoshop ecosystem
- Discussions
- Re: Action for place image twice on a template
- Re: Action for place image twice on a template
Action for place image twice on a template

Copy link to clipboard
Copied
Hi, I have a template that I want to place an image twice template size is 15X18" and artwork size is 3.8x3.5" First I need to resize the image to fit template area and then place same artwork twice on template please see template here:

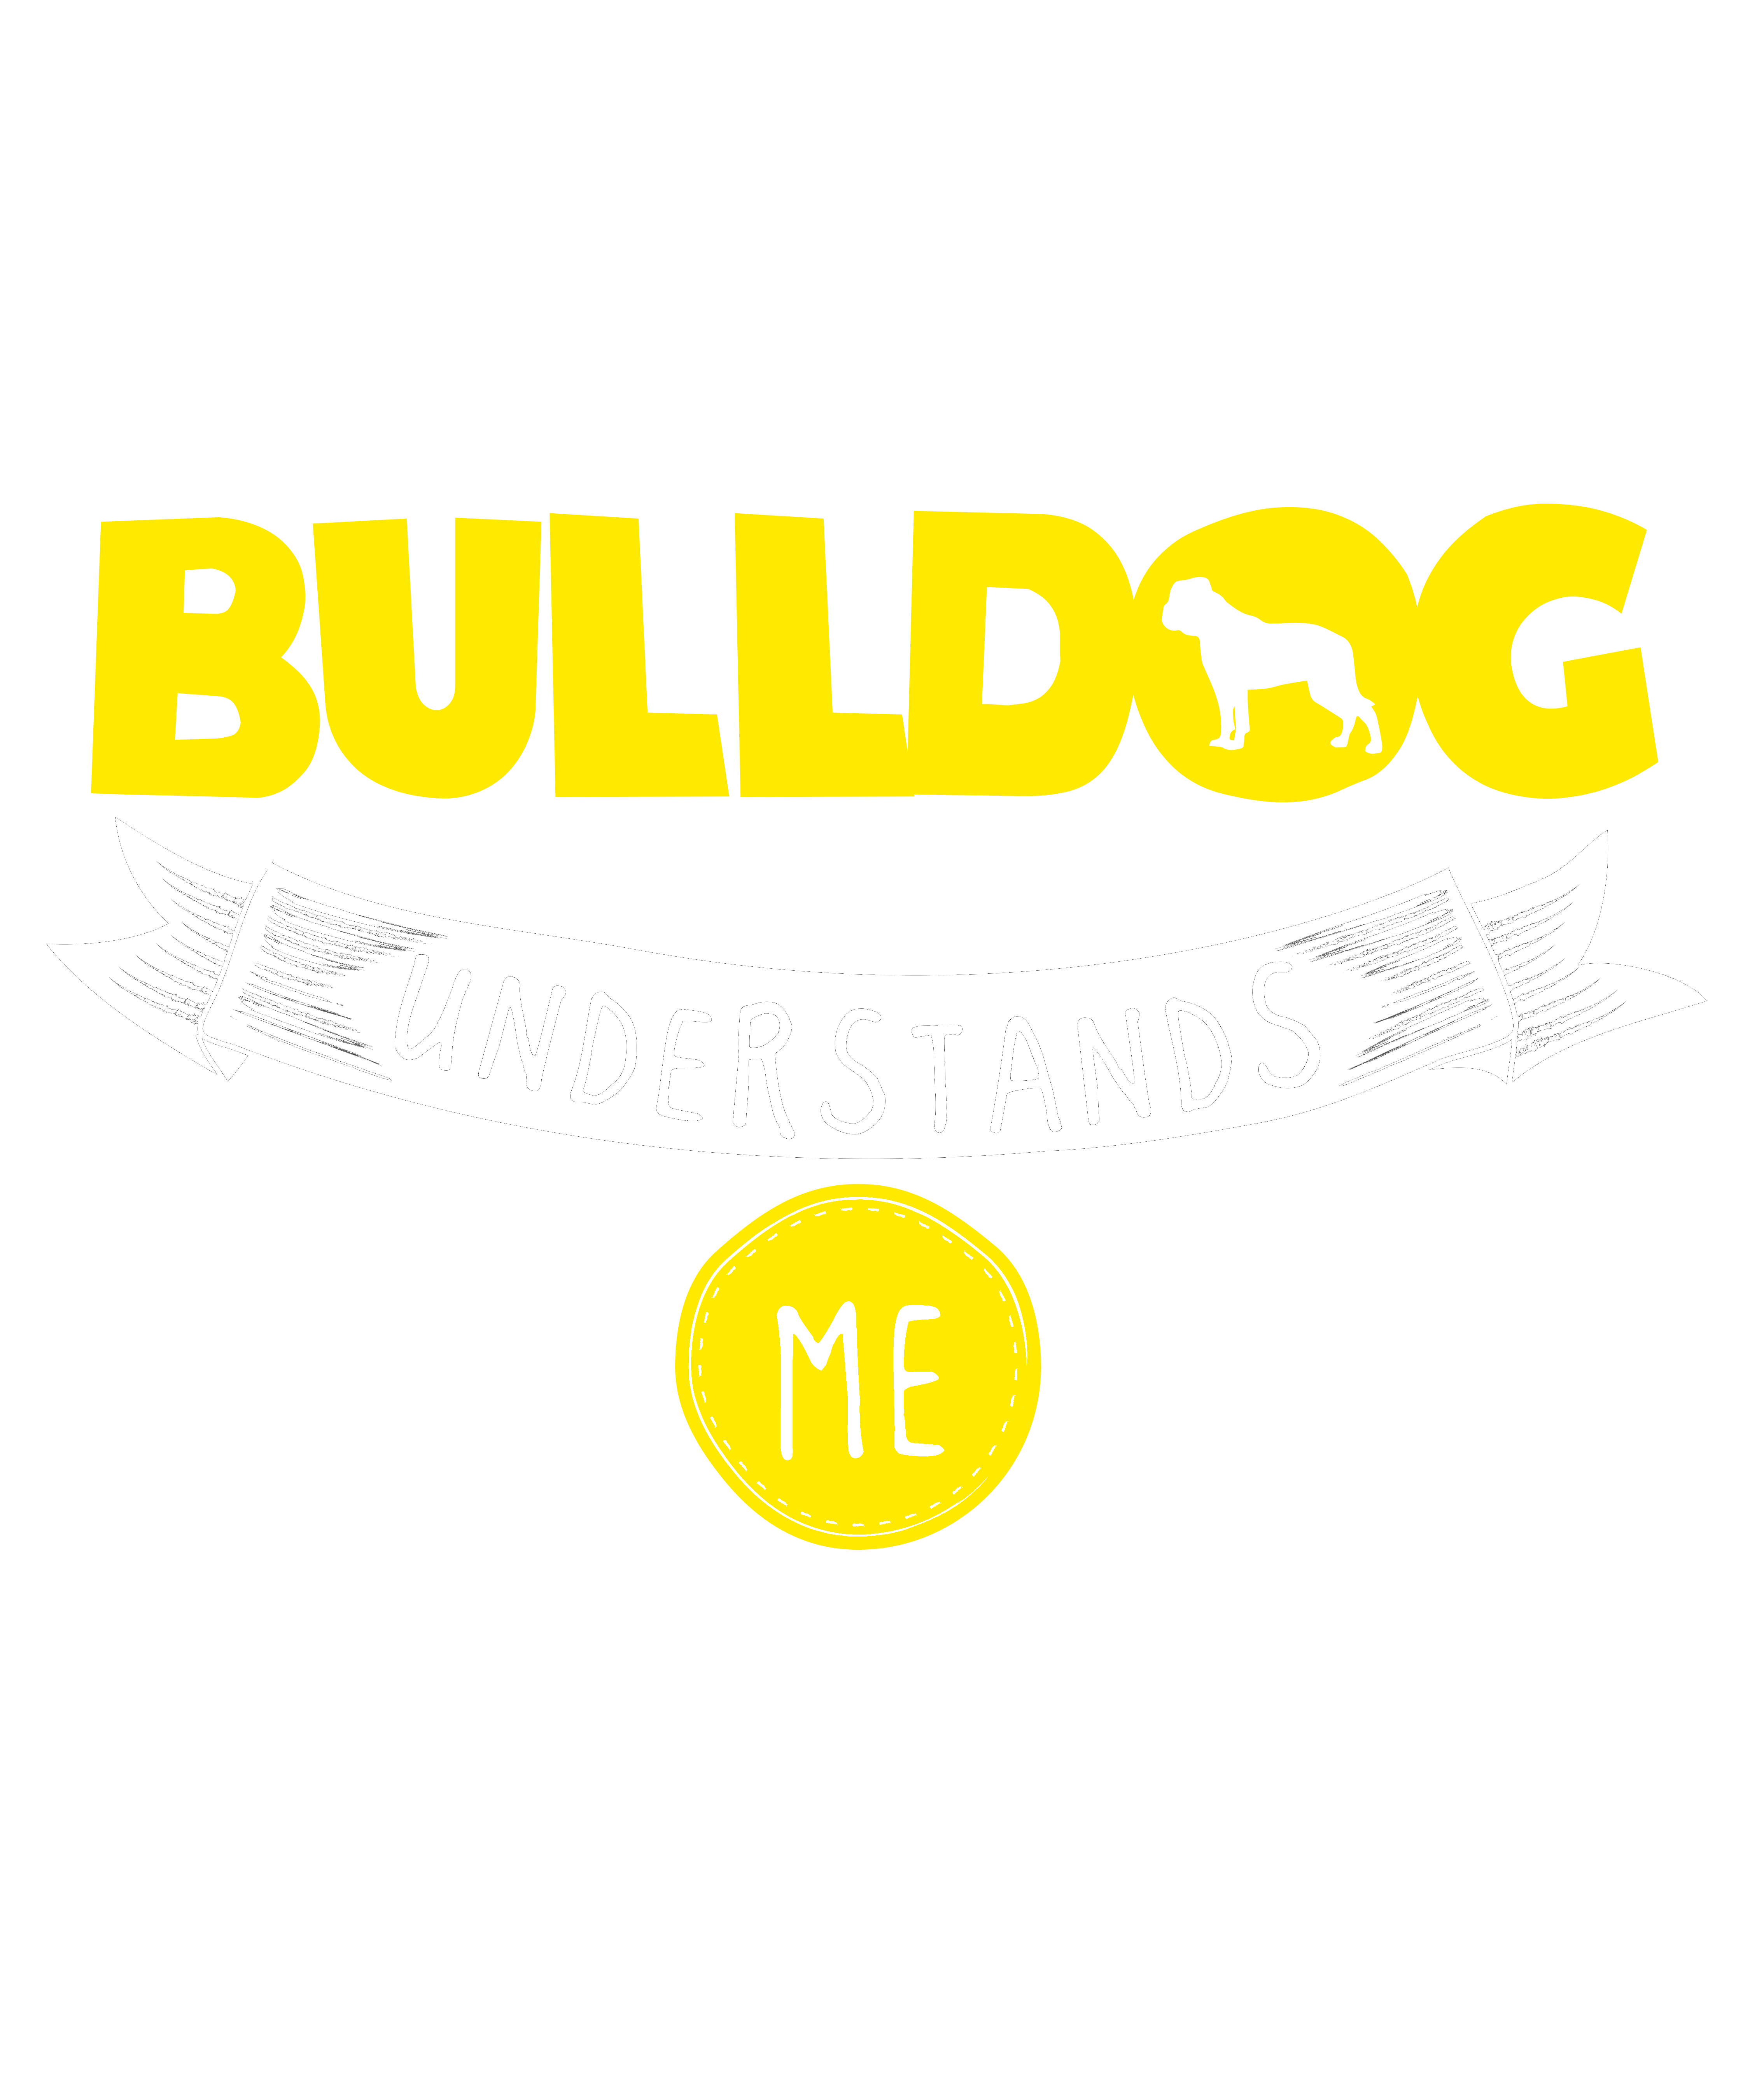
and this is artwork that I want to place twice on this template:
Note: I have a script that JJ Mack created, Thanks, Mack that works with alpha channel, but the main problem is related to resizing when I resize artwork and run script artwork will not fit on look faded.
HERE are the Template and script
Can any one please advise?


Explore related tutorials & articles
 19
Replies
19
19
Replies
19

Copy link to clipboard
Copied
If your using my photo collage toolkit and all the location in the template you want the same image populated. You should use one of the picture package scripts. Not the script you are using. Images can be any size but should have the same or nearly the same aspect ration of the templates images aspect ration. There are two batch Picture Package scripts. One will rotate images orientation for best fit, the other will not rotate images. However landscape to portrait and portrait to landscape resizing does not result in acceptable compositions. Images are not be cropped however they will be resized to fill the templates image area and masked to the templates images shape. Actions can not deal with random image sizes well. Images would need to be preprocessed to size first.
Copy link to clipboard
Copied
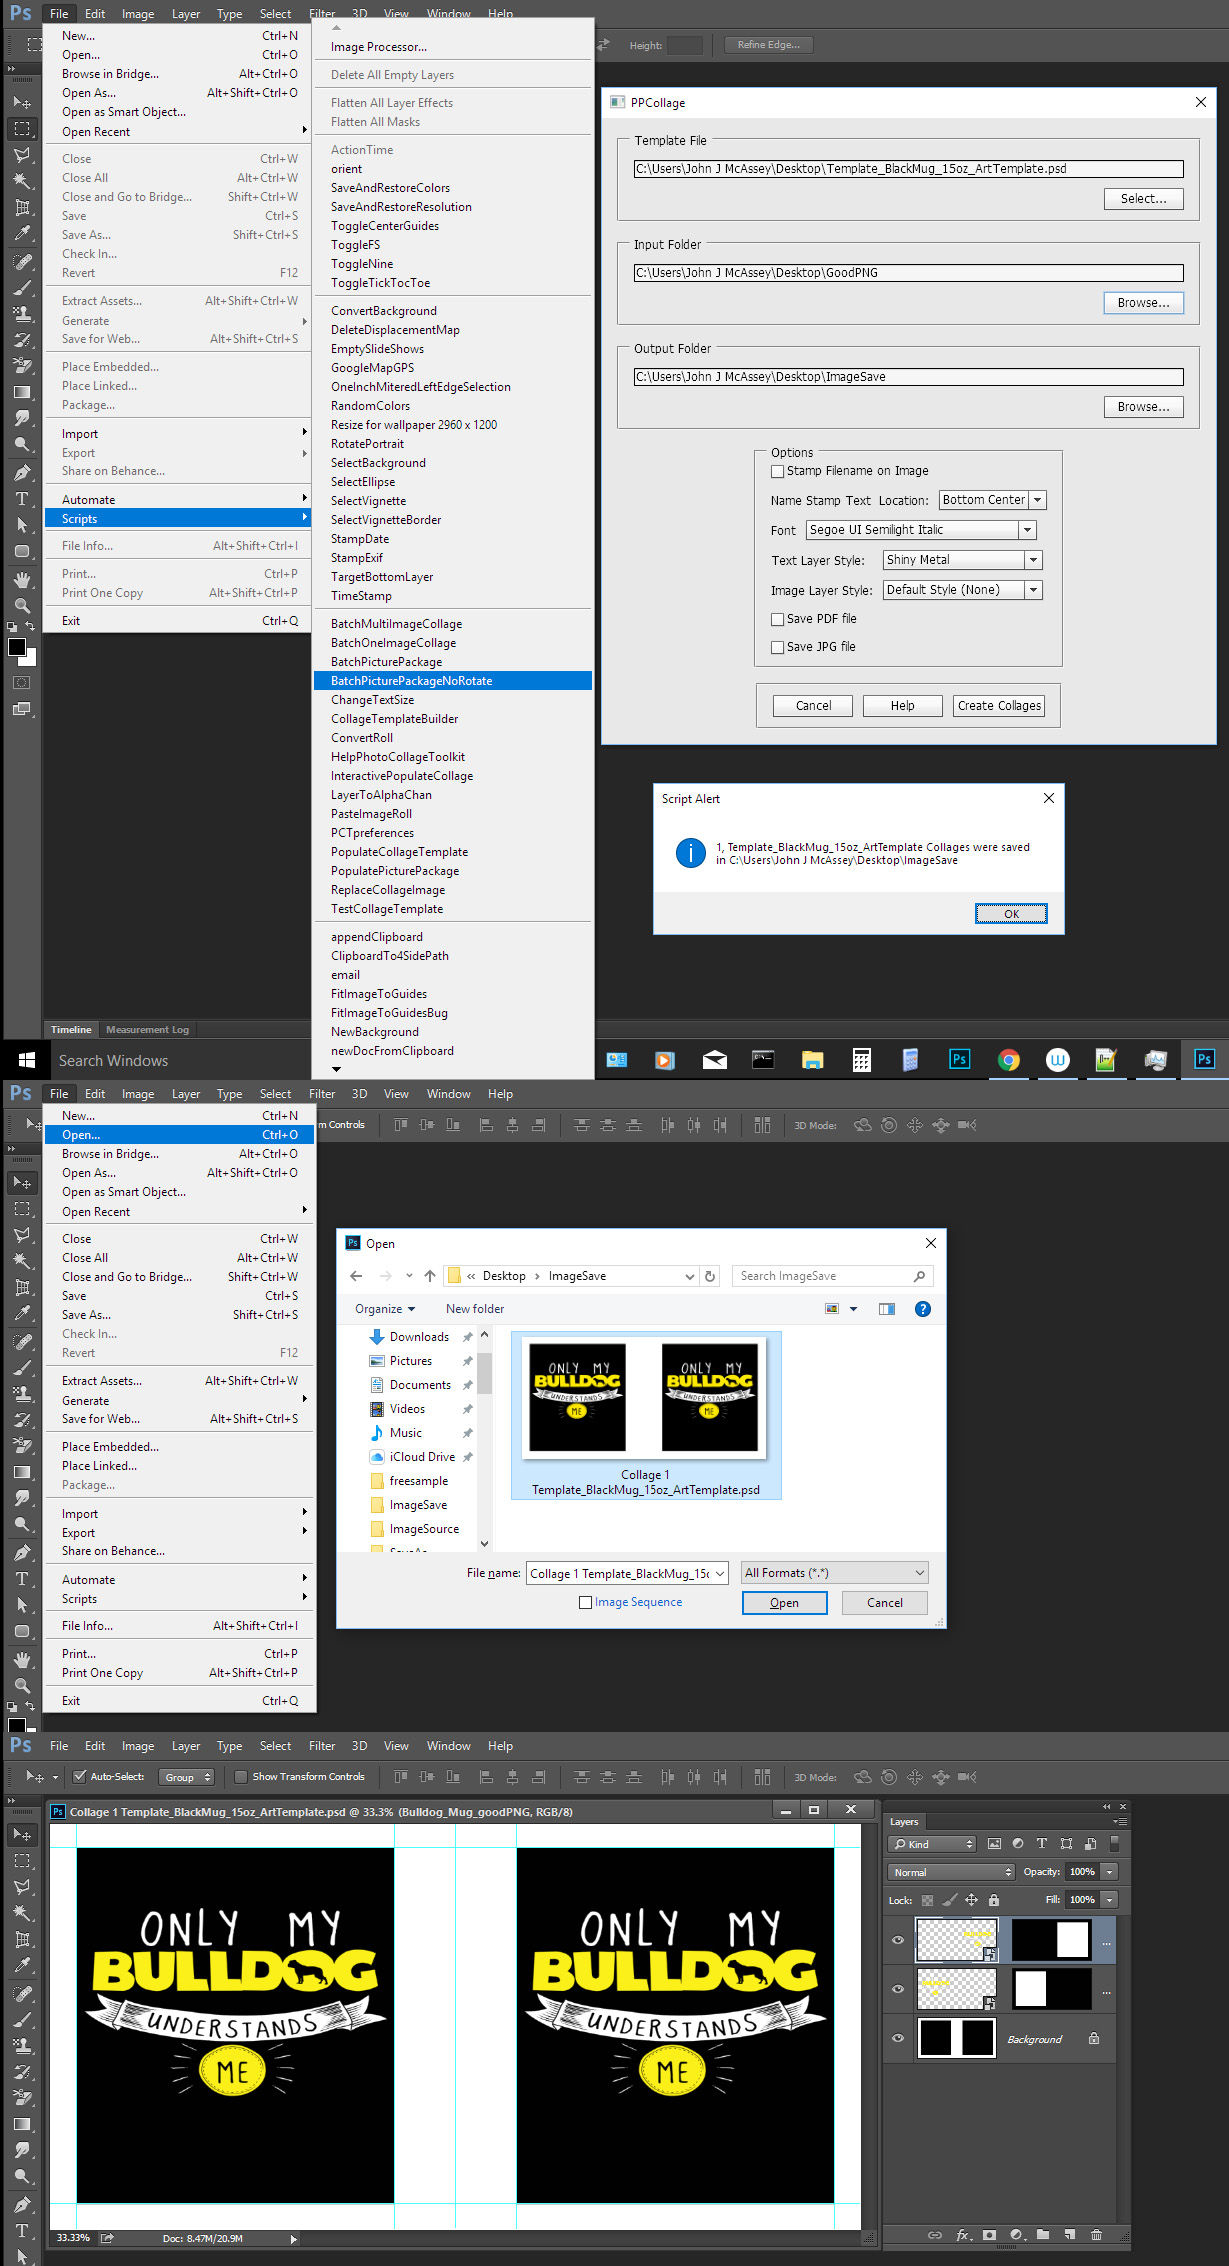
Thanks JJMack for your valuable comments, actually I used your script called "BatchPicturePackageNoRotate" but this will not produce righ size? dont know why? I have the right size of logo/artwork and just need to place twice on template
don't know why? I have right size of logo/artwork and just need to place twice on template
I have right size of logo/artwork and just need to place twice on template
I got this result:

Copy link to clipboard
Copied
I use the Template you posted. I do not know what you did. If you tried using PSD or PGN images files with a transparent backgrounds resizing would be off. Still the Alpha channels mask should show the white part of the templates background. If you made the background all black there should still be a black bar seperating the images the were resized too big.
Try the template you posted with image files that have a color background.
It is very important the Image use have and aspect ratio nearly the same as the Alpha channels bounds and the images bounds be the same as the document canvas.
I use 1% opacity pixels in the top left and bottom right corners to force image files formats that support transparency like PSD and PNG files.
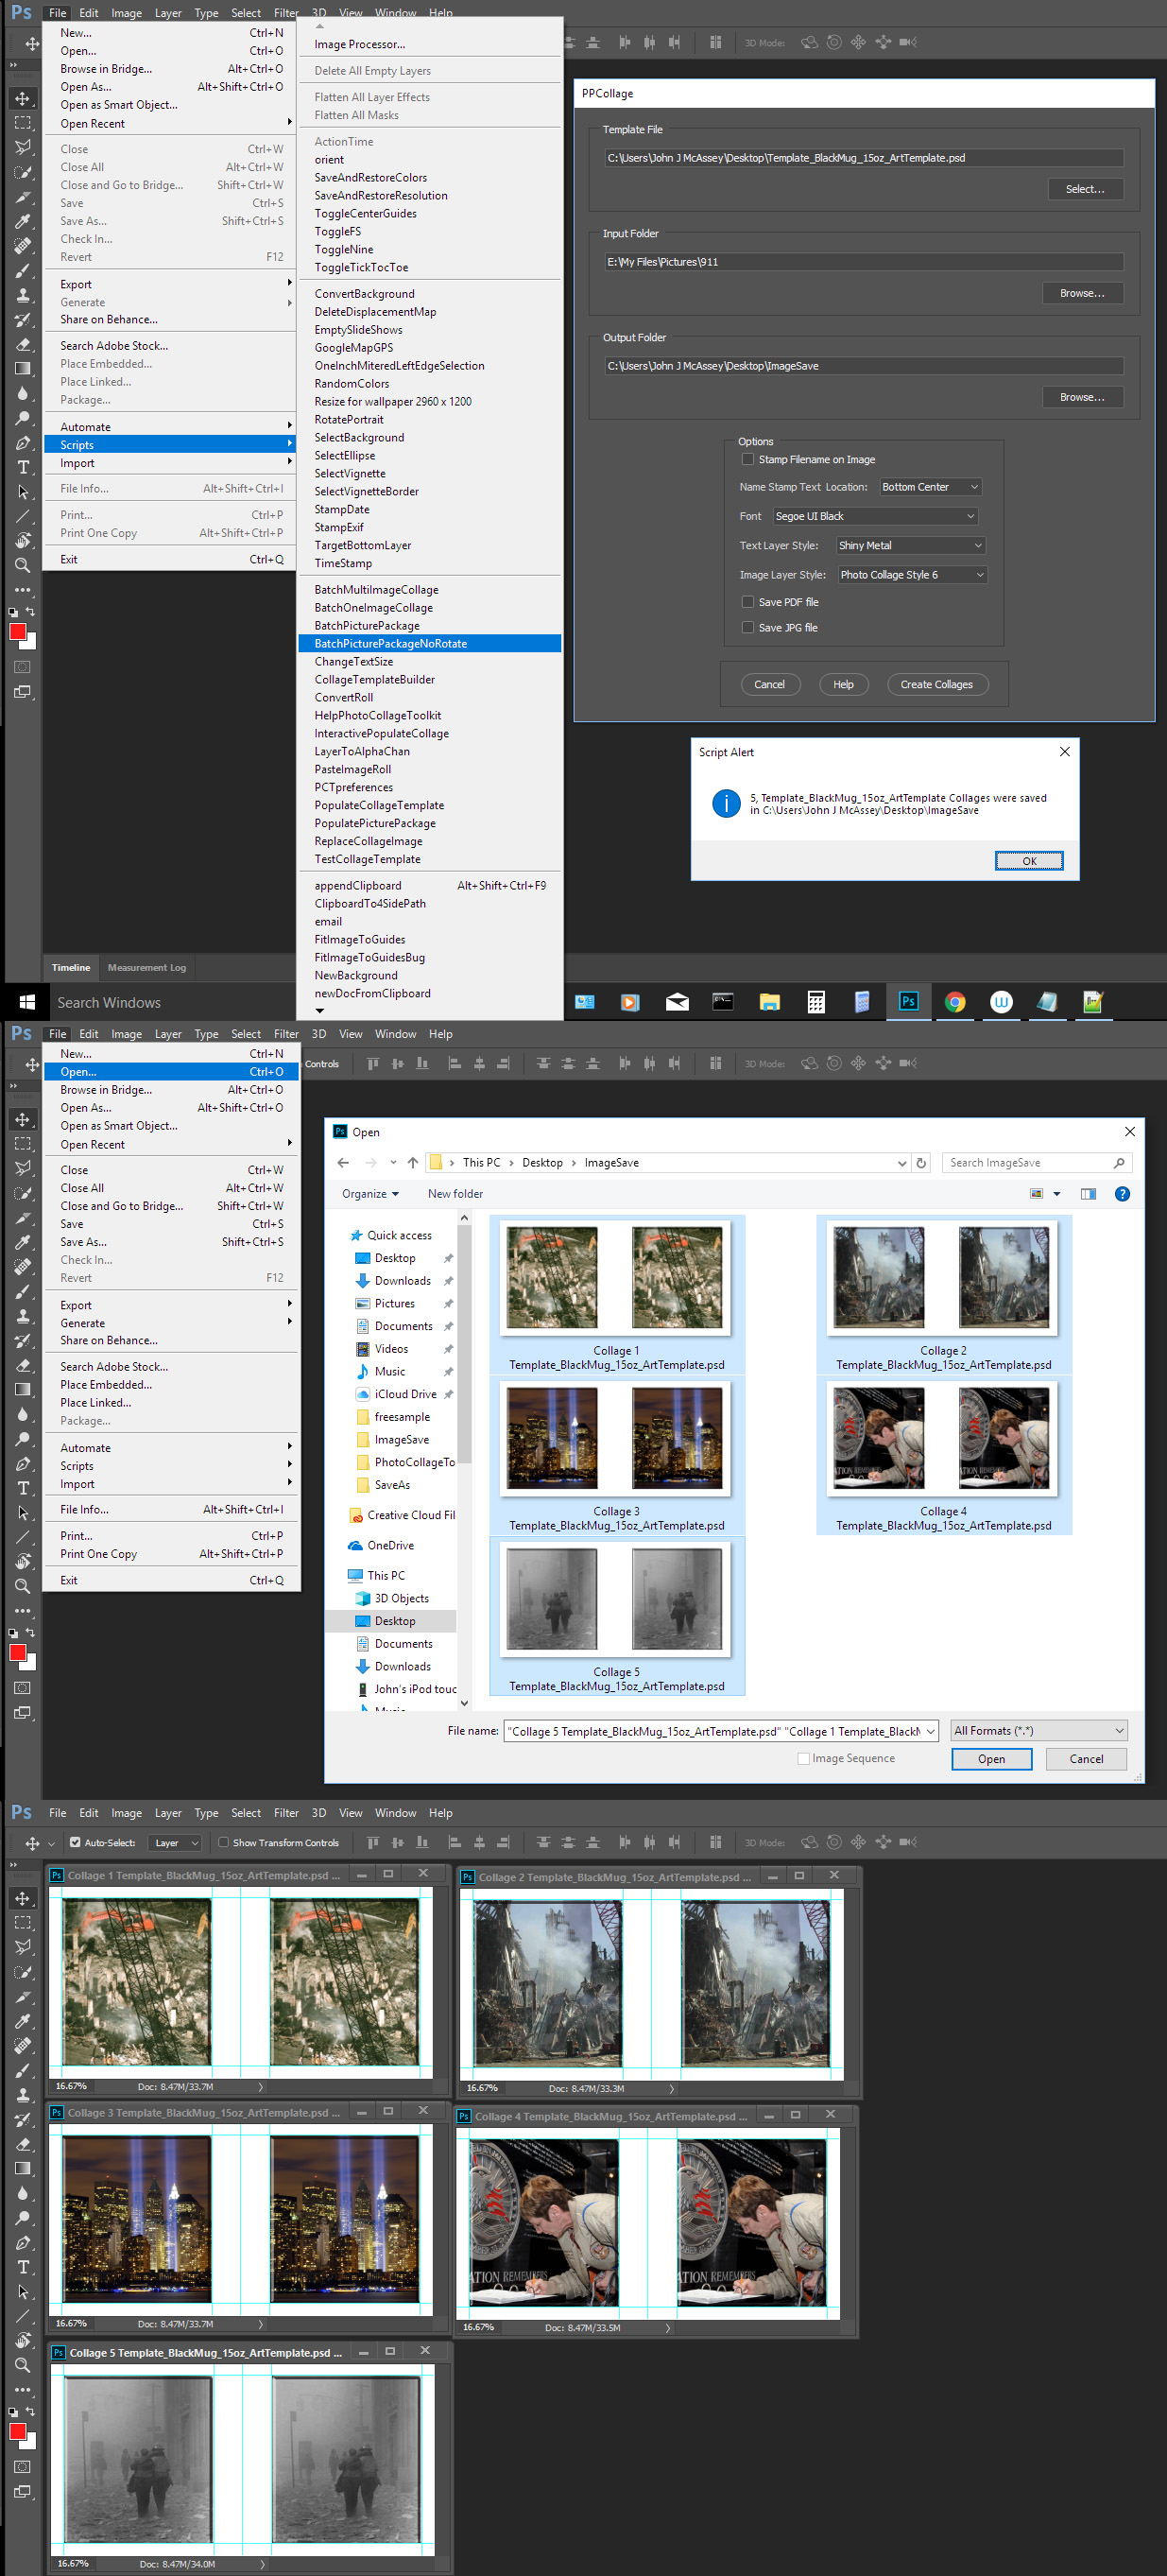
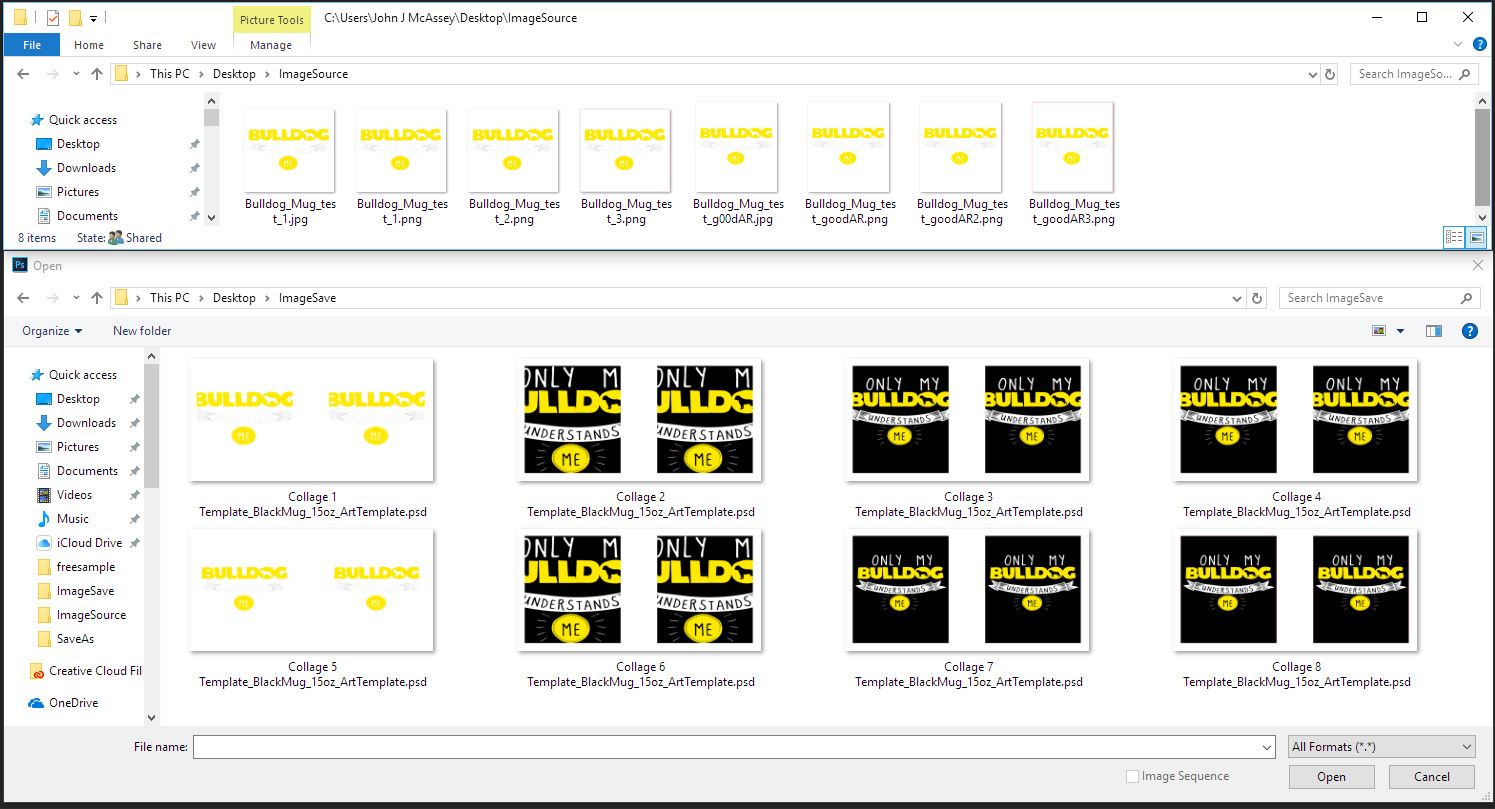
Here is your template used with you image without transparency the Aspect Ratio is not a good match for the image mapping alpha channels. You PNG files has transparency on all four borders soe the layers bounds does not match the place image canvas size so resizing is off and image is resized too big. Border transparency is lost. I modified you PNG Aspect Ratio save as Jpg and PND and also added pixels to force the image bounds to be the same as canvas bounds and ran the script. You can see from the thumbnails the source images see the same they are not. You can see the results. The top row has bad resize and aspect ratio the second row only the png image the image bounds does not match the canvas bounds is resized wrong.

Copy link to clipboard
Copied
mirza5313 exactly like the last few times that you have asked this question on different but similar automation projects – the answer and approach is pretty much exactly the same.
It can be done via scripting.
Or it can also be done using a batch action, this is simple enough for an action to handle and as I can’t write script I generally have to work out how to do it using actions…
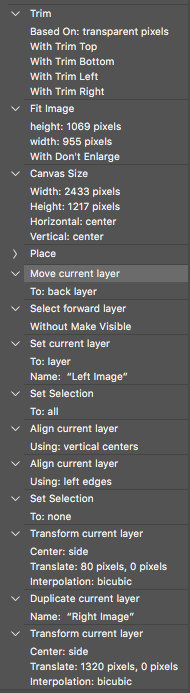
The batch action command will sequentially open each the logos/images you wish to place on the mug template. The Place step in the action will place the template into the logo/image file and then resize and move everything as required. For your sample, the batch action run time was around 1.5 seconds to create the final template. The action Align steps presume that the logo/image should be centred within the target area.
Copy link to clipboard
Copied
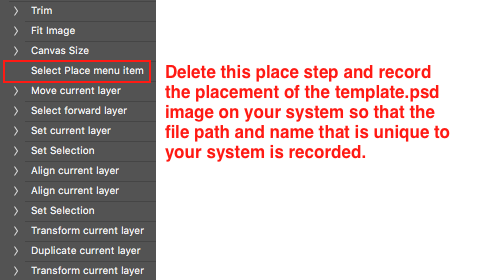
Delete and replace the Place action step with the recorded placement of the template.psd file on your system (the select place menu item step recorded in the action is just a “placeholder” and is not intended to be used in the final action).
Action download here:
Copy link to clipboard
Copied
Your Action expects the template to have cut outs for the images the template only has as background layer which does not support transparency. Your Batched images would be covered by the placed template. Your action does not have a save step so if batched the batch save would be interactive not well suited for batch. I also had to disable your trim step it became interactive if the image top left pixel was not transparent. The action also had problems with various size images with various aspects ratios. Its hard to deal with image size in actions. The Fit Image script will maintain an image aspect ratio the resulting image may well have a different aspect ration than the template image areas.
Copy link to clipboard
Copied
JJMack, thank you for the constructive criticism!
Your Action expects the template to have cut outs for the images the template only has as background layer which does not support transparency.
I can only go by the single sample image provided by mirza5313, which was transparent.
I doubt that the final artwork actually requires the template image and that it will most likely be deleted and that the final action or script would do so. The action could be simplified to not even bother with the template, as the action is creating art that suits the template without requiring the template. The source images requiring transparency will most likely not be the case, whether they are flattened or not will probably not matter in the end. If it does matter, that can be factored in once known. The steps to add the template could be removed or disabled to simply ignore the use of the template. The final art should not need the template, it is just in there to show that the art is correctly sized and positioned relative to the template. The action does not rely on the template in any way.
Your Batched images would be covered by the placed template.
Only if the original image was flattened, the single sample image provided by mirza5313 was transparent, not flattened. It is easy enough to add extra processing to handle flat images and transparent images in the same action.
Your action does not have a save step so if batched the batch save would be interactive not well suited for batch.
It is of course possible to add a save step to the action if required – it could be run from either batch or Image Processor Pro where an explicit save action step is not required.
I also had to disable your trim step it became interactive if the image top left pixel was not transparent.
Only if the original image was flattened, the single sample image provided by mirza5313 was transparent, not flattened. I can only go by the sample image posted. Of course a sample of 1 may not be representative of all images, however for now it is all that I have. It is easy enough to add extra processing to handle flat images and transparent images in the same action.
The action also had problems with various size images with various aspects ratios. Its hard to deal with image size in actions. The Fit Image script will maintain an image aspect ratio the resulting image may well have a different aspect ration than the template image areas.
There are of course options and alternatives for portrait orientation images that may result in a width smaller than the original action was targeting for the image positioning.
The action posted shows what is possible for the single transparent source image provided. For other images the action may need to be refined which is not known at this early point.
_______________
EDIT: This revised action should handle both flattened and transparent images correctly and uses a better method to position the images that works independently of the aspect ratio. The place step will need to be replaced. There is no save step, that can be added as required, I was batch testing using Image Processor Pro. The previous action has been deleted.
Copy link to clipboard
Copied
I create way more actions than Scripts. Both Actions and Scripts have limitations. Actions are quicker than scripts and are easy to record and edit.
IMO both Actions and Scripts need to be well crafted to work well. Actions and Scripts have dependences. So their processes need to be designed to work on the files the user would like to use. Actions and Scripts you create for yourself will be the bese ones you have for you know how they work what they depend on and they were designed for your work flow.
Actions and Script created by others may or may not work in your work flow because of dependencies they have. What they depend on is not always spelled out.
Scripts like Image Processor Pro, Photomerge, Merge to HDR Pro, Contact Sheet II etc.require a lot of design work and coding and far more powerful than any Action can be for Scripts can use logic where Actions can not.
My Photo Collage Toolkit Depends On a simple Template design the has four simple rules. The design depends on Alpha channels to map image location size and shape. Any Image file type that Photoshop supports can be populated and images can be any size but should have an aspect ration near the aspect ration of the matching alpha channel in the templates. The scripts have limitations. Any image that needs rotation or a perspective transform will be placed in without rotation and perspective warp. That needs to be manually added to the populated collage. Also Some image transform may be off. Formats like PSD, and PNG may have Transparency around the images bound and through of the scripts resizing function. I create image like the with a 1% opacity pixels in the top left and bottom right corners to force the layers bounds to be the same size as the document canvas. Image Files like .AI and .SVG will not be populated though Photoshop can place these in documents. I do not support them because they may have border transparency which can through my resizing process off.
It is very hard to create Actions and Scripts for general use. I began with Collage Populating Actions but ran into too many limitations with actions a major one was Actions could only populate a fixed number of images. Many actions were needed 1image 2image 3image etc.
My previous post was meant to note that actions and scripts have dependencies to use them one need to know what the Actions and Scripts depend on. It is hard work to create Action and Scripts that will generally work with any document and image files.
Copy link to clipboard
Copied
The previous two links have been removed (I have been locked out of editing those old posts), the current action is here:
Dropbox - Revised-2up-Mug-Image-Action.zip
It appears that the black panel is required, however there is no need to place a template to create these black panels, the action can just create them. Also it does appear that the source art to be placed will be transparent to show over the black panels. I am guessing that the transparent image will not need to be exactly the same width as the black box and that it should be smaller, so the fit image step could be edited to fit into a slightly smaller size if required.
I have tested the action using both landscape and portrait images (both flattened and transparent) and it appears to work without error. If you are not using Image Processor or Image Processor Pro, then simply record a save step as the final step to the action for use with the automate/batch command + override action save as checkbox.

Copy link to clipboard
Copied
Thanks, Stephen action works correctly, I have run your action, I just removed black background as I need transparent bg, but when I go to make the batch image this action seems not work?
so, there is any way to get worked this action via batch image? or batch?
Copy link to clipboard
Copied
The action works fine for me in a batch using automate/batch, Image Processor or Image Processor Pro.
I removed the step placing the template and again, all appears to work correctly.
Copy link to clipboard
Copied
also, if in this action can include resizing step that would be great as I have tried to add step be this step not working I just want all logo file 11.50x10.50px and then place on the template. is this possible?
Copy link to clipboard
Copied
I don’t understand how a logo can be 11.50x10.50px in dimension? Do you mean 1150x1050px in dimension?
Your template only offers a final size of 955x1069px (the black box).
What is the final pixel width and height that is the maximum size required for the logo on the final template? I am presuming that the logo should not be distorted to fit this size and that is why I am using fit image.
Copy link to clipboard
Copied
Sorry Stephen for misunderstanding, please see final results that I want:

and here is the logo that I want to place on the template but first resize.
Note: I have all logo in the same size as below file and final file will be png.
Copy link to clipboard
Copied
Here is final result and logo that need to resize.
Copy link to clipboard
Copied
With my scripts it is very important that image files have and aspect ratio be nearly the same to the mapping alpha channels bounds. Also the image bounds and canvas bounds should be the same boundary transparency will mess up resizing.
Try this png with your template. It has a matching Aspect Ration and 1% opacity pixel in the upper left and lower right corners to force the layer bounds to be the same as the document canvas size.
Without these Pixels the boundary transparency will be lost by place only placing in the images files pixels. The placed image is trimmed to the image pixels bounds. The layers aspect ratio will not match the alpha channels Aspect Ratio. So the Layer will be resized too large and content will be masked off because of the aspect ratio differences.
Actions and Scripts have dependencies.... How Photoshop does thing may throw in some complexity that is not alway easy to deal with.
I did not expect that Photoshop would trim places images transparency. It would be possible to handle this that however it would require a lot of code and slow down processing. IMO it is better to work around that problem then kill performance when so few image will have transparent boundaries that is only supported by PNG and PSD files. Many PNG and PSD files do not have that boundary transparency only some do.
 se
se
Copy link to clipboard
Copied
Dealing with different size image is difficult in Actions. Resizing image based on their size relative to something would not be possible without using some plug-in or script. Like the Fit Image plug-in Script which resized while preserving the images aspect ratio. It does not change the images aspect ratio the what in used in Fit images width and height. the resulting image width and height will either be what is used with fit image width or height or will be smaller then what is used. If you change an image aspect ration during resize the image will be distorted. Photoshop Content Aware Resize distorts images while trying to preserver recognize objects in the image perspective. Size is very hard to deal with in Actions they can not use logic on their own. Transparency can add additional complexity. Some scripting steps can help actions out.
In my crafting Action Package I include a dozen or more script designed to be used in actions.
Crafting Actions Package UPDATED Aug 10, 2014 Added Conditional Action steps to Action Palette Tips.
Contains
- Action Actions Palette Tips.txt
- Action Creation Guidelines.txt
- Action Dealing with Image Size.txt
- Action Enhanced via Scripted Photoshop Functions.txt
- CraftedActions.atn Sample Action set includes an example Watermarking action
- Sample Actions.txt Photoshop CraftedActions set saved as a text file.
- More then a dozen Scripts for use in actions
Adobe design in a bug into CC 2015.5 and CC 2017 that\e brake my run twice scripts. You can get around Adobe bug by adding garbage into document info filed if it not there using a new document and open document script event handler using Photoshop Script event manager. use this script
if (app.activeDocument.info.instructions.indexOf("Garbage") == -1 ) app.activeDocument.info.instructions = app.activeDocument.info.instructions + "Garbage";
Copy link to clipboard
Copied
Thanks JJMack for sharing this valuable examples and actions, I will definitely look these actions and scripts you did a great job in Photoshop actions.
Copy link to clipboard
Copied
Automation requires thought knowledge and experience simply recording steps without thinking through the process will have problems down the line. Good actions need to be crafted well the process needs to be designed well to work on most documents and images. Photoshop knowledge and skill is required.
It is easy to record an play actions however all actions are not well crafted. Private actions need not be well crafted for you record them for you work flow you know how they work and when to user them.

 AdChoices