- Home
- Photoshop ecosystem
- Discussions
- add a 1px border to a selection in a existing imag...
- add a 1px border to a selection in a existing imag...
Copy link to clipboard
Copied
Hey everbody,
I'm working on this huge image, about 4608*3072 pixels, i want to add a tiny red(#FF0000) border(1px) to a selection, those are the steps i did:
But doesn't work, photoshop draw also other pixels with a shade of red, there seem no obvious to cause something like this...and it's not the case of my objective
I've been trying different tools to achieve that but haven't found a way yet. Does something like that exist? i need something like this
PS: the image size: 4608*3072, type : JPG
 1 Correct answer
That's anti-aliasing—Photoshop is softening the transition from the red to the background. If you zoom back to 100%, it probably looks just fine.
That said, with the marching ants selection active as in the first screen shot:
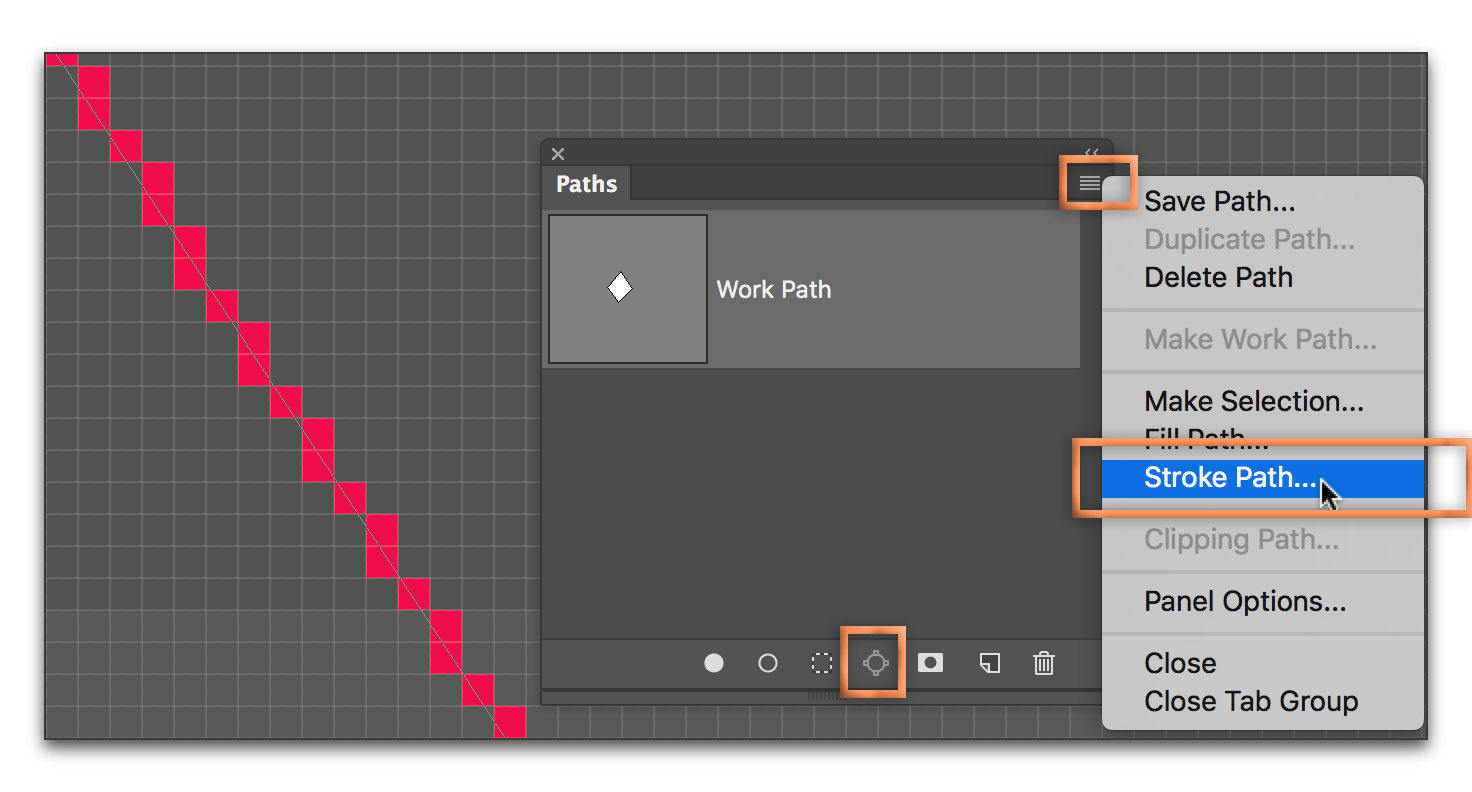
- Window > Paths
- Click Make Work Path from Selection button
- Click to select the new Work Path
- Pick Stroke Path from the panel menu
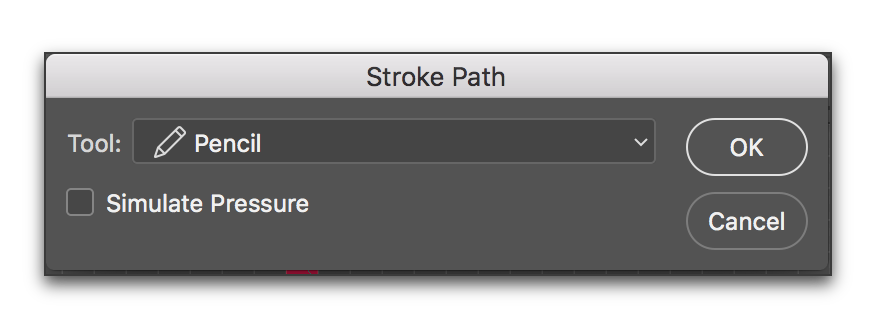
- Change the Stroke Path tool to Pencil
- OK


Explore related tutorials & articles
Copy link to clipboard
Copied
That's anti-aliasing—Photoshop is softening the transition from the red to the background. If you zoom back to 100%, it probably looks just fine.
That said, with the marching ants selection active as in the first screen shot:
- Window > Paths
- Click Make Work Path from Selection button
- Click to select the new Work Path
- Pick Stroke Path from the panel menu
- Change the Stroke Path tool to Pencil
- OK


Copy link to clipboard
Copied
You are seeing the impact of anti-aliasing - which is there to prevent jagged lines.
To get a 1px wide line round your selection that is not anti-aliased:
Either make your selection with the pen tool (or convert your existing selection to a path)
Then with the pencil tool selected and set at one pixel wide - stroke the path (click on the symbol at the bottom of the paths panel)

Dave
Edit to add : Answers round here are like buses. You wait a while then several come at once ![]() - well done Barbara for getting in quicker and with screenshots !
- well done Barbara for getting in quicker and with screenshots !
Copy link to clipboard
Copied
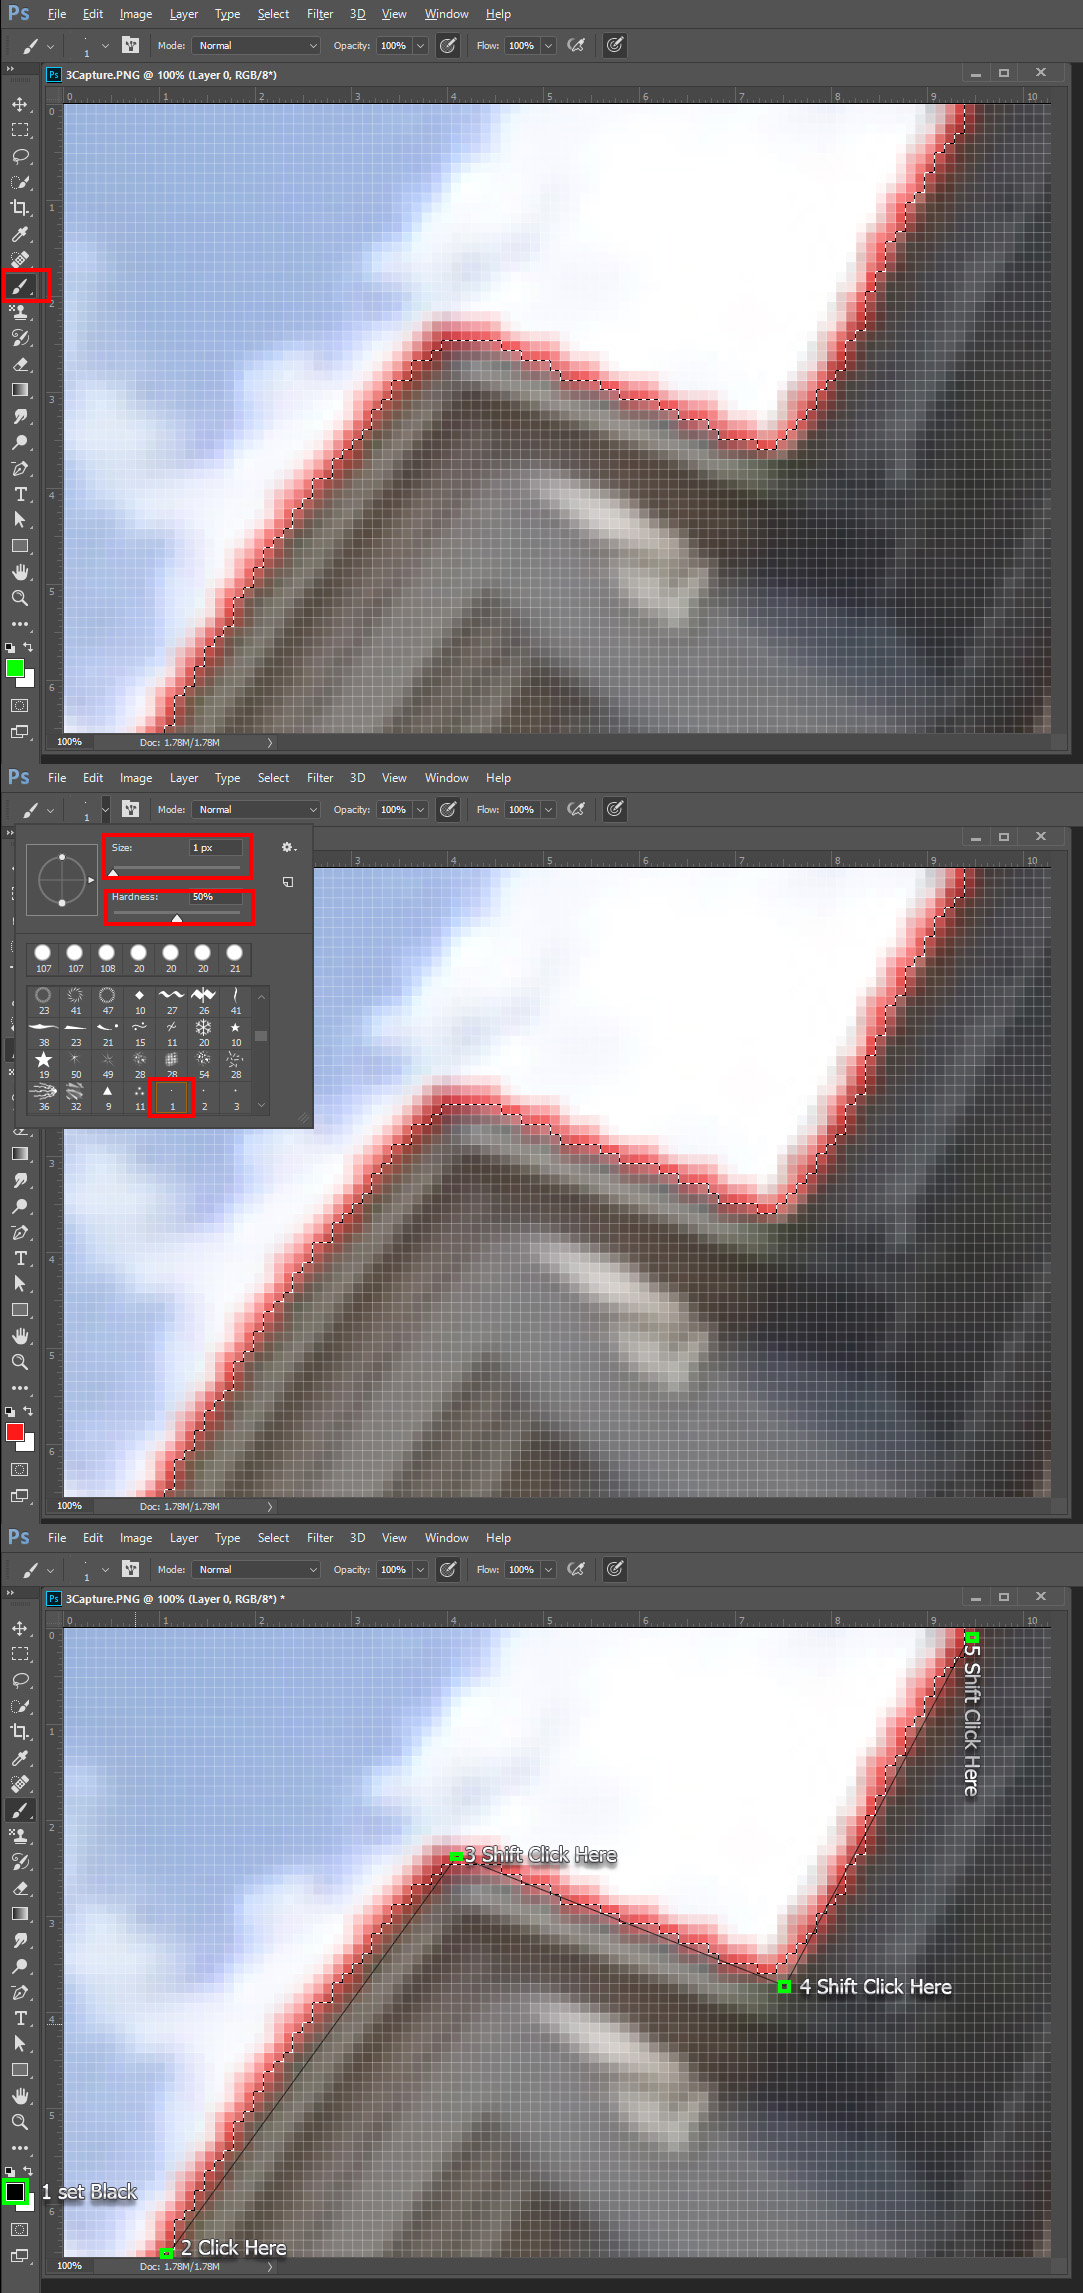
It is also very easy to draw straight lines with a brush using the Click and a shift click method...

Find more inspiration, events, and resources on the new Adobe Community
Explore Now
