

- Home
- Photoshop ecosystem
- Discussions
- Batch HDR Merging/Toning Script
- Batch HDR Merging/Toning Script
Batch HDR Merging/Toning Script

Copy link to clipboard
Copied
I've seen a number of different posts on these forums about trying to do this and I never really found a complete and suitable solution. It also has really annoyed me that adobe never implemented this (and it's not possible to do with actions because the action just runs a script and you can't record the HDR toning settings, the dialog always pops up, its in the script). So I finally had some time to get my hands dirty with ExtendScript and I have created a fully featured script complete with UI that allows batch creation of HDR tonned images in photoshop.
The code I got working from various snipets of code I found around the 'net and single stepping through the MergeToHDR.jsx script that is built into photoshop.
This has only been partially tested on photoshop CC on a mac. Hopefully I made it portable enough and it will work on windows and older versions. I don't think the MergeToHDR script has changed much in the last several versions (and that is mainly what I call to do the work) so I think it should work. If you have issues please let me know.
My motivation for this script was coming up with a way to do batch HDR toning for timelapse and so this script's features lean toward using it for that end. I really didn't want to buy another separate program for doing this like photomatix, when I knew it should at least be possible to do in photoshop.
I uploaded the script to github:
https://github.com/davidmilligan/PhotoshopBatchHDR/blob/master/Batch%20HDR.jsx
How to use:
- Drop the script in the '[photoshop folder]/presets/scripts' folder and restart photoshop if it is already running.
- The script should appear as a menu item under File>Automate>Batch HDR...
- A dialog will appear where you specify all the settings for the batch
- Input Section:
- Click browse and select the source folder that contains the images to be merged/toned
- Specify "Number of Brackets" this is how many separate images to group into a single HDR output image (the script will group the images in the source folder in order based on this parameter). You can use a value of 1, which means each image in the source folder is separate and will be toned and output. (I find that many times when shooting RAW, 14 bits is ample to capture the full dynamic of the scene, so I do not waste storage space and shutter acutations using more than one exposure, just make sure to ETTR, also post-processing with this script will be faster)
- If there are other files in your source folder (for example .xmp files) that you need to exclude you can specify a filte. For example: *.cr2
- Typically for timelapse you are using a tripod and do not need to have photoshop align the images, but I provided that capability for anyone who might need it b/c it was easy to enable. Note that enabling this will make the process MUCH slower.
- Toning Section:
- These settings are all the same as the photoshop HDR toning dialog for "Local Adaptation"
- To preview what your toning settings will look like you can select any file(s) in your sequence by clicking "Select File(s)..." under "Preview". The file(s) you select will open and merge (if more than one file). When that's finished you can click the "Update Preview" button to apply the current toning settings and see what they will look like (I can't do the fast, automatic previews like the builtin dialog, sorry - somebody from adobe want to show me how to do this?)
- You can see what the settings will look like at another point in your sequence by clicking the "Select File(s).." button again. (I recommend previewing a shot near the beginning, middle, and end of your sequence)
- The dialog prevents you from using anything in photoshop while its open so I provided a zoom to allow you to zoom in on the preview
- The tone curve you must enter as a comma separated list of points (sorry, ScriptUI is not really adequate to create the graphical histogram overlay for the curves like in the builtin dialog). The points are grouped into x,y pairs so for example: x1,y1,x2,y2,etc. Typically you will start with 0,0 and end with 255,255 (note that 255 is the max, full white). Like the curves tool, x represents the input and y represents the output
- Output Section:
- Click browse and select a folder for the script to save the output files to
- The rest of this section should be self explanitory. NOTE: If you select to output 32bit files, the toning will not be applied, the files will simply be merged into a 32bit HDR image and saved.
- Once you have specified the input and output folders the OK button should be enabled, when you are ready, click OK to start the process
- Go watch a movie or take a nap, this is going to take a while. The script will display a progress window showing you how far along the proces is (the photoshop progress windows may occasionally appear on top of it, I usually just move them up a little so I can see both)
Limitations:
- Only the local adaptation method is supported. It's really the only one I ever use, and I didn't really feel like implementing the other ones, but feel free to modify the script yourself to add this support
- You canot load or save presets from the builtin toning dialog. The format of the preset files is binary and would require reverse engineering of the format and it would be very difficult to read to the files in javascript anyway. If it were xml, it would be much easier, alas it is not. Feel free to grab a hex editor and do this yourself. For now you'll just have to copy all of the values of a preset by hand into the dialog if you want to use a preset. If I have more time this is something I might work on.
- Preview is slow because it has to do the actual full toning, I don't know a way to do the fast real time previews like the builtin dialog.
- I don't think the "Cancel" button on the progress window really works, once running, the script is too busy to register a click, anybody know how I might fix this?
- There may potentially be some ways to improve performance of this script in certain scenarios, IDK, but I'm just glad it works

You're welcome Adobe, you can send me a check at:
[REDACTED]
[REDACTED]
[REDACTED]
Please hit me up with comments/suggestions,
David


Explore related tutorials & articles
 76
Replies
76
76
Replies
76

Copy link to clipboard
Copied
For some reason it says I have 421 images. If I go to the folder in the finder and "select all" it says I have 420 images in the folder.
Copy link to clipboard
Copied
You need to specify a file filter. You might only have 420 *images* in your folder, but there are more than 420 *files* in that folder (such as non-image files and hidden system files like .DS_Store on Mac). So you have to tell the script how to tell the difference between an image file and a non-image file. You do this using the file filter. If all your images filenames are for example IMG_0001.CR2, IMG_0002.CR2, IMG_0003.CR2 ... then you would use *.CR2 as the file filter. Since you're on a Mac this is going to be case sensitive.

Copy link to clipboard
Copied
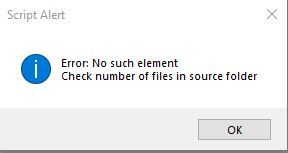
Hey there, I'm having the same issue as others above with "Error: No such element, Check number of files in source folder".
I've been through and checked the number of files (150, 5 shot brackets), checked for any hidden files, set a filter (*.ARW), and none of this has seemed to help. At the start it correctly identifies there's 150images starts loading the first 5 images, aligns them, and then when attempting to do the merge (or somewhere around there) it comes up with the error. Has anyone had any luck figuring out any other causes for it?
Weird thing was is it was working for a while, just stopped a couple of days ago.
Thanks

Copy link to clipboard
Copied
This is amazing, thank you!
Probably a stupid question, but when I open the script in adobe CC 2015 the dialogue isn't large enough to fit all of the options (some are lost off the bottom of the page). I can't seem to change the output file. The lowest part visible is the "filename format" text field and I unfortunately cant change it from jpg. Hoping to edit the 32bit tiffs...
Any suggestions welcome, this is exactly what I was looking for! So close yet so far.
Thanks,
Matt


Copy link to clipboard
Copied
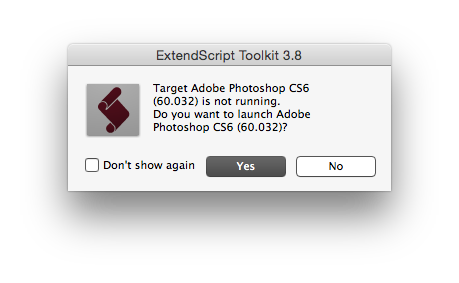
I've tried running this with PS CC 2014 and get this error:
Since that didn't work, I copied the code directly from git hub, pasted it into a blank txt doc, changed the extension to .jsx, saved it then copied it to the the scripts folder. After relaunching PS CC 2014, it didn't show up in the scripts menu. After that I attempted to debug using Extendscript toolkit. When launching, it defaulted to PS CS6, which I changed to CC 2014. Upon attempting to play the action in Extendscript it returned this:
I tried changing "# target photoshop" to "# target photoshop CC" and other variations to no avail. When I viewed the original code from the Batch HDR.jsx file from git hub in extenscript and text edit, it isn't the same as what you can preview on github. There's 3000+ lines of code with lots of "blob- code" throughout. I'm clearly missing something here. Although I'm not a developer, I've had success modifying and working with PS scripts in the past, but not this one.
Copy link to clipboard
Copied
You have downloaded and are trying to run the HTML page generated by github, rather than the script itself (the script is about 850 lines, so if you have 3000, that is definitely wrong). Try this link: https://github.com/davidmilligan/PhotoshopBatchHDR/raw/master/Batch%20HDR.jsx or you can checkout the code directly with git: Set Up Git - User Documentation

Copy link to clipboard
Copied
# target photoshop-60 //CS6
# target photoshop-70 // PSCC
# target photoshop-80 // CC 2014
# target photoshop-90 //CC 2015
# target photoshop //default to the version of ESTK that's installed.
Copy link to clipboard
Copied
Great, thanks!
Copy link to clipboard
Copied
I can see everything just fine with Mac Photoshop CC 2015, perhaps your screen resolution is too small?

Copy link to clipboard
Copied
I see lots of Mac users, but has anybody tried this script in Windows?

Copy link to clipboard
Copied
Works fine on Win7 with PS CC2015(2016 Update installed)

Copy link to clipboard
Copied
This script is awesome. It worked first time on my 3786-image folder of 3-bracket pictures taken for a whole-day HDR time lapse. See it here: https://www.facebook.com/groups/689237787824303/permalink/937015926379820/
My environment is a Dell XPS 15 Laptop, Windows 8.1, 16GB, 1TB SSD, Photoshop CS6. It took abut 9.5 hours to run.

Copy link to clipboard
Copied
David, Thank you so very much for doing the work! This is a really awesome script. After assembling about 10 series of HDRs for panoramas I finally searched for an automated way to do this. I really think Adobe should buy you out and implement this script in Photoshop! Besides that, they should implement a way to fix chromatic aberrations to the entire HDR Pro import/creation process...
I also wanted to confirm that it works well on Win7 and Photoshop CC2015 (2016 update installed)
Nevertheless I noticed three things:
1) I loaded a adjustment profile that is not stored in the Photoshop folder but remains with the files in case I loose my OS partition. When I load it, the settings are correctly applied, but the loaded setting is not added to the drop-down list in the UI of your script. It is added if you run the "Merge to HDR Pro" manually. If I place the adjustment files in the appropriate folder inside the Photoshop installation, everything works as expected though.
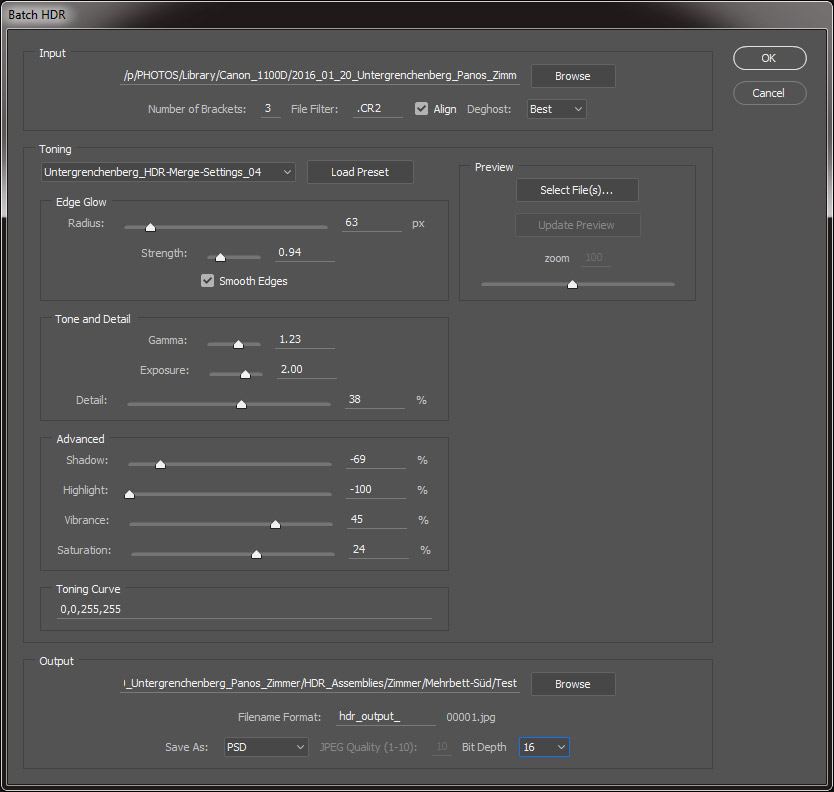
2) I always shoot RAW and JPG. I tried to separate them using the "File Filter" in the UI of your script. I entered .CR2 in the "File Filter" slot. But after starting the script by pressing "OK", nothing happened. I got back to Photoshop and the script didn't run. (I attached a screenshot of my settings to this post below.)
Is there a way to see a log so I could try to debug what's happening?
My workaround the was to create a folder called "JPG" and move all the JPGs in there. After that the script ran as expected but showed 25 items instead of 24 (8 shots with each 3 brackets).
3) When you assemble a series of different shoots, the browse for input files and the browse for output files doesn't open the last directory that was opened. I noticed that on several Photoshop open dialogs, so I guess it's a Photoshop limitation. It can be quite tedious to always go through the entire process of finding the directory when you have to assemble many different HDR shots.
Is there a way to implement that in the script so it remembers the last directory?
I am not expecting you to honor my input and put more work into the script as it works perfectly. I merely post this here to contribute my experience, in case someone else runs into similar issues. Plus, the more we talk in this thread, the likelier Adobe will hear us and send you a check 
Thanks!
Alex

Copy link to clipboard
Copied
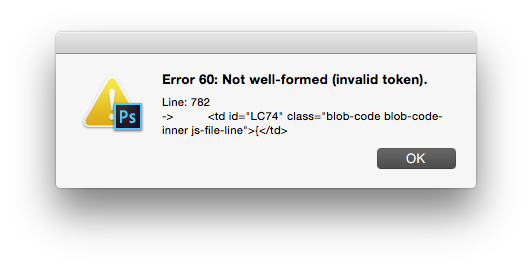
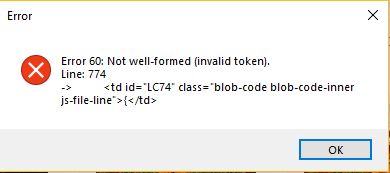
It is failing with Photoshop CS6 and windows 10 x64.
Error 60: Not well-formed (invalid token).
Line: 757
-> <td id="LC74" class="blob-code blob-code-inner js-file-line">{</td>

Copy link to clipboard
Copied
After spending a LOT of money on photog equip and software lately, this was a great answer to SNS HDR Pro, (especially for free). I've been interested in HDR timelapses, and this script (after a short 120 shot test) worked perfectly. Love the presets you have built into it, (or, did it import mine??) Great job, and THANK YOU!!!!!
Copy link to clipboard
Copied
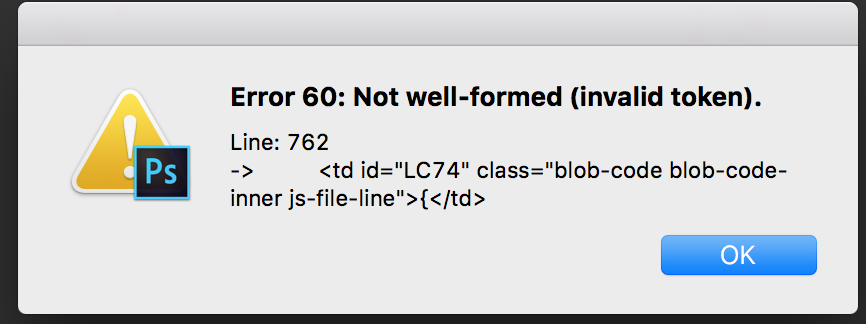
Hi, this sounds amazing and seems like it's wonderful for everyone! I downloaded the latest file and I am running OSX 10.11.3 and Photoshop 2015.1.2 Release and it also says 20160113.r.355 x64. I'm having a problem though when I run the script, I get this error. Any ideas? Thanks for the help!

Copy link to clipboard
Copied
That look like line of HTML Code not a line of Scripting code??? What were you doing in Photoshop CC 2015? This was also reported several other times user trying to run the html generated code not the script code. Make sure you download the script not the HTML. Right click and save link as.
https://raw.githubusercontent.com/davidmilligan/PhotoshopBatchHDR/master/Batch%20HDR.jsx
Copy link to clipboard
Copied
Thank you thank you! Ridiculous mistake! Downloaded and it opened right up! Thanks!

Copy link to clipboard
Copied
Uhhh i'm having the same issue! Did you manage to work this out? I downloaded the jsx file, i tried copying the code into a fresh file, i've done all i could think off! Either it doesn't show up in photoshop at all or it shows me that very error. Been fighting with this for an hour, please help!
Copy link to clipboard
Copied
Where is the fresh file and what is its name. For a script to be listed in menu File>Scripts or menu File>Automate the script must be in Photoshop version script path. The file name should be "Batch HDR.jsx". After you install ise in Photoshop Scropts path stert Photoshop and you should see it listed ins menu File>Automate>Batch HDR...
Copy link to clipboard
Copied
I'm pretty sure the file i downloaded is all correct (it is "Batch HDR.jsx", all seems fine) - i put in in the right place (C:\Program Files\Adobe\Adobe Photoshop CC 2018\Presets\Scripts) - then restart photoshop and I do see Batch HDR under File/Scripts, but when i click on it, I only get this error msg:
So i tried to do it another way: I copied the whole code from github link and simply pasted it into the Batch HDR file (open in notepad) and then saved. Again - left it as same file name, in same location. I restart photoshop - and now it doesn't show up under the Scripts menu but does show up under File/Automate.
But now - when i try to use it - it thinks for a good while (some 2 minutes, just says "processing images" while nothing happens) - and then comes up with another error:
I'd appreciate any advice you may have. Spent a good few hours trying to make this work ughh.
Copy link to clipboard
Copied
It look like you download the HTML Page Not the Photoshop Script. Use the link so the Photoshop open as a page of text in your browser then Right Click and save the Photohop.

Copy link to clipboard
Copied
Thank you - i did this, got the script to run - but i'm still getting that same error: "No such element. Check number of files in source folder". Any other ideas?
Copy link to clipboard
Copied
Did you check the number of files and the files in the source folder? It look Like the Script tried to do HDRToning with the some active document but there was a problem that the script caught. The error was "No such Element" Alerted you to the error that happened. Looks like some element was missing in the current document. The script suggest that you check the source folder files are correct. I doe not create HDR images so I have no idea of what should be in the files in the source folder.

The doHDRToning function Seems toe call Adobe Automate Merge to HDR Pro plug-in script.

Copy link to clipboard
Copied
Thanks - but this error message doesn't actually give me any hints on what may be wrong with it. I thought maybe there were too many images in the folder - so i created a folder with only a few - but same thing. I thought maybe it was tripping up on my TIFF file sequence -- so i tried JPEGs instead - same thing. I'm a fairly advances user when it comes to photo/video editing - but know absolutely nothing about programming and such.
I always hate letting the machine win heh, but it's the second day i wasted trying to troubleshoot this and i'm slowly giving up. I wanted to color correct parts of a feature film i'm working on in photoshop (HDR toning of exported TIFF sequence) - but i may just have to give up on this and simply color grade it with the video tools i do have available. Bummer really - as I can do much more with photoshop - but i have no other ideas.
Appreciate your efforts to help - if anything else comes to mind, please let me know!

Find more inspiration, events, and resources on the new Adobe Community
Explore Now
 AdChoices