 Adobe Community
Batch Resizing Images

Copy link to clipboard
Copied
Hey,
I have been batch resizing a lot of images to 1000 x 1000 pixels recently for clients websites and I have setup a task that runs through actions I have created, these are:
Trim
Resize image to 900 x 900px
Resize canvas to 1000 x 1000px
Save for web
This works fine for most images however, some images have hidden artifacts on them which causes the trim to not go right to the edges of the image which means the resized image is a lot smaller than it should be, does anyone know if there is a way or removing these artifacts (which can be in different places on different image) without having to do them manually?
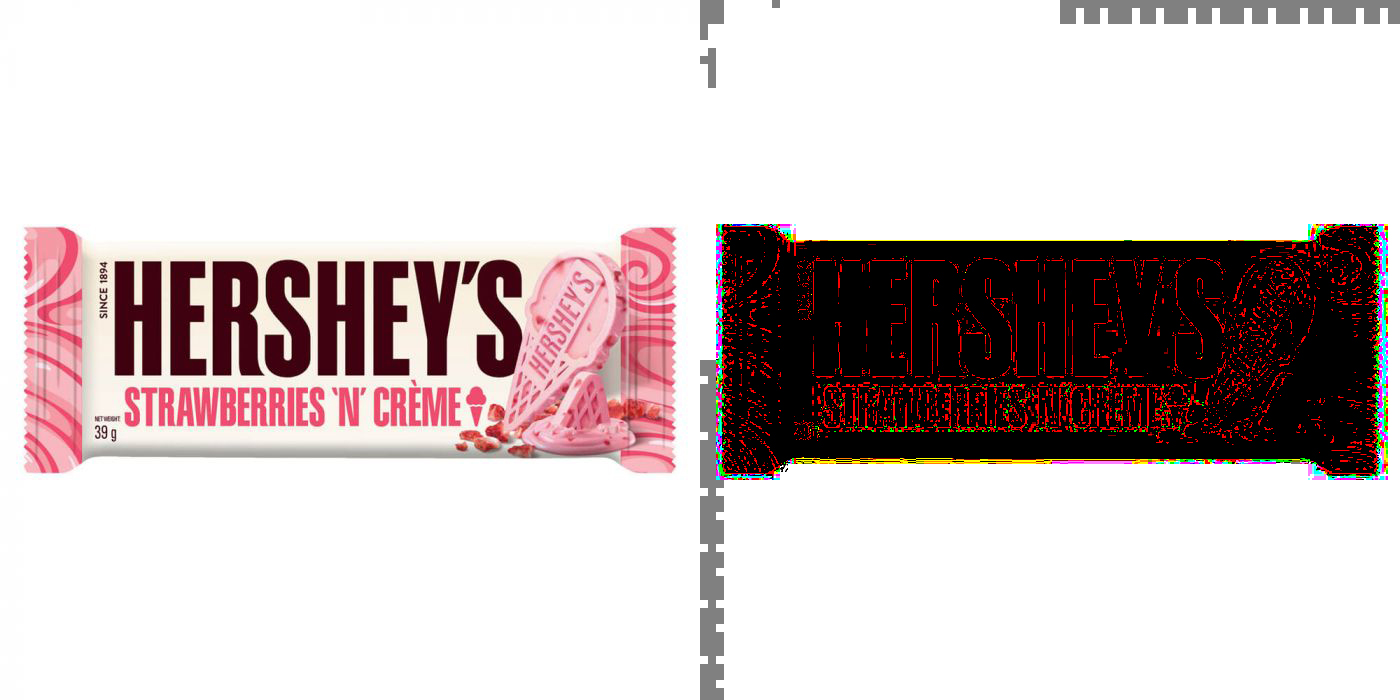
Here is an example of one of the images, you can see on the right the image looks like it is just a pure which background, but if I add a levels adjustment with the black arrow all the way to the right you will be able to see the artifacts.
Thanks


Explore related tutorials & articles
 14
Replies
14
14
Replies
14

Copy link to clipboard
Copied
Perhaps start with Select > Select Subject, then Image > Crop. Then add in the trim command using upper left pixel. Then a second trim using lower right pixel (or use a single trim based on transparency if there isn't a background).
Copy link to clipboard
Copied
Thanks for the suggestion, I just tested it on a few images and whilst it worked with two images that are more simple one of the more complex one the select subject didn't do a great job and ended up cropping the top of the image off.
I posted the same question on Reddit and someone suggested using a script but I'm not familiar with Javascript.
Copy link to clipboard
Copied
A script may or may not be needed. It is easy to say "use a script" - but what will the script do that you otherwise can't do in this case?
If every image is on a white background, another option would be to load a selection based on the image pixel content, the trick being to remove the "invisible" artifacts.
Copy link to clipboard
Copied
Perhaps something like this action using Select > Color Range set to highlights, inverted, then crop, trim etc:

The lower limit set to 253 ignores any values from 254-255 which is where the artifacts currently reside.
In addition to or replacing the smooth step, you could use contract selection 4 and then expand selection 8 to help simplify the selection and provide a little safety for the crop. All of this can be batched without needing a script.
Copy link to clipboard
Copied
Thanks Stephen, I didn't think to use colour range in an action, I was doing that manually when I had to edit them one by one if it needed.
I just tried it and it seems like this is a solution but sometimes the artifacts are in different places so I will continue to use this one in the future and if I run into problems, I will create another post.
Thanks for your help.
Copy link to clipboard
Copied
Can you find some pattern like all images can be cropped using selection 2000x2000 pixels from center to remove artifacts and unwanted areas. Later downsample to 900x900 and add extra canvas. If old images which you are processing share same dimensions then chances are you can find some pattern which will work without brainstorming too much what can give results but also may fail. I am always trying to think simple and try to find simple solution before adding complexity.
Copy link to clipboard
Copied
I've been resizing different images so one was for a bed company, another for a sweet shop so the images have all been different so would need it to be suitable for all images rather than just a set of one as I will be using it in the future as well 🙂

Copy link to clipboard
Copied
Looking at you steps
-
Trim
-
Resize image to 900 x 900px
-
Resize canvas to 1000 x 1000px
- Save for web]
I see 1. Trim without any information of the settings used in the Trim Dialog this step may or may not change the documents canvas size.

2, Resize image to 900 x 900px the will make the Canvas size 900px by 900px and resample the image to that sized canvas. It will distort any image that did not have a 1:1 Aspect ratio This is not something you should want to do, You should use menu File>Automate>Fit Image... 900px x900px soe the image will retain its aspect ratio and bot distort. The document canvas will be 900px px 900px or smaller where one dimension will be 900px.
3. Canvas Size 1000px by 1000px will make the canvas size 1000px by 1000px adding a border around the resized image. The Added canvas will be empty if there is no background layer or the added pixels will be the background color or the color specified in the Canvas sized Dialog.

4. Save For web will save the 1000px by 1000px document into an image file type specified in the save for web dialog. If Jpeg and the boarder added was empty save for web will fill the boarder with background colored pixels for Jpeg file format does not support transparency. PNG does.

Copy link to clipboard
Copied
Hi JJMack,
I should have been more specific with my steps, I have an action that trims both options and the resize is using fit image rather than image resize, sorry that's my mistake.
I am saving all images as a jpeg so a transparent background wouldn't matter as it will be added automatically.
Thanks
Matt 🙂
Copy link to clipboard
Copied
Why do you want 1:1 square images? If you really do want that you should incorporate image cropping in your action so the image will not distort and you will have your 50px boarders. Using my AspectRatioSelection plug-in script it would be easy the set the max size centered 1:1 aspect selection for your images then use an arrows key to tweak the selection position for best composition. when you hit enter the action would make the 1:1 crop resize the image 900x900px and then add the 50px boarders. You should use the Action with an images processor so you can specified where to saved the cropped resized images into the file type you want saved. You could turn off the interactive transform selection step if a centered 1:1 crop will do. The action would batch and no intervension woul be done for positioning the crop

Copy link to clipboard
Copied
Hi JJMack,
1:1 images are required for my clients e-commerce stores. The images haven't been distoring when I have been running my actions. Where would I get your Aspect Ratio plugin from?
Would this remove any of the hidden artifacts that I have been seeing on many images?
Thanks
Matt
Copy link to clipboard
Copied
It is my crafting action package. Some of the script hane beem broken by Adobe. You can add Garbage the a docyment info to bypass Adobe bug. Jeff seems to think the info feiled is copyright info the Adobe should interfear with.
Crafting Actions Package UPDATED Aug 10, 2014 Added Conditional Action steps to Action Palette Tips.
Contains
- Action Actions Palette Tips.txt
- Action Creation Guidelines.txt
- Action Dealing with Image Size.txt
- Action Enhanced via Scripted Photoshop Functions.txt
- CraftedActions.atn Sample Action set includes an example Watermarking action
- Sample Actions.txt Photoshop CraftedActions set saved as a text file.
- More then a dozen Scripts for use in actions
Copy link to clipboard
Copied
Thanks JJMack,
I will have a play around with it and see if it works better than the other solution above.
Copy link to clipboard
Copied
Remember if you crop there will be image content lost. You should not crop very wide or vert tall imags 1:1. The Trim you do first in your action may trim to a very wide or tall aspect ratio. Subject matter could have any Aspect Ratio.

 AdChoices