Lisa Di Paola
Inspiring
June 20, 2019
Answered

Best process for making identical crops/trims/cuts

  • June 20, 2019
  • 4 replies
  • 662 views

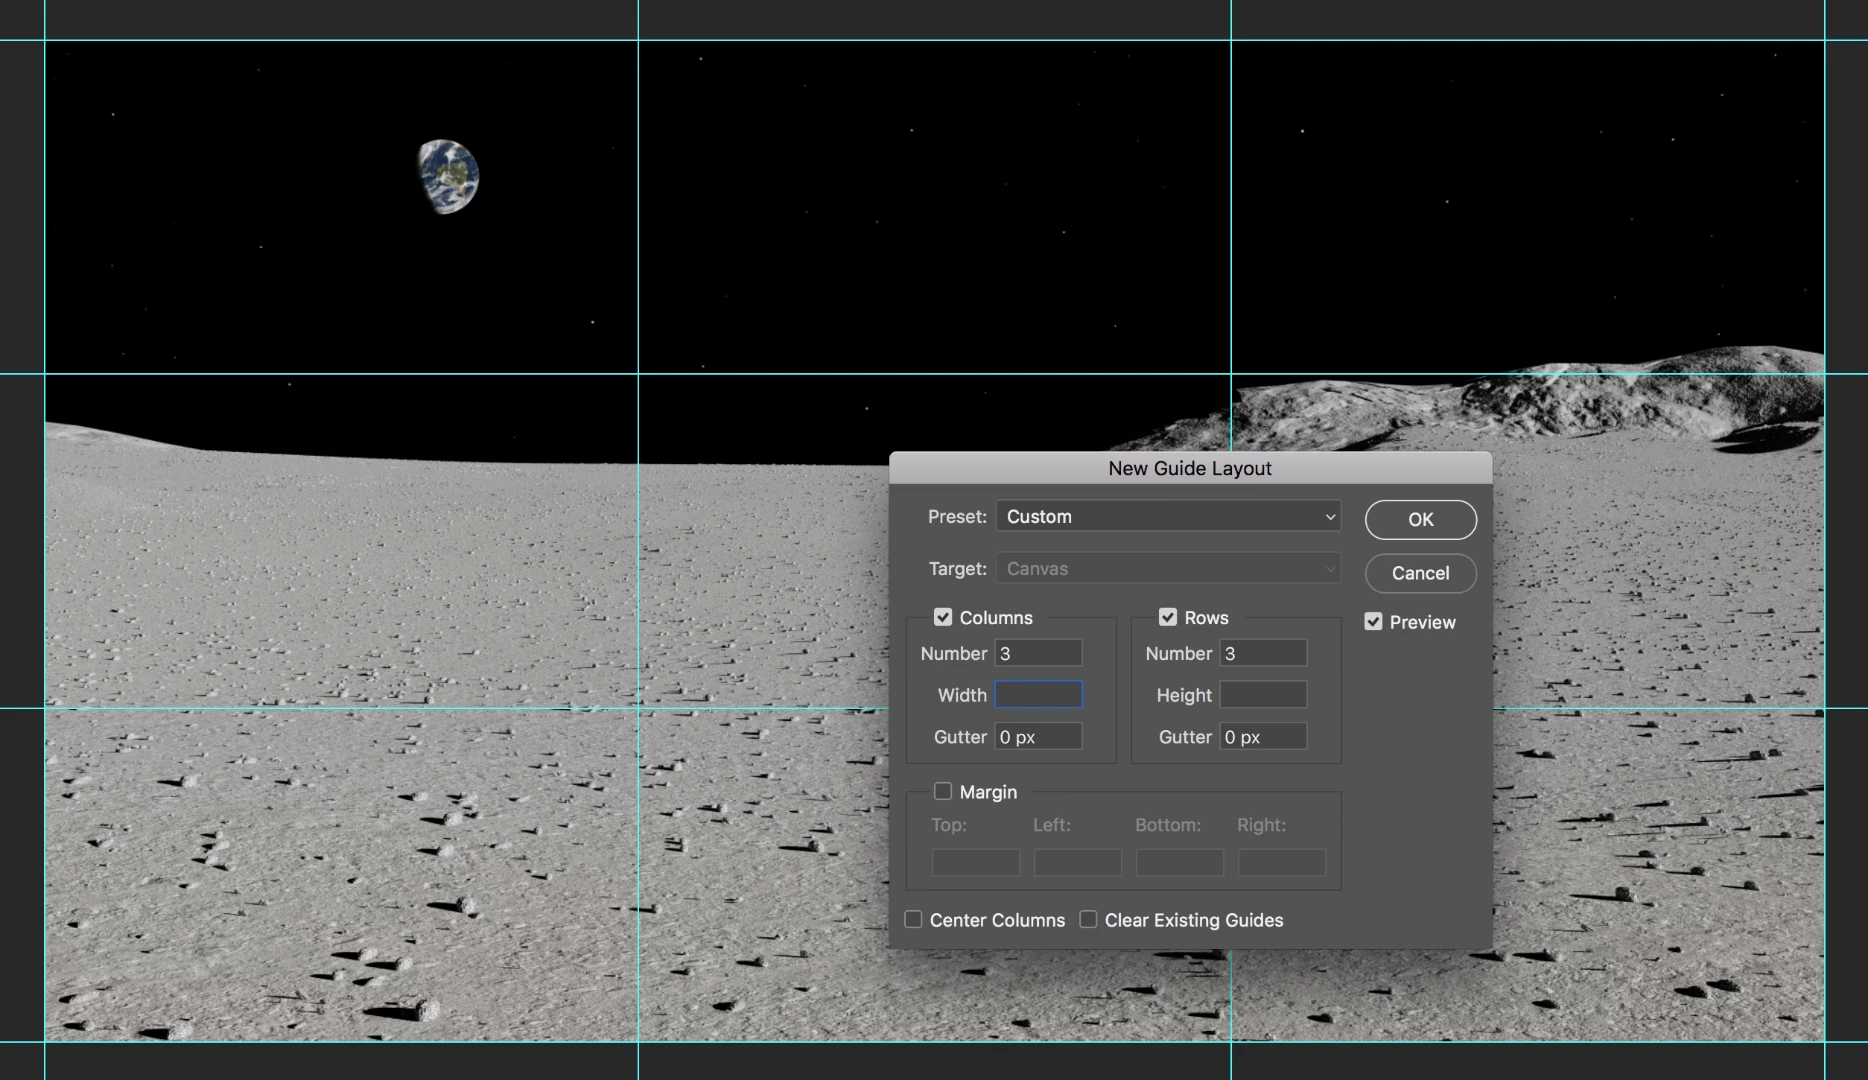
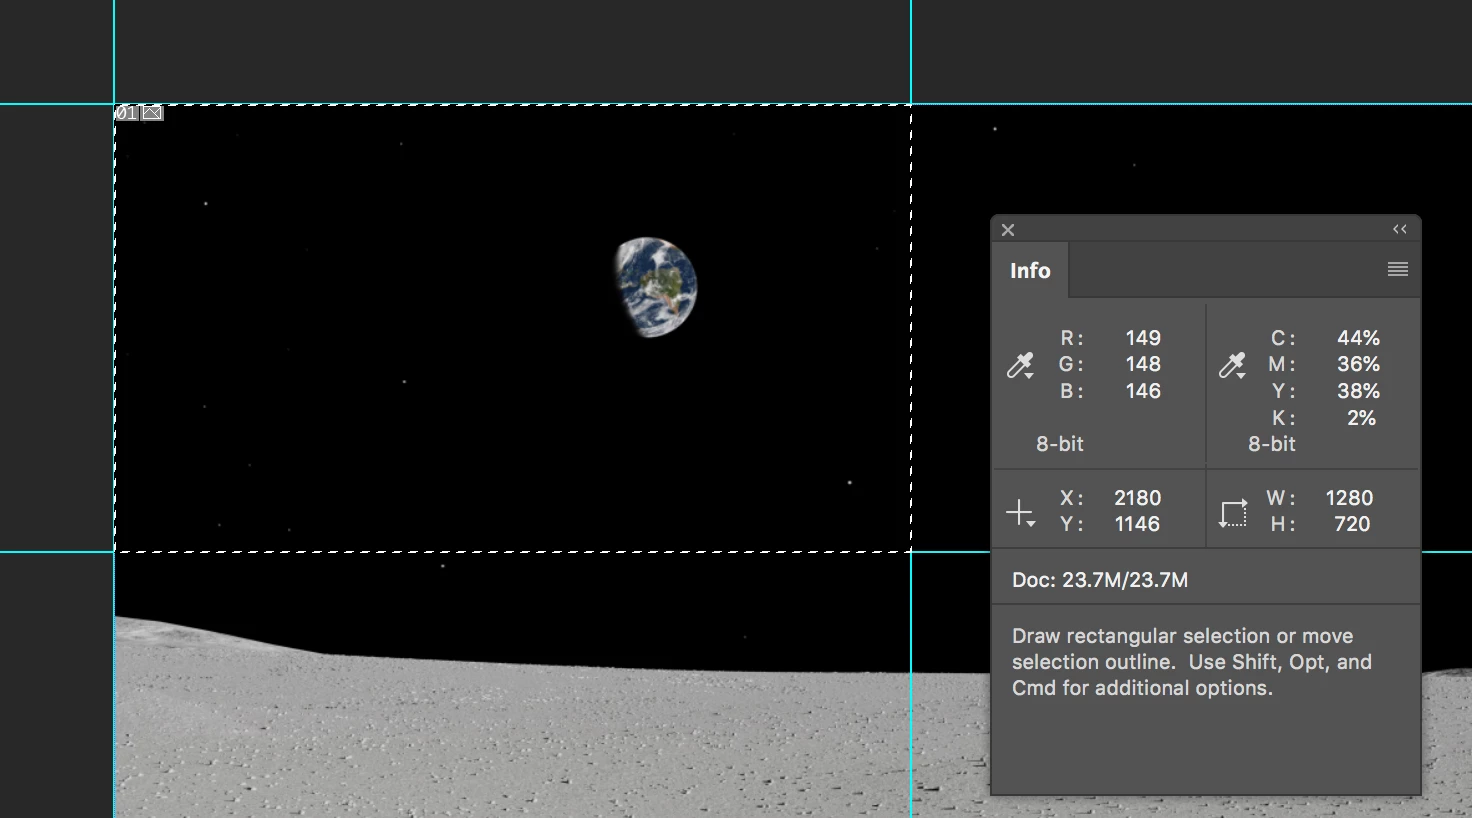
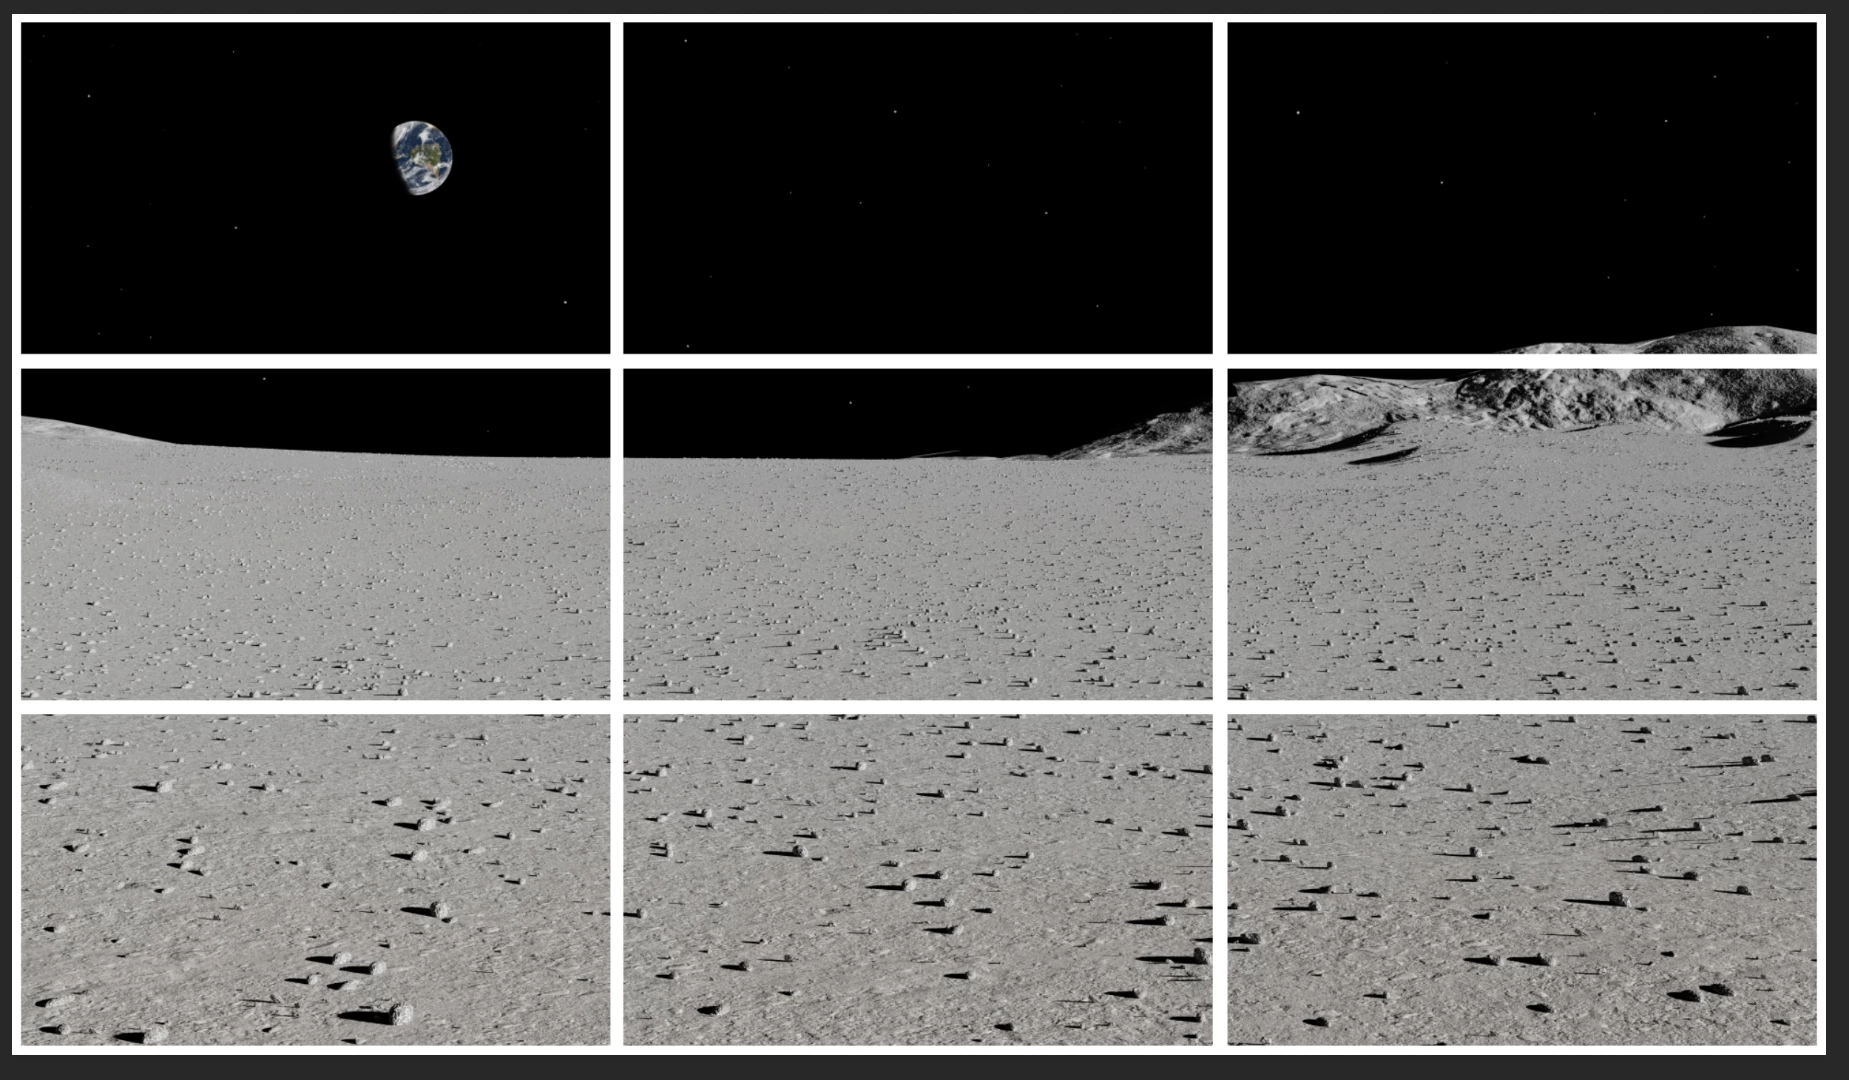
I have an image that I would like to cut (or crop, trim, whatever works best) into smaller, identically-sized images.  Let's say you have 9 small paintings on your living room wall in a 3x3 grid, with spaces between the paintings, and you take a picture of it.  (Assume that the paintings are identically sized and the grid is precisely placed.)  I'd like to separate that image into 3 strips - the top row, middle row, and bottom row.  And I'd like to ensure that all the strips are exactly the same in size, with the same border around the photos. 

How would you accomplish this?  I can think of a couple of ways to do it but they're a bit convoluted and are not exactly precise.  I feel like there's an easier way to go about this and I just don't know what it is.

Thanks!

This topic has been closed for replies.
Correct answer jane-e

caitlen  wrote

Let's say you have 9 small paintings on your living room wall in a 3x3 grid, with spaces between the paintings, and you take a picture of it.

Hi Caitlen,

Here's another way:

  • View > New Guide Layout > 3 columns, 3 rows
  • Draw a rectangular marquee across one section. Check the size in the info panel.
  • Set a fixed size for the rectangle marquee tool in the options bar.


  • Cmd+Shift+J to cut the selected rectangle to a new layer (Cmd+J to Copy)
  • Repeat, remembering to return to the composite layer each time
  • File > Export > Layers to Files


  • If you want them in the same image with a border: increase the size of the canvas, make a new guide layout with margins and gutters, then move the images. You can also align and distribute multiple layers using the options bar.

Photo credit: davescm​ in the weekly Photoshop Challenge from this week:
Re: Something for the weekend - Part 76 - Fly me to the moon!

Is this what you are looking for?

~ Jane

4 replies

JJMack
Community Expert
Community Expert
June 21, 2019

Dice with Guides Script

// Dice layer with according to guides;

// 2015, use it at your own risk;

#target photoshop

if (app.documents.length > 0) {

var myDocument = app.activeDocument;

var myResolution = myDocument.resolution;

var theLayer = myDocument.activeLayer;

var layerID = getLayerId(theLayer);

var originalRulerUnits = app.preferences.rulerUnits;

app.preferences.rulerUnits = Units.POINTS;

// check guides;

var theVer = new Array;

var theHor = new Array;

var theNumber = myDocument.guides.length;

for (var m = 0; m < theNumber; m++) {

if (myDocument.guides.direction == Direction.HORIZONTAL) {theHor.push(myDocument.guides.coordinate)};

if (myDocument.guides.direction == Direction.VERTICAL) {theVer.push(myDocument.guides.coordinate)};

};

// sort and add beginning and end;

theHor = treatGuideArray (theHor, app.activeDocument.height);

theVer = treatGuideArray (theVer, app.activeDocument.width);

$.writeln(theHor.join("\n")+"\n\n\n"+theVer.join("\n"));

// create selections;

for (var y = 0; y < theHor.length - 1; y++) {

var Y1 = theHor;

var Y2 = theHor[y+1];

for (var x = 0; x < theVer.length - 1; x++) {

try {

var X1 = theVer;

var X2 = theVer[x+1];

rectangularSelection([Y1, X1, Y2, X2], false);

// layer via copy;

var id14 = charIDToTypeID( "CpTL" );

executeAction( id14, undefined, DialogModes.NO );

// add mask;

intersectedLayerMask (layerID)

} catch (e) {};

// reselct layer;

myDocument.activeLayer = theLayer;

};

};

activeDocument.selection.deselect();

// reset the ruler units;

app.preferences.rulerUnits = originalRulerUnits

};

////////////////// the functions //////////////////

////// treat array //////

function treatGuideArray (theArray, theExtreme) {

theArray.sort(function(a,b){return a - b});

if (Number (theArray[theArray.length - 1]) != theExtreme) {theArray.push(theExtreme)};

if (Number (theArray[0]) != 0) {theArray.unshift(new UnitValue(0, "pt"))};

theArray.sort(function(a,b){return a - b});

return theArray;

};

////// rectangular selection //////

function rectangularSelection (theBounds, add) {

// =======================================================

if (add == false ||  add == undefined) {var idsetd = charIDToTypeID( "setd" )}

else {var idsetd = charIDToTypeID( "AddT" )};

var desc55 = new ActionDescriptor();

var idnull = charIDToTypeID( "null" );

var ref11 = new ActionReference();

var idChnl = charIDToTypeID( "Chnl" );

var idfsel = charIDToTypeID( "fsel" );

ref11.putProperty( idChnl, idfsel );

desc55.putReference( idnull, ref11 );

var idT = charIDToTypeID( "T   " );

var desc56 = new ActionDescriptor();

var idTop = charIDToTypeID( "Top " );

var idRlt = charIDToTypeID( "#Rlt" );

desc56.putUnitDouble( idTop, idRlt, theBounds[0] );

var idLeft = charIDToTypeID( "Left" );

var idRlt = charIDToTypeID( "#Rlt" );

desc56.putUnitDouble( idLeft, idRlt, theBounds[1] );

var idBtom = charIDToTypeID( "Btom" );

var idRlt = charIDToTypeID( "#Rlt" );

desc56.putUnitDouble( idBtom, idRlt, theBounds[2] );

var idRght = charIDToTypeID( "Rght" );

var idRlt = charIDToTypeID( "#Rlt" );

desc56.putUnitDouble( idRght, idRlt, theBounds[3] );

var idRctn = charIDToTypeID( "Rctn" );

desc55.putObject( idT, idRctn, desc56 );

executeAction( idsetd, desc55, DialogModes.NO );

};

// by mike hale, via paul riggott;

function getLayerId(theLayer){

// http://forums.adobe.com/message/1944754#1944754

app.activeDocument.activeLayer = theLayer;

//Assumes activeDocument and activeLayer

var ref = new ActionReference();

ref.putEnumerated(charIDToTypeID("Lyr "), charIDToTypeID("Ordn"), charIDToTypeID("Trgt"));

d = executeActionGet(ref);

return d.getInteger(charIDToTypeID('LyrI'));

};

////// load transparency, ontersect with layer mask ofd another layer, add layer mask //////

function intersectedLayerMask (layerID) {

var idChnl = charIDToTypeID( "Chnl" );

// =======================================================

var idsetd = charIDToTypeID( "setd" );

var desc2 = new ActionDescriptor();

var idnull = charIDToTypeID( "null" );

var ref1 = new ActionReference();

var idfsel = charIDToTypeID( "fsel" );

ref1.putProperty( idChnl, idfsel );

desc2.putReference( idnull, ref1 );

var idT = charIDToTypeID( "T   " );

var ref2 = new ActionReference();

var idTrsp = charIDToTypeID( "Trsp" );

ref2.putEnumerated( idChnl, idChnl, idTrsp );

desc2.putReference( idT, ref2 );

executeAction( idsetd, desc2, DialogModes.NO );

// =======================================================

var idIntr = charIDToTypeID( "Intr" );

var desc3 = new ActionDescriptor();

var idnull = charIDToTypeID( "null" );

var ref3 = new ActionReference();

var idMsk = charIDToTypeID( "Msk " );

ref3.putEnumerated( idChnl, idChnl, idMsk );

var idLyr = charIDToTypeID( "Lyr " );

ref3.putIdentifier( idLyr, layerID );

desc3.putReference( idnull, ref3 );

var idWith = charIDToTypeID( "With" );

var ref4 = new ActionReference();

var idfsel = charIDToTypeID( "fsel" );

ref4.putProperty( idChnl, idfsel );

desc3.putReference( idWith, ref4 );

executeAction( idIntr, desc3, DialogModes.NO );

// =======================================================

var idMk = charIDToTypeID( "Mk  " );

var desc4 = new ActionDescriptor();

var idNw = charIDToTypeID( "Nw  " );

desc4.putClass( idNw, idChnl );

var idAt = charIDToTypeID( "At  " );

var ref5 = new ActionReference();

var idMsk = charIDToTypeID( "Msk " );

ref5.putEnumerated( idChnl, idChnl, idMsk );

desc4.putReference( idAt, ref5 );

var idUsng = charIDToTypeID( "Usng" );

var idUsrM = charIDToTypeID( "UsrM" );

var idRvlS = charIDToTypeID( "RvlS" );

desc4.putEnumerated( idUsng, idUsrM, idRvlS );

executeAction( idMk, desc4, DialogModes.NO );

};

JJMack
jane-e
Community Expert
jane-eCommunity ExpertCorrect answer
Community Expert
June 21, 2019

caitlen  wrote

Let's say you have 9 small paintings on your living room wall in a 3x3 grid, with spaces between the paintings, and you take a picture of it.

Hi Caitlen,

Here's another way:

  • View > New Guide Layout > 3 columns, 3 rows
  • Draw a rectangular marquee across one section. Check the size in the info panel.
  • Set a fixed size for the rectangle marquee tool in the options bar.


  • Cmd+Shift+J to cut the selected rectangle to a new layer (Cmd+J to Copy)
  • Repeat, remembering to return to the composite layer each time
  • File > Export > Layers to Files


  • If you want them in the same image with a border: increase the size of the canvas, make a new guide layout with margins and gutters, then move the images. You can also align and distribute multiple layers using the options bar.

Photo credit: davescm​ in the weekly Photoshop Challenge from this week:
Re: Something for the weekend - Part 76 - Fly me to the moon!

Is this what you are looking for?

~ Jane

Nancy OShea
Community Expert
Community Expert
June 20, 2019

Go to View > Show > Grid.  You can adjust the size & color of your grid lines in Preferences.  In this example, I have a grid line every 1 inch with 6 subdivisions.   Your image size may vary so feel free to experiment with grid  values.

Next go to View > Snap to > Grid.   Using the single row and single column marquee tools with add to selection chosen, I selected several areas from my image and hit the backspace key to  reveal a transparent background layer below the daisy.

Result with single row and single columns redacted from image.

Nancy O'Shea— Product User & Community Expert
JJMack
Community Expert
Community Expert
June 20, 2019

Are the paintings on the wall in their own  Photoshop layer?   If  so select the three image layers you want transparency and do a copy merge and paste that should paste in a layer with the three image you want.

If you take a picture they will not be identical. You be very lucky to even take the picture straight and level.  How were the pictures so perfectly mounted on the wall

JJMack
Lisa Di Paola
Inspiring
June 21, 2019

Sorry about asking a question and then disappearing - we had a storm come through and our power went out.

What I'm actually working with is a mockup that has a 3x3 grid of frames on a wall, but I need to expand it to 4x4. At first, I had just cut out each frame and pasted them onto a new project, but I'm having to fiddle with the sizing and placement on the new project and I figured there had to be a more consistent way to do it.  I think jane-e​'s solution will probably work best for this.

I'd never be able to get actual photos mounted to my wall this precisely!

jane-e
Community Expert
Community Expert
June 21, 2019

caitlen  wrote

I think jane-e 's solution will probably work best for this.

I'd never be able to get actual photos mounted to my wall this precisely!

Hi Caitlen,

I’m glad this will work for you. It was fun to do, so thanks for that!

Here are a few other thoughts I had after I finished:

I didn’t say it, but confirm that Snap to Guides and Smart Guides are on.

Setting the the rectangle options to the exact size of a one section makes it easy to select the next section perfectly and fast — just click, then drag the selection to the next area.

I didn’t do it, but make a copy of your original image layer and hide it in case there is another edit next week or next month.

My measurements weren’t very precise when I did the separations with borders, so I selected the layers in each row and aligned tops using the options bar, then aligned the columns to the left, center, and right respectively. You can also distribute for the spacing. I would have taken more time with that part for accuracy if it had been more than a mockup.

And name your layers — I didn’t. I would go with a spreadsheet syntax of either A1 B1 C1 or R1C1 R1C2 R1C3 for clarity. It will help if you need to multiple-select layers later and nudge a column or row with the arrow keys.

No, I can’t hang photos on the wall precisely either — but we can be very precise when using Photoshop!

Cheers,

Jane