• Global community
    • Language:
      • Deutsch
      • English
      • Español
      • Français
      • Português
  • 日本語コミュニティ
    Dedicated community for Japanese speakers
  • 한국 커뮤니티
    Dedicated community for Korean speakers
Exit
1

Blending image into black background

New Here ,
Aug 04, 2018 Aug 04, 2018

Copy link to clipboard

Copied

Hi everyone

I'm very new to photoshop so slowly working my way round it. Apologies for asking what may seem a very simple question. I am playing with an image and all i am looking to do is just blend the image into my black background. I just cant figure out how to achieve this. I have my image and an example image below to what i am trying to achieve. Ideally i want to blend it into the background to hide the straight edge on the right hand side of the image.

My image

big5.jpg

How i want my image to look

Screen Shot 2018-08-05 at 07.50.05.png

Really appreciate any advice

Thank very much

Rufus

Views

8.5K

Translate

Translate

Report

Report
Community guidelines
Be kind and respectful, give credit to the original source of content, and search for duplicates before posting. Learn more
community guidelines
Adobe
Community Expert ,
Aug 05, 2018 Aug 05, 2018

Copy link to clipboard

Copied

Hi

Add a new layer filled with black (SHIFT +F5) and move it to the bottom of the layer stack by dragging it down in the layers panel.

Add a layer mask to your original image layer using Layer ..Layer Mask..Reveal selection

Now click on the mask in the layers panel and with a soft brush (0% hardness), set to black, paint on the image. You are actually painting on the mask.

Where the mask is white it will show the image on the layer. Where the mask is black it will hide the image and allow the black layer below to show through. Grey is semi transparent. So switch between the black and white brush until you have the effect you want.

Dave

Votes

Translate

Translate

Report

Report
Community guidelines
Be kind and respectful, give credit to the original source of content, and search for duplicates before posting. Learn more
community guidelines
Community Expert ,
Aug 05, 2018 Aug 05, 2018

Copy link to clipboard

Copied

You will first need to convert your image layer to a normal layer if you image is in Photoshop background layer.  No layer can be move below a background layer and background layer can not be masked for it does not support transparency.  If you hold down the Alt  or option  key and click on the add layer mask icon in the layers palette the targeted Background will be converted to a normal layer and a hide all layer mask will be added. The layer mask will be Photoshop's current target  and the layer will look empty. Switch to a white soft large paint brush and paint over you subject to reveal your animal subject in the masked layer.  Then Hold down  the Crtr or CMD key and click on the Add layer icon in the layers palette to add an empty layer below your image layer. Fill that layer with the background color you want like black.

JJMack

Votes

Translate

Translate

Report

Report
Community guidelines
Be kind and respectful, give credit to the original source of content, and search for duplicates before posting. Learn more
community guidelines
Community Expert ,
Aug 05, 2018 Aug 05, 2018

Copy link to clipboard

Copied

Just to add a tiny bit to what Dave and JJ had said.

And note that I placed the black layer above the leopard layer, and added the layer mask to that

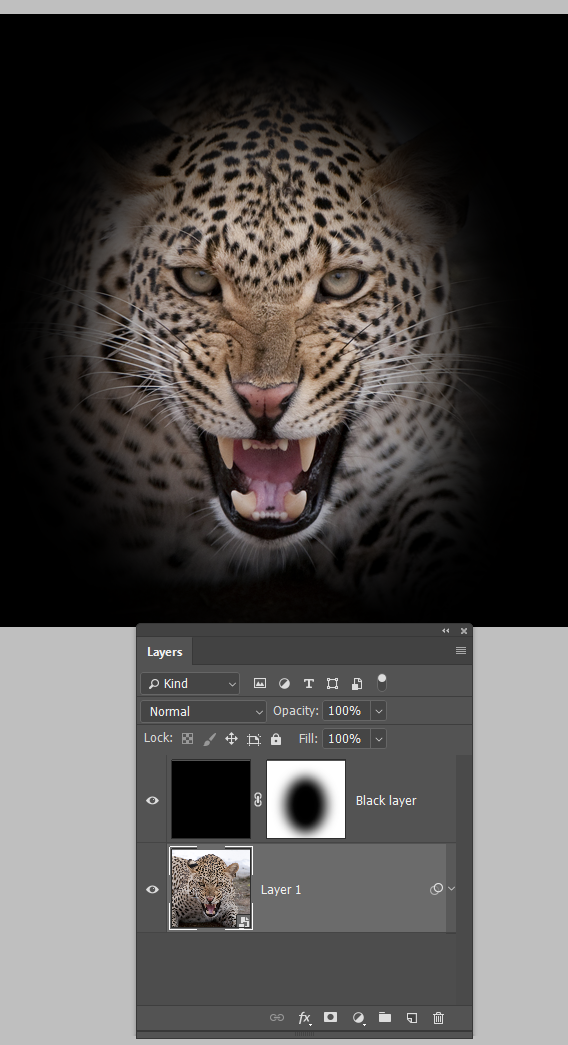
You have some useful options in Mask Properties.

My mask is fully hard

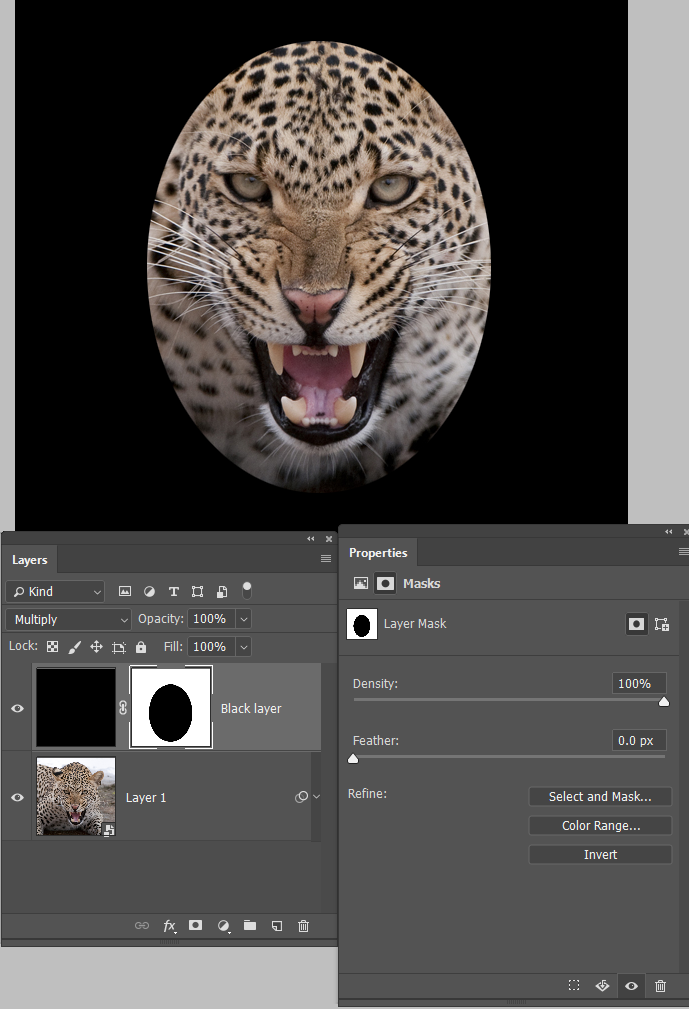
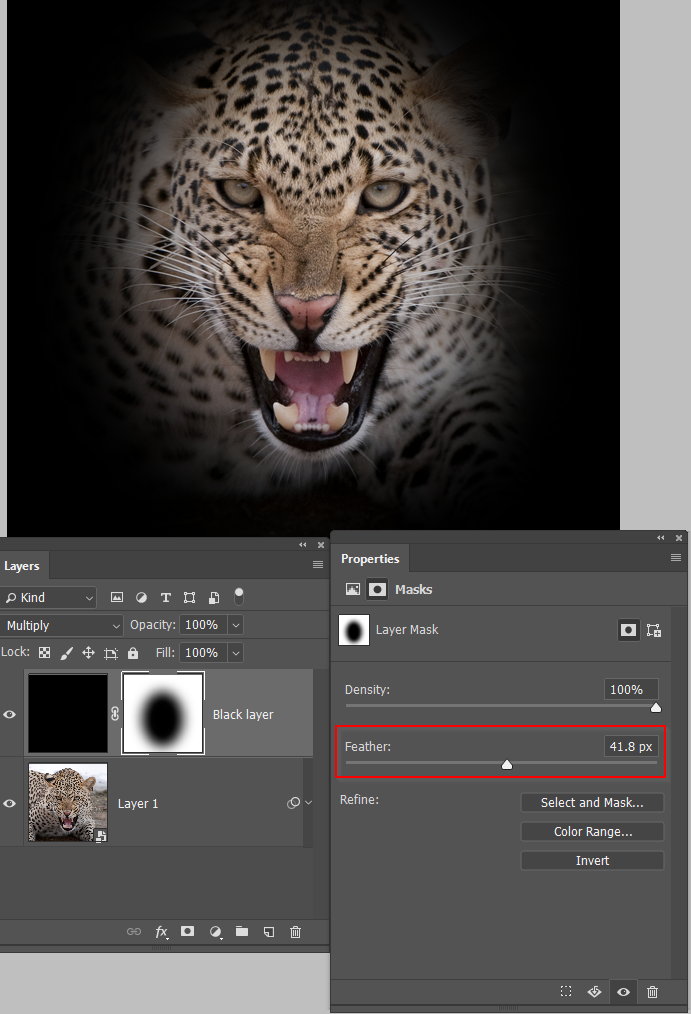
I can feather it non destructively in Mask Properties

I can also unlink the mask from the layer contents, and move it around (I clicked to turn off the chain link between the layer thumbnail and mask.

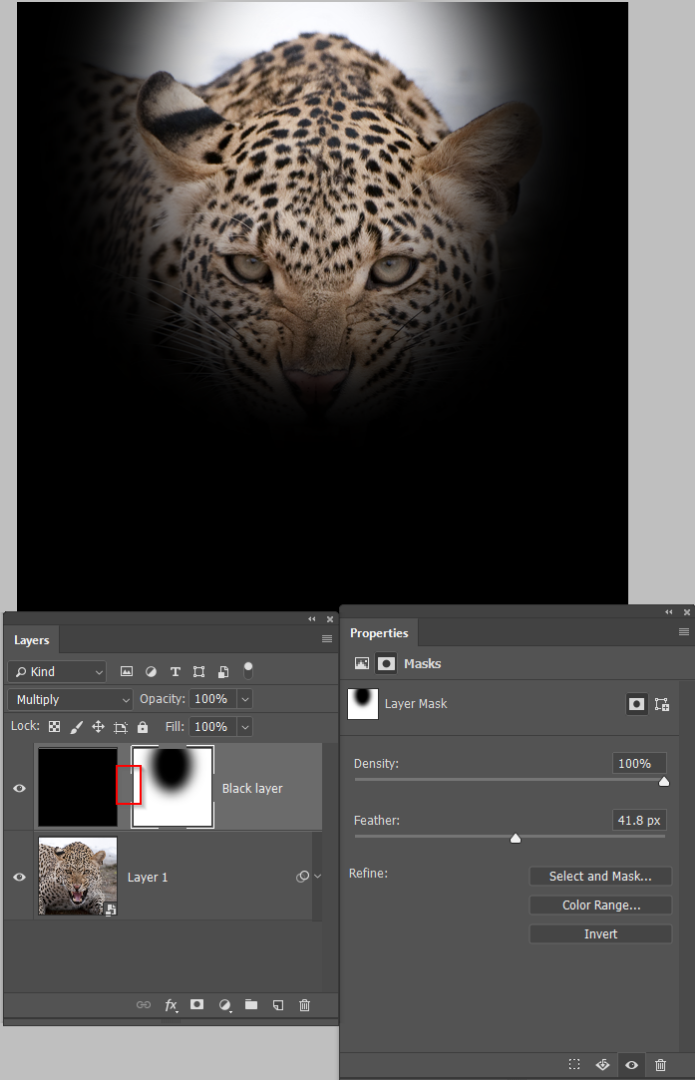
I can also Free Transform the mask to better fit the image (The mask needs to be unlinked for this).

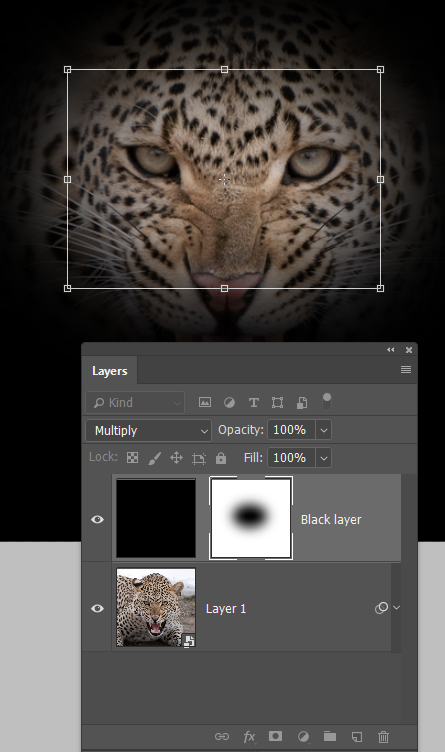
i like this approach both for its non-destructive affect, and its flexability.

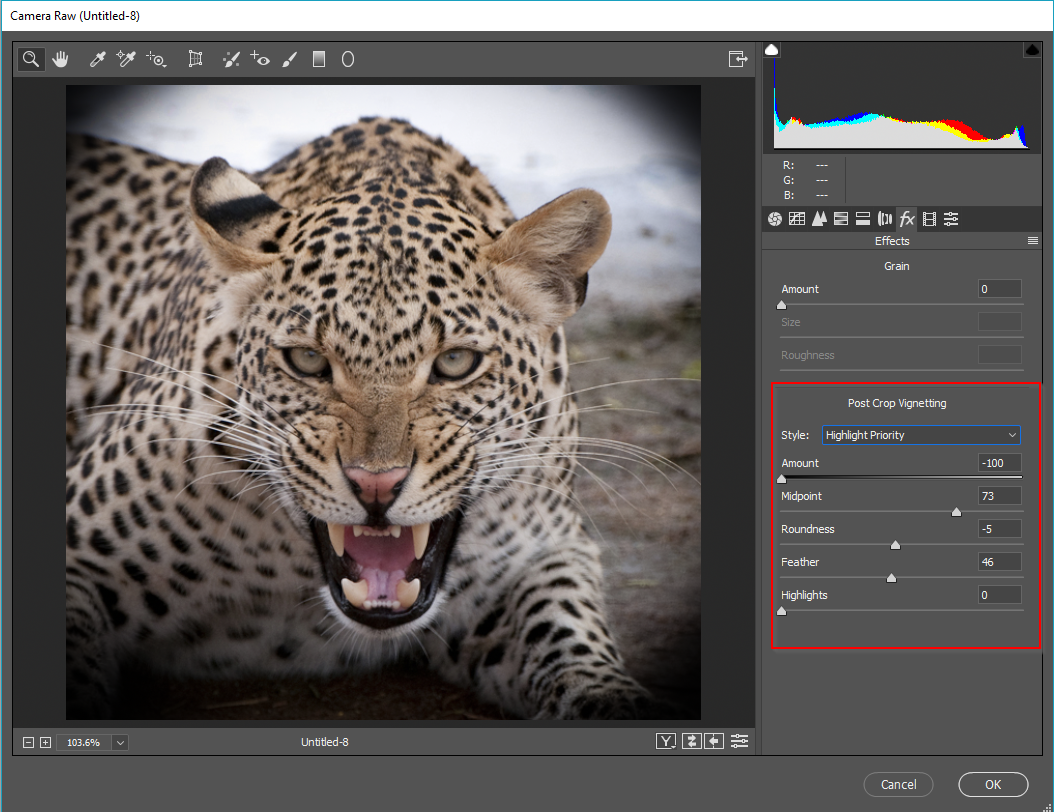
Something else I use a lot is Camera RAW > fx > Post Crop Vignette which has a lovely soft gradient.  If you make the layer a Smart Object, this is also non-destructive, but is limited in how far the vignette can extend into the scene

Votes

Translate

Translate

Report

Report
Community guidelines
Be kind and respectful, give credit to the original source of content, and search for duplicates before posting. Learn more
community guidelines
New Here ,
Aug 06, 2018 Aug 06, 2018

Copy link to clipboard

Copied

LATEST

Thank you so much everyone for all your help I am very grateful, i shall have a play with this tonight and see how i get on.

Trevor - Can i ask how you made the round selection? was that just using the round marquee tool? Sorry to sound silly, im currently taking a photoshop course as we speak 🙂

Thanks again

Liam

Votes

Translate

Translate

Report

Report
Community guidelines
Be kind and respectful, give credit to the original source of content, and search for duplicates before posting. Learn more
community guidelines