- Home
- Photoshop ecosystem
- Discussions
- Re: Can someone please sketch this photo to help m...
- Re: Can someone please sketch this photo to help m...
Copy link to clipboard
Copied
I need to see what a photo looks like when someone paints it. I am trying to learn hyper-realistic drawing. It could be in color or grayscale. I need to see something other than a ball or cube or cone in order to learn value, shading, etc.
I am at the beginning of my art journey, and only sketched cartoon-like drawings. Thanks so much in advance.
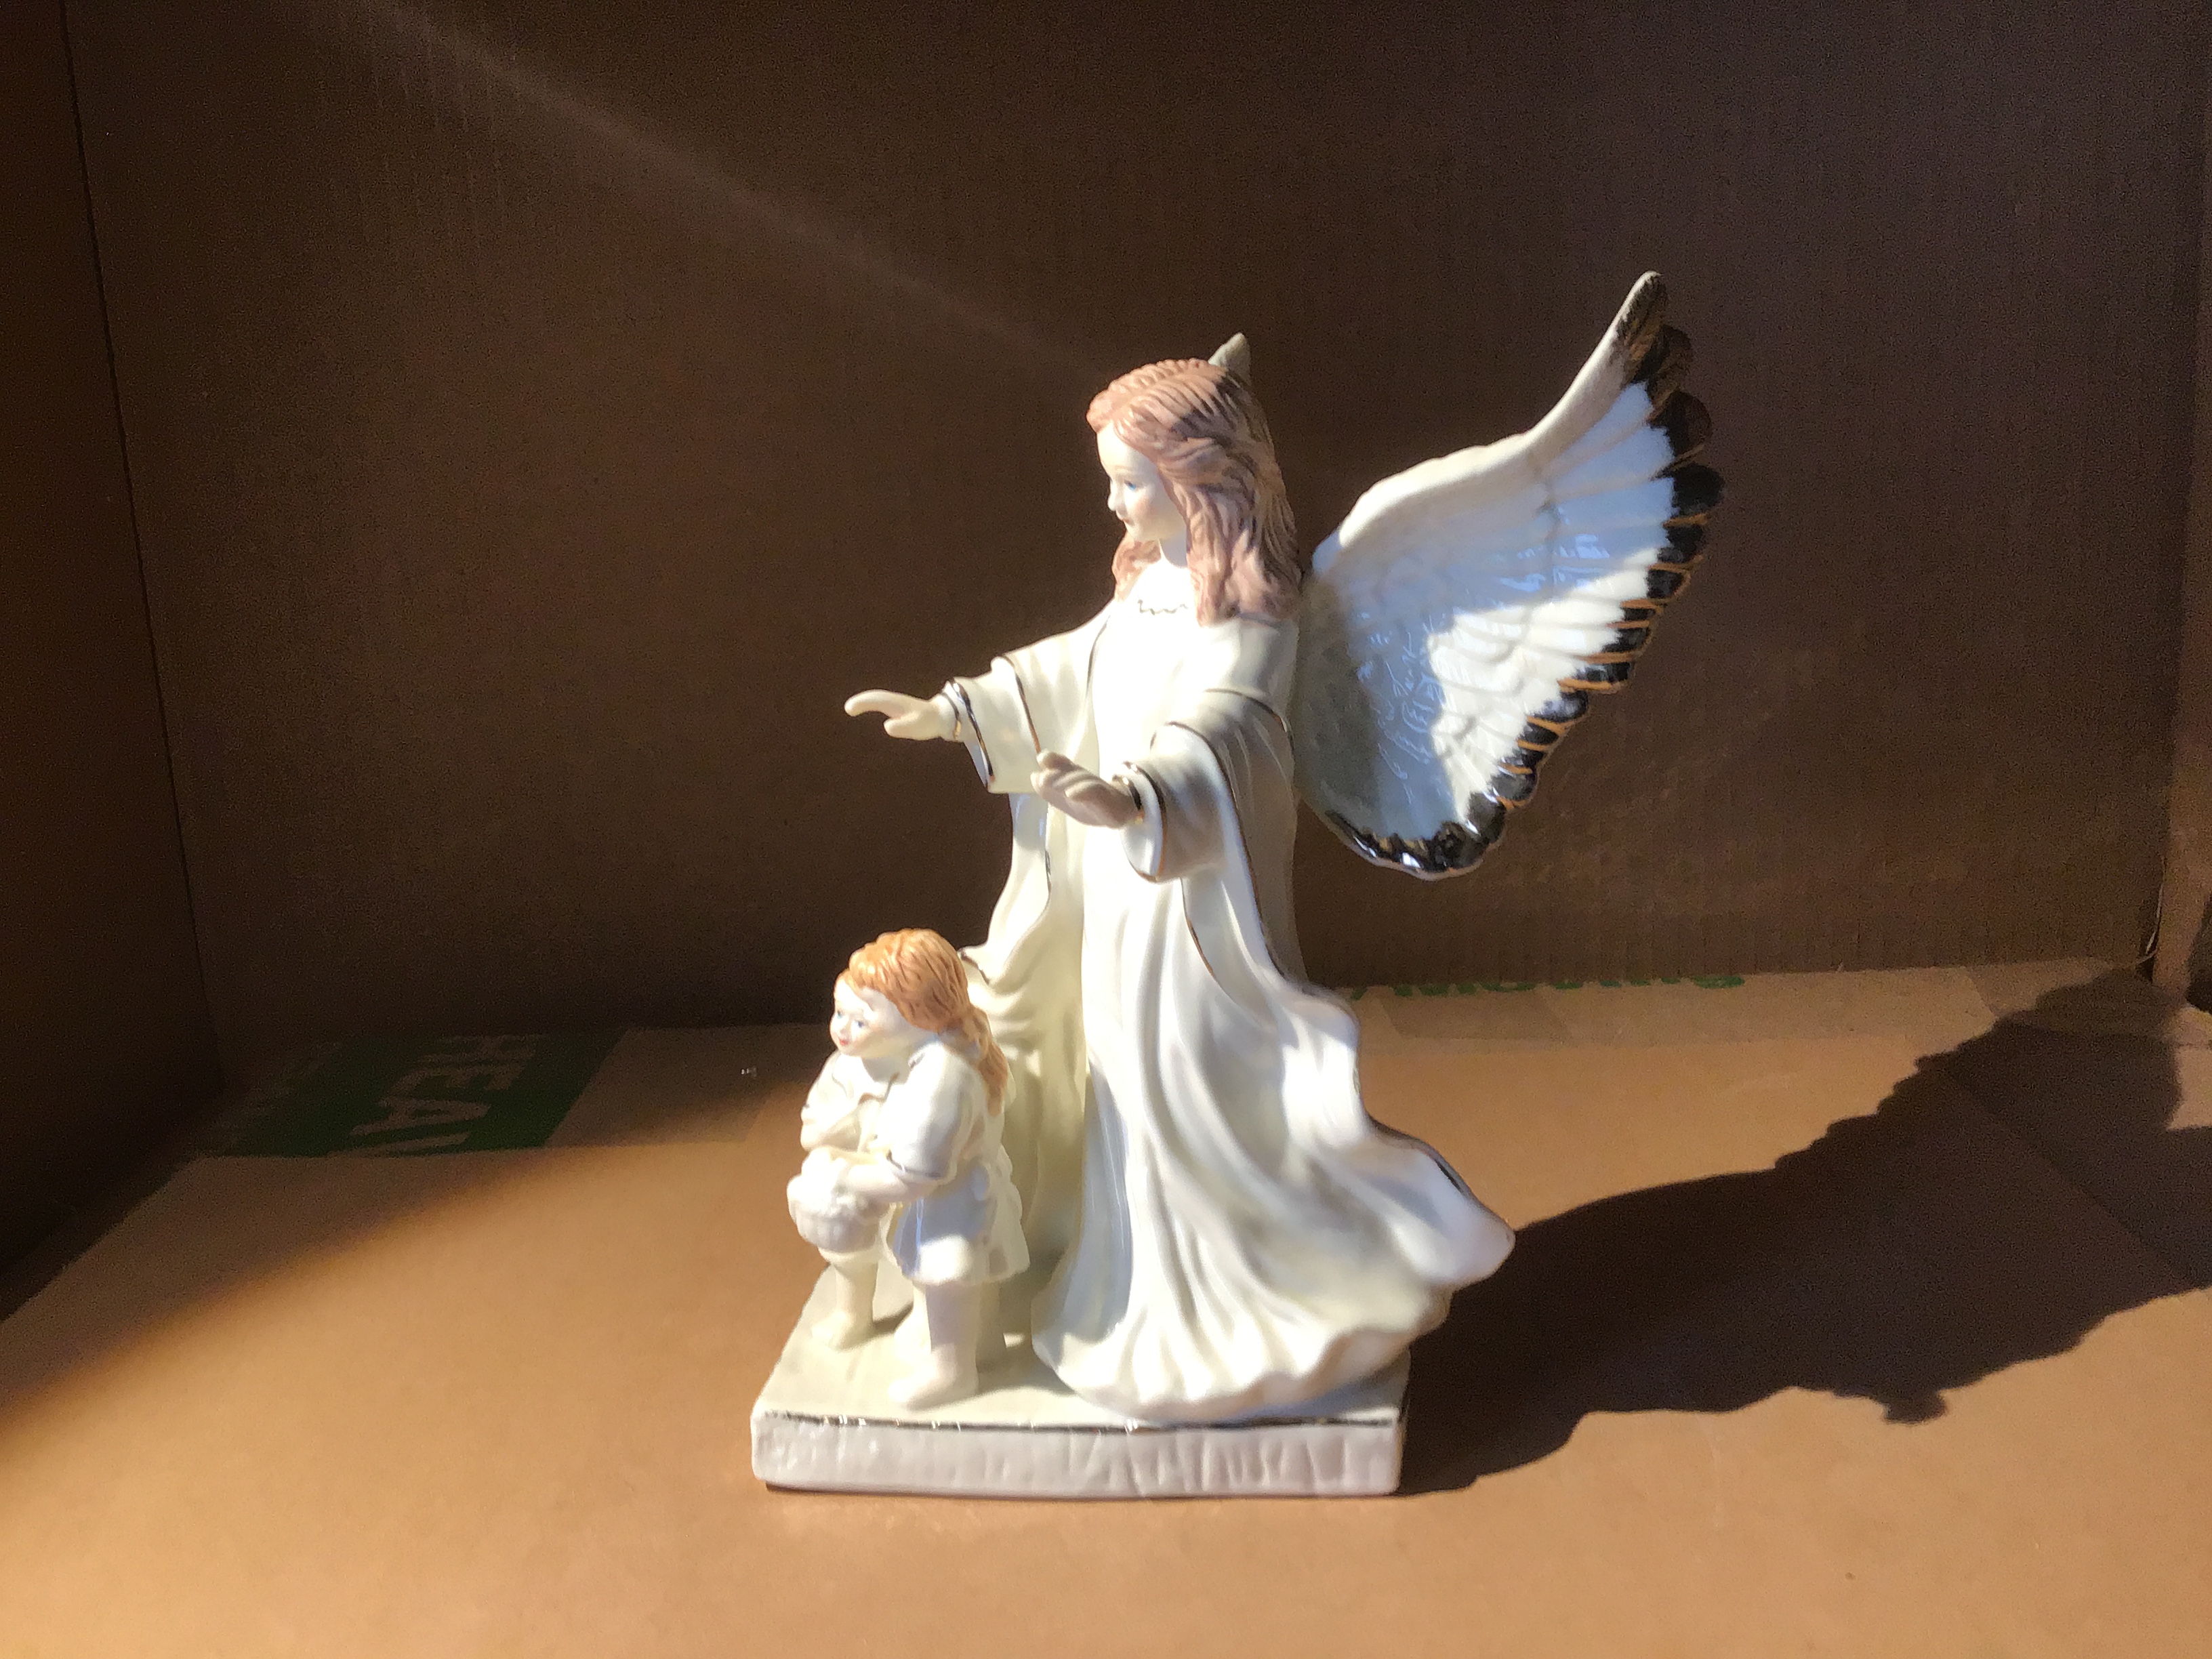
 1 Correct answer
Hi
Are you wanting to simulate a sketched effect? If so you could try something like this:
1. Put the image in a smart object and duplicate it 3 times
2. On the first use the Find Edges filter
3. On the second use the Filter Gallery "Graphic Pen" Set the blend mode to Multiply

4. On the third use the Filter Gallery Graphic Pen with different angle shading and different Light /Dark balance. Set this layer to Linear Burn

5. Add a black and White adjustment layer

You can play around with the settings and
...Explore related tutorials & articles
Copy link to clipboard
Copied
Hi
Are you wanting to simulate a sketched effect? If so you could try something like this:
1. Put the image in a smart object and duplicate it 3 times
2. On the first use the Find Edges filter
3. On the second use the Filter Gallery "Graphic Pen" Set the blend mode to Multiply

4. On the third use the Filter Gallery Graphic Pen with different angle shading and different Light /Dark balance. Set this layer to Linear Burn

5. Add a black and White adjustment layer

You can play around with the settings and blend modes until you get the effect you like
Dave
Copy link to clipboard
Copied
I had no idea you could do this with Photoshop. I am not as familiar with the software as you obviously are, so I had issues with:
2. On the first use the Find Edges filter (where do I find this....I looked in the Filter drop down, didn't see it.
I found the Graphic Pen, but don't know how to set "blend mode to multiply".
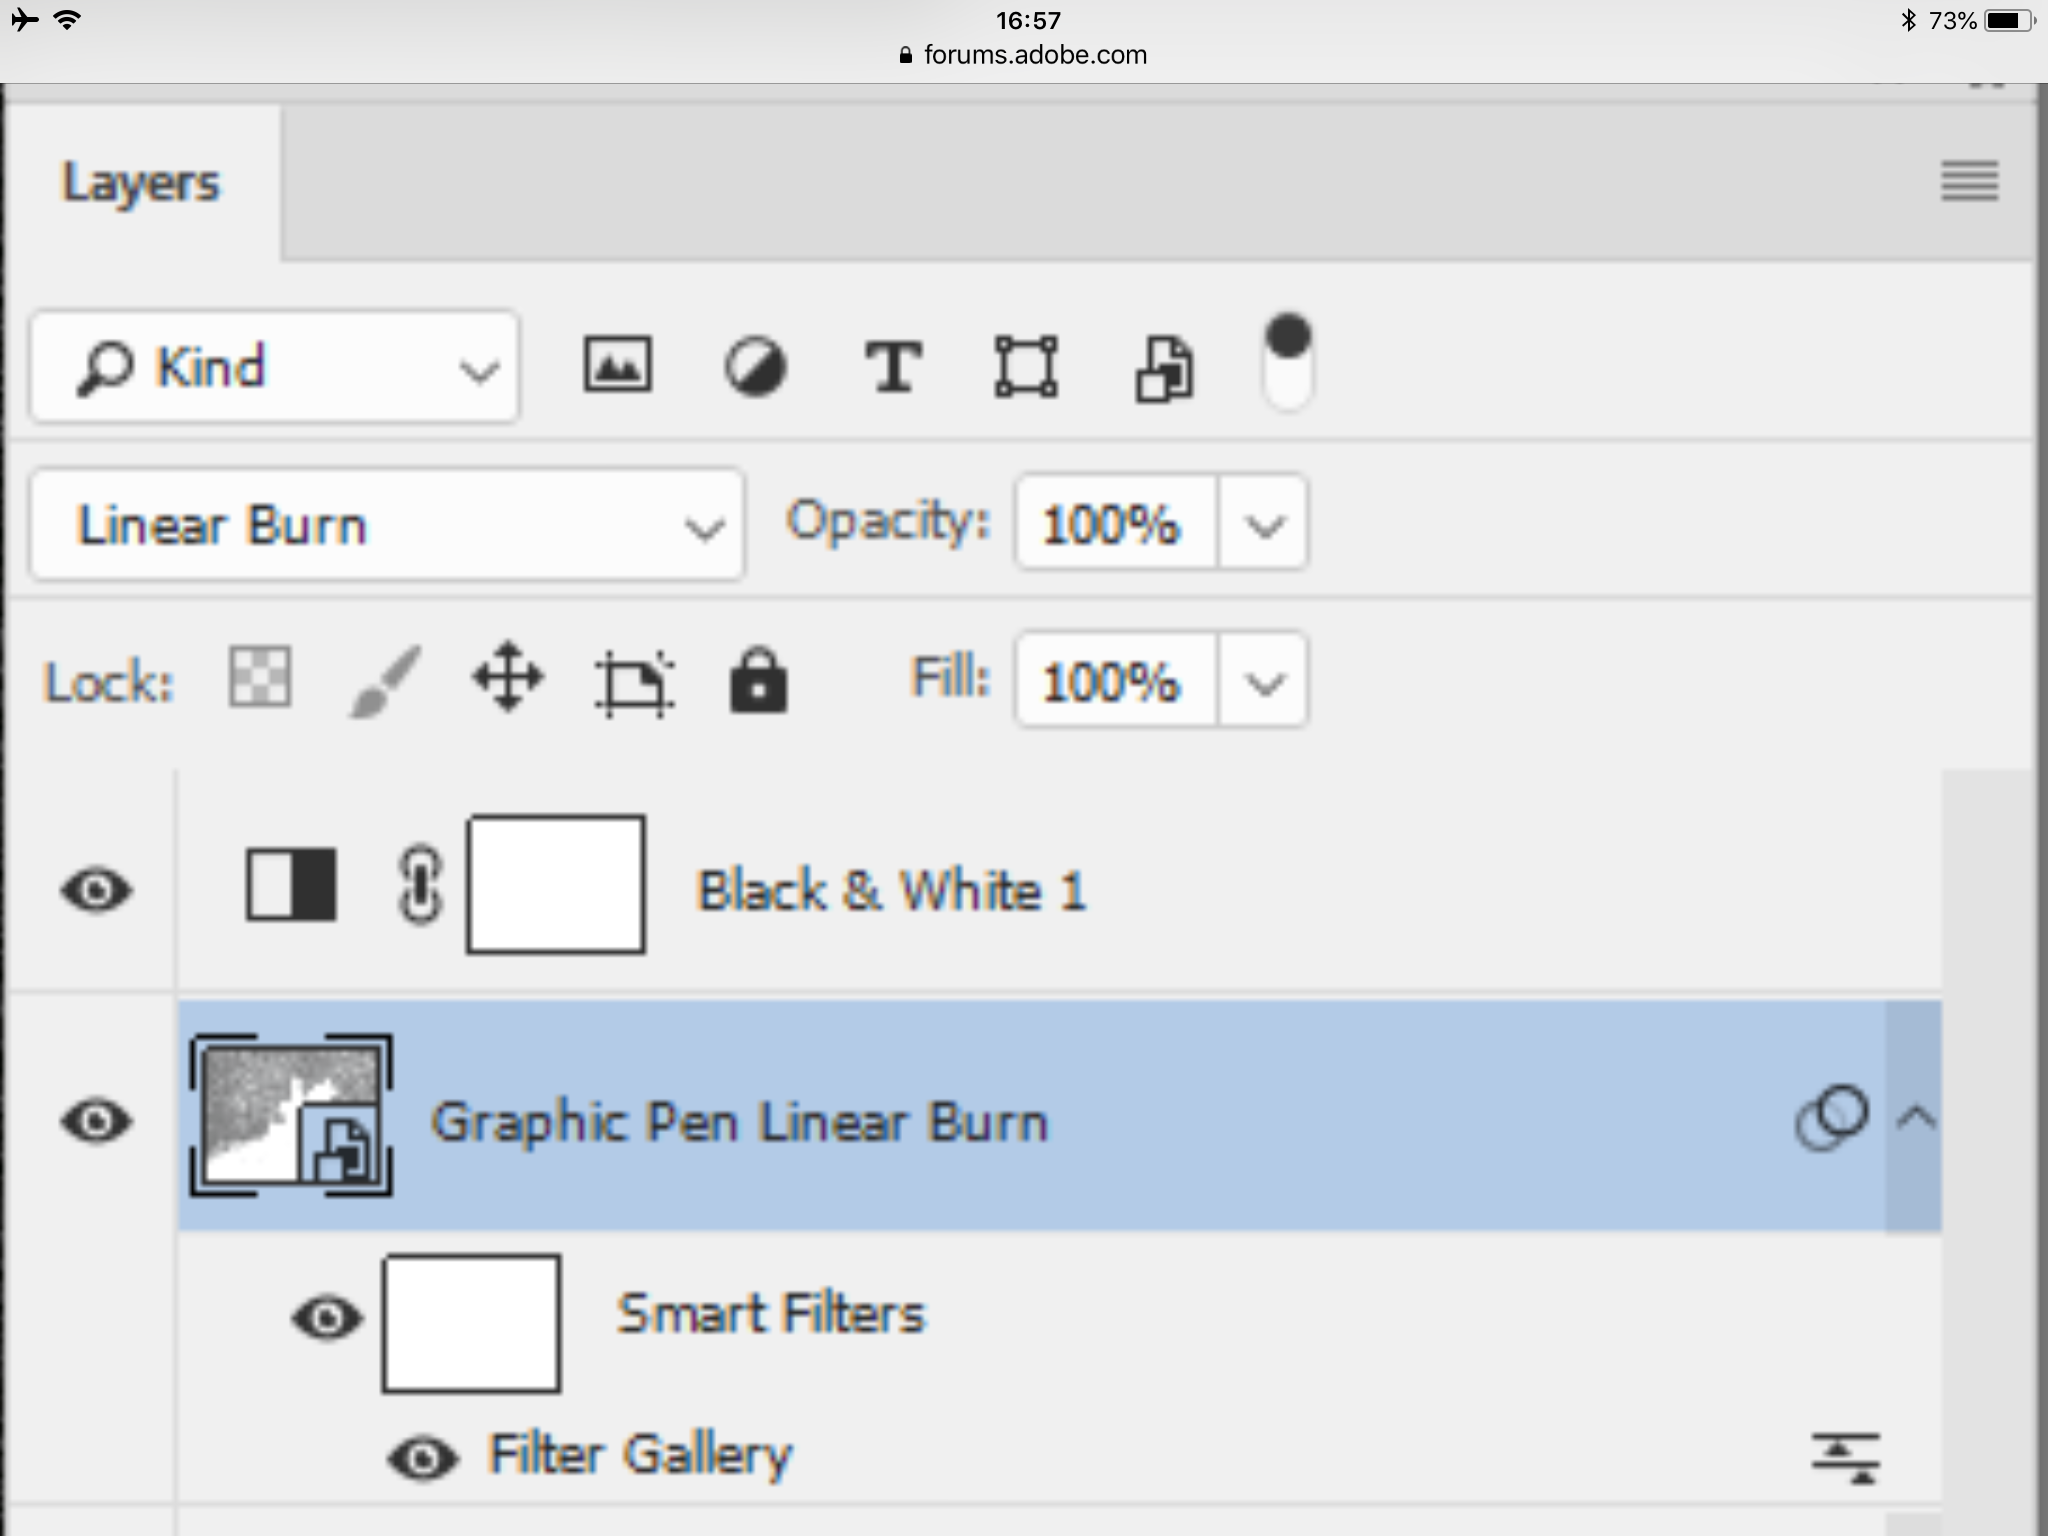
How do I "set layer to linear burn"?
Can you make it look like a grayscale oil painting as well? You are evidently a Photoshop wizard!
Copy link to clipboard
Copied
Hi
I am not at my PC at present so from memory Find Edges is in the menu Filter - Stylise
The Blending modes, multiply and linear burn are in the layers panel. Select the layer and then change the blending mode - the default is normal.
I'll be back in the office tomorrow but in the meantime I'm sure one of the others will answer any questions.
Dave
Copy link to clipboard
Copied
Hi, attached is the result of following your steps....it doesn't look quite as much like a sketch as yours, so feedback is welcome.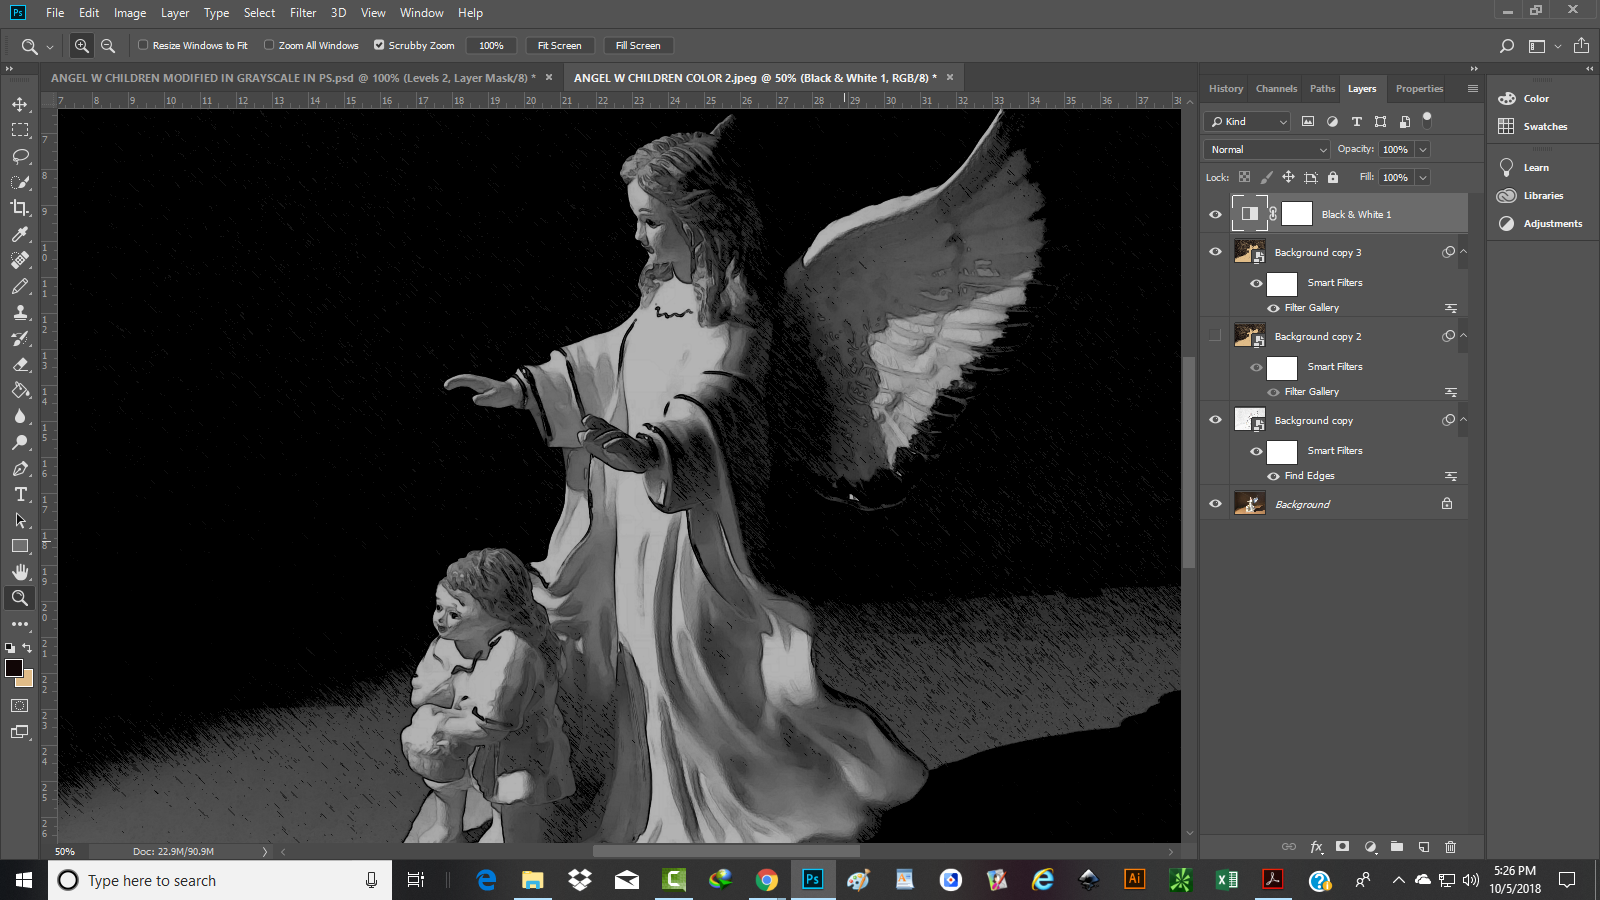
Copy link to clipboard
Copied
sheana2014 wrote
Hi, attached is the result of following your steps....it doesn't look quite as much like a sketch as yours, so feedback is welcome.
Hi Sheana,
First, name your layers as Dave has done to avoid confusion later. Then double-click each of the filters, i.e., “Find Edges”. Try to match the settings to his exactly, then close the dialog box. If it still doesn’t work, then post those screen shots so we can troubleshoot them. And by “we”, I mean most likely Dave, when he is back in his office, but maybe someone else.
I am also not in my office, so I am going from memory here. I think Find Edges does not have a dialog box, so you only need the other two. Also, make sure the layers are in the correct order. With generic names, it’s hard to keep track of that.
Copy link to clipboard
Copied
Hi
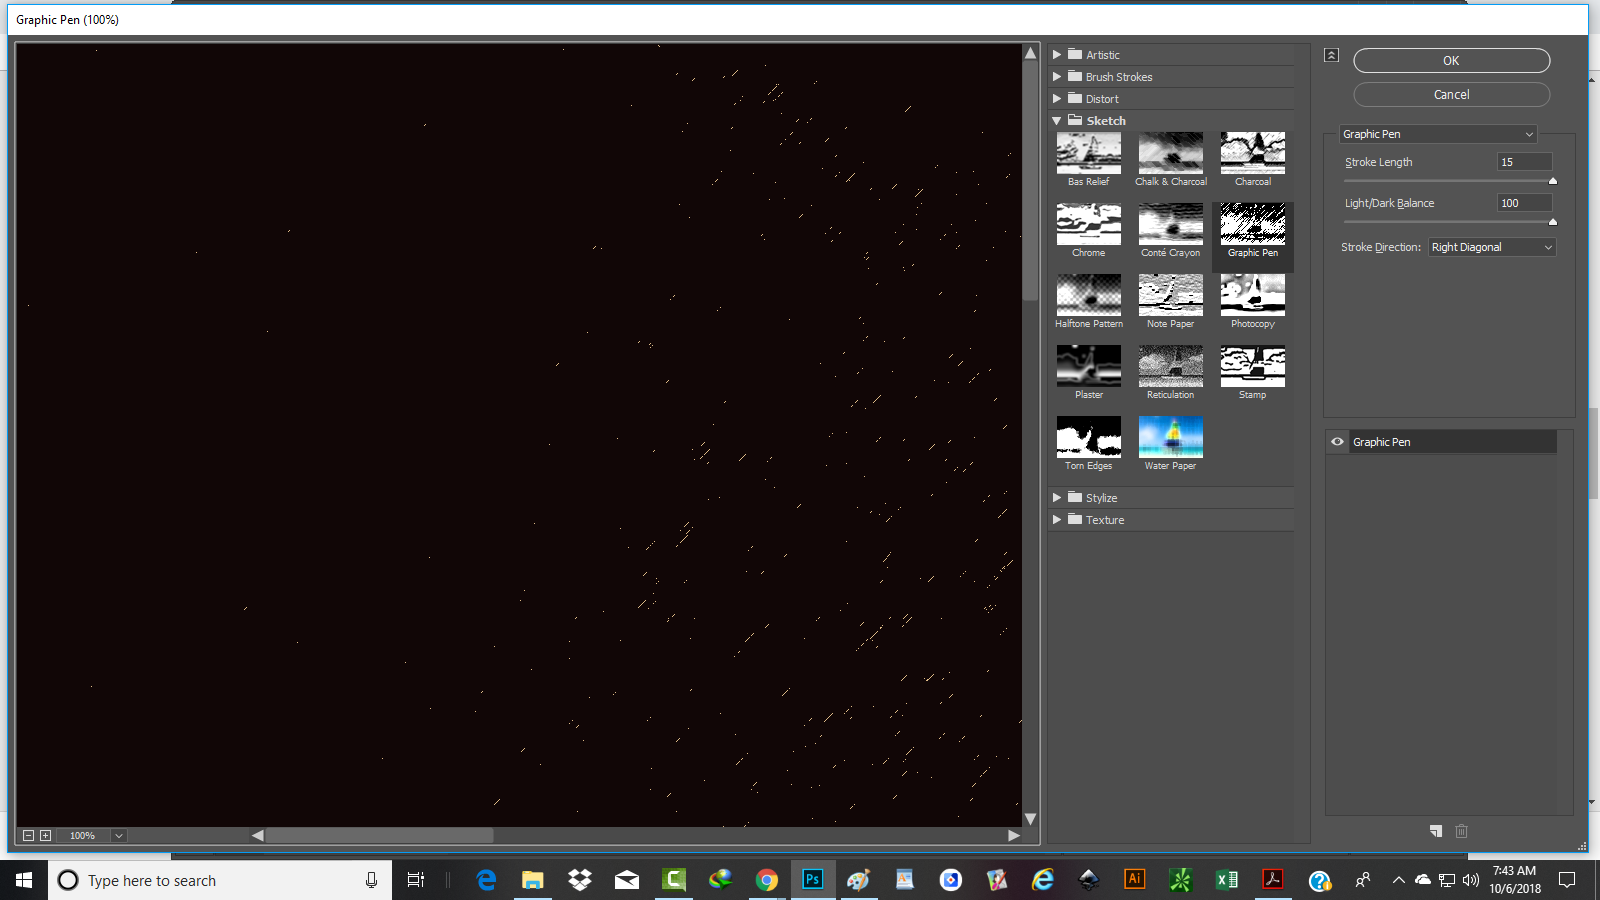
If you are not getting the same results, can you show your filter settings and the blending mode you have used for each layer (I also notice you have one of the layers turned off)
Dave
Copy link to clipboard
Copied
Hi, I tried again following suggestion from jane-e, and named the layers. I couldn't find a way to view any settings on Find Edges/
All blending modes are Normal except for Linear burn, opacity is 100% and Fill is 100%. It seems closer to yours than the first image I uploaded, but outline is not as clear besides other differences.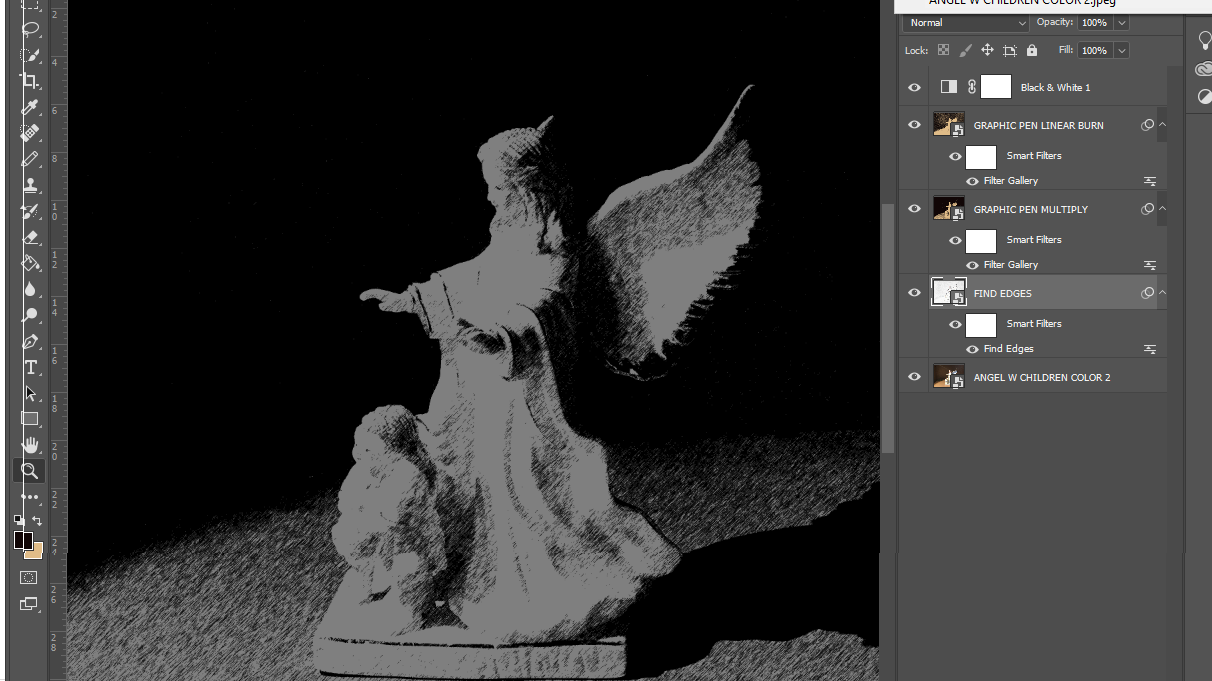
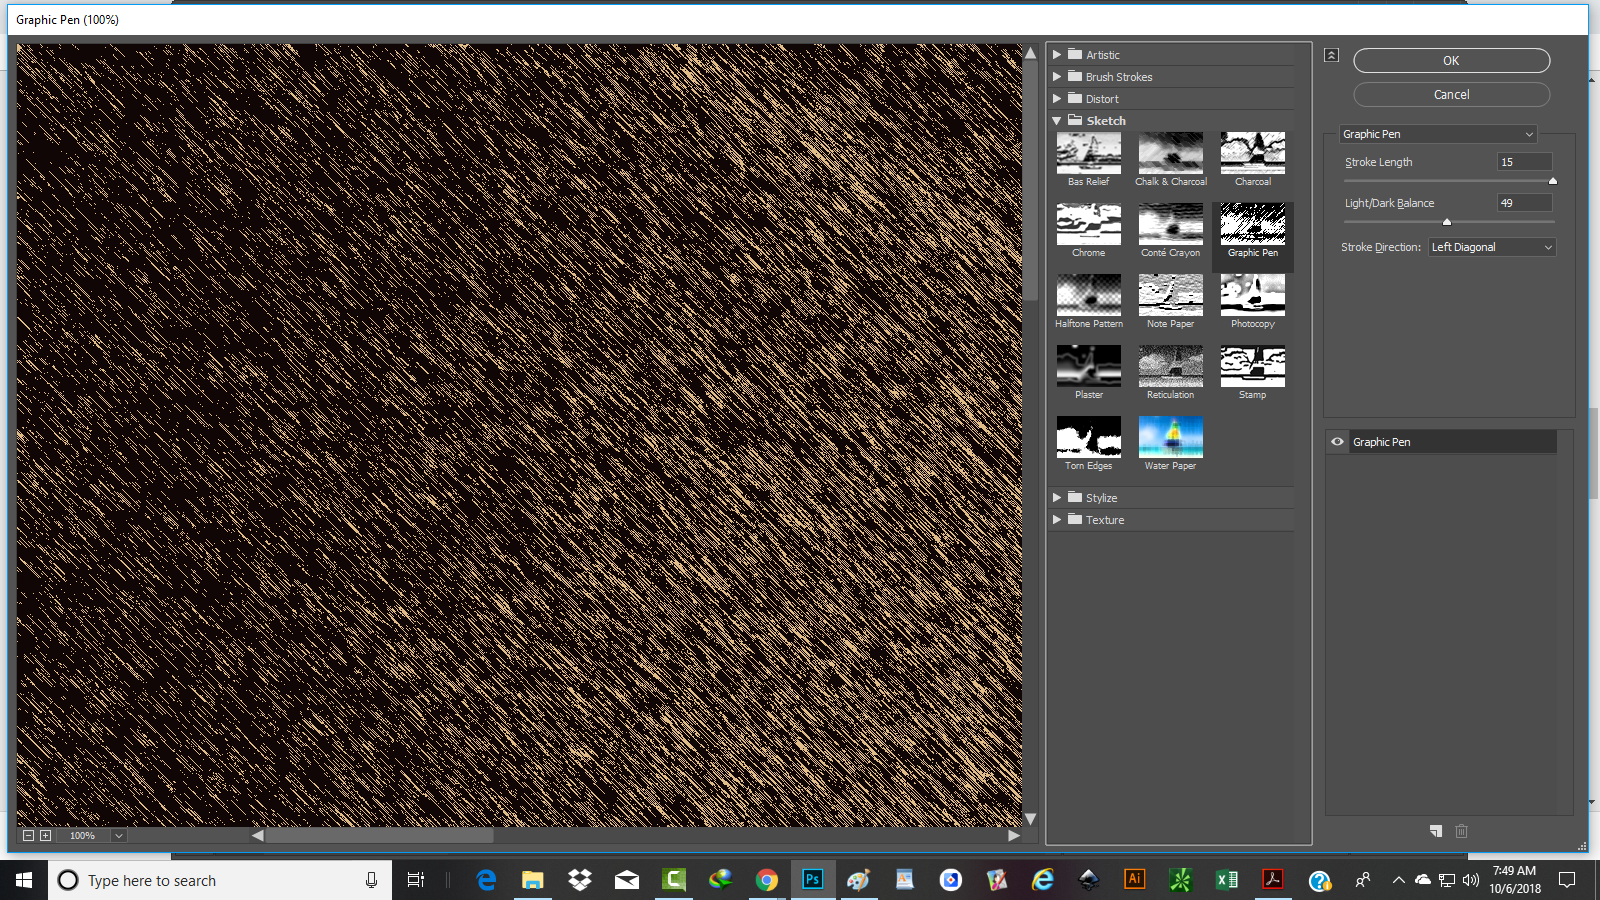
Thanks so much for going out of your way to help me!
Copy link to clipboard
Copied
No problem with help - that is what we are here for.
Find Edges doesn't have any settings so no problem there
sheana2014 wrote
/
All blending modes are Normal except for Linear burn, opacity is 100% and Fill is 100%. It seems closer to yours than the first image I uploaded, but outline is not as clear besides other differences.
The first of the Grphic pen filtered layers, the one just above the find edges layer and with the "Right Diagonal" filter settings should be set to blending mode multiply. The one above that with the left diagonal filter settings should be set to linear burn.
Dave
Copy link to clipboard
Copied
Thanks so much! That improved my results a great deal!
Copy link to clipboard
Copied
Hi sheana2014
I just went through these steps myself now that I am at a computer, and found one more tip to make this work for you. The Graphic Pen uses the Foreground and Background colors, and your screenshot shows a tan background color. Reset your swatches to Black and White before you use the Graphic pen. The shortcut is to type the letter "D".
~ Jane


Copy link to clipboard
Copied
Oops - thanks Jane - I should have mentioned that ![]()
Dave
Copy link to clipboard
Copied
I might not have seen it either, Dave, if my foreground color had been black. It's a lovely technique, by the way, and very adjustable.
Copy link to clipboard
Copied
Thanks so much! You guys are awesome, the way you go out of your way to help!
Copy link to clipboard
Copied
sheana2014 wrote
How do I "set layer to linear burn"?
You are evidently a Photoshop wizard!
Hi Sheana,
Here is a larger screen shot made from Dave’s screen shot of the layers panel. Note that he has the layer selected and that where it usually says “Normal”, he has changed the Blending Mode to Linear Burn from a drop down menu. Does this help?
Yes, I agree that this is a very clever technique!
Copy link to clipboard
Copied
I neglected to thank you for your efforts on my behalf!
Copy link to clipboard
Copied
There are seveal ways to simulate painting in the Filters.
However, I recommend to learn how to paint images watch tutorials on YouTube. If you watch one tutorial a week and practice you will master techiques quickly.
Adobe has several filters you can download as well.
https://www.adobeexchange.com/creativecloud.photoshop.html#product
But here are some screen caps from the filters...
.png)
.png)
Copy link to clipboard
Copied
Thank you so much for the oil transformation demo. This will definitely add to my learning this skill. I appreciate your taking the trouble to help me!
Copy link to clipboard
Copied
Another option, if you want to cut down on layers and/or file size, would be to apply all of the Smart Filters to one layer.


