

- Home
- Photoshop ecosystem
- Discussions
- Re: Changing color of Dalmatian spots in a photo
- Re: Changing color of Dalmatian spots in a photo
Changing color of Dalmatian spots in a photo

Copy link to clipboard
Copied
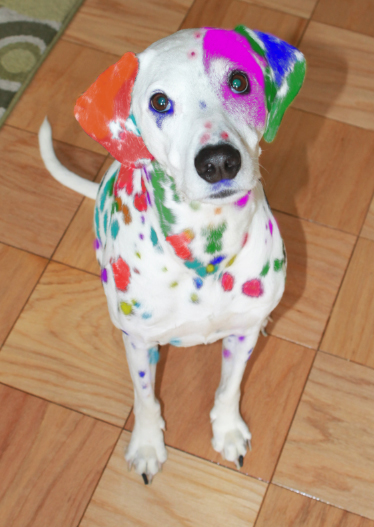
I'm trying to alter a photo of my Dalmatian in Photoshop. I would like to change the color of all her black spots to several different colors. I would like her body to remain white but to have a few spots be bright blue, a few spots to be bright pink, etc. so that she is covered in a rainbow of dots. I created a channel and used the Quick Selection tool to select a few of her black spots. I then created a new layer and selected a bright pink color from my color tools for the foreground and filled it. I selected the screen option on my layer. Next I selected New Adjustment Layer and hit Hue and Saturation and selected Colorize. My issue is that the pink spots still look like they are overlaid on her black spots. Can someone tell me what I did wrong? I want her spots to appear as if they are actually bright pink and not just a tinted pink. Also is there an easier way to do this?


Explore related tutorials & articles
 14
Replies
14
14
Replies
14

Copy link to clipboard
Copied
Can you post a starting image and what you result looked like
Dave
Copy link to clipboard
Copied

Copy link to clipboard
Copied
Hi
Quick Mask is giving you to hard an edge.
Instead of masking try this
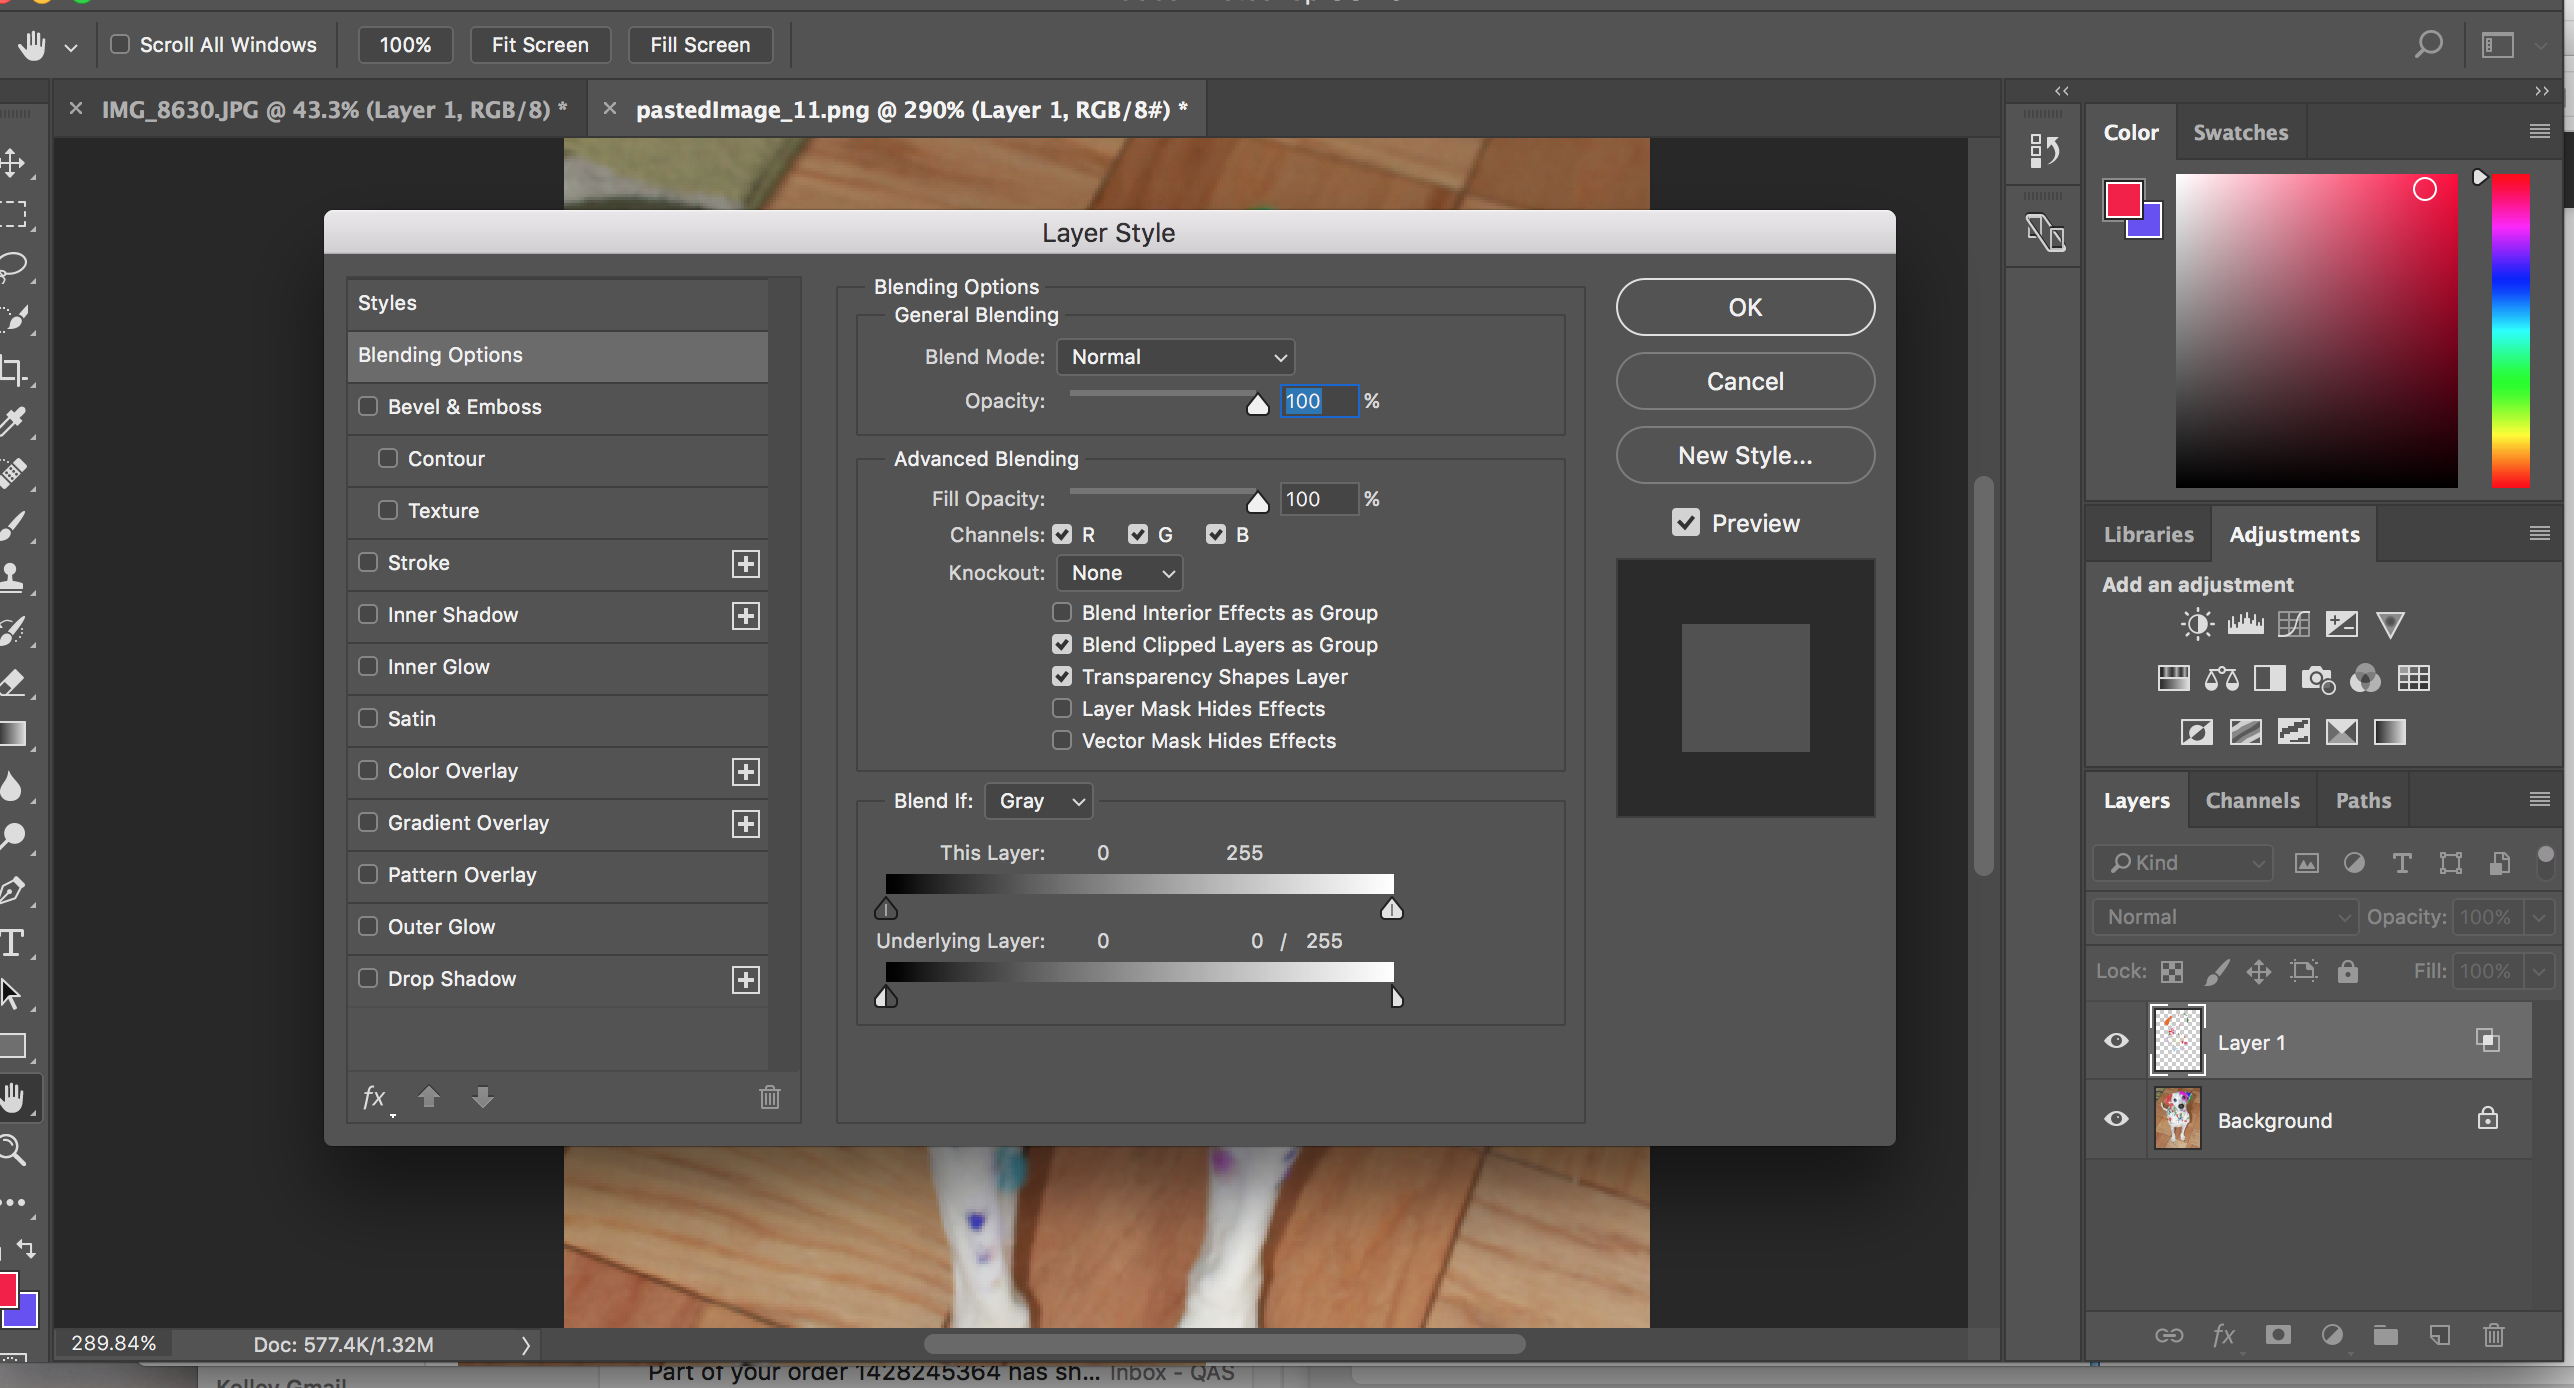
Create a new layer - right click on it and in Blending options go the the Blend if sliders. Alt click on the white triangle at the bottom right so it splits and put one half all the way to the left and the other all the way to the right. This will mean that the blend of any colour on this layer will be stronger where the image is black and weker where it is white.

Now just get a soft brush and paint on the new layer over the black spots. Don't worry about spilling into teh white - it will not show.
Note : I could not do anything with the hard edges you had already painted but soft edge on the other colours should give you the idea

I hope that gets you started again
Dave
Copy link to clipboard
Copied
Dave,
Thank you so much. The picture you sent back is exactly what I wanted! However, this is literally my first time ever using Photoshop so I'm a little confused on what to do next. I added a new layer and did the blending as you said and then just used the brush to start painting. However, my colors have very harsh edges yet in your photo they look realistically blurred. How did you delineate the spots so accurately with no black showing? Am i missing a step here? Thanks again!
Jess
Copy link to clipboard
Copied
No magic 
Can you show a screenshot of the layer panel with the paint layer selected and also the blending mode dialogue so that I can see the settings on both
Dave
Copy link to clipboard
Copied
Copy link to clipboard
Copied
Hi Jessica
Not sure if you meant to send that - it is the panels we need to see i.e. the layers showing the blending mode for the coloured paint layer and the blending options dialogue showing the blend if settings.
Dave
Copy link to clipboard
Copied
I just realised on re-reading my reply . I should also have said - set the blending mode of the colour layer to screen. Sorry 
Dave
Copy link to clipboard
Copied
Sorry Dave, my fault. I completely spaced that you wanted the blending mode. Here's the screen shot I think of what you're asking for. Oh okay, so right click on the layer and hit screen before I color as well?
Copy link to clipboard
Copied
Yes those settings are fine except for the blending mode (which was my fault ).
After that just use a soft brush (0% hardness). If you set the brush opacity to say 40-50% you can build up the colour over a few strokes. You can also use a separate layer for each colour so that you can tweak the settings a bit later if required.
I'm about to drop offline for a while - it is 1am here. I will be back on in the morning if you are still having any problem or , in the meantime I am sure one of the other regulars will help you. Good luck with it.
Dave

Copy link to clipboard
Copied
LOL
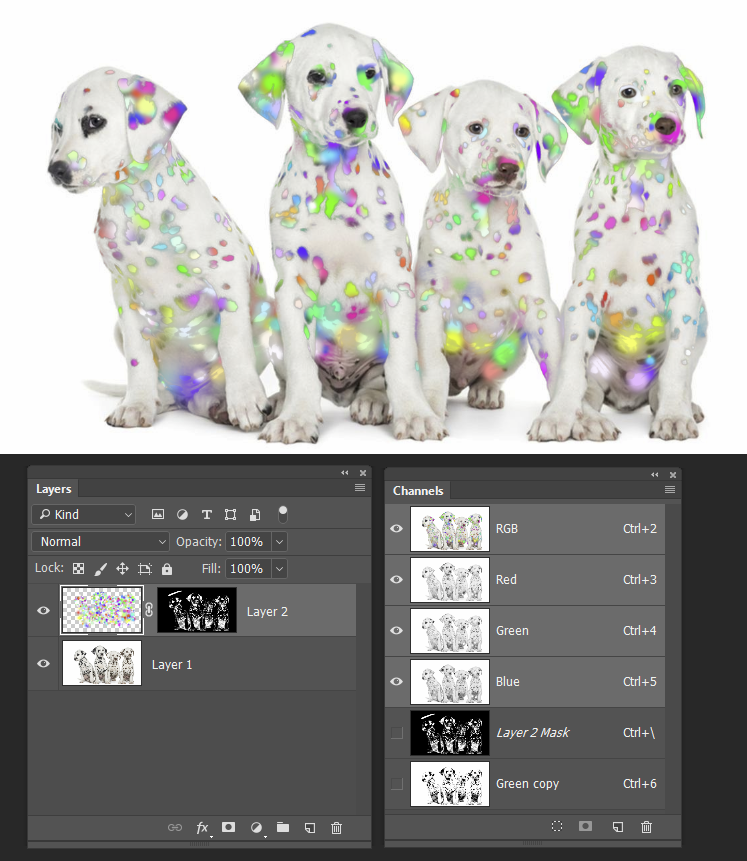
I was thinking that lovely clear black and white would make a nice alpha channel mask, and that you just use that to make a layer mask and paint right over the top. I maxed out hue and background/foreground jitter and got to it.
Copy link to clipboard
Copied
Nice one Dave, looks like the pooch has gone through an explosion in a paint factory.
Copy link to clipboard
Copied

This is in this is your e-back
Copy link to clipboard
Copied
nice

Find more inspiration, events, and resources on the new Adobe Community
Explore Now
 AdChoices