- Home
- Photoshop ecosystem
- Discussions
- Clear tutorial on displacement maps?
- Clear tutorial on displacement maps?
Copy link to clipboard
Copied
I continue to struggle with understanding displacement maps and would like to find a clear tutorial that explains how the process works. YouTube is loaded with people showing off what they have done but not explaining how the process works. I don't want to do what they do. I want to work on my own projects, and for that I need to understand the function of each step. I am sure someone out there understands this issue and has addressed it effectively. And I am sure some folks in this discussion know where they are. Advice? Thanks in advance.
David Habercom
Boston
 1 Correct answer
I think this tutorials I've found are very clear:
Explore related tutorials & articles
Copy link to clipboard
Copied
I think this tutorials I've found are very clear:
Copy link to clipboard
Copied
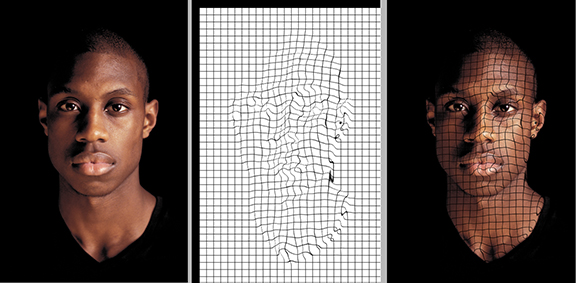
A couple of years ago I posted this Tech Sheet that I had written for my students. I hope it helps you.
The Unique Effect of Displacement Mapping
Displacement Mapping is the process of changing the geometry of an image so that such things as straight lines are contoured according to the tones appearing the in image in the layer below. This is how it is done in Photoshop
1. Open a file
2. Choose Image > Duplicate. In the As: field enter file name as: filename_map.psd. (Example: man_map.psd). This file, which will ultimately serve as the Displacement Map must be in psd format.
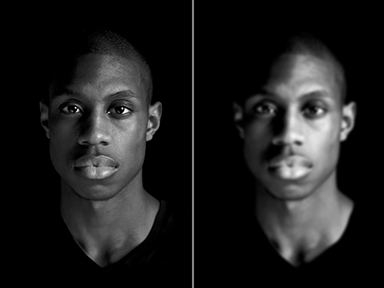
3. Choose Image > Mode > Grayscale. Increase the image contrast using Curves or Levels. Since each image is unique, there is no exact setting. Then choose Filter > Blur > Gaussian Blur. Once again, there is no set amount. The sample below is a useful guide.
4. Save this file – filename_map.psd -- to the desktop.
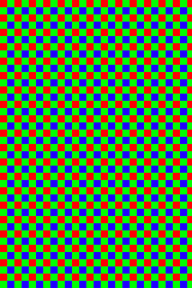
5. Open another file consisting of a pattern or type*. Drag that image over the full color image. It will be Layer 1. For the samples below, this was the image that was used. (You may recognize it as the Bayer array camera chip design discussed in the article related to image sharpening.)
* If you choose to use type for Layer 1, it must be rasterized. After typing, choose Layer > Rasterize > Type.
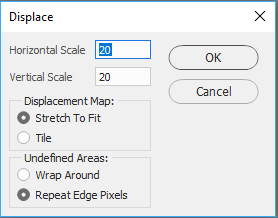
6. Choose Filter > Distort > Displace. The default numbers of 10 for Vertical and Horizontal Scale usually work very well. For greater displacement,15 is satisfactory, as well. Radio buttons should be set to Stretch to Fit and Repeat Pixel Edges. Click OK.
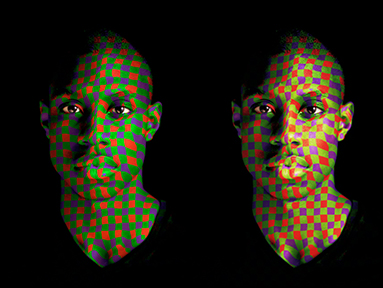
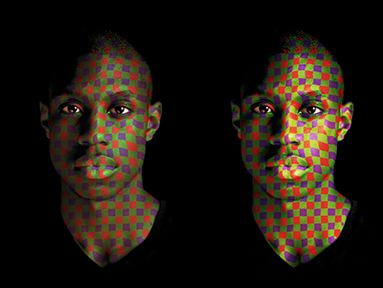
7. Choose a Blend Mode of Multiply or Overlay (the results appear on the following page). Experiment with other Blend Modes, as well. Adjust the opacity of Layer 1 for the most pleasing effect.
8. In the images below, a mask was added to Layer 1 by clicking on the mask symbol at the bottom of the Layers panel. Then, by painting in black on the eyes, that area of the bottom layer was revealed.
Multiply Overlay
Opacity at 50%
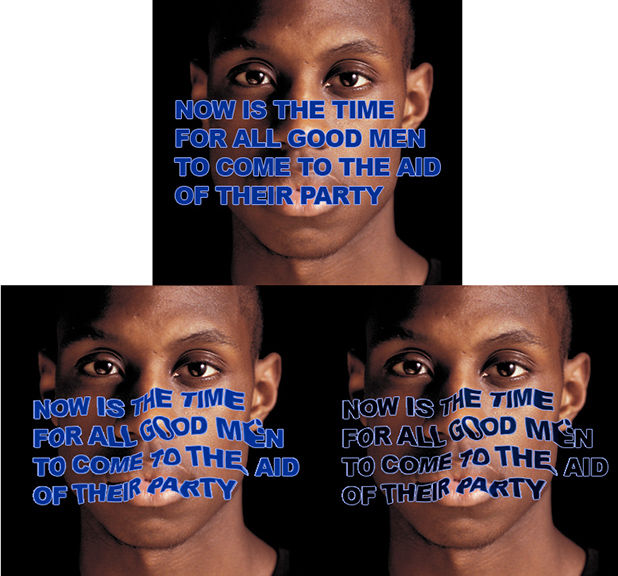
In the example below, the same Displacement Map was applied as had been used in the previous example. A light blue Stroke was applied to the rasterized type so that it would be readable against the black background of the image when the 100% Multiply Blending Mode was added, as shown at the bottom/right.
Copy link to clipboard
Copied
May be this will help with the process :
A displacement map is just an image with grayscale (i.e with values from black, through mid gray to white)
When applied to an image using Filter Distort Displace, in the area where the displacement map is white the image pixels will be moved up and to the left. In the area where the map is black they will be moved down and to the right.
Take this example - an image with a simple grid made of red pencil lines (so this is a pixel image):

I also have a displacement map in the form of a simple gradient of white on the left black on the right

If I use Filter - Distort Displace
I choose how much I want to scale the movement
I also choose how I want to use the map if it is not an exact size for the image (in my case it is an exact fit)
Finally I choose what happens at the edges
As you can see where the map was white, the movement was furthest to the top and left. Where the map is black, movement was furthest to the bottom and right. 50% grey did not move at all.
I hope that helps your understanding. Make a similar grid and play with the settings - you will soon see how it works.
Dave
Copy link to clipboard
Copied
Thanks all for your input. I found Francesco's video link to be the most useful -- once I converted it in YouTube to HD, since it defaulted to 240p, which made the menu items unreadable on my screen. I need to view the video a couple of more times to get it embedded in my brain, but it will do the job. Thank you, Francesco!
First I thought Norman's written instructions would be perfect for me, but they are a couple of years old, and I pretty quickly got lost, since I am using PS 2017 CC, which has a significantly changed menu system.
Again, thank you!
David
Copy link to clipboard
Copied
I keep on meaning to write up a tutorial about DMaps, but until then, a bit of information about how they work--
Displacement Maps use the value of pixels stored in the "Backward Compatibility" part of an image, which is a view of what was visible when the image was saved. This can be some other .PSD doc, or the image you are working on, provided you have save it with only the DMap layer showing before running Displace. If there is only one channel in the DMap, it will affect both the vertical and horizontal dimensions. If there is more than one channel, the first channel [re or cyan] will affect the horizontal direction, the second channel [green or magenta] will affect the vertical dimension, and any other channels will have no effect. A value of 127 will have no effect; values of 0 or 255 will have the maximum effect (in opposite directions).
One thing about constructing DMaps that I find can be hard to wrap your head around is that they don't "Move the pixels somewhere else", but rather, they "Get the pixels from somewhere else, and move them here."
Here's an image I made to show [I hope] how they work:
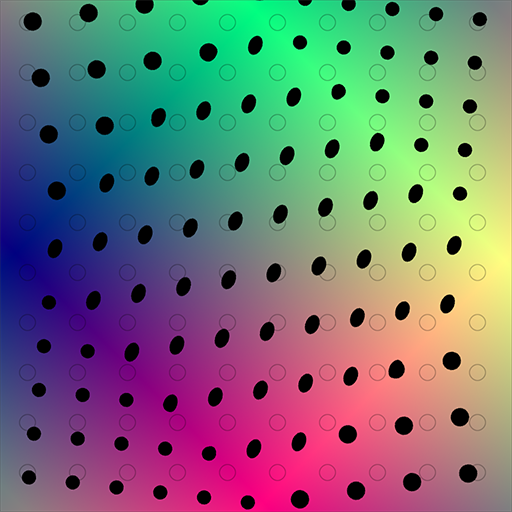
The grey circles show the original locations of the black dots. The visible black dots have been Displaced using the underlying colors for the DMap. This was made by applying a 127 - 0 - 127 - 255 - 127 gradient from the top left to the bottom right of the Red channel, and from the bottom left to the top right of the Green channel, with the Blue channel filled with 127 but the Blue channel could be anything; I just always use 127. Note that the corners and the center, having a value of 127R - 127G - 127B, have the least effect. The Channels panel might make this more clear:

One thing to note is that if you're using gradients, you'll want to set the Smoothing to Zero. The gradients will look strange, but they are not meant to be visible.
One way to think of how they will apply is, "Gradients 'Scale', Solid colors 'Move', and they can be combined."
Copy link to clipboard
Copied
Good point on the multi-color - I left that out of my reply.
Dave
Find more inspiration, events, and resources on the new Adobe Community
Explore Now
