• Global community
    • Language:
      • Deutsch
      • English
      • Español
      • Français
      • Português
  • 日本語コミュニティ
    Dedicated community for Japanese speakers
  • 한국 커뮤니티
    Dedicated community for Korean speakers
Exit
0

Color Fringing/Artifacts When Adjusting Hue/Saturation Sliders

New Here ,
Jul 17, 2018 Jul 17, 2018

Copy link to clipboard

Copied

I am using Photoshop CC for post-processing images taken with an infrared camera. Most of the time, I am able to use the Hue/Saturation slider to modify colors by selecting one or more sliders (such as blue and cyan) and adjust the hue without any artifacts. Under some conditions, however, I experience what I refer to as "fringing," in which I get a halo around the edges where two colors meet - such as when leaves are outlined against the sky. When this condition occurs, I am not able to affect the areas where the fringing occurs, as the pixels appear to be a neutral color, one not recognized by any of the color sliders in the Hue/Saturation control.

In the case of the attached photos, I was attempting to turn a blue sky red. As I adjust the hue of the blue slider, and it approaches the color red, the area where the yellow vegetation meets the sky, however, produces significant artifacts or fringing, detracting from the image quality. I can move the blue slider in the Hue/Saturation control approximately +20 or -50 before encountering this condition. Once I exceed the +20/-50 threshold, it appears that Photoshop neutralizes the pixels of the yellow vegetation. Thus no movement of any sliders of the Hue/Saturation control affects the color of the fringe areas.

It seems that Photoshop "forgets" where the edge of the yellow vegetation is as the hue of the blue sky moves from blue to red. Some images turn out better than others, but almost all similarly processed images experience this same form of this fringing effect.

This issue is important to those of us who specialize in infrared photography. The following article I wrote describes an example of the workflow many follow for processing infrared photos using Adobe Lightroom and Photoshop.

https://photographylife.com/reviews/kolari-vision-550nm-infrared-filter 

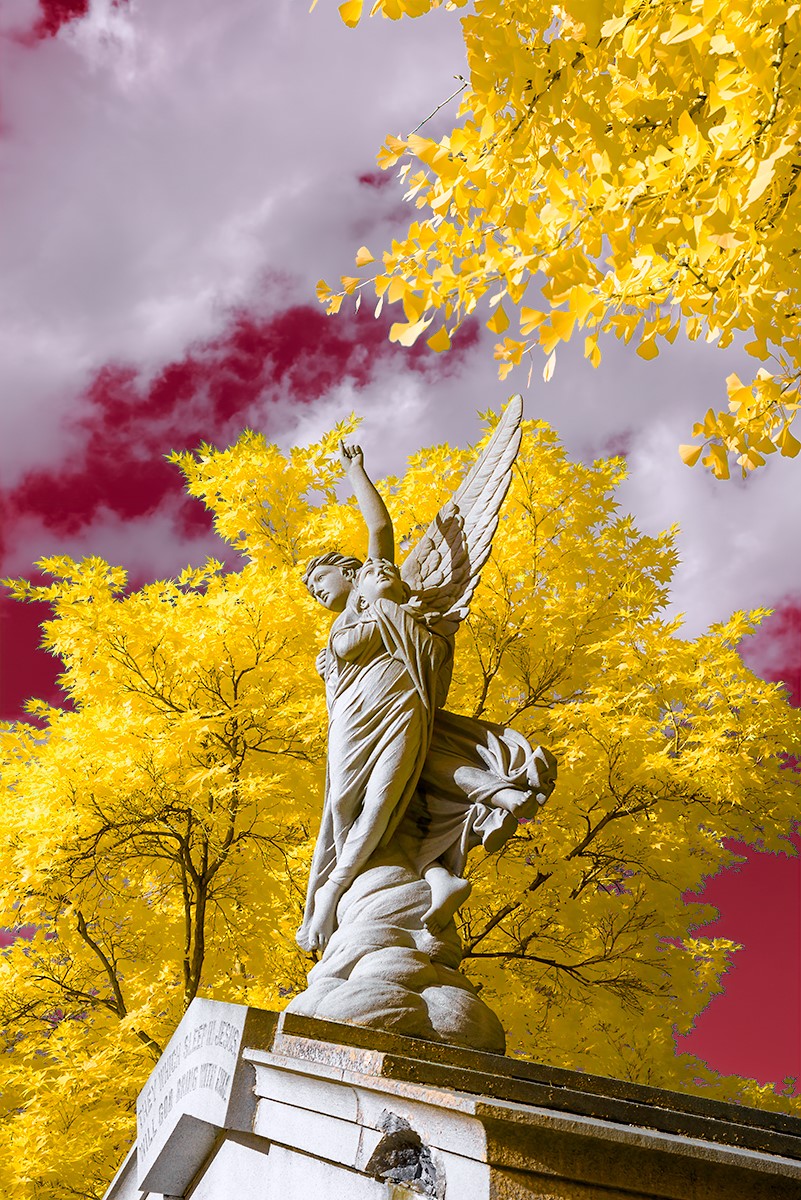
  • The first image (angel and mausoleum) shows the full effect.  The lower right-hand corner is a good place to focus.
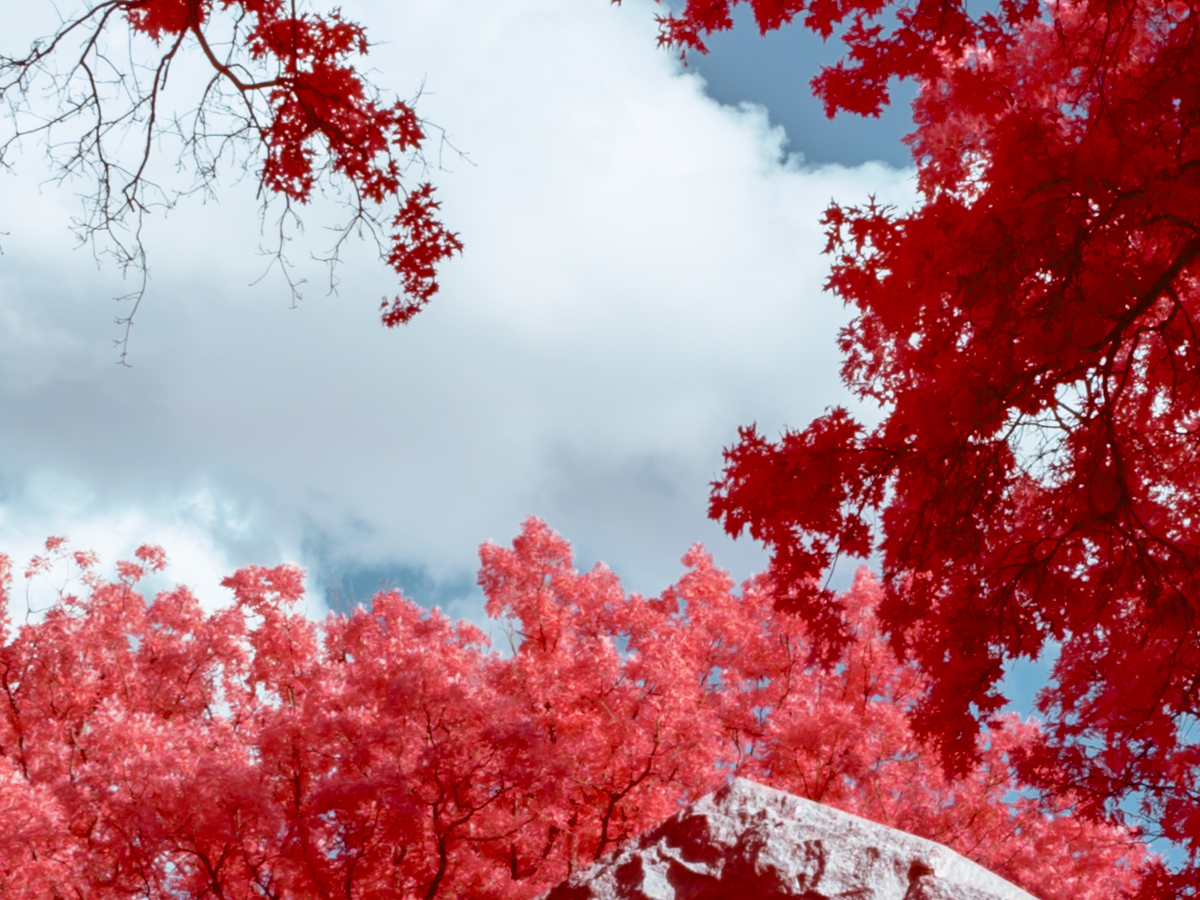
  • The Starting Point image (2nd image - 100% crop of the red vegetation and blue sky) reflects how an image appears at the beginning of the process (after a Channel Swap process). As you can see, the Starting Point image (2nd image - 100% crop of the red vegetation and blue sky) exhibits no fringing and there is a clear delineation between the colors.
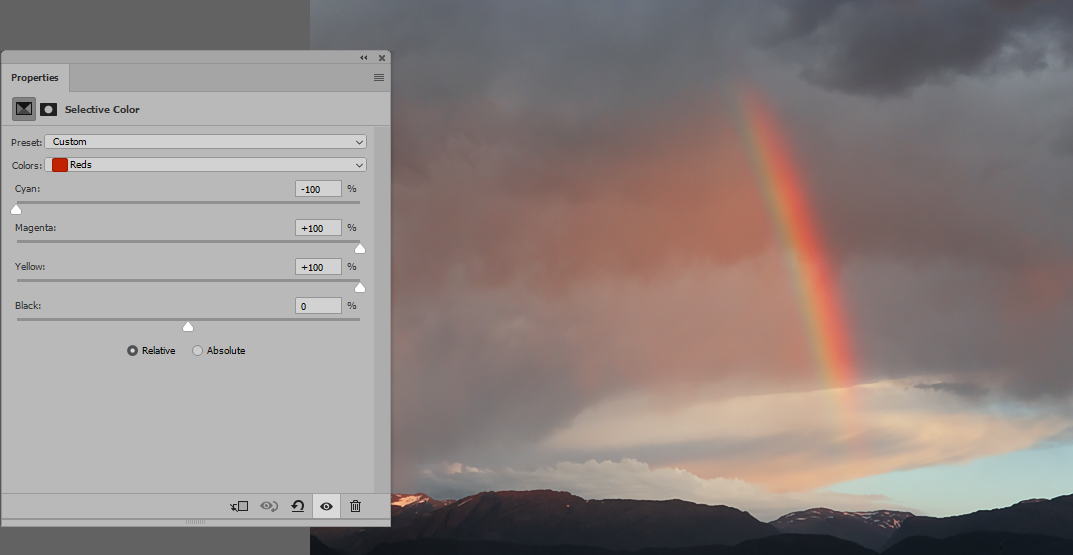
  • The other image (3rd image - 100% crop of the yellow vegetation and pinkish-red sky) reflects my changes and the resultant fringing effect.

Please advise.

Best Regards,
Bob

thumbnail_RJV_20180617_2442.jpg

Starting_Point.jpgAfter_HueSaturation_Adjustment.jpg

Views

2.7K

Translate

Translate

Report

Report
Community guidelines
Be kind and respectful, give credit to the original source of content, and search for duplicates before posting. Learn more
community guidelines
Adobe
Advisor ,
Jul 17, 2018 Jul 17, 2018

Copy link to clipboard

Copied

Bob,

I've gotten away from photography for several years. When I use to go out I would often go to cemeteries. When people would ask why I went to cemeteries, I would answer "the subjects don't move and they never complain when I want to take just one more shot"

After reading your article I was surprised to see that you are from Pittsburgh too. Allegheny Cemetery is a rich source of statuary and monuments.

Votes

Translate

Translate

Report

Report
Community guidelines
Be kind and respectful, give credit to the original source of content, and search for duplicates before posting. Learn more
community guidelines
New Here ,
Jul 18, 2018 Jul 18, 2018

Copy link to clipboard

Copied

Bo,
Yes, indeed, cemeteries have a beauty all their own. And Pittsburgh has some of the country's finest.
Bob

Votes

Translate

Translate

Report

Report
Community guidelines
Be kind and respectful, give credit to the original source of content, and search for duplicates before posting. Learn more
community guidelines
Community Expert ,
Jul 18, 2018 Jul 18, 2018

Copy link to clipboard

Copied

This is what Hue/Sat does. I've always felt it's a bit flawed for this reason. It's very quickly done to break up the image in banding and blotches.

Yes, you can split the sliders to taper the range off gradually - but neutral is still neutral and those pixels are never touched. There's always an abrupt threshold there. What's needed is an area/feathering control in addition to the hue/range controls.

Much like Select and Mask, in fact. So in other words, the obvious workaround is to use Select and Mask, and a global adjustment to alter hue/sat within your selection.

I normally use Selective Color instead of Hue/Sat, at least for smaller corrections, because it works differently and never breaks image integrity. It doesn't have quite the potency, though:

fringing_1.jpg

fringing_2.jpg

fringing_3.jpg

BTW - the hue/sat controls in ACR behave the same way, breaking up integrity, even on raw files.

Votes

Translate

Translate

Report

Report
Community guidelines
Be kind and respectful, give credit to the original source of content, and search for duplicates before posting. Learn more
community guidelines
New Here ,
Jul 18, 2018 Jul 18, 2018

Copy link to clipboard

Copied

D. Fosse,


I tried the Select and Mask technique on a few photos last night, using a popular youtube video on this topic, but it didn't produce better results. The issue remains that the neutralized pixels have no color value and thus cannot be used by the Hue/Saturation adjustment tool.

Photoshop does a fine job adjusting colors within some range. As an example, red or yellow vegetation looks fine against the blue sky. Once I attempt to change the sky to red, however, the edges, in some cases, fall apart as I cross the thresholds I outlined in my post.

I suspect Photoshop needs to refine its algorithm to handle some specific combination of color transitions better than it does. I noticed it with my blue-to-red sky conversion, but I suspect other color shifts may also experience the same issue.

Bob

Votes

Translate

Translate

Report

Report
Community guidelines
Be kind and respectful, give credit to the original source of content, and search for duplicates before posting. Learn more
community guidelines
Community Expert ,
Jul 18, 2018 Jul 18, 2018

Copy link to clipboard

Copied

I think you misunderstand what I'm saying. The point of Select and Mask is that you can make a selection with any method you like, like Color Range, and then modify (expand/contract/feather) the selection in Select and Mask.

For the adjustment itself, you wouldn't need to use Hue/Sat at any color range, you could just use it as a global adjustment in the "master" mode. Or you could use Curves, Levels, whatever you want.

The problem here is the way Hue/Sat selects the pixels to work on. That's what you bypass if you modify the selection yourself.

Votes

Translate

Translate

Report

Report
Community guidelines
Be kind and respectful, give credit to the original source of content, and search for duplicates before posting. Learn more
community guidelines
New Here ,
Jul 18, 2018 Jul 18, 2018

Copy link to clipboard

Copied

LATEST

D Fosse,


Maybe I am misunderstanding you, but I followed the Select and Mask technique associated with attempting to those errant pixels I described and the results looked identical to what I got by simply changing the Hue/Saturation layer alone. "Refining" the selection by sampling those neutral pixels didn't improve the end results.

I will take another crack at using Select and Mask, however, as I admit it's been some time since I practiced it to any degree and I am a bit rusty regarding the technique. Even if it were to do a somewhat better job, having to do this for every infrared photo would not be feasible. The bulk of my IR processing is based on presets and actions, allowing me to go from RAW file to processed photo in a minute or two. Sometimes I will make some minor modifications based on lighting, enhancing a color, etc., but these adjustments take very little time. I'd much rather be out taking photos than spending hours processing them on my computer.

The Select and Mask technique examples I've seen on youtube require a fair degree of tinkering and refinement per image. And based on my experience with it thus far, I'm not convinced this technique will completely address the concern I raised.

Again, I suspect the real answer is for Adobe to improve its algorithm so the fringing does not occur when adjusting the hue. In this case, allowing users to correctly modifying the blue hue outside the (+/-) range I described.

Bob

Votes

Translate

Translate

Report

Report
Community guidelines
Be kind and respectful, give credit to the original source of content, and search for duplicates before posting. Learn more
community guidelines