 Adobe Community
- Home
- Photoshop ecosystem
- Discussions
- Re: Colors not converting properly from AI to Phot...
- Re: Colors not converting properly from AI to Phot...

Copy link to clipboard
Copied
Using Adobe Creative Cloud... When importing an .ai file into Photoshop, colors are not importing across accurately... particularly grey tones.
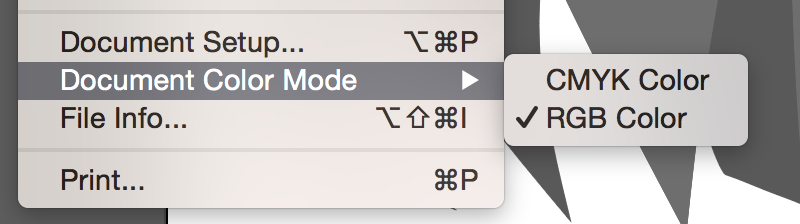
Source .ai file is in RGB color space. Problem persists regardless whether importing into sRBG or RGB Color in Photoshop...
The example below is only grey tones but the file is color RGB... for some reason, don't seem to be having this problem with other colors, just grey tones in the color space.
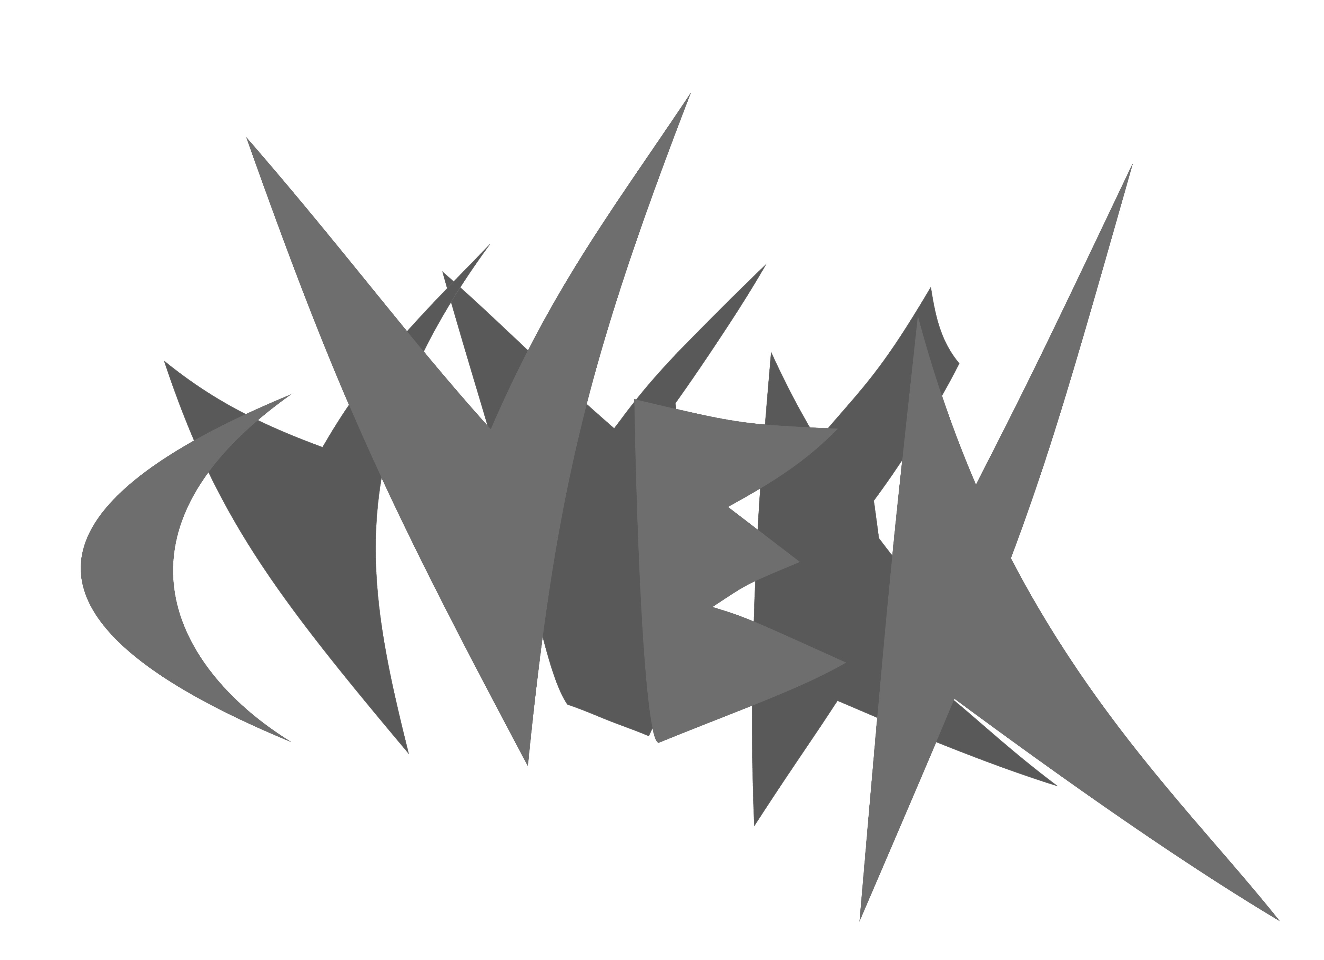
following attachment is a screenshot from Illustrator >>
following attachment is what it looks like one imported/rasterized into Photoshop >>
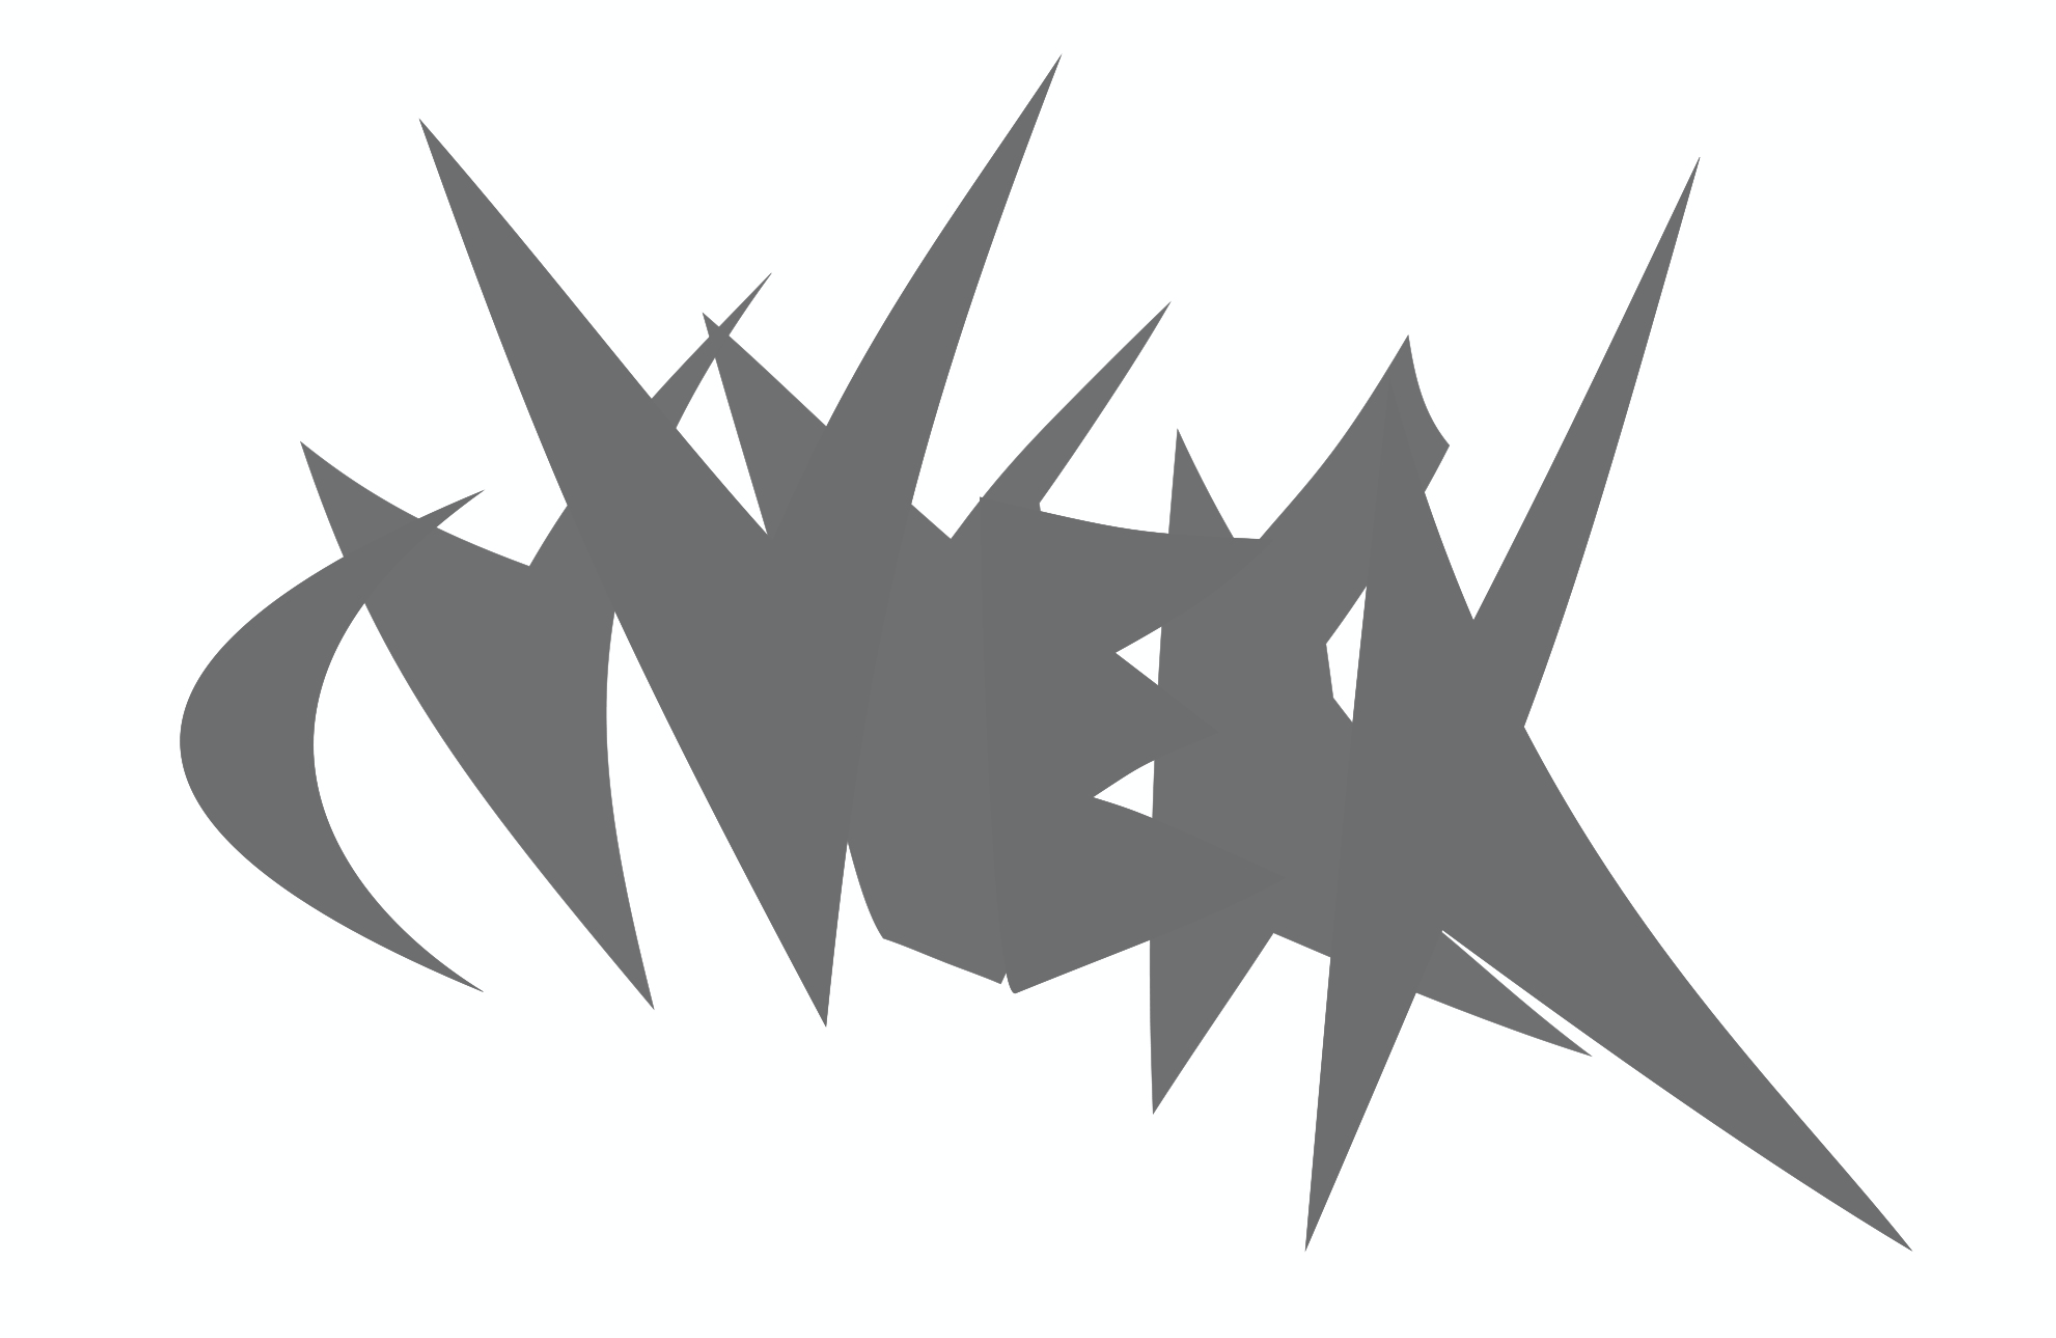
What is going on here? Clearly these greys are not translating properly, and yet it should be the same hexadecimal code.
I have been having this problem for over a year with various drawings... if it were a temporary glitch with a certain version of Adobe Creative Cloud, I imagine it would have been fixed by now


 1 Correct answer

What the OP does wrong is define swatches as a K value, in other words grayscale.
As it turns out Ai does not properly color manage grayscale, hence the shifting gray values when you go to Photoshop, which does color manage grayscale. RGB and CMYK both work fine.
That's basically it.
So this is an Illustrator problem; not a Photoshop problem. Maybe the Ai team thought color management wasn't necessary with grayscale, since there's no color in it... 
Explore related tutorials & articles
 48
Replies
48
48
Replies
48
Copy link to clipboard
Copied
I guess it's semantics as to whether this constitutes a bug or not. I'm just looking at the length of this discussion thread and thinking it should be simpler to get the desired/anticipated effect in converting an image from AI to PS. Maybe that's not a bug, but then it's definitely very poor product design/implementation. To use the car analogy... if, in order to not drive the car into a ditch, only experienced drivers know that you need to honk the horn four times and wiggle your ears otherwise u go off the road, then while that may not be a bug it certainly won't win car of the year award.
Anyways, thanks to all for sorting this out. Now I'm exporting my AI files into TIFF from Illustrator and using Photoshop for resizing after the fact. Gonna have to study up a bit about color swatches and global versus non global swatches and all that. Any recommendations for a concise and articulate expose on the topic?

Copy link to clipboard
Copied
andrewklug wrote:
Now I'm exporting my AI files into TIFF from Illustrator and using Photoshop for resizing after the fact.
No, don't do that!
If the final destination is a raster (pixel-based, rather than vector) format (images for web for instance), then you want to rasterise the vectors at the final size, not have Illustrator rasterise (which happens when you export to TIFF) before resizing in Photoshop.
I'd recommend doing all the vector work in Illustrator first. Then, when you need to rasterise, open the AI as a Smart Object in Photoshop, and resize it to the desired pixel dimensions and Save For Web in the desired format. You could cut out Photoshop altogether, and Save For Web out of Illustrator, but Photoshop does a slightly better job of the rasterisation.
Copy link to clipboard
Copied
I hear you. I'd love to let Photoshop do the rasterizing, but I'd have to solve the grayscale issue... Importing into Photoshop as a Smart Object still yields the grayscale shift that are at the heart of this whole thread. I have yet to try D Fosse's suggestion regarding the Gamma and grayscale, because I'm still trying to wrap my head around how to do that.
For now, letting Illustrator do the rasterizing is the only way I can ensure my grays are converting properly.
FYI, my current output is to screen display but ultimately I'm probably looking to make high res digital c-prints, hence the need to output to Photoshop. My boys at Laumont Photographics (http://laumont.com/printing ) can only take rasterized as input to the printing process...
I'm doing some resizing (downsizing) in Photoshop to get screen images at the appropriate resolution because I'm having issues when resizing my vectors in Illustrator... my shapes are super complex blends and they are behaving strangely when I try to resize them, I won't even get into that... I think I'm just pushing Illustrator to it's intended limits. But converting vector to rasterized without changing the color/grayscale is like bread and butter so Adobe needs to step up to the plate and make this at lot smoother...
Copy link to clipboard
Copied
andrewklug wrote:
Importing into Photoshop as a Smart Object still yields the grayscale shift that are at the heart of this whole thread.
If my theory is correct, grayscale values are exported from Ai as untagged gray. Bug or whatever I don't know. In any case Photoshop has to interpret the values in the RGB profile it opens the file in, and if that's not the same profile Ai uses internally (most likely 0-0-0-K), there's a mismatch and the tone comes out wrong.
Opening the .ai as a smart object in Photoshop is clearly the best way to do it. So if that still gives a gray shift:
- The workaround is to not define swatches as grayscale (K) in Ai. Define them as RGB.
- Danny's suggestion of using percentages will probably work too, but then I'd start with RGB 0-0-0, not K.
Again, I don't think Photoshop is the problem here, so don't worry about PS's working gray here. The problem is much more likely in Ai.

Copy link to clipboard
Copied
Maybe that's not a bug, but then it's definitely very poor product design/implementation.
Maybe you should make a report over at
Feature Request/Bug Report Form
but unfortunately it seems unlikely you’ll get an official response.
non-global swatches have always seemed silly to me, having used Freehand for many years
Freehand had several shortcomings compared to Illustrator but in some regards it seemed so much better … and have I mentioned that the Illustrator team has left a bug go unfixed for more than a decade?
I have, but I feel very annoyed by that, so I mentioned it again …
Copy link to clipboard
Copied
There is no Adobe documentation indicating that grayscale is broken in Illustrator and shouldn't be used, particularly in an RGB mode. A better analogy would be a feature in a car that only experienced drivers of that car know will drive you into a ditch unexpectedly. We know to avoid it, but we can't expect Andrew to.
The solution is, if you want to work with neutral greys in RGB in Illustrator, use tints of an R0 G0 B0 swatch. It will look identical to using greyscale, but will export/import into Photoshop correctly. 50% RGB black converts to 128 128 128, but 50% K converts to 155 155 155.
In this image, the top steps are tints of RGB black and the bottom is the corresponding K percentages. They look identical in AI, but look like this in PS:

Copy link to clipboard
Copied
There is no Adobe documentation indicating that grayscale is broken in Illustrator and shouldn't be used, particularly in an RGB mode.
Not sure »broken« is fully justified … in the OP’s test file simply Adding Used Colors seems to take care of the problem, does it not?
And is using global swatches not the prudent approach to handling colors in Illustrator to begin with?
Copy link to clipboard
Copied
If you start with greyscale objects in an RGB AI document, 'Add Used Colours' changes the appearance of them to what you'd see if you opened the document in PS. So you'd have to take care of the problem manually after (probably by making the swatches RGB and altering their values until you get the desired appearance). Personally I'd call that 'broken'.
Using global swatches is generally the best approach (non-global swatches have always seemed silly to me, having used Freehand for many years), but if you wanted to work with many grey levels, I still think tints of a global RGB black swatch is the best way.
Copy link to clipboard
Copied
Hex values mean nothing. Hex is a leftover from before color management was invented. In the same way, "RGB" means nothing, that's just a generic color model.
You need to get specific with icc profiles. sRGB? Adobe RGB? ProPhoto RGB? They all produce different colors with the same numbers, and that includes hex numbers. Make sure all apps are set up to embed the profile when saving, and to preserve that embedded profile when opening. They will be at default settings.
To make things simple for a start, use Bridge to synchronize color settings, and pick one of the presets.
Grayscale is a special case that comes with its own set of grayscale icc profiles. So you should also make sure that Photoshop isn't opening your RGB file as grayscale.
Copy link to clipboard
Copied
Thank you for the quick response and for greatly increasing my understanding.
I am familiar with ICC profiles in Photoshop and have experience using them to calibrate output to digital c-prints, however I was not aware of their presence in AI.
As far as AI is concerned, I only see the option of selecting RGB or CMYK...
If I am able to set a specific ICC profile in AI, can you kindly indicate where/how this might be done?
As far as Photoshop is concerned, I am definitely NOT opening/converting the file into grayscale. As mentioned in my initial query, I have attempted to import the "RBG .ai file" (no specific ICC profile) into Photoshop as both RBG and sRBG, the mismatch persists in both.
Finally, I do use Adobe Bridge and would be very happy if I could use Bridge to streamline this process.
Can you kindly start at the beginning? I have an .ai file (with no specific ICC color profile embedded) that I would like to rasterize via photoshop (or Bridge) preserving the color as closely as possible...
Thanks, Andrew
Copy link to clipboard
Copied
andrewklug wrote:
(with no specific ICC color profile embedded)
That's probably it. With no embedded profile, Photoshop will assign the working space, which may not be right.
In Illustrator (as in Photoshop), the default working color spaces and policies are controlled in Edit > Color Settings:
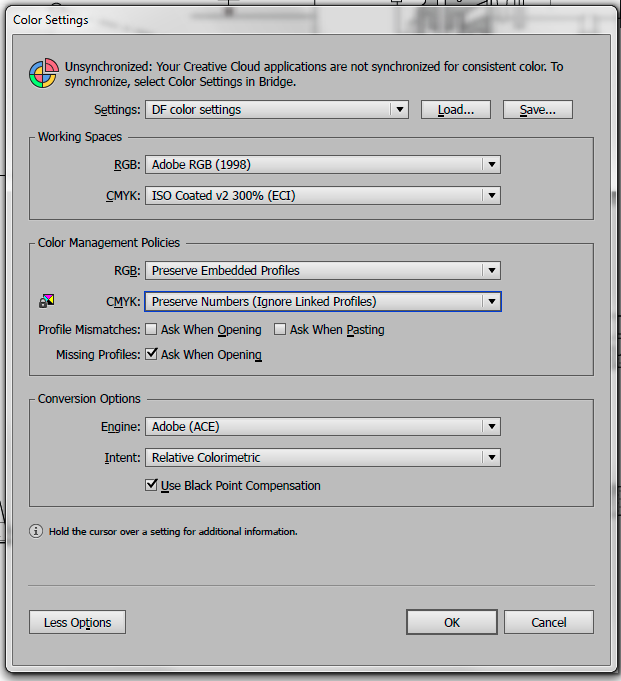
There is also Edit > Assign Profile, which you would use here. Since you don't know which one is the right one, you'll just have to try until it looks right. Then save the file with that profile embedded.
Unlike Photoshop, Illustrator does not have a Convert To Profile option, which recalculates the numbers to preserve appearance in a profile change. That would seem like an omission, since this is the one you use all the time in Photoshop. But there are good reasons for this. Illustrator is an offset print/CMYK-centric application, and CMYK to CMYK conversions should always be avoided in content that has black-plate-only areas like text and graphics. That's just to give an explanation for it.
Photoshop's color settings should always have Color Management Policies set to "Preserve Embedded Profiles". This means your Illustrator file, with embedded profile, will be read and interpreted correctly in Photoshop, and the colors be maintained as they are in Illustrator.
Which color space you set as working RGB in Ps/Ai isn't all that important. It's just a fallback default. The really important setting is the "preserve" policy. However, until you know more, sRGB is probably the safest choice with the least potential for problems.
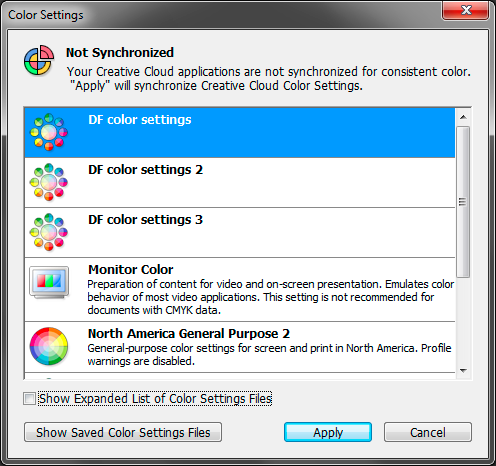
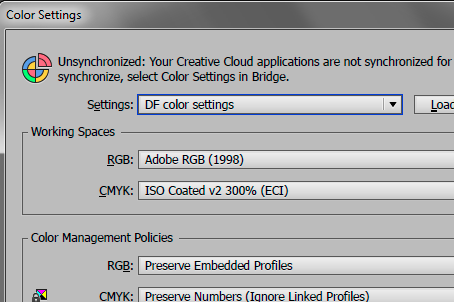
In Bridge, you synchronize color settings here, again under Edit > Color Settings. Set up in one of the main apps, and Save out the color settings file. Then use Bridge to load across all apps:
Copy link to clipboard
Copied
Thanks this is very helpful to my understanding... but, alas, the plot only thickens...
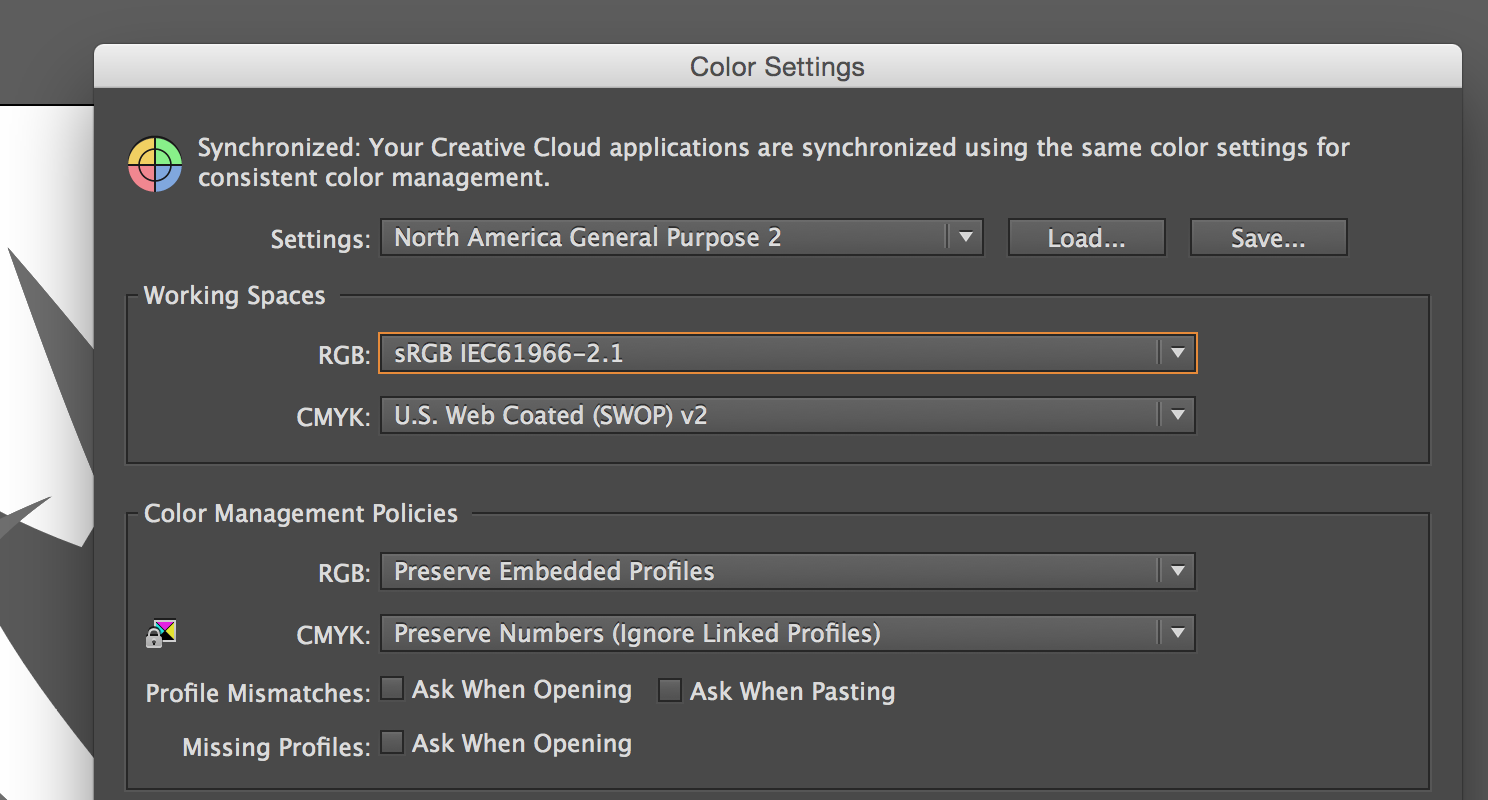
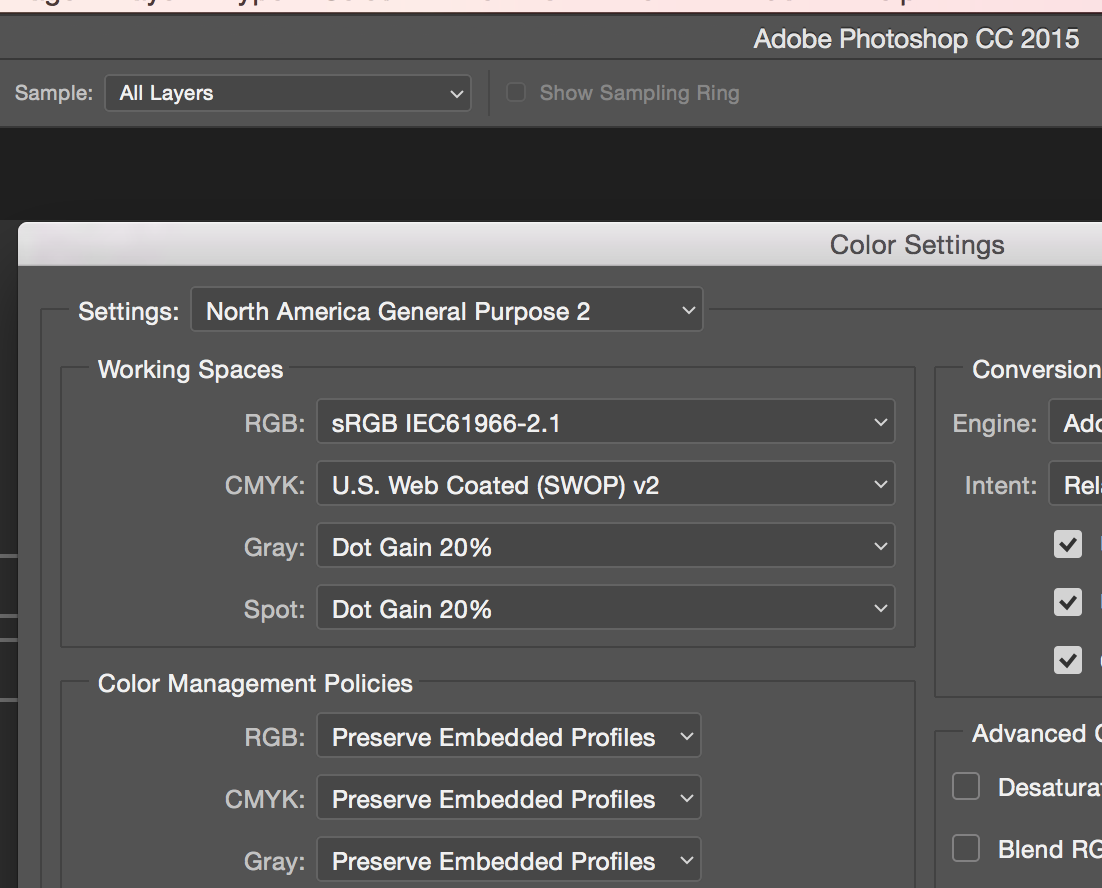
Per below AI screenshot, it seems I ALREADY HAVE color settings synchronized by default, and the Color Settings in AI of the files in question already has the color space set to >> sRBG IE61966-2.1 // which is, per previously, the color space I have used (or attempted to use) in rasterizing via Photoshop
To give some additional head-scratching, consider the following in careful detail...
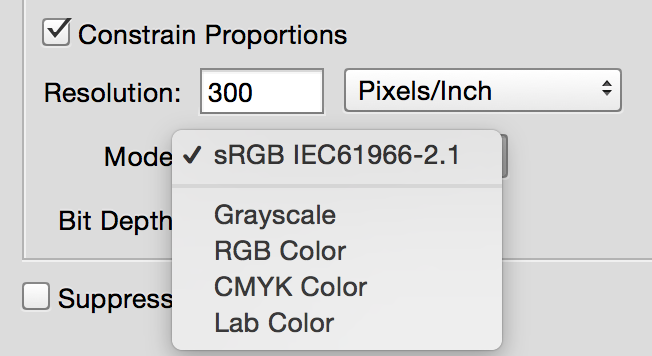
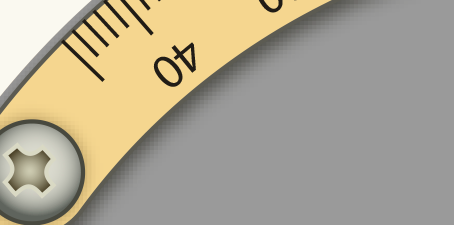
When I look to import the .ai file in Photoshop, per below PS screenshot, the thumbnail preview displays the image correctly, at least in so far as the relative appearance and contrast of the greys... and, as you can see, the color profile selected is CORRECT, ie. the same one as in Illustrator, namely sRBG IE61966-2.1 >>
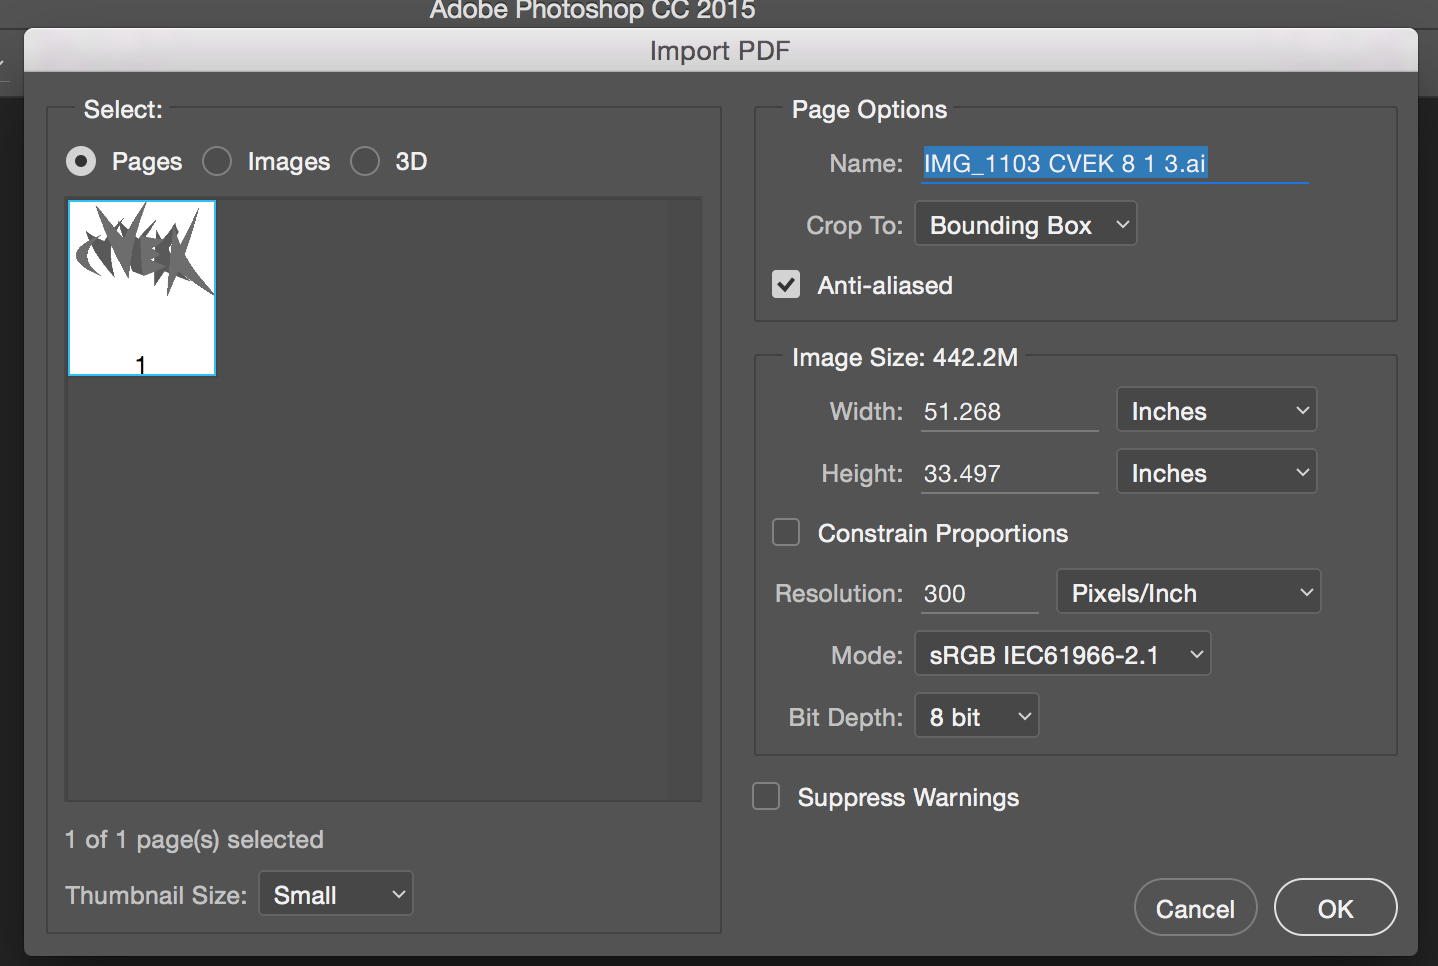
And yet... the greys are different once Photoshop delivers the result >>

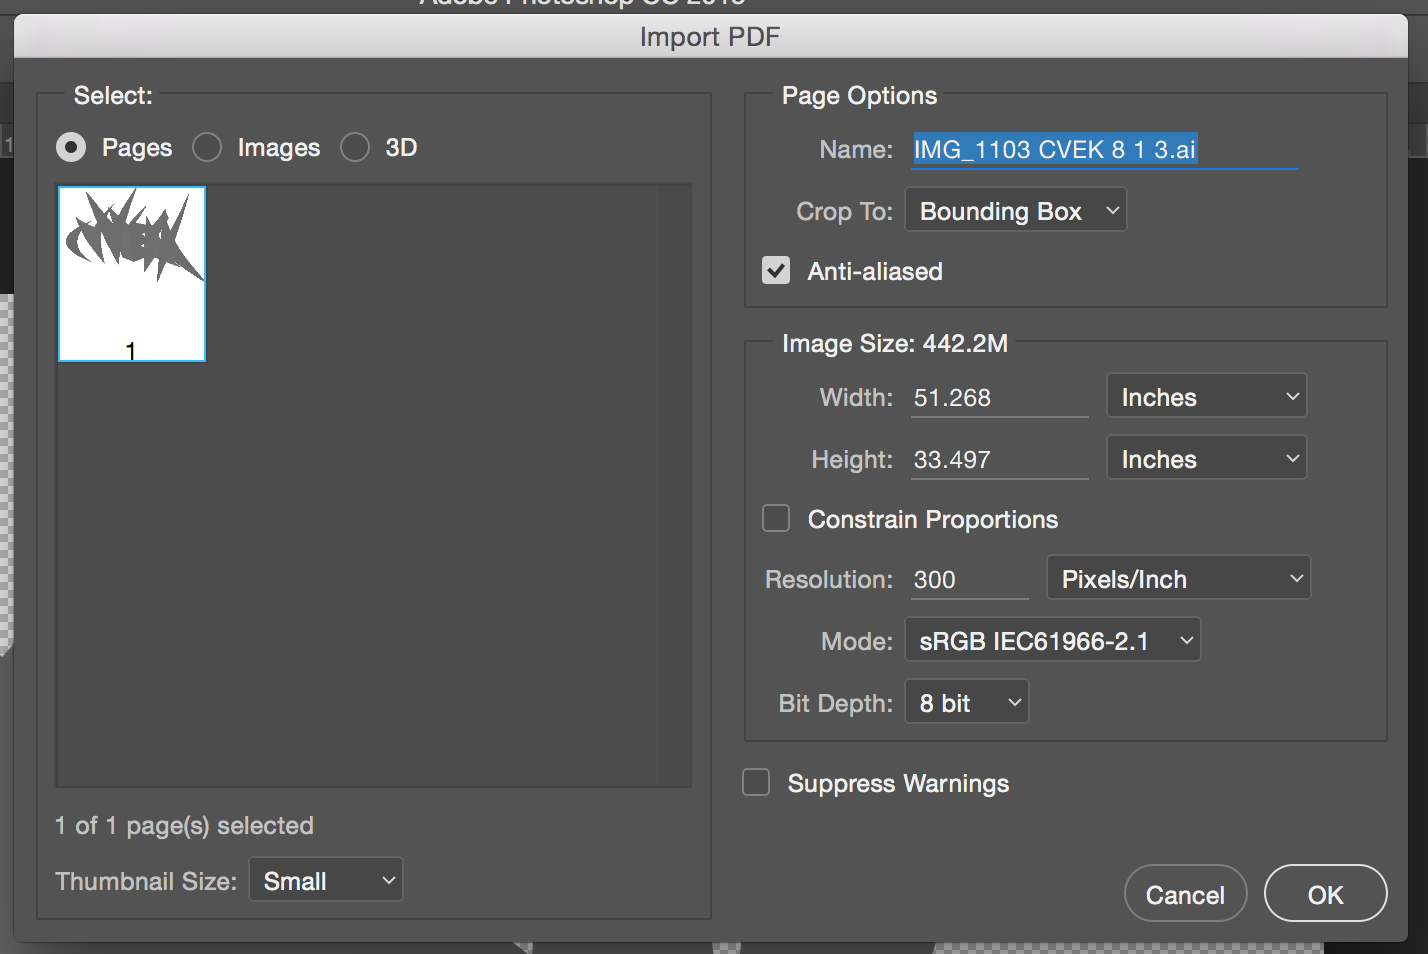
Now here's the wierd part... if, now, I should attempt again to rasterize the same .ai file a second time, this time the thumbnail preview displays the greys incorrectly (relative to the ai file), whereas the first time, as per above, the preview was correct. Quitting and restarting Photoshot would appear to "re-set" the color reading of the thumbnail preview to the correct/AI appearance of the greys.
Would look forward to knowing your thoughts...
Copy link to clipboard
Copied
... And finally, just to quell the question, Photoshop is correctly set to Preserve Embedded Color Profiles >>
Copy link to clipboard
Copied
OK. I don't have a lot of experience opening PDFs in Photoshop, so maybe someone else can chime in.
What I would try here is to open the .ai as Smart Object in Photoshop, and then rasterize once you're satisfied it looks right, and has the right resolution.
Copy link to clipboard
Copied
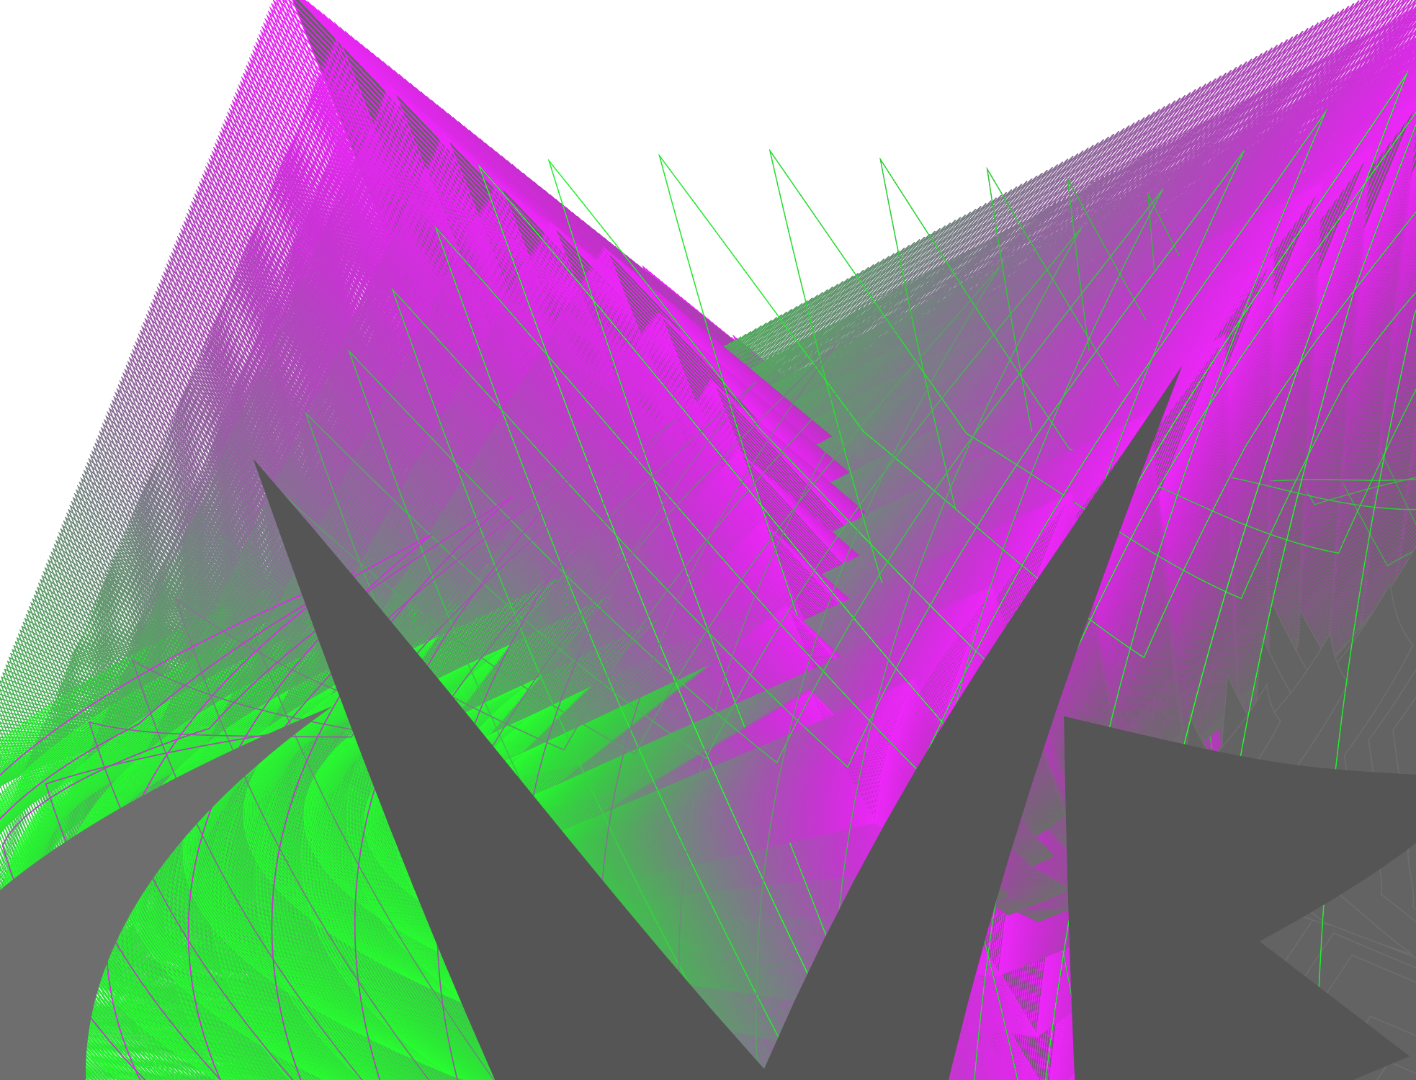
In the ai file there appears to be a mixture of RGB and CMYK colors.
Copy link to clipboard
Copied
Parallel posting in both threads:
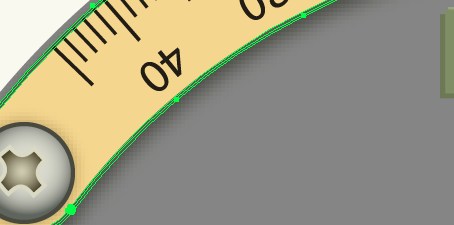
And as far as I can make out, the dark gray ellipses are defined as grayscale:
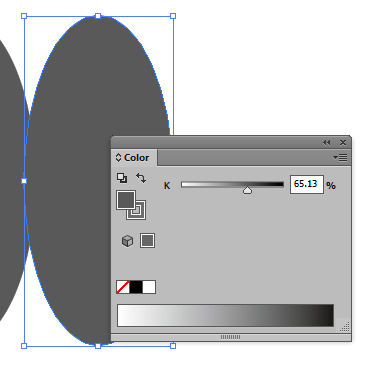
Grayscale is a can of worms. It will render according to working gray in Photoshop, so that's the least of the problems.
But Illustrator and InDesign have pretty poor grayscale support. In a PDF it should export as CMYK, 0-0-0-K, but with the tone response curve of that particular CMYK profile. This is not the same as a default working gray in Photoshop. AFAIK none of the dot gain profiles correspond exactly to any given CMYK profile.
So cp is right, this particular problem should go away with a little more discipline and consistency in setting up the document.
But aside from that I agree that Ai's and Id's grayscale support leaves a lot to be desired. Photoshop is doing it right.
Copy link to clipboard
Copied
My, this is getting confusing. I've suggested that the other thread is locked, and we continue the discussion here.
Copy link to clipboard
Copied
In Photoshop it's possible to avoid these problems.
For RGB you can set working gray to gamma 2.2, which corresponds to Adobe RGB. For ProPhoto you'd use 1.8. There's even an sGray profile that corresponds to sRGB.
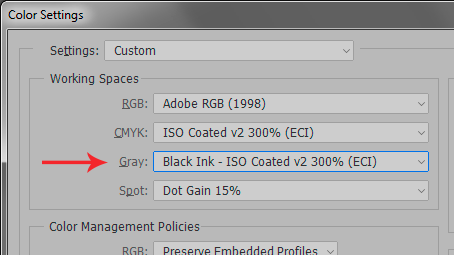
For CMYK, you can load the K tone response curve as working gray:
But Illustrator / InDesign don't have a working gray, so there's no way to know how grayscale is handled under the covers. All you know is that it should emerge as 0-0-0-K, but the actual tone response curve is a mystery.
Copy link to clipboard
Copied
Where is it that I adjust the Gamma to 2.2? in Photoshop? Where and how?
Will this affect the rest of my colors?
Copy link to clipboard
Copied
Edit - written before I saw Danny's post. Taken together they should probably cover most scenarios.
Just a few general tips for safely working with grayscale images.
For offset print, convert using the "working gray - black ink" option (see screenshot above). Paste the result into the K channel in a new CMYK file, so that it prints on the black plate only. This will now for all intents and purposes be a standard CMYK file that should be handled correctly everywhere.
For screen/web, I usually just convert to sRGB and think no more of it. But if you set your working gray to gamma 2.2, you should be safe in most circumstances and see the image correctly.
Desktop printers always expect RGB data, so the same here, just convert. If you need to print with black/gray inks only, there's usually a setting in the printer driver to take care of that.
Copy link to clipboard
Copied
OK, I did what I should have done a long time ago: I did some testing.
My theory seems to hold. Here's a bit from an sRGB .ai file, and the central gray area was defined as RGB vs grayscale. They appear identical in Ai.
When defined as K, and exported to PDF, it opens in Photoshop like this. First with Photoshop's working gray as dot gain 20%:
So that's a bit lighter. With working gray gamma 2.2, it looks like this:
Closer, but still not a perfect match.
So then I tried again, but this time, the gray area is defined as RGB. And now they all display identically in Photoshop, and identical to the .ai original:
My immediate suspicion here is that Illustrator doesn't color manage grayscale at all, but I'd need to do more testing to get to the bottom of that. In any case - always define swatches as RGB or CMYK, and you'll be fine (but stay in the main document color mode). Then color management works and does its thing. Avoid grayscale (K) values.
Copy link to clipboard
Copied
always define swatches as RGB or CMYK, and you'll be fine (but stay in the main document color mode).
Yeah.

Copy link to clipboard
Copied
Hi
I'v been following this thread since day one, trying to understand the Op problem.
We do (in my studio) add IA stuff to PS all the time without any problem (like since 20 years).
I'm Off of this thread. ( I don't understand the Op workflow) I prefer to get headache with other matters.
I wish I could add my 2¢ in the matter, but you are in good hands with all the experts around here.
Good luck.
Pierre
Copy link to clipboard
Copied
What the OP does wrong is define swatches as a K value, in other words grayscale.
As it turns out Ai does not properly color manage grayscale, hence the shifting gray values when you go to Photoshop, which does color manage grayscale. RGB and CMYK both work fine.
That's basically it.
So this is an Illustrator problem; not a Photoshop problem. Maybe the Ai team thought color management wasn't necessary with grayscale, since there's no color in it... 
-
- 1
- 2

 AdChoices