- Home
- Photoshop ecosystem
- Discussions
- Re: Combining Shapes and Making A Selection Inside...
- Re: Combining Shapes and Making A Selection Inside...
Combining Shapes and Making A Selection Inside the Combined Shapes Transparent
Copy link to clipboard
Copied
Below is a video describing my questions in more detail
I'm having trouble combining shapes and making a selection within the combined shape transparent
Combining Shapes and Transparent - YouTube
My questions are in the video
Explore related tutorials & articles
Copy link to clipboard
Copied
Forget the eraser tool exist,.
Click here to make an opacity mask.
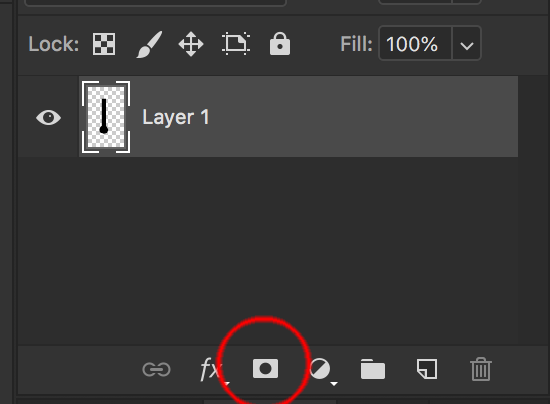
The mask will have a black border showign that is what you wil be painting into. Paint on your canvas a tint of black. 100% black is totally transparent, white is opaque..
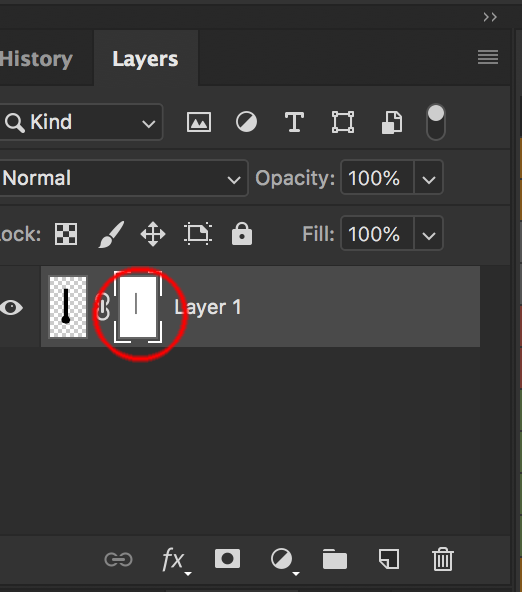
Clcik on the thumbnail to switch between editing the mask, or your art.
The artwork you show is more suited for Adobe Illustrator, any reason you do not want to do int there?
Copy link to clipboard
Copied
I do not have Adobe Illustrator. I can only work with Photoshop for now until I'm able to buy Illustrator
I'm new to photoshop so I may not understand the terminology yet.
I don't know what an opacity mask is and when I tried to do what you said, I did not get 'The mask will have a black border showing'
See video below
Copy link to clipboard
Copied
If you click on the button I circled in red in the first screenshot, the opacity mask is in the 2nd screenshot circled in red.
Copy link to clipboard
Copied
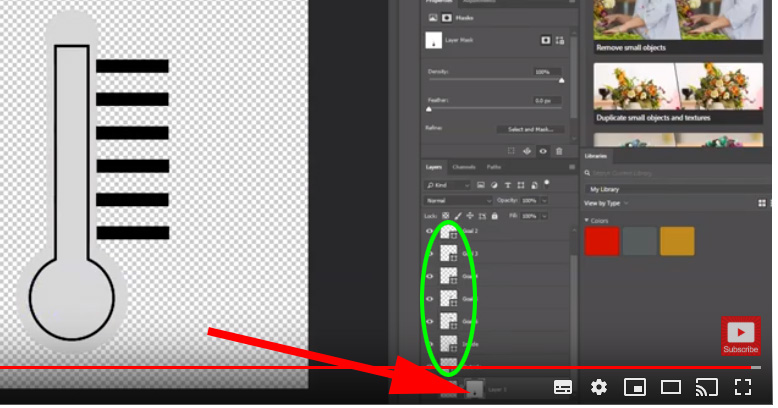
If you look at your video you will see you see something did happen. Red arrow you painted black on the bottom shape layer layer mask you are masking part of the shape layer. However you have many shape layers above that shape layer circled on green so they are most likely covering the area in the composite where you masked the lower shape layer.
Copy link to clipboard
Copied
So, what is the solution? How do I create a transparent selection, like I asked originally?
Copy link to clipboard
Copied
You need to mask all the layers that display in pixels in the area you want transparent. If you target all the shapes you have you have not merged them they are separated shape layers. Once targeted use menu Layer>New Group from layers. Then mask the group
Copy link to clipboard
Copied
I'm going to say this again, i am NEW to photoshop so the terminology you
are using, I do not understand.
1. what do you mean by 'You need to mask all the layers that display in
pixels in the area you want transparent'? And then show me how to do that.
2. The 'inside' and 'outside' layers were individual shape layers. I then
selected them all together and did 'Layer, combine layers, ....'
3. What do you mean by 'Once Targeted?' And then show me how to do that?
4. What am I selected in the layers panel when I go to 'Layer>New Group
from Layers'?
5. How do I then mask the group?
6. Once the above is done, then how do I make the selection I want and make
it transparent?
Copy link to clipboard
Copied
Yes you are a new user. Photoshop is a very powerful application. It is complex and has many feature. It a very useful development tool. Image Processing use many advance methods to manipulate images, Processing is not intuitive it took many years for mathematician and researchers to develop methods and algorithms to filter and process images. You need to learn the basic of Image processing and Digital Images file format capabilities. You need to educate yourself you must learn how things work. Layers and layer type, masking, filtering, adjustment, blending, tools and many other things. There is a huge learning curve when it come to Photoshop. Once you learn the basics learning Photoshop will be easer and you will learn things in a shorter period of time. All things are not intuitive. There are many Tutorials some are video tutorial you can access through Photoshop home workspace. New users like yourself need to use these first thing. Starting off trying to skip the basics like your trying to do will just slow your learning Photoshop down. You can not use Photoshop if you do not understand and know how thing work. Start by learning the basics. Take an online course play with Photoshop. Learn the Basics first.... Do not continue this thread.
You need too learn the basic you need to understand Photoshop terminology.
Copy link to clipboard
Copied
There are lots of different ways to do any one task in Photoshop. Here is what I think might be the most straightforward method with how you have your image set up. Before we start, it can help to go to Edit > Tools... and make sure Show Tooltips are turned on.
With your layers as they were at the end of your video...
1. In the Layer panel, click on the layer with the shape you combined that you want to select inside and make transparent (I believe it was labeled "Inside")
2. Select the Quick Selection Tool (keyboard shortcut W)
3. Drag inside the shape. The Quick Selection Tool will make a selection of the area up to the edge of the black outline (the area you want to be transparent)
4. Select the gray shape layer in the Layer panel (I think it's the layer labeled "Outside")
5. Go to the bottom of the Layer panel and click the 3rd icon from the left to create a layer mask (When a layer mask is applied to a layer, anywhere there is black the pixels in the layer won't show up, and anywhere it's white the pixels will show up. Levels of gray in the mask will affect the opacity of the image).
6. We're close but not there yet. The layer mask is masking the opposite of what we want (the outside portion is hidden and the inside is still showing). To swap the black and white, make sure the layer mask is still selected and go to Image > Adjustments > Invert.
The gray shape should now be transparent inside of the area outlined in black.
Let me know if you get stuck or need help understanding any of the terms I used or any of the steps.
Copy link to clipboard
Copied
thanks Myra,
I did follow your steps and it seemed like I was getting the correct results for each step.
However, the area I expected to be transparent did not become that. I saved the file as a .png and placed it on a new canvas with the background of red. The red did not show through.
any suggestions?
Copy link to clipboard
Copied
When you got to #6, was the outside part transparent and the part you wanted still filled? If so, then the layer mask needs to be inverted. Make sure the layer mask (the thumbnail on the right in that layer) is selected (it'll have white lines around the corners when selected). Go to Image > Adjustments > Invert.
Or did you get through the steps, export a png, and that result was not transparent where you expected? How did you export your png and what were your settings? One way to export a png is to go to File > Export > Save for Web (Legacy)... In the panel on the right side, select PNG. You can choose 8 or 24 which is shorthand for 8-bit and 24-bit. When you have a lot of colors, go for 24. It'll have a bigger file size, but it looks better. Because your image is gray and black, you should be fine with 8. Either one lets you select transparency. If you select transparency in the Save for Web dialog, do you get the result you wanted?
If neither of the above help, can you post a screenshot that shows your layers and your result?
Copy link to clipboard
Copied
Myra
I will get back to you on this. It may not be until Monday. I just got tied
up with something else. Please, just give me a few days to go through your
suggestions
thanks again for your help
Keith
On Tue, Aug 13, 2019 at 11:27 AM Myra Ferguson <forums_noreply@adobe.com>
Copy link to clipboard
Copied
Myra,
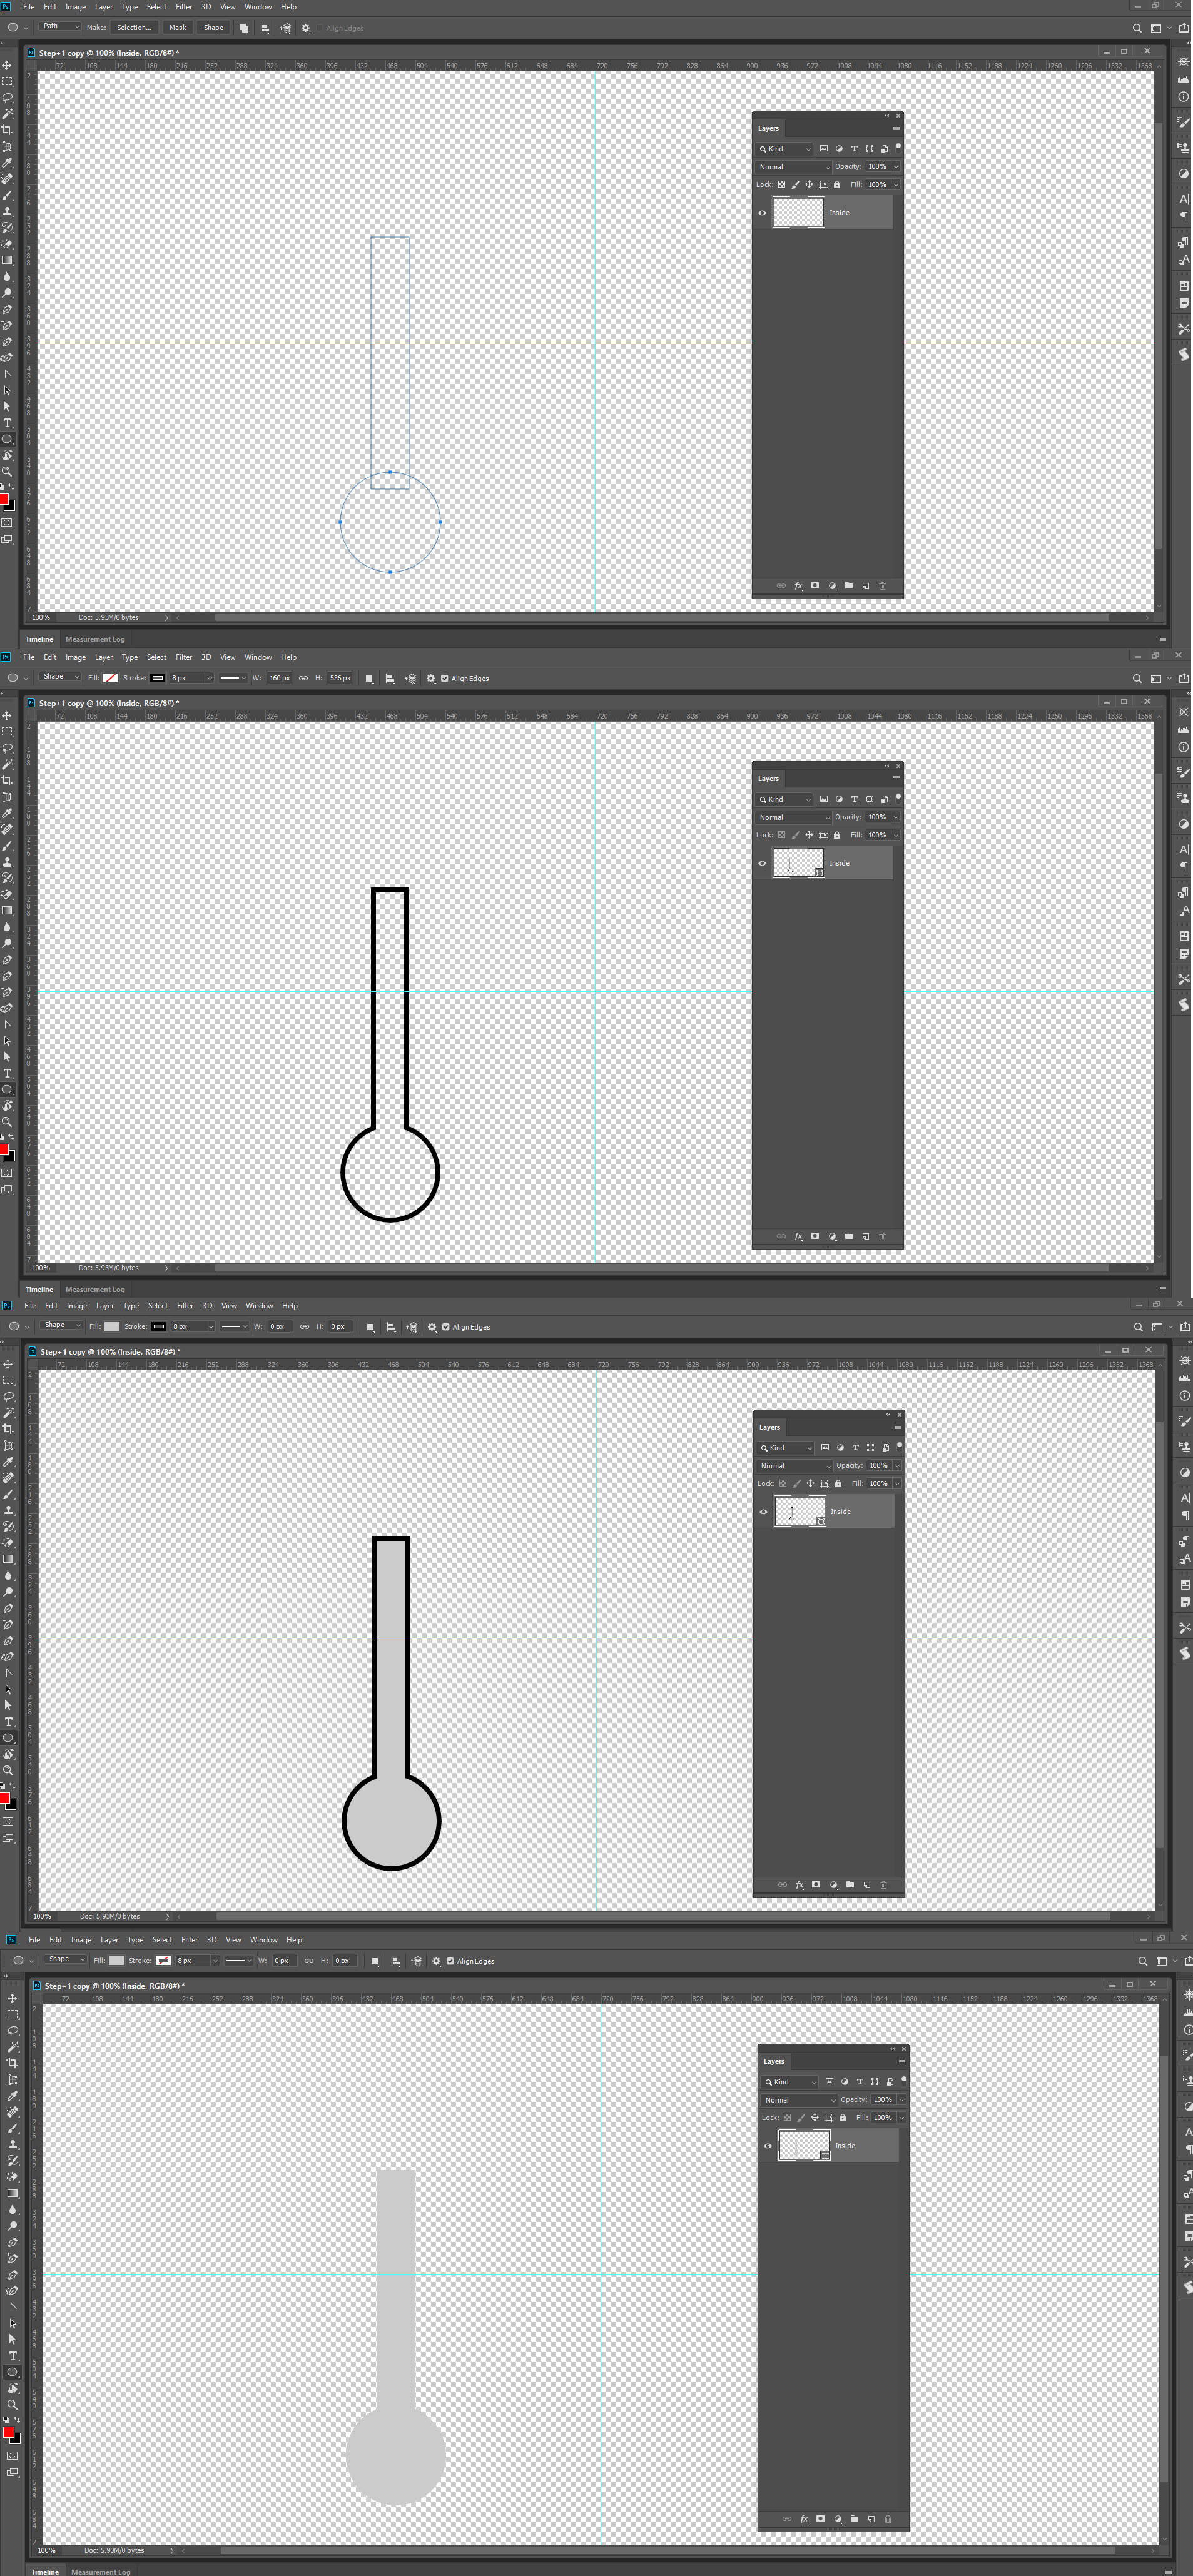
I couldn't get it to work. So here are the screenshots of each step
I have steps 1 thru 8
the images are backward. Step 1 is at the bottom and then work your way up
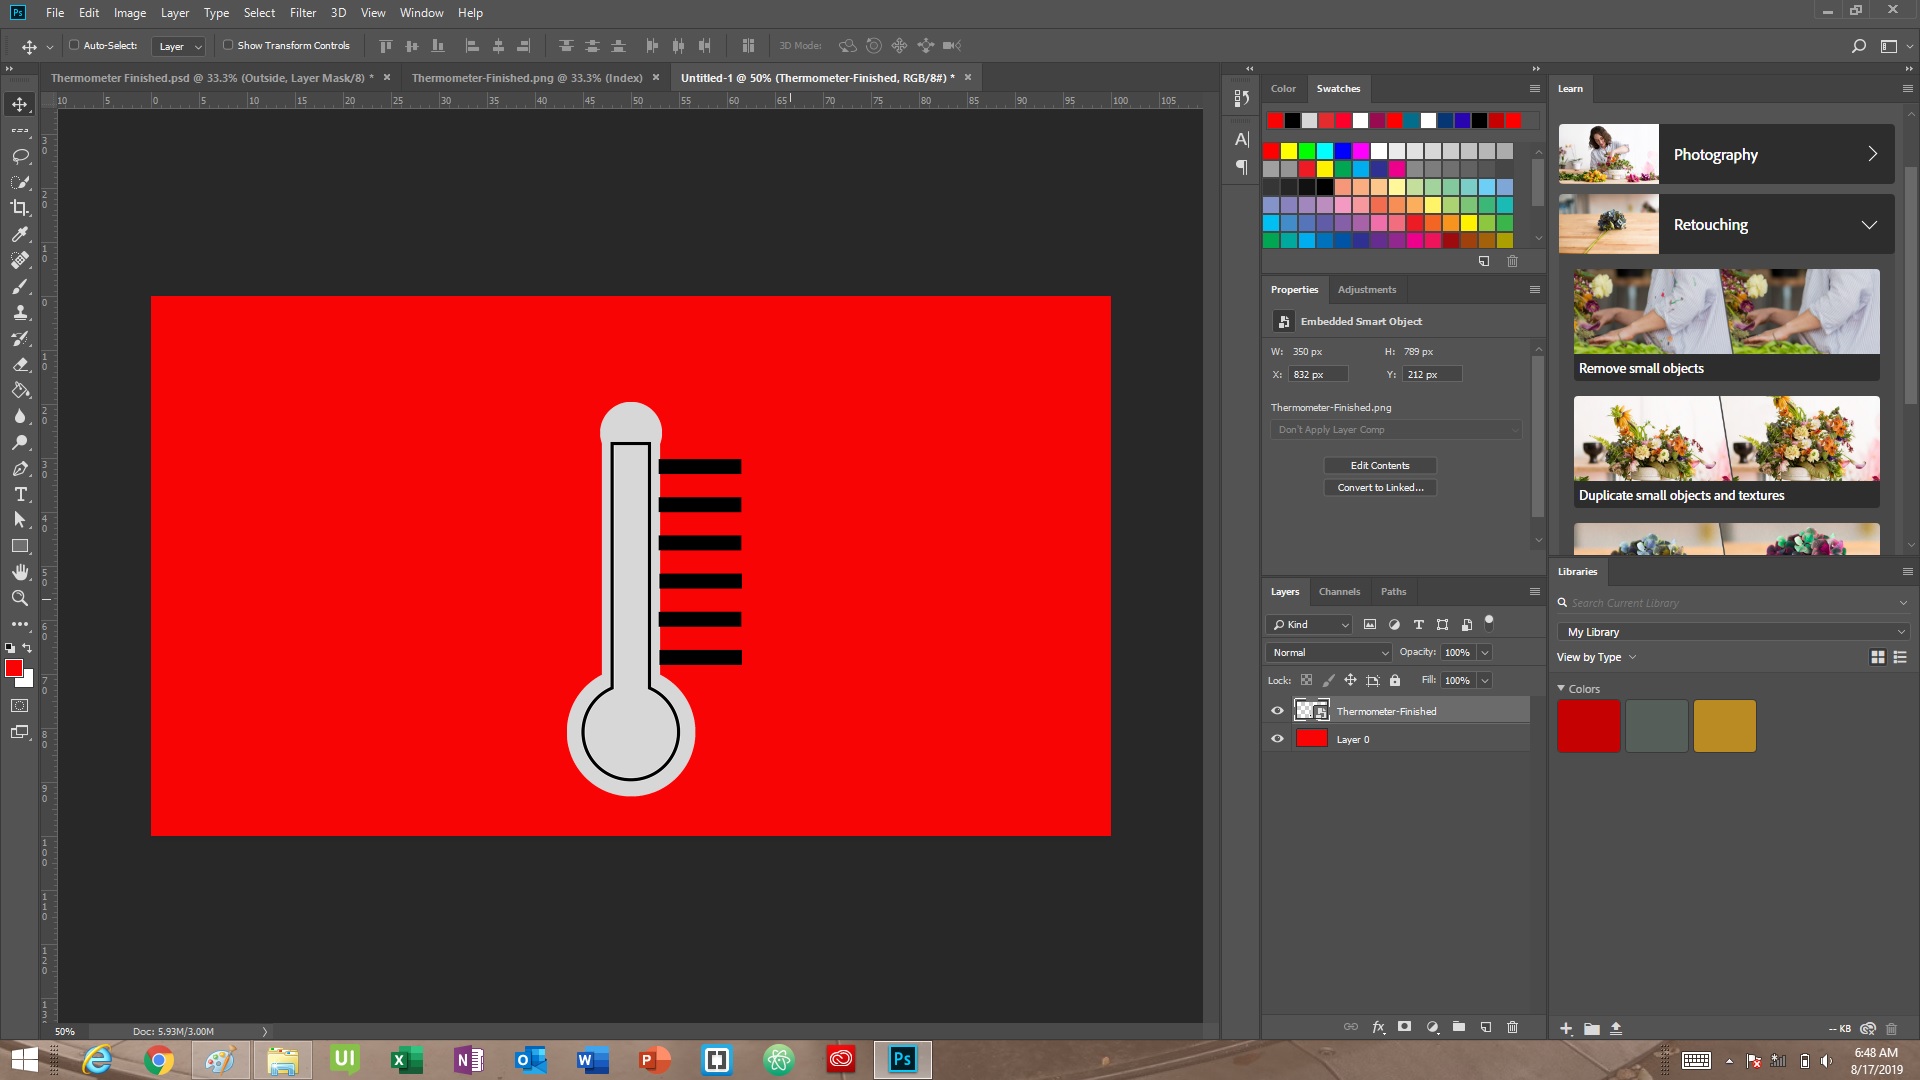
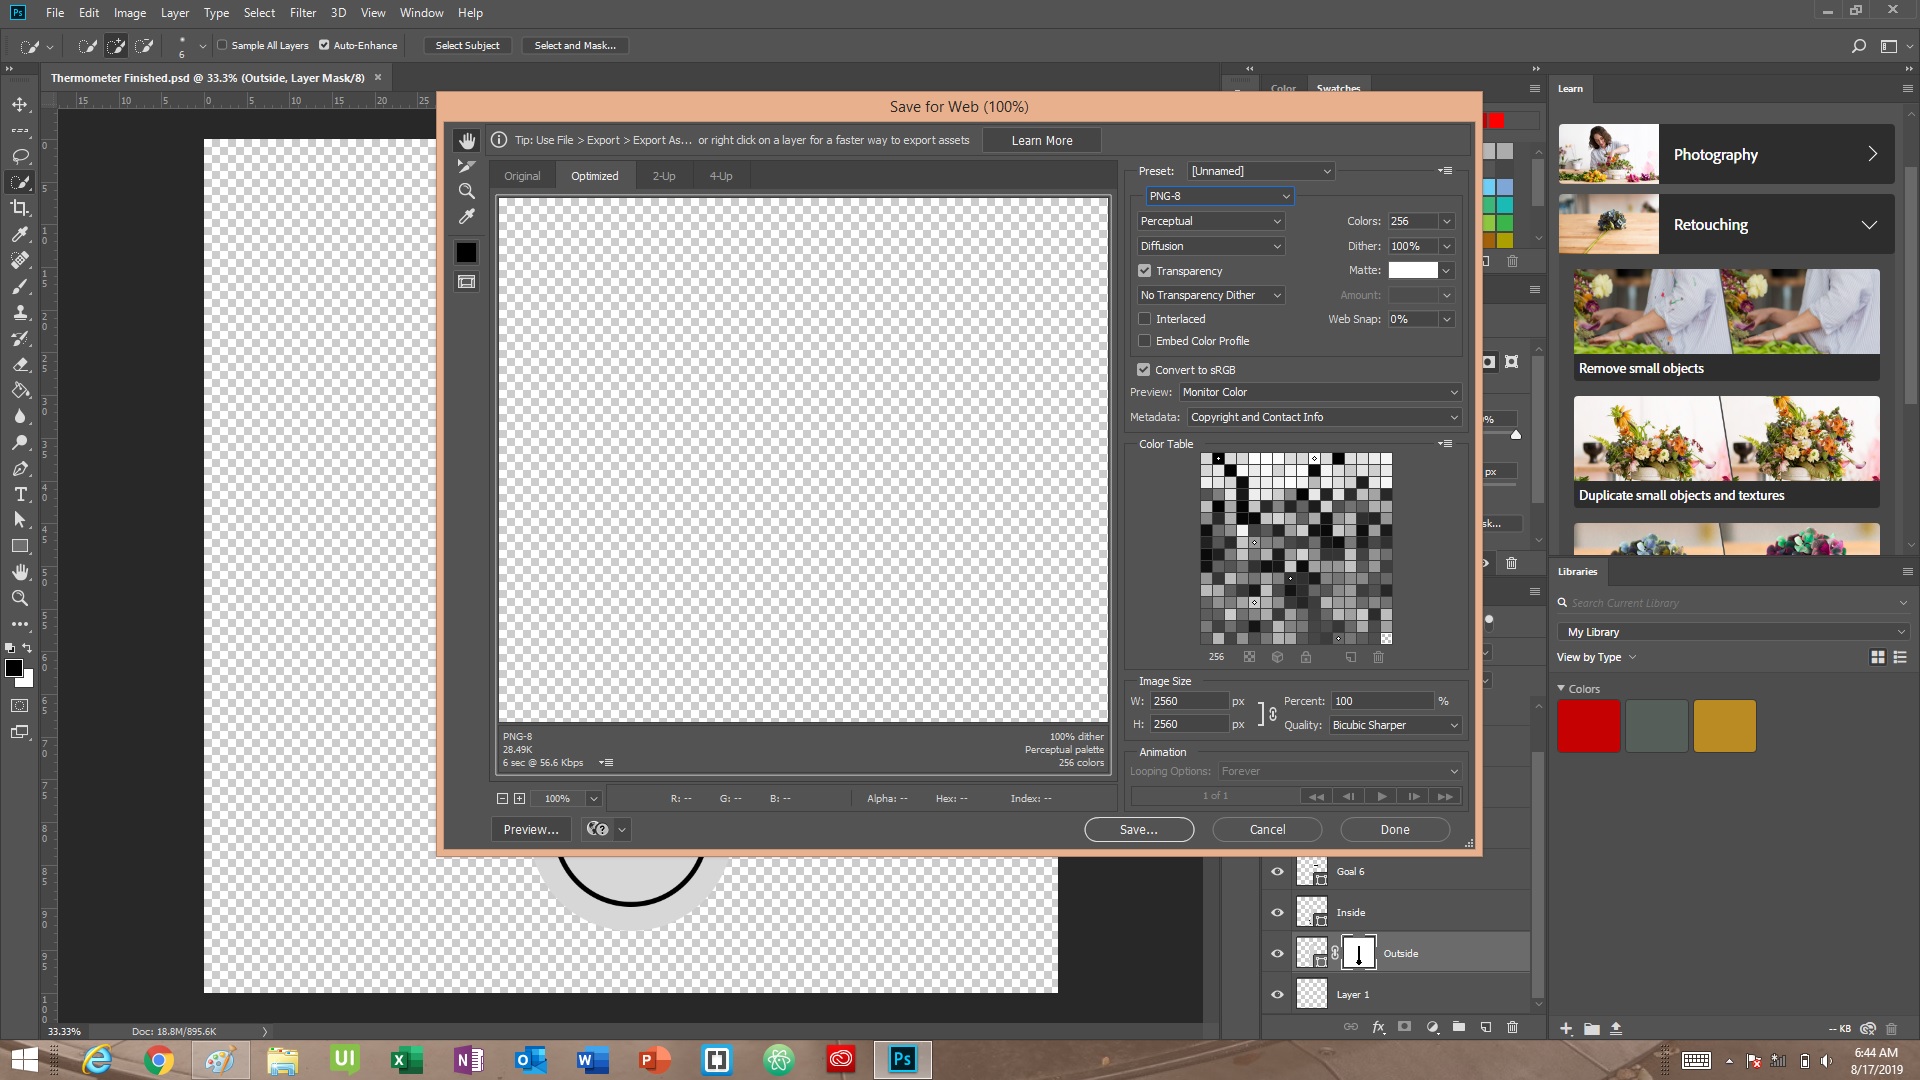
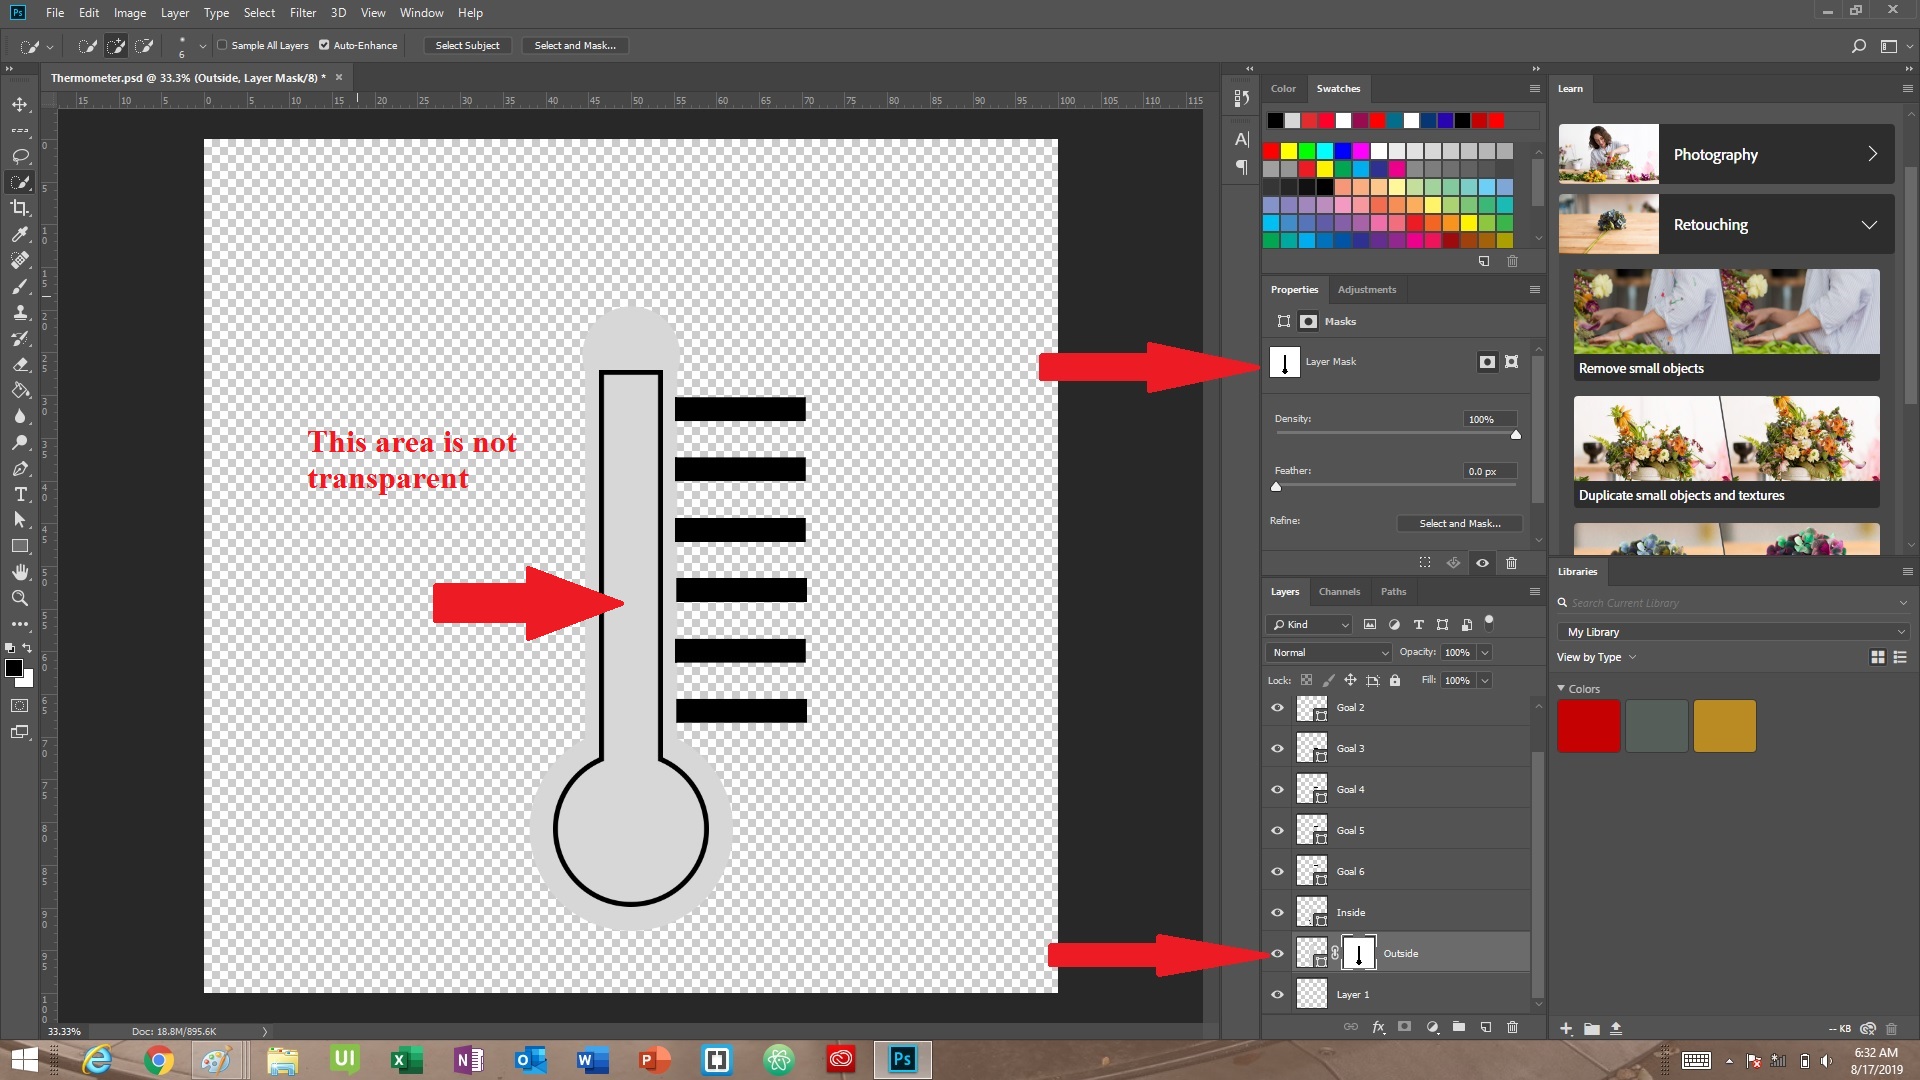
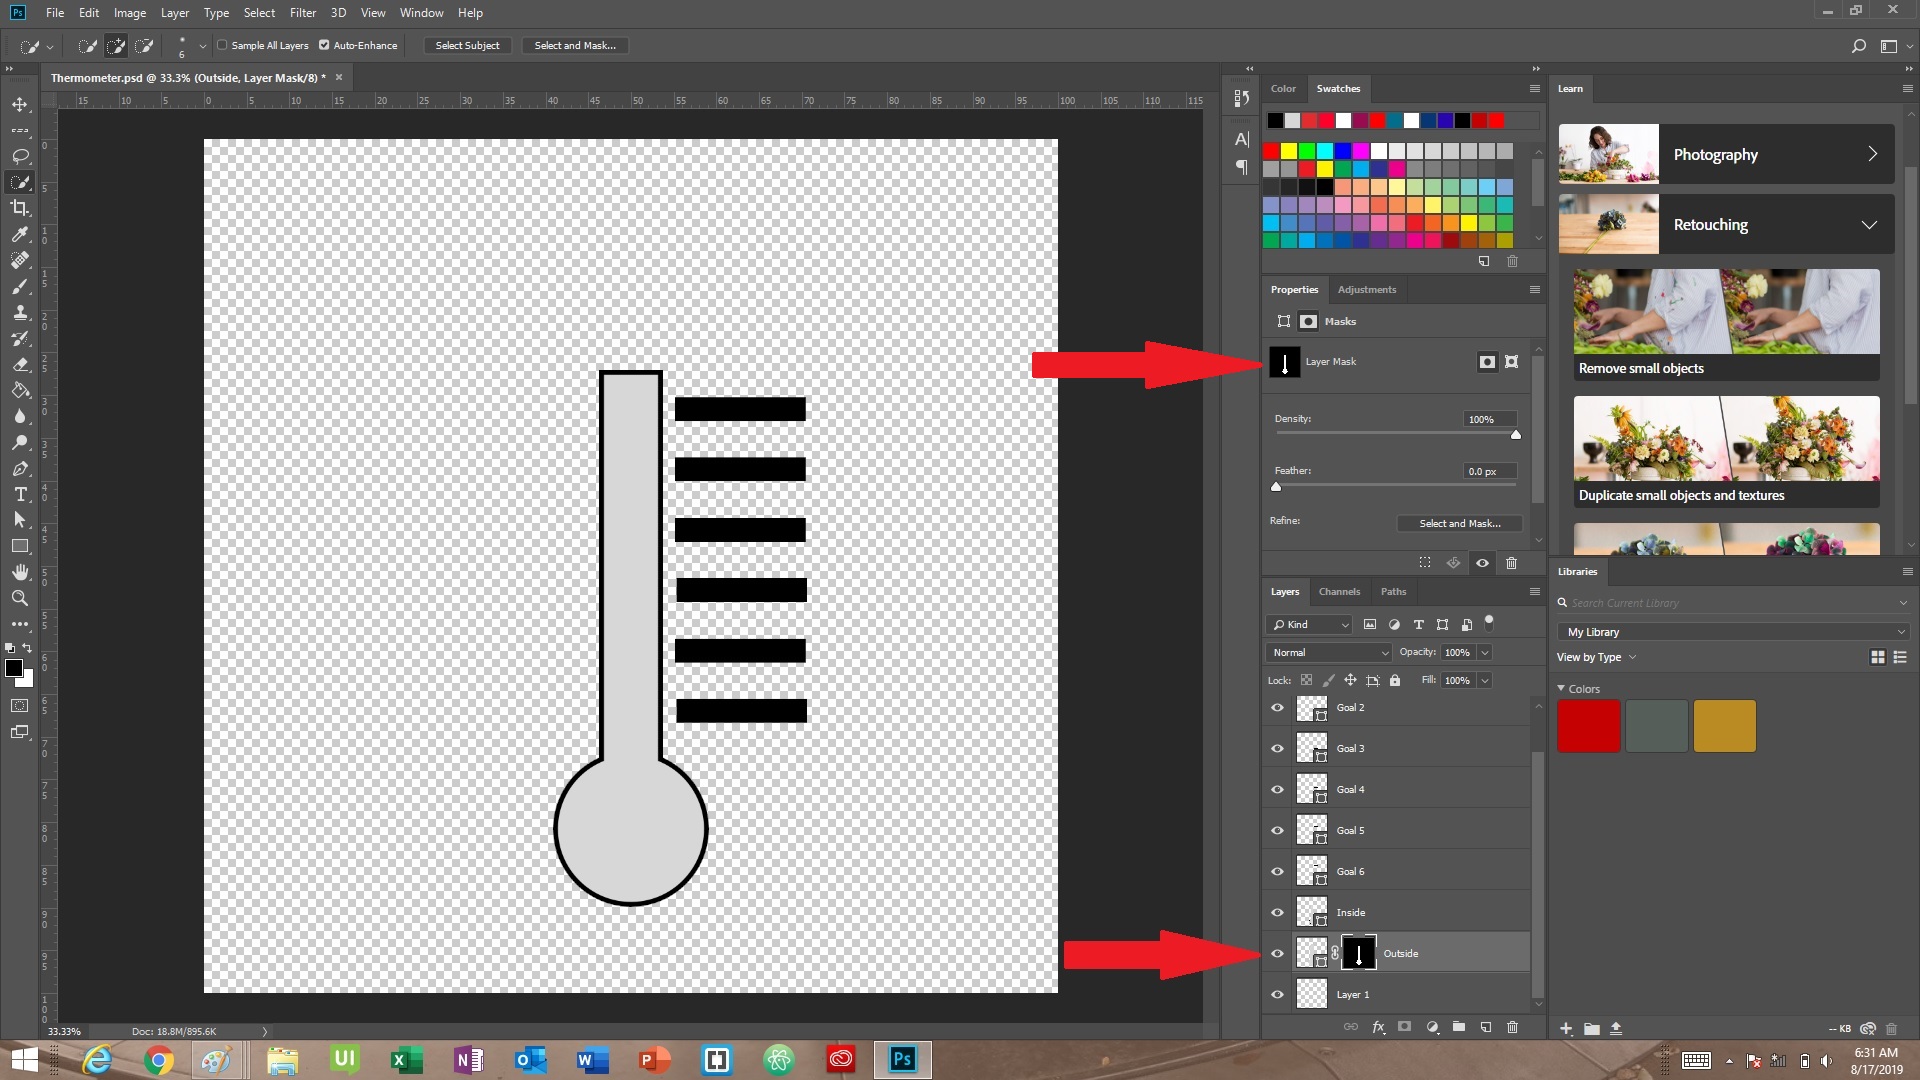
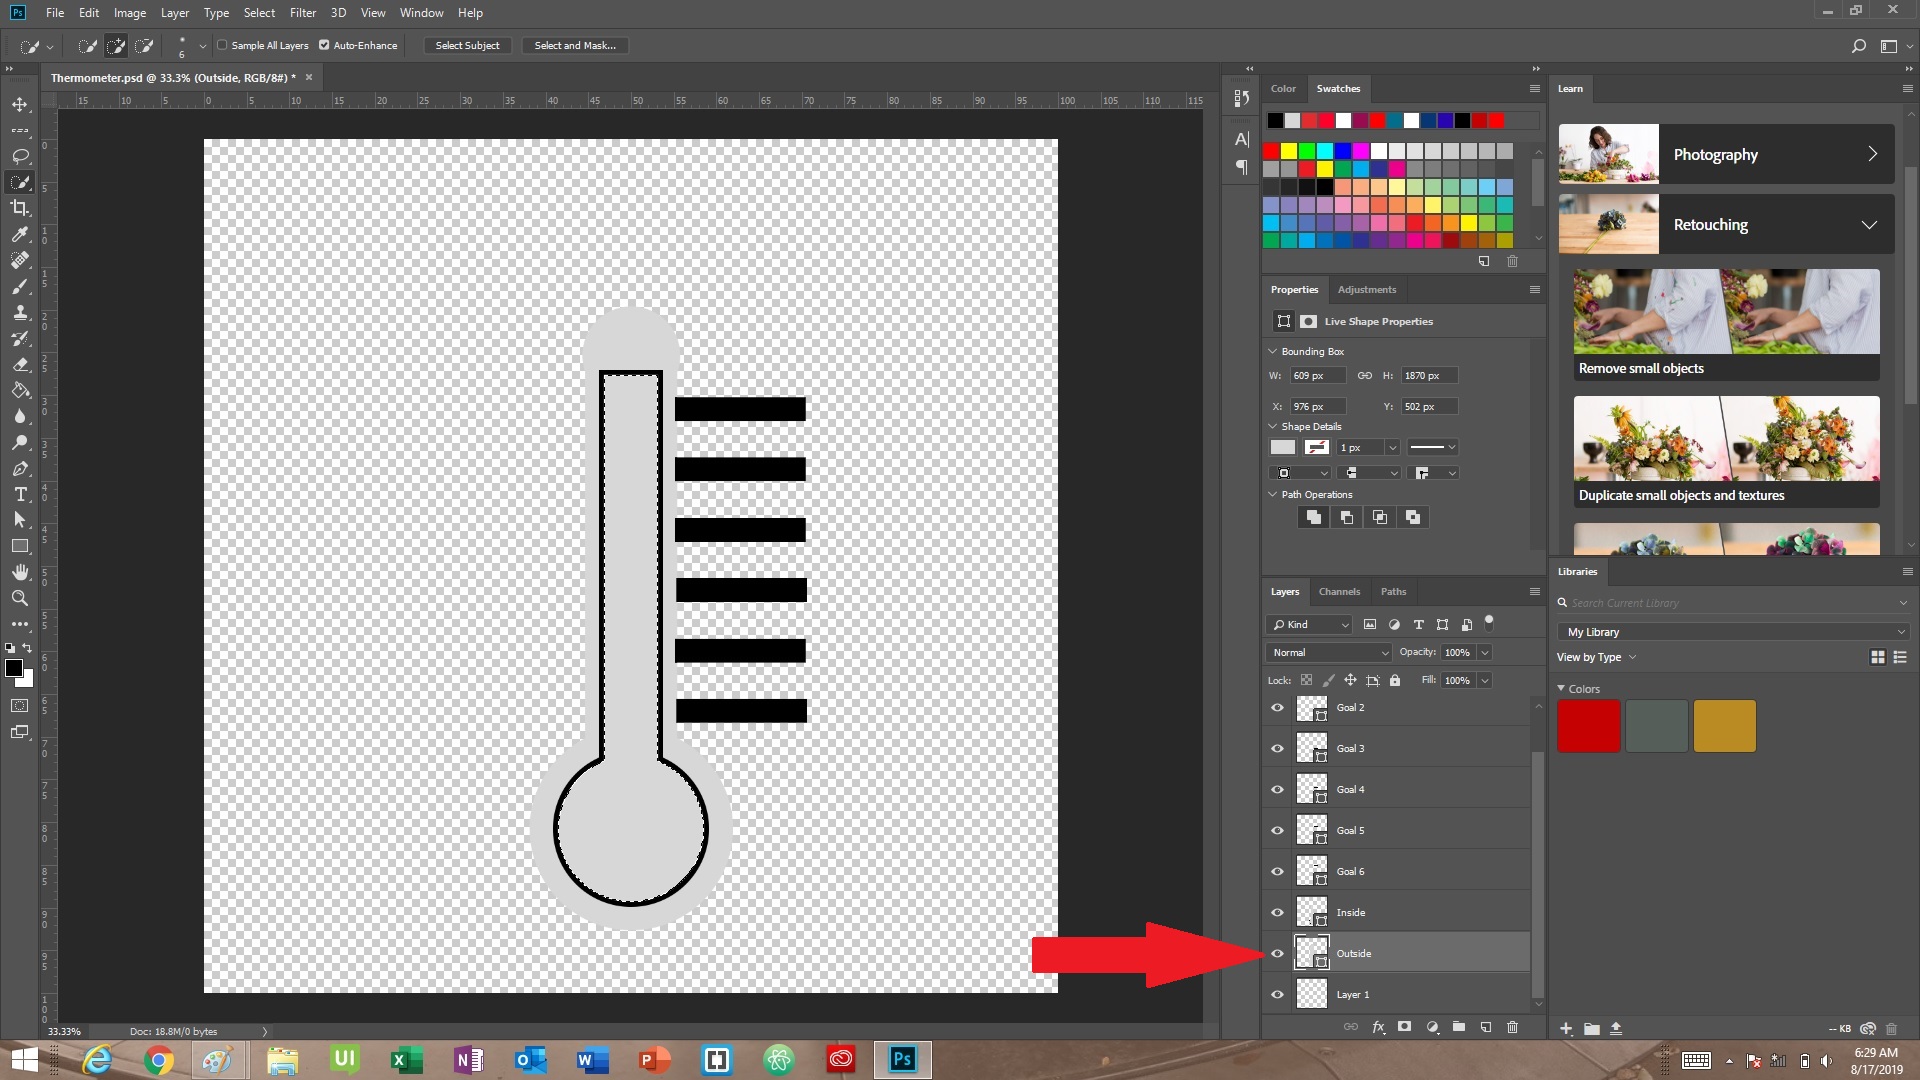
step 2 and 3
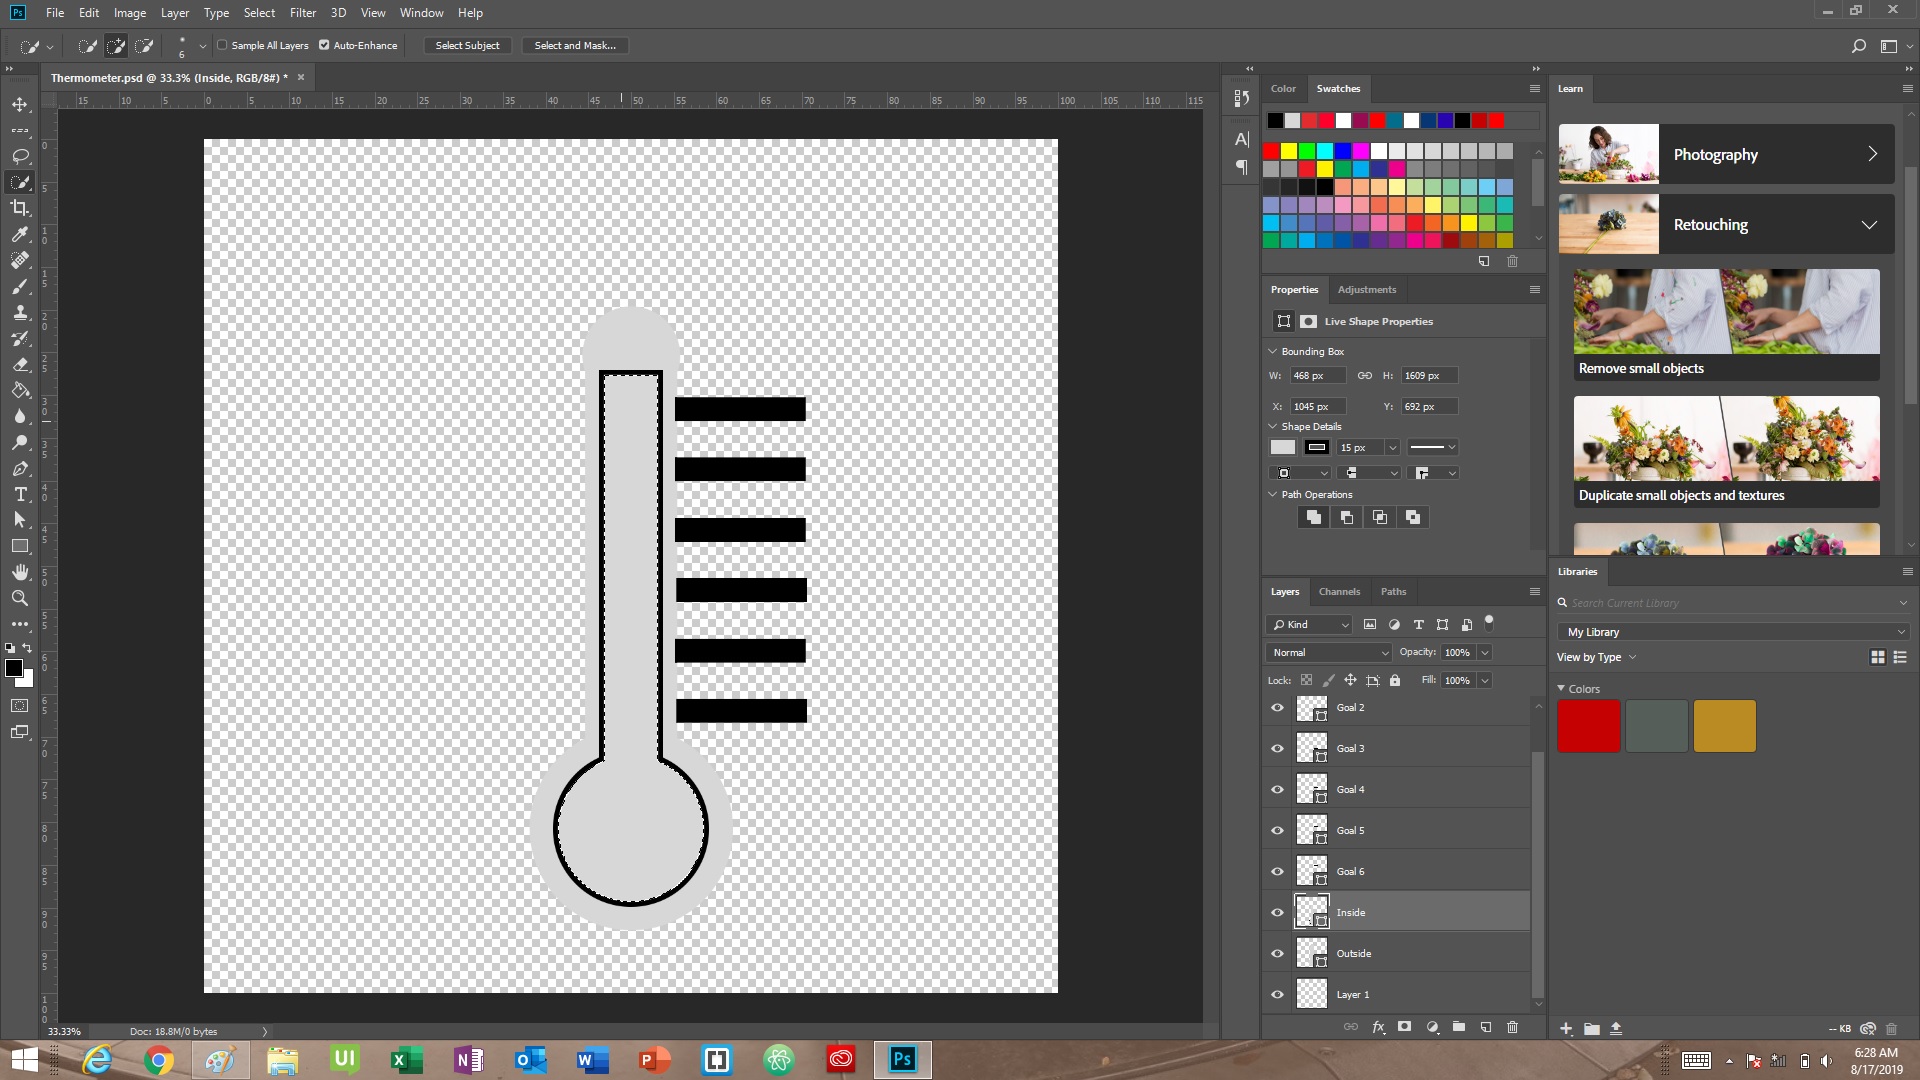
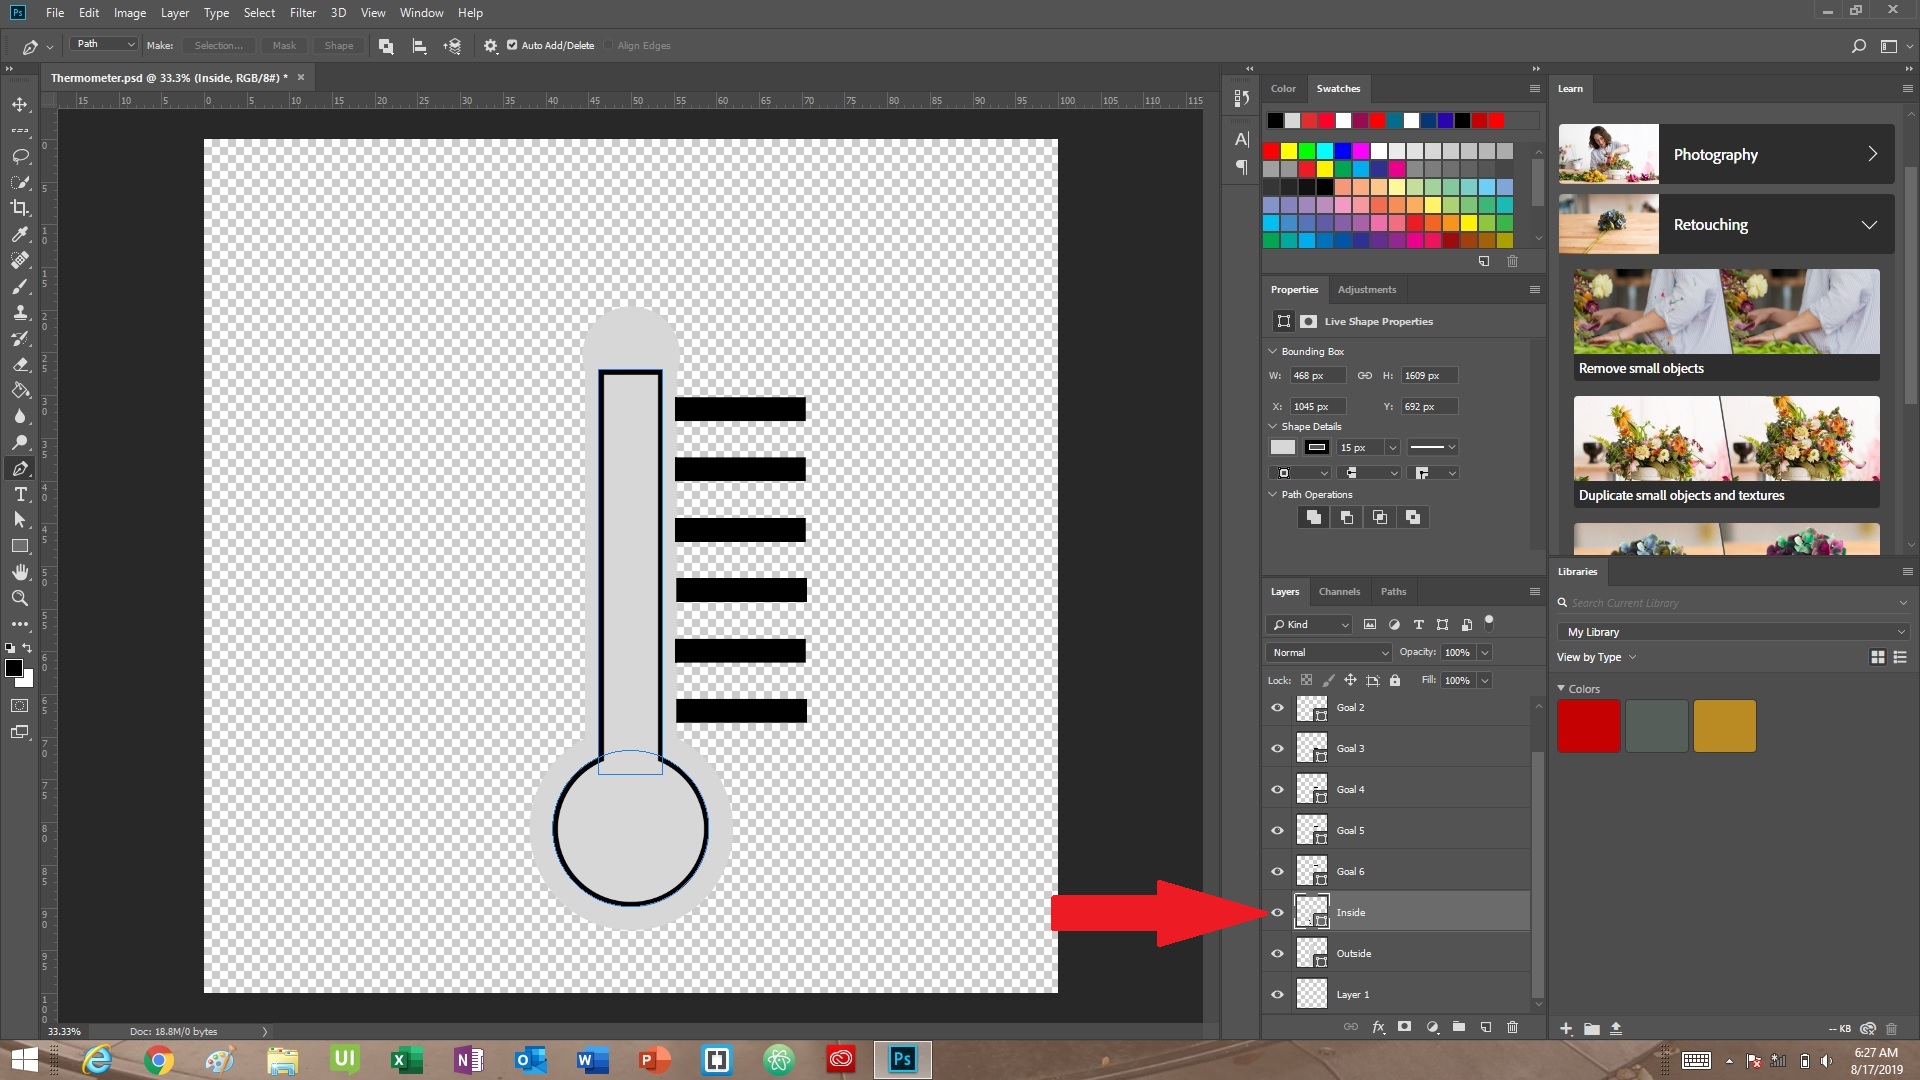
Copy link to clipboard
Copied
Lets start with what you call Your Step one. Shape Layer Inside is hard to tell exactly what it is actually like for all your layers are visible on the composite. We can see it has at least two closed paths in the shape by the visible blue path displayed. If stroke with Black it would look like and stroked key hole with no fill. If filled it would be a stroked filled key hole, If not stroked a filled key hole shape layer. What does your shape layer Inside look like when its is the only visible layer?
Copy link to clipboard
Copied
It would help if you learned how to use the shape tool better.

Copy link to clipboard
Copied
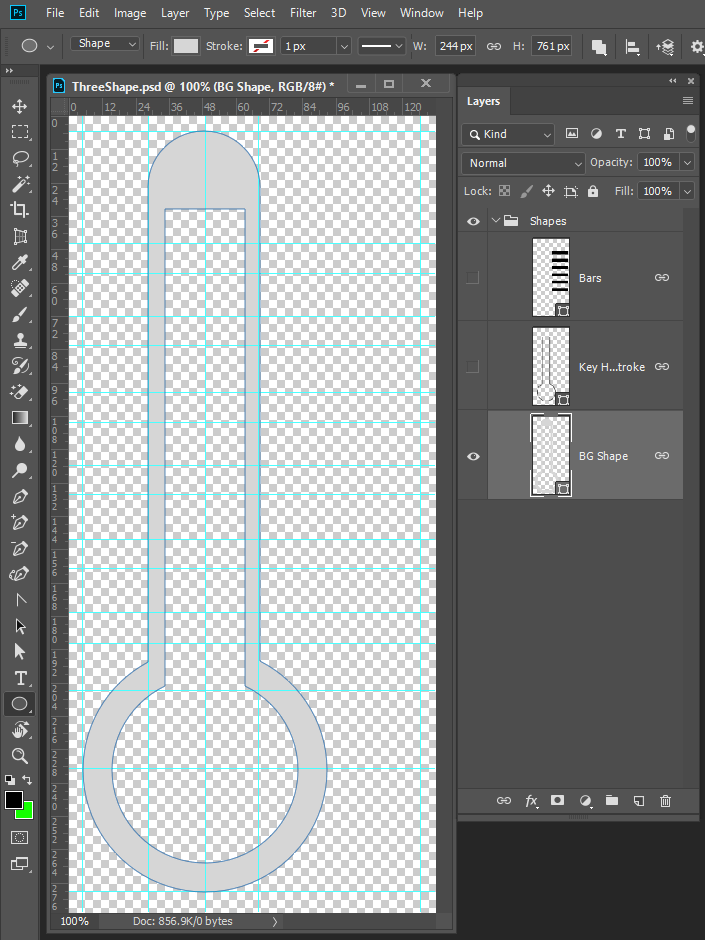
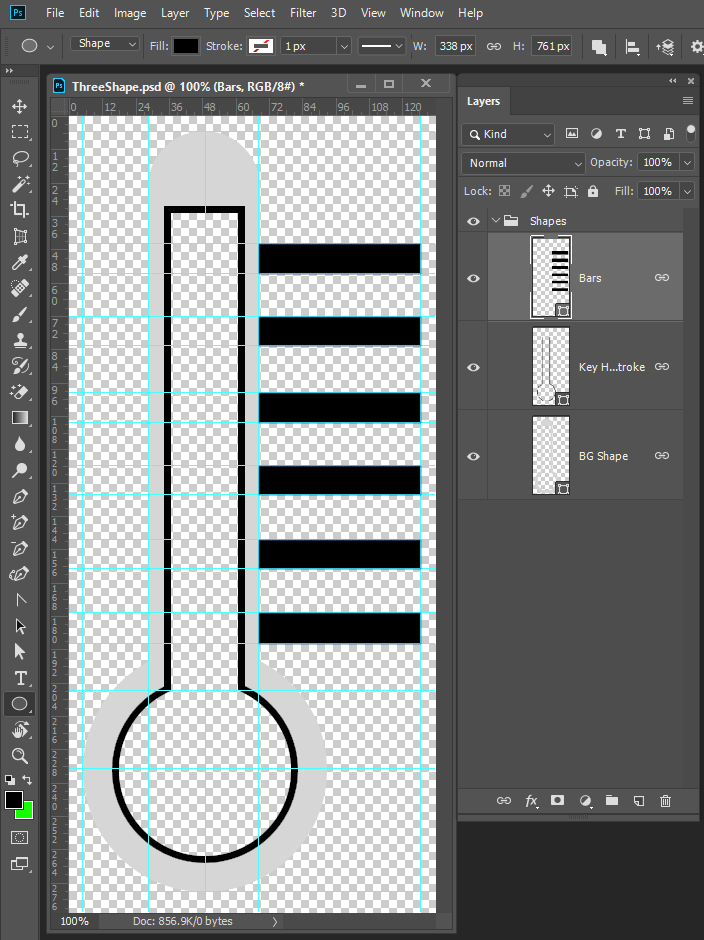
Learning to set guides and snap to might help download this psd http://www.mouseprints.net/old/dpr/ThreeShape.psd see if it helps.

Also explore the tool options bar

Also remember there are other vector tools you can edit shapes

You can merge shape layers

Copy link to clipboard
Copied
You will not learn to use Photoshop well in a short period of time. Learn the basics, Learn by playing with Photoshop. Make it a toy make it a game relax you will do no harm if you play on copies or new documents. Take it easy you will become comfortable in Photoshop and things will get easier to learn.
Copy link to clipboard
Copied
I downloaded the PSD and I exported the file as a png and the area that I wanted transparent is transparent. This was the result I was looking for, so thank you.
However, I'm going to have to figure out from your psd and your screen shots of each step, to figure out how this was done and why the inside area is transparent.
Give me a few days for me to look over this and see if i can figure this out. I'll let you know in a few days
Thanks.
Copy link to clipboard
Copied
I did not show any steps I use creating that PSD.
I started with your screen I screen captured from your video. I cropped you graphic out and resized it up in size. Quality does not matter.
I dragged out guide lines and aligned them to your graphic to make creating the three shape I plained to create easier.
I then used Photoshop vector tools the create the three shape layers.
First I added an empty layer I would create the shape in.
Create the shape
Add an empty layer
Create the second shape
Add an empty layer
Create the third shape.
The first shape was the Gray background shape. That was the most complex shape layer to create. Two Path where combined and two path subtracted. The Shape was filled with gray and has no stroke applied,
The second shape was easier, It has two combined path the shape is not filled but has a Black solid line stroke that forms the key hole.
The third Shape layer was the easiest it 6 rectangle filled shape combined.
The third could also be easily be made by creating one rectangle shape. Dupe the shape layer 5 times. Position the five copies then target the 6 shape layers and merge them into a single shape layer.
Normally there are more than one way to do things in Photoshop.

Copy link to clipboard
Copied
Thanks again for your suggestions. I will go through them and let you know
my results and if any questions come up.
Please give me a few days. I got tied up with something
Keith
Copy link to clipboard
Copied
I agree with JJMack. I think your Inside layer likely has a fill. If you want to check it, you can Alt + click on the eyeball for the Inside layer so that it's visible while the other layers aren't. Alt + clicking on that eyeball again will turn the other layers back on.
Copy link to clipboard
Copied
It more like from his screen captures it not possible to tell how many of his layer may have a gray fill in the inner key hole area. We see that if the Inner Shape has a fill in that area they have masked it off so one or more of the other layers have gray in the inner key hole area.
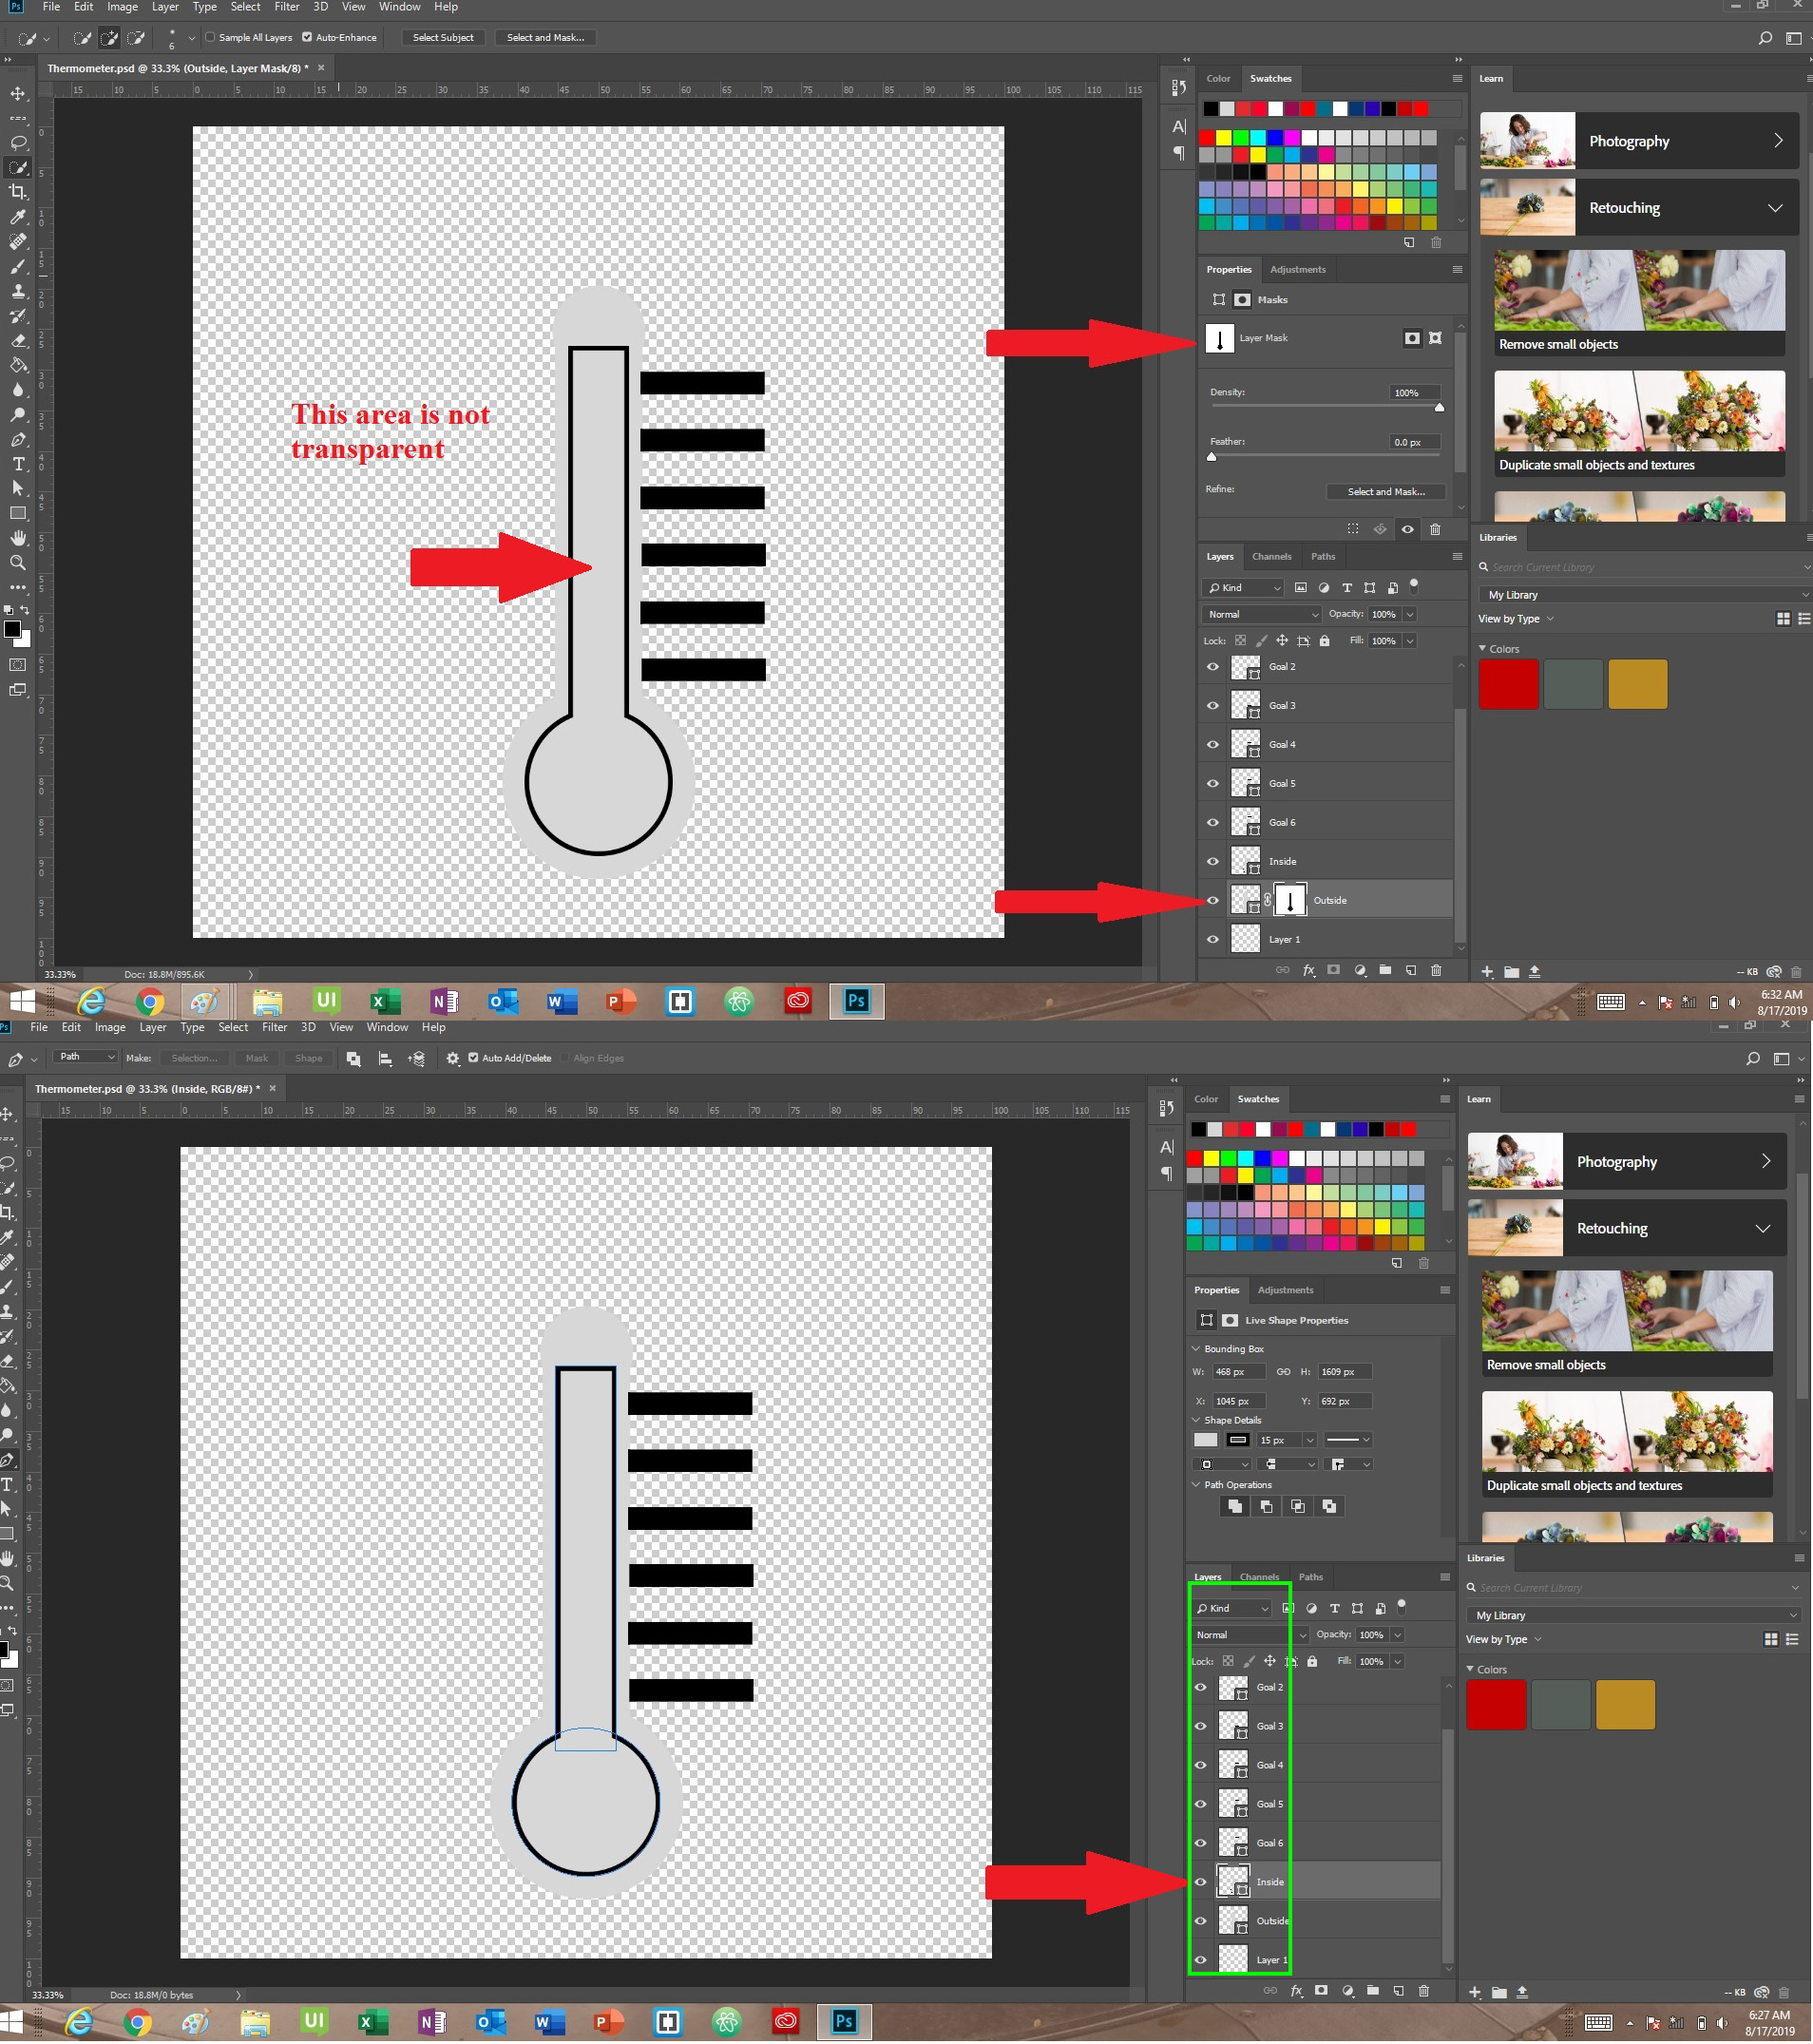
I created a PSD for them that has three shape layers none hat gtay ine that area. He most likey tried toe replicate what I cread foe them and was not able toe create the outer shape layer.

He does not understand basic things when it comes to Photoshop. He is trying to skip learning the basics. He doe not seem to believe me that he is making a mistake. I wrote repeatedly learn the basics then learning Photoshop will be easier.


Copy link to clipboard
Copied
After giving you all the sreen shots, I came across a video teaching about the 'Knockout' Effect in blending options
So I thought I would try it on my example. This is what I did
1. highlight the 'Inside' layer
2. Open the Layer Styles dialog box (i.e. blending options)
3. Selected 'Knockout'
4. selected the 'shallow' options and then decreased the fill capacity to 0
I under stand by doing this, it Allows you to Knockout/punch a hole in any particular shape or text from a layer. This will effect all layers below the current layer
By following what I did above, I now have the result I wanted, which is a transparent inside layer as you can see in the image below

Copy link to clipboard
Copied
Yes there are may ways to do some thing in Photoshop. Some ways are better then other ways. There may be no right or wrong way to do something if all way work. Sometime Image content or how something will be used may make one way better than all other ways.
You're new to Photoshop. Photoshop is huge and complex. Most terminology use in discussion about Photoshop is Greek to you and How Photoshop works is also unknown to you. Much of the technology used in Photoshop is not intuitive and took researcher years to develop, understand and develop software. When you first start using Photoshop you should use some teaching guide for learning Photoshop. Develop a good Basic foundation you can build upon. A firm foundation will make learning easier in a shorter period of time. The are Photoshop Tutorials on the web for just about anything you will ever want to do. However, right now you not ready for many of these. You will miss thing, you will not understand things and you will not learn things well. One reason while there is a lot a great information and tutorials on the Web there is also a lot of wrong Information and bad tutorials on the web. With your knowledge you will have difficulty knowing Right from wrong. For the bad information was place on the Web by someone that thought the information is right, great and want to help other. Unlike me they may be able to type , write well and be quite convincing.
Do yourself a favor learn the basics first, In the end if you want to keep using Photoshop you will eventually learn the basics. However learning them early will help a lot and you will Pickup on things quicker.
-
- 1
- 2
Find more inspiration, events, and resources on the new Adobe Community
Explore Now
