 Adobe Community
- Home
- Photoshop ecosystem
- Discussions
- Re: Could I use two magic wand selections to strai...
- Re: Could I use two magic wand selections to strai...

Copy link to clipboard
Copied
This is an odd query, but it relates to one I posted yesterday about trying to recognize the sprockets in a movie film frame.
If I have a vertical strip of sixteen movie film frames, which isn't perfectly straight-- what if I selected the top sprocket hole with the magic wand, and the bottom sprocket hole, and had a script which would take the coordinates of the two to straighten the image?
Thanks to anyone for whom this makes sense. I'm finding the crop-and-straighten command doesn't work.


 1 Correct answer

The script you want may work like this one.
...// Save the current preferences
var startRulerUnits = app.preferences.rulerUnits;
// Set Photoshop to use pixels
app.preferences.rulerUnits = Units.PIXELS;
Main();
// Return the app preferences
app.preferences.rulerUnits = startRulerUnits;
function Main() {
if (app.activeDocument.colorSamplers.length!=2) {
alert('two color sampler points are required');
return;
}
else {
point1 = [];
point2 = [];
for (var s=0,len=app.activeDocument.colorSamplers.length;s<len;s++) {
var
Explore related tutorials & articles
 18
Replies
18
18
Replies
18

Copy link to clipboard
Copied
I suppose you could. You would need to select one sprocket hole, get the bounds of the selection, then deselect it and select the second hole to compare the values, then put that info into a transform routine.
Copy link to clipboard
Copied
Please do not keep opening addition threads for the same subject. Sprocket holes may damaged. But as chuck wrote if you do one sprocket at a time you can get the bounds of each. Using the top left corner point of each you may be able to set a Photoshop ruler then use straighten. If that is possible I do not think it would matter what the distance between sprocket holes is any two holes could be used and Photoshop would calculate the rotation angle. Its a simple right triangle calculation. Your script could of course also do the math instead of Photoshop. However after the rotation the holes would move in an arc and now have different bounds
Copy link to clipboard
Copied
My apologies for double-posting.
JJ, I'm presently using this to recognize the frame from the single sprocket:
#target photoshop
if (documents.length == 0) {
alert("nothing opened");
} else {
// start
//setup
var file = app.activeDocument;
var selec = file.selection;
//run
var bnds = selec.bounds; // get the bounds of current selection
var // save the particular pixel values
xLeft = bnds[0],
yTop = bnds[1],
xRight = bnds[2],
yBottom = bnds[3];
var newRect = [ [xLeft-100,yTop -305], [xLeft-100,yTop+555], [xLeft + 1400,yTop + 555], [xLeft + 1400,yTop - 305] ]; // set coords for selection, counter-clockwise
selec.deselect;
selec.select(newRect);
// end
}
Now, this script is doing a pretty good job of growing the selection size from the magic wand selection. But it only handles one magic wand selection -- I've tried adding xLeft2 = bnds[4] up to 7, assuming this would encompass the second magic wand selection, but that doesn't work.
Copy link to clipboard
Copied
How are you defining the the two selections for the sprocket holes, or are you? If you know the general distance between the two holes, you can select, say, the top one, then interpolate where the second might be and use AM code to do a magic wand sample in the general area of the second sprocket hole. In this way, you can save the first selection to a variable, the deselect and have your script select the second and compute the needed rotation.
Copy link to clipboard
Copied
As I wrote in the other threat you would have to design some interface to pass to the script where sprocket holes are. The script would then use the magic wand to select a hole get the selection bounds do some processing then move on to the next hole and repeat the process. I suggested using color samplers points. You can set up to 10 points then run your script. Your current script process a hole that has been select with the magic wand and then does not know how to process the next hole for it does not know where it is.
You would need two scripts one to rotate the strip using two marked sprocket holes then clear the points. The second script to create frame documents or files for the sprocket holes marked with sample points.
Food
var orig_ruler_units = app.preferences.rulerUnits;
app.preferences.rulerUnits = Units.PIXELS; // Set the ruler units to PIXELS
message="Canvas Width=" + app.activeDocument.width.value + " ,Height=" + app.activeDocument.height.value;
for (var s=0,len=app.activeDocument.colorSamplers.length;s<len;s++) {
var colorSamplerRef = app.activeDocument.colorSamplers
;message = message + "\nColorSampler=" + s + " ,x=" + colorSamplerRef.position[0].value + " ,y=" + colorSamplerRef.position[1].value;
}
alert(message);
app.preferences.rulerUnits = orig_ruler_units; // Reset units to original settings
The magic wand can be use by making a function from scriptlistener action manager code you pass the x and y points here magic want sample 3x3 tolerance 20 anti-alias contiguous.
function MagicWand(Xpoint,Ypoint) {
// =======================================================
var idsetd = charIDToTypeID( "setd" );
var desc121 = new ActionDescriptor();
var idnull = charIDToTypeID( "null" );
var ref33 = new ActionReference();
var idChnl = charIDToTypeID( "Chnl" );
var idfsel = charIDToTypeID( "fsel" );
ref33.putProperty( idChnl, idfsel );
desc121.putReference( idnull, ref33 );
var idT = charIDToTypeID( "T " );
var desc122 = new ActionDescriptor();
var idHrzn = charIDToTypeID( "Hrzn" );
var idPxl = charIDToTypeID( "#Pxl" );
desc122.putUnitDouble( idHrzn, idPxl, Xpoint );
var idVrtc = charIDToTypeID( "Vrtc" );
var idPxl = charIDToTypeID( "#Pxl" );
desc122.putUnitDouble( idVrtc, idPxl, Ypoint );
var idPnt = charIDToTypeID( "Pnt " );
desc121.putObject( idT, idPnt, desc122 );
var idTlrn = charIDToTypeID( "Tlrn" );
desc121.putInteger( idTlrn, 20 );
var idAntA = charIDToTypeID( "AntA" );
desc121.putBoolean( idAntA, true );
executeAction( idsetd, desc121, DialogModes.NO );
}
Copy link to clipboard
Copied
OK, this is what I've got so far. With each image file I execute an action where I select the top sprocket hole with the magic wand and then the bottom sixteenth sprocket hole with the same. The script first subtracts the width of the sprocket (178 pixels) and then takes the difference in width to calculate the angle of rotation. Because the images are consistently the same length I don't really need a y coordinate to get good enough numbers to rotate. As well, using the action I can get close enough to the sprocket so that the magic wand takes care of the inexactness. So far this seems to work not badly.
#target photoshop
if (documents.length == 0) {
alert("nothing opened");
} else {
// start
//setup
var file = app.activeDocument;
var selec = file.selection;
//run
var bnds = selec.bounds; // get the bounds of current selection
var // save the particular pixel values
xLeft = bnds[0],
yTop = bnds[1],
xRight = bnds[2],
yBottom = bnds[3];
var newAngle1 = [ [xRight - 178 ] - xLeft ]; // remove sprocket width
var newAngle2 = [ [newAngle1 / 200 ] ]; // set amount of rotate
var Angle = parseFloat(newAngle2);
//Angle = -1 * Angle;
//alert(Angle);
}
Rotate();
function Rotate() {
var orig_ruler_units = app.preferences.rulerUnits;
app.preferences.rulerUnits = Units.PIXELS;
// Rotate portrait to landscape orientation
if (activeDocument.height > activeDocument.width) activeDocument.rotateCanvas(Angle);
// Reset units to original settings
app.preferences.rulerUnits = orig_ruler_units;
}
Copy link to clipboard
Copied
I do not understand how you are trying to calculate rotation from a single selection bounds. IMO you need the bounds of two sprocket holes. I do not understand how one would calculate any angle from a single selection that has two areas of selected pixels the selection has a single bounds. How do you calculate the offset of the two pixels areas within the selections bounds.
what is this about?
var newAngle1 = [ [xRight - 178 ] - xLeft ]; // remove sprocket width
var newAngle2 = [ [newAngle1 / 200 ] ]; // set amount of rotate
Copy link to clipboard
Copied
Hello JJ
Thanks very much for your patience.
I don't know how to obtain two magic wand selections. The code I have so far only draws a rectangular box around the two sprockets at the top and bottom sixteen frames down. What I'm doing in the code in the sample is to take the rightmost x value and deduct the width of the sprocket (178 pixels). By subtracting the difference between the left-x and right-x I get newAngle1. Now, the next part is inexact, but I've just done trial and error (not knowing the triangulation well enough) to figure out that if I take newAngle1 and divide by 200 I get the right angle to rotate with (e.g. 654 pixels out / 200 = 3.27 degrees).
The problem I have just realized is that this script can't tell whether the film is leaning to the left or the right-- it just knows that the film is out of kilter and figures out how much.
I am out of my depth with the color measuring script, and am using the magic wand because it doesn't need to be very exact-- so long as the action clicks somewhere within the sprocket hole the wand will fill the rest.
Cheers.
Copy link to clipboard
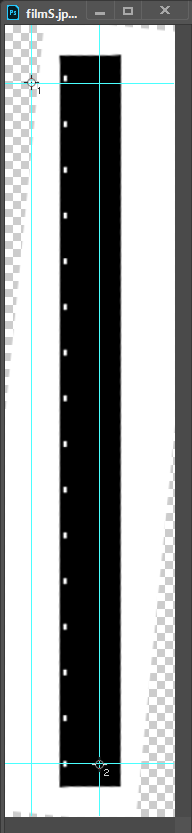
Copied
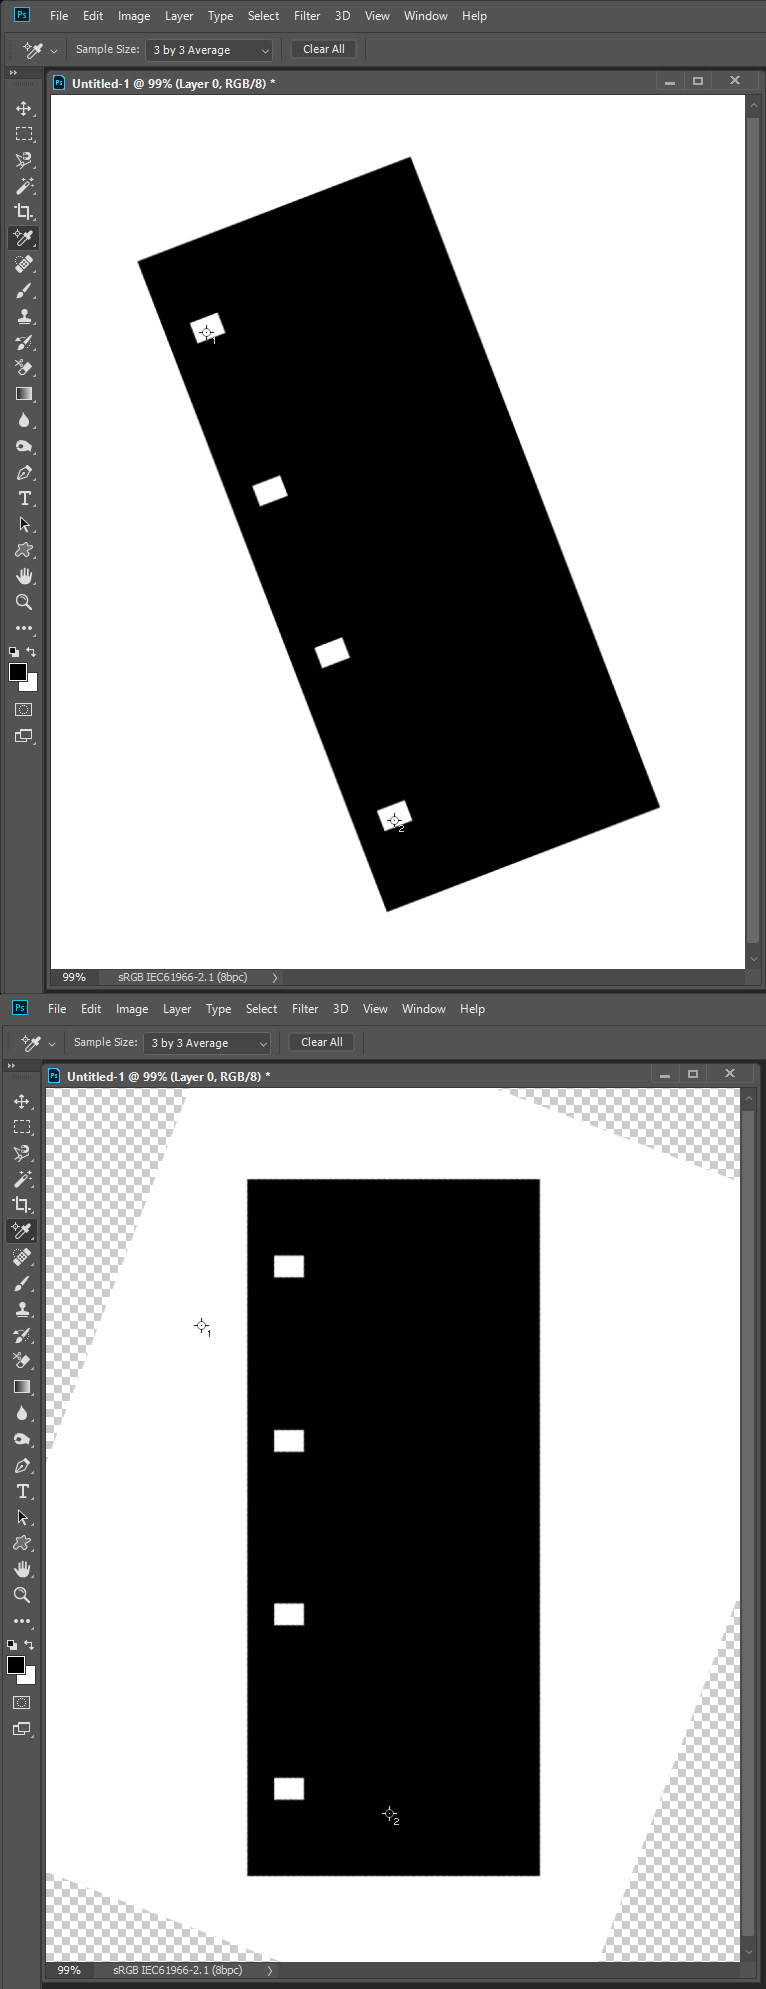
This is what I'm seeing (greatly reduced in size). If I select the top sprocket and the bottom one, my code just makes a box. The width of the sprocket is taken out-- but the box just knows how wide it is, not which way the film is drifting. On the plus side, the magic wand does a very good job of finding each sprocket and isolating the film frame-- once the strip is finally vertically straightened.


Copy link to clipboard
Copied
Recommendation.
Select both holes with the magic wand.
Save the selection as an alpha channel. Make the intersection with the selection equal to the upper half of the canvas. Remember the boundaries.Load the selection from the saved channel. Make the intersection with the selection equal to the bottom half of the canvas. Remember the boundaries. Calculate the angle of rotation.

Copy link to clipboard
Copied
Another inspiration...
CropStraighten();
function CropStraighten() {
executeAction( stringIDToTypeID('CropPhotosAuto0001'), undefined, DialogModes.NO );
};
Copy link to clipboard
Copied
Having seen your screen shot of the film strip, I would suggest that you do what you did to select the the two sprockets, then use the color sampler tool via scripting to sample a few pixels inside the four corners of the selection. then you can tell which sample have the pure white of the spockets and that would tell you which direction to rotate - the white edge might be an issue with this, so that's why you should sample the 4 corners.
Copy link to clipboard
Copied
moldyrutabaga wrote
Hello JJ
Thanks very much for your patience.
I don't know how to obtain two magic wand selections.
Yes I know that I was trying to help you do that. Instead of setting a selection and then running your script you would set two color sampler point marking a point inside of two different sprocket holes. Your script would select these sprocket holes one at a time using the magic wand tool and get the selection bounds of each the selections. You could use the two top left selection points to calculate the angles of right triangle to get rotation degree or perhaps use the two points to set a Photoshop ruler and then have Photoshop do the rotation for you with straighten. However it does not look like you can script Photoshop ruler tool. Straighten is a Photoshop Script.
// Save the current preferences
var startRulerUnits = app.preferences.rulerUnits;
// Set Photoshop to use pixels
app.preferences.rulerUnits = Units.PIXELS;
Main();
// Return the app preferences
app.preferences.rulerUnits = startRulerUnits;
function Main() {
if (app.activeDocument.colorSamplers.length!=2) {
alert('two color sampler points are required');
return;
}
else {
for (var s=0,len=app.activeDocument.colorSamplers.length;s<len;s++) {
var colorSamplerRef = app.activeDocument.colorSamplers
;MagicWand( colorSamplerRef.position[0].value ,colorSamplerRef.position[1].value);
MarkSelection();
app.activeDocument.selection.deselect();
}
}
}
function MarkSelection() {
try{
var SB = app.activeDocument.selection.bounds;
var SWidth = (SB[2].value) - (SB[0].value);
var SHeight = (SB[3].value) - (SB[1].value);
//MarkX((SB[0].value + SWidth/2));
MarkX(SB[0].value);
MarkX(SB[2].value);
//MarkY((SB[1].value + SHeight/2));
MarkY(SB[1].value)
MarkY(SB[3].value)
}
catch(e){}
}
// Return the app preferences
app.preferences.rulerUnits = startRulerUnits;
function MarkX(x) {
// =======================================================
var idMk = charIDToTypeID( "Mk " );
var desc61 = new ActionDescriptor();
var idNw = charIDToTypeID( "Nw " );
var desc62 = new ActionDescriptor();
var idPstn = charIDToTypeID( "Pstn" );
var idPxl = charIDToTypeID( "#Pxl" );
desc62.putUnitDouble( idPstn, idPxl, x);
var idOrnt = charIDToTypeID( "Ornt" );
var idOrnt = charIDToTypeID( "Ornt" );
var idVrtc = charIDToTypeID( "Vrtc" );
desc62.putEnumerated( idOrnt, idOrnt, idVrtc );
var idGd = charIDToTypeID( "Gd " );
desc61.putObject( idNw, idGd, desc62 );
executeAction( idMk, desc61, DialogModes.NO );
}
function MarkY(y) {
// =======================================================
var idMk = charIDToTypeID( "Mk " );
var desc63 = new ActionDescriptor();
var idNw = charIDToTypeID( "Nw " );
var desc64 = new ActionDescriptor();
var idPstn = charIDToTypeID( "Pstn" );
var idPxl = charIDToTypeID( "#Pxl" );
desc64.putUnitDouble( idPstn, idPxl, y );
var idOrnt = charIDToTypeID( "Ornt" );
var idOrnt = charIDToTypeID( "Ornt" );
var idHrzn = charIDToTypeID( "Hrzn" );
desc64.putEnumerated( idOrnt, idOrnt, idHrzn );
var idGd = charIDToTypeID( "Gd " );
desc63.putObject( idNw, idGd, desc64 );
executeAction( idMk, desc63, DialogModes.NO );
}
function MagicWand(Xpoint,Ypoint) {
// =======================================================
var idsetd = charIDToTypeID( "setd" );
var desc121 = new ActionDescriptor();
var idnull = charIDToTypeID( "null" );
var ref33 = new ActionReference();
var idChnl = charIDToTypeID( "Chnl" );
var idfsel = charIDToTypeID( "fsel" );
ref33.putProperty( idChnl, idfsel );
desc121.putReference( idnull, ref33 );
var idT = charIDToTypeID( "T " );
var desc122 = new ActionDescriptor();
var idHrzn = charIDToTypeID( "Hrzn" );
var idPxl = charIDToTypeID( "#Pxl" );
desc122.putUnitDouble( idHrzn, idPxl, Xpoint );
var idVrtc = charIDToTypeID( "Vrtc" );
var idPxl = charIDToTypeID( "#Pxl" );
desc122.putUnitDouble( idVrtc, idPxl, Ypoint );
var idPnt = charIDToTypeID( "Pnt " );
desc121.putObject( idT, idPnt, desc122 );
var idTlrn = charIDToTypeID( "Tlrn" );
desc121.putInteger( idTlrn, 20 );
var idAntA = charIDToTypeID( "AntA" );
desc121.putBoolean( idAntA, true );
executeAction( idsetd, desc121, DialogModes.NO );
}
the right triangle
Copy link to clipboard
Copied
Ah-- I've just seen your previous post, JJ. Thank you. I will see if I can understand that and learn from it.
Copy link to clipboard
Copied
The script you want may work like this one.

// Save the current preferences
var startRulerUnits = app.preferences.rulerUnits;
// Set Photoshop to use pixels
app.preferences.rulerUnits = Units.PIXELS;
Main();
// Return the app preferences
app.preferences.rulerUnits = startRulerUnits;
function Main() {
if (app.activeDocument.colorSamplers.length!=2) {
alert('two color sampler points are required');
return;
}
else {
point1 = [];
point2 = [];
for (var s=0,len=app.activeDocument.colorSamplers.length;s<len;s++) {
var colorSamplerRef = app.activeDocument.colorSamplers
;MagicWand( colorSamplerRef.position[0].value ,colorSamplerRef.position[1].value);
if (s==0) point1=TopLeft();
else point2=TopLeft();
app.activeDocument.selection.deselect();
}
Rwidth = point2[0]-point1[0];
Rheight = point2[1]-point1[1];
degrees = Math.atan(Rwidth/Rheight) * 180 / Math.PI;
app.activeDocument.activeLayer.rotate(degrees);
}
}
function TopLeft() {
try{
TL=[];
var SB = app.activeDocument.selection.bounds;
TL[0]=SB[0].value;
TL[1]=SB[1].value;
return TL;
}
catch(e){}
}
function MagicWand(Xpoint,Ypoint) {
// =======================================================
var idsetd = charIDToTypeID( "setd" );
var desc121 = new ActionDescriptor();
var idnull = charIDToTypeID( "null" );
var ref33 = new ActionReference();
var idChnl = charIDToTypeID( "Chnl" );
var idfsel = charIDToTypeID( "fsel" );
ref33.putProperty( idChnl, idfsel );
desc121.putReference( idnull, ref33 );
var idT = charIDToTypeID( "T " );
var desc122 = new ActionDescriptor();
var idHrzn = charIDToTypeID( "Hrzn" );
var idPxl = charIDToTypeID( "#Pxl" );
desc122.putUnitDouble( idHrzn, idPxl, Xpoint );
var idVrtc = charIDToTypeID( "Vrtc" );
var idPxl = charIDToTypeID( "#Pxl" );
desc122.putUnitDouble( idVrtc, idPxl, Ypoint );
var idPnt = charIDToTypeID( "Pnt " );
desc121.putObject( idT, idPnt, desc122 );
var idTlrn = charIDToTypeID( "Tlrn" );
desc121.putInteger( idTlrn, 20 );
var idAntA = charIDToTypeID( "AntA" );
desc121.putBoolean( idAntA, true );
executeAction( idsetd, desc121, DialogModes.NO );
}
Copy link to clipboard
Copied
Background layer can not be rotated you can add this before the rotate to convert a background layer to a normak layer
activeDocument.activeLayer.isBackgroundLayer=0; // Make it a normal Layer

Copy link to clipboard
Copied
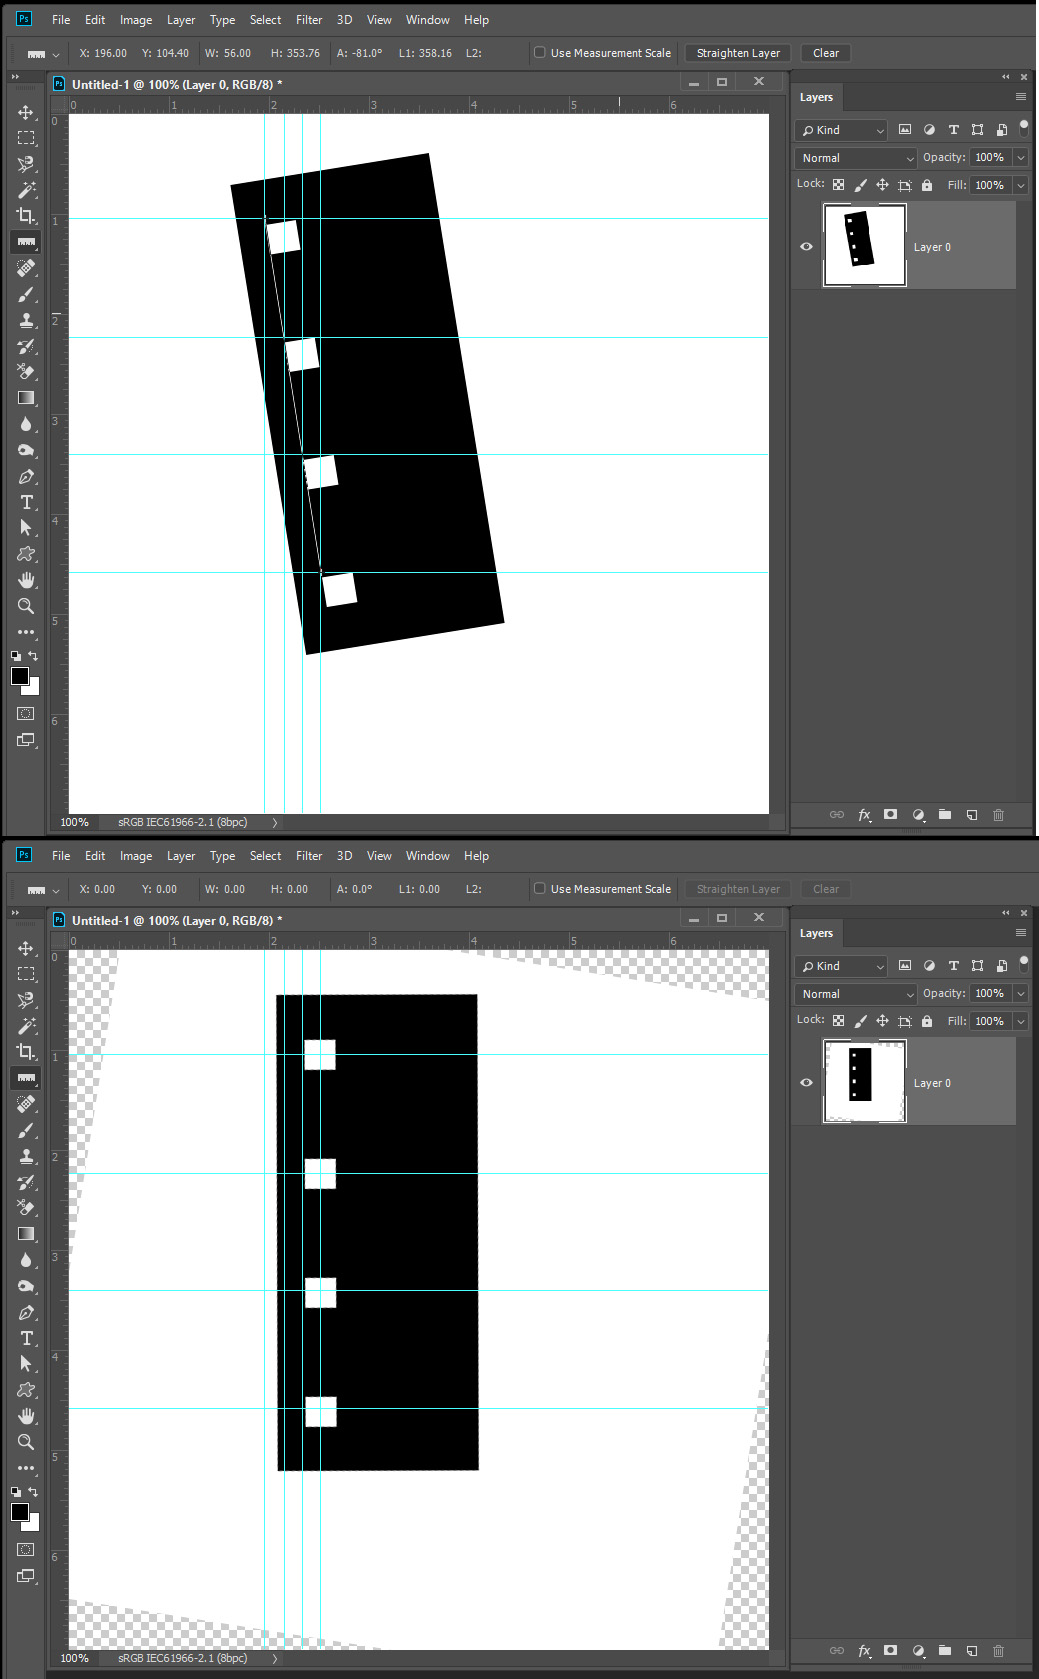
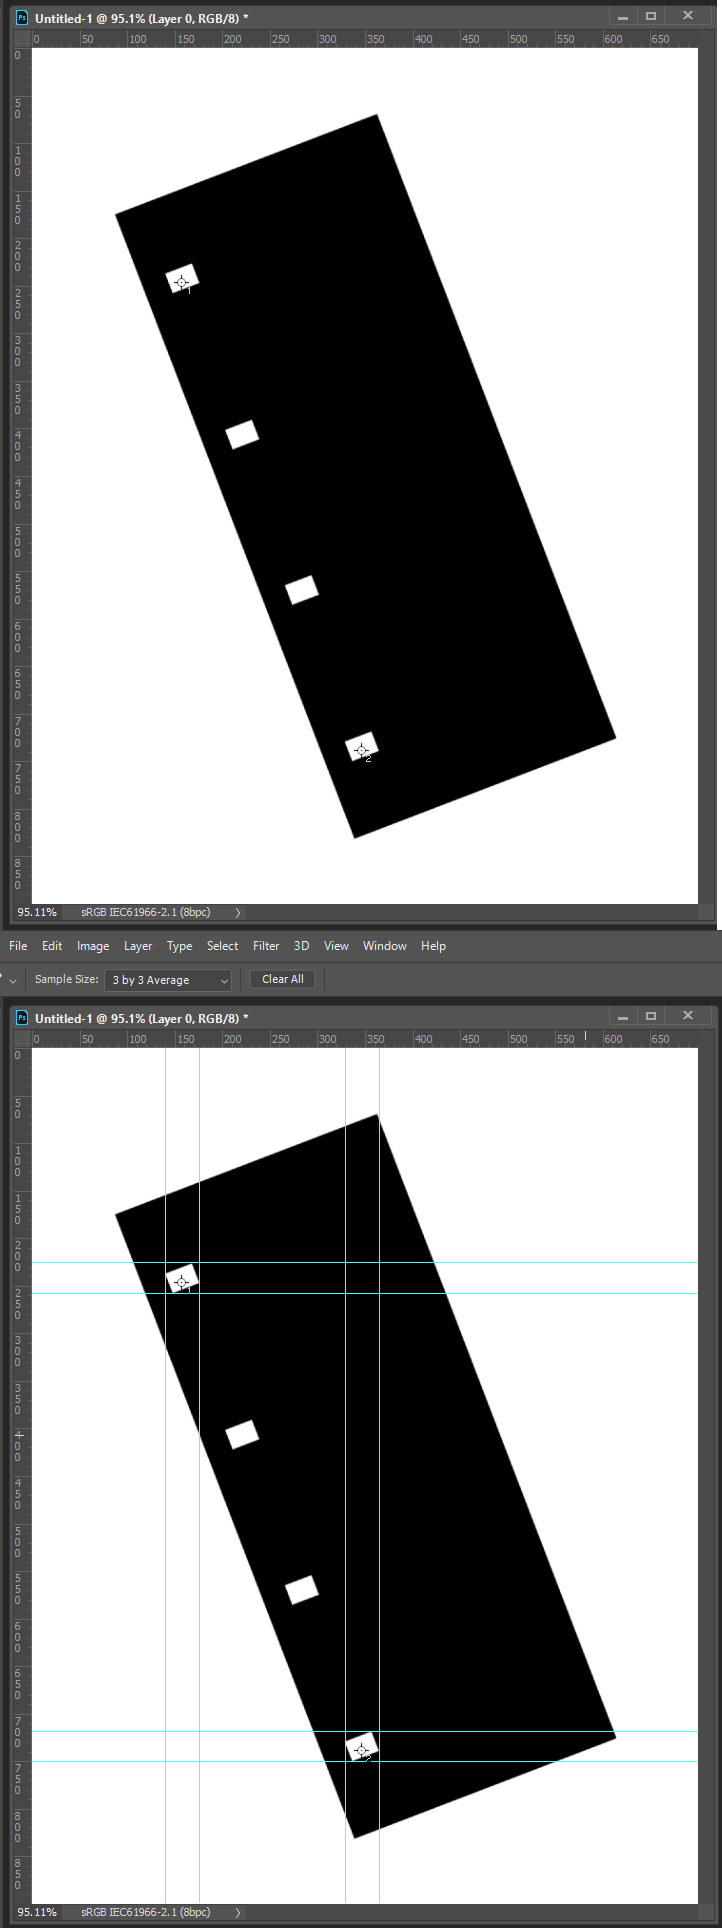
This works beautifully, John. Thank you so much.
Step 1: load image and select color samples inside top and bottom sprocket.
Step 2: using action, run your script:
// Save the current preferences
var startRulerUnits = app.preferences.rulerUnits;
// Set Photoshop to use pixels
app.preferences.rulerUnits = Units.PIXELS;
Main();
// Return the app preferences
app.preferences.rulerUnits = startRulerUnits;
function Main() {
if (app.activeDocument.colorSamplers.length!=2) {
alert('two color sampler points are required');
return;
}
else {
point1 = [];
point2 = [];
var mySampler = app.activeDocument.colorSamplers[0]; //find out where x y coordinates of first sampler are
var samptx =mySampler.position[0];
var sampty =mySampler.position[1];
var sampx = parseInt(samptx);
var sampy = parseInt(sampty);
for (var s=0,len=app.activeDocument.colorSamplers.length;s<len;s++) {
var colorSamplerRef = app.activeDocument.colorSamplers
;MagicWand( colorSamplerRef.position[0].value ,colorSamplerRef.position[1].value);
if (s==0) point1=TopLeft();
else point2=TopLeft();
app.activeDocument.selection.deselect();
}
Rwidth = point2[0]-point1[0];
Rheight = point2[1]-point1[1];
degrees = Math.atan(Rwidth/Rheight) * 180 / Math.PI;
activeDocument.activeLayer.isBackgroundLayer=0; // Make it a normal Layer
app.activeDocument.activeLayer.rotate(degrees);
}
activeDocument.selection.selectAll();
var file = app.activeDocument;
var selec = file.selection;
var newRect = [ [sampx-300, sampy -500], [sampx-300 , sampy+12520], [sampx + 1400, sampy + 12520], [sampx + 1400, sampy - 500] ]; // get selection for cropping so that all images are same size
selec.deselect;
selec.select(newRect);
}
function TopLeft() {
try{
TL=[];
var SB = app.activeDocument.selection.bounds;
TL[0]=SB[0].value;
TL[1]=SB[1].value;
return TL;
}
catch(e){}
}
function MagicWand(Xpoint,Ypoint) {
// =======================================================
var idsetd = charIDToTypeID( "setd" );
var desc121 = new ActionDescriptor();
var idnull = charIDToTypeID( "null" );
var ref33 = new ActionReference();
var idChnl = charIDToTypeID( "Chnl" );
var idfsel = charIDToTypeID( "fsel" );
ref33.putProperty( idChnl, idfsel );
desc121.putReference( idnull, ref33 );
var idT = charIDToTypeID( "T " );
var desc122 = new ActionDescriptor();
var idHrzn = charIDToTypeID( "Hrzn" );
var idPxl = charIDToTypeID( "#Pxl" );
desc122.putUnitDouble( idHrzn, idPxl, Xpoint );
var idVrtc = charIDToTypeID( "Vrtc" );
var idPxl = charIDToTypeID( "#Pxl" );
desc122.putUnitDouble( idVrtc, idPxl, Ypoint );
var idPnt = charIDToTypeID( "Pnt " );
desc121.putObject( idT, idPnt, desc122 );
var idTlrn = charIDToTypeID( "Tlrn" );
desc121.putInteger( idTlrn, 20 );
var idAntA = charIDToTypeID( "AntA" );
desc121.putBoolean( idAntA, true );
executeAction( idsetd, desc121, DialogModes.NO );
}
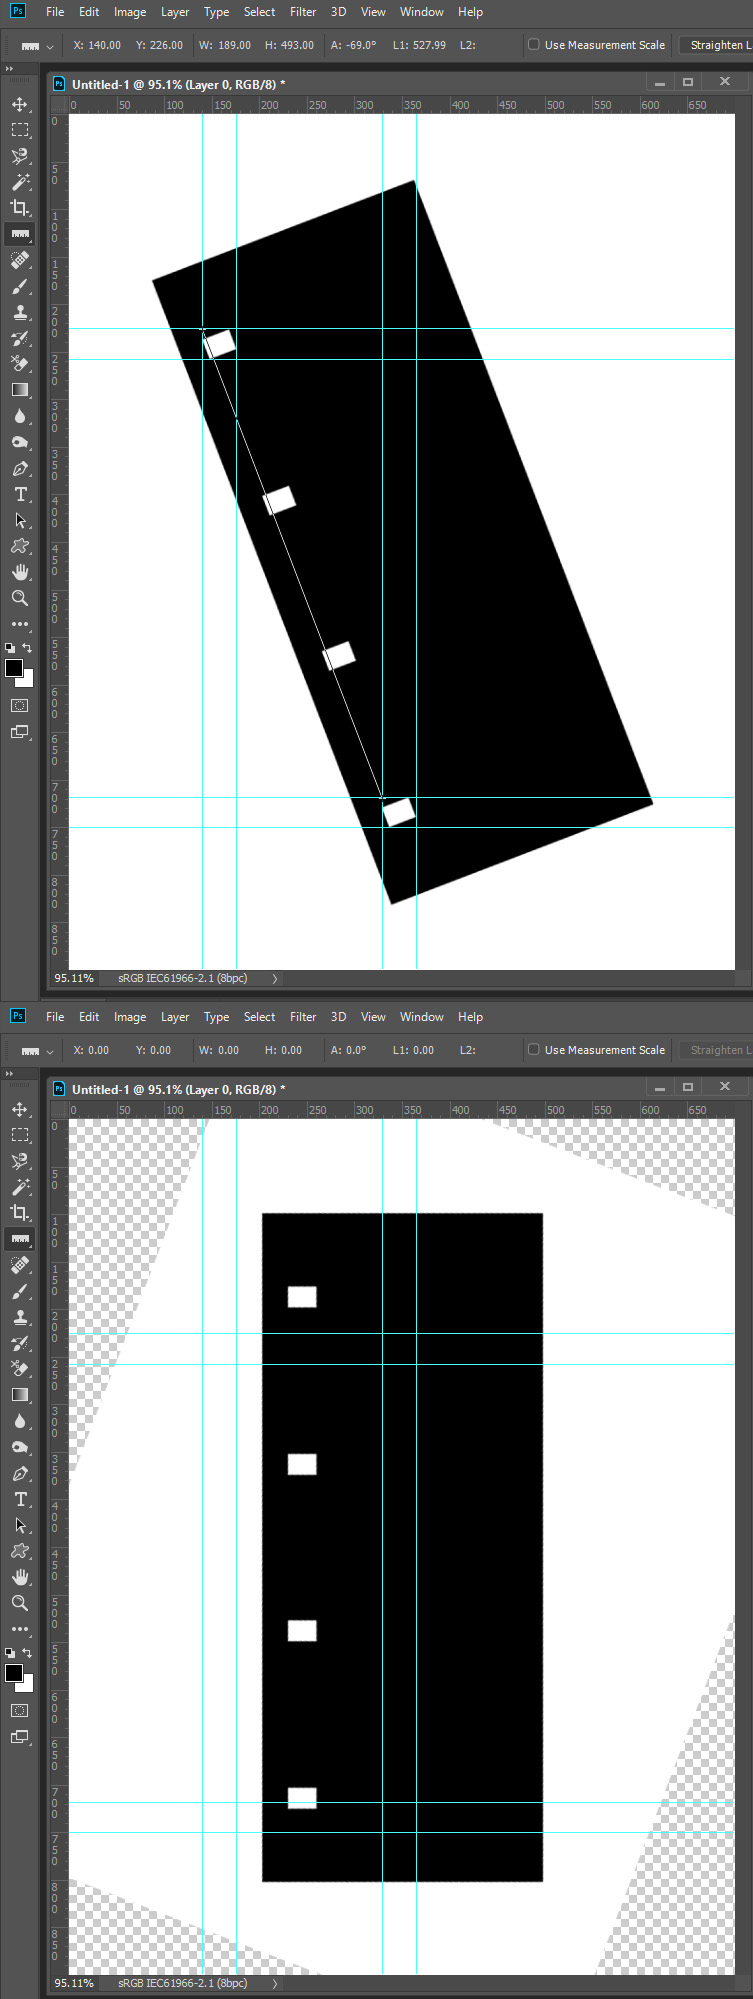
The little bit I have added gets the x y coordinates from the first color sample and makes a selection box for cropping. That way, the image is not only vertical, but the sprockets will be roughly in the same y position in each file.
3. Using the same action, finish cropping.
4. Using the same action, magic wand is programmatically clicked on first frame sprocket. Script 2 is run:
#target photoshop
if (documents.length == 0) {
alert("nothing opened");
} else {
// start
//setup
var file = app.activeDocument;
var selec = file.selection;
//run
var bnds = selec.bounds; // get the bounds of current selection
var // save the particular pixel values
xLeft = bnds[0],
yTop = bnds[1],
xRight = bnds[2],
yBottom = bnds[3];
var newRect = [ [xLeft-100,yTop -305], [xLeft-100,yTop+555], [xLeft + 1400,yTop + 555], [xLeft + 1400,yTop - 305] ]; // set coords for selection, counter-clockwise
selec.deselect;
selec.select(newRect);
// end
}
5. The action crops to this selection; saves it; then un-crops; then the cursor programmatically takes the next sprocket down and executes script 2 again, up to frame 16.
Resulting in 168,000 perfectly cropped frames of animation which I can later use other actions or routines to clean, sharpen, and adjust. The hardest part of movie film scanning is the registration, making sure each frame is straight and has the sprocket in the same place.
.jpg)
Again, thank you, John, and to others who made suggestions. 😆 This was good exercise for my liberal-arts brain.
Copy link to clipboard
Copied
You could use any two sprocket hole if one is damaged don't target it.
You could write a second script the would get the bounds of the top sprocket hole use it top right corner and calculate the frame top left corner the projector would create projector you could say it has a frame mask which is smaller then the captured image. Knowing the frame's width and height you can set a selection for the image frame. With that selection you can create a file with the strip name frame number, Knowing the distance to the top of the next frame the script could create the files for the remaining 15 frames. The Rotation moves the sprocket The sample point may not be in the sprocket hole so a so I don't know it the sprocket hole new bounds can be always set. You seem to be using the position the hole had before it was moved with the rotation. I think that could be a problem if the rotation needed was large.


 AdChoices