

create a script for mockup

Copy link to clipboard
Copied
hi there
i am looking for a way to can automate replacing images in smart object for a mockup then export it as jpg.
i have about 2000 image that i wanna to this work for them . i tried to make one action for this but i couldn't make it.
layers looks like this :
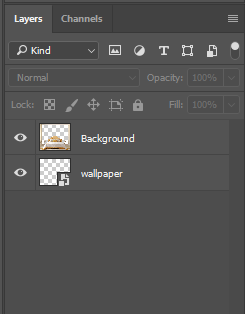
script should place images in "wallpaper" smart object then export as jpg for each image.
hope masters in scripting could help me for this.
thanks in advance
with best regards
hossein


Explore related tutorials & articles
 9
Replies
9
9
Replies
9

Copy link to clipboard
Copied
Copy link to clipboard
Copied
thanks
I will try it hope that's work good.

Copy link to clipboard
Copied
Personally I do not think replacing smart object content is a good way to do Templates. Except for two things when the template is for a picture package where several Smart object layers share a single smart object . The other good reason to use a smart object layer object replacement is when a image needs to be tilted and have a perspective warp transform.
The reason I do not like to use replace object in templates is all smart object layers have an associated transform that is not changed when you replace the layer smart object. For the transform to work correctly the replacement object need to be exactly the same size and resolution as the object being replaced. Replacement images need to be preprocessed for the template to insure they are the correct size and resolution.
I place in image as smart object layer in templates however I set the layers transform so it has the correct size and resolution for the template and positions the image correctly. I also mask that placed smart object layer to the correct shape for the template. Image can be any size and resolution they will be transformed for the template.
Copy link to clipboard
Copied
thanks
so what's your suggestion for this work
I have about 2000 stockmark images in large resolution
I mean is there any other tool to can do this ?
or I have to do all manually
Copy link to clipboard
Copied
My scripts automate the whole process.
Photo Collage Toolkit
Photoshop scripting is powerful and I believe this package demonstrates this A video showing a 5 image collage PSD template being populated with images:
The package includes four simple rules to follow when making Photo Collage Template PSD files so they will be compatible with my Photoshop scripts.
- Size the photo collage templates for the print size you want - width, height and print DPI resolution.
- Photo collage templates must have a Photoshop background layer. The contents of this layer can be anything.
- Photo collage templates must have alpha channels named "Image 1", "Image 2", ... "Image n".
- Photo collage templates layers above the background layers must provide transparent areas to let the images that will be placed below them show through.
There are fifteen scripts in this package they provide the following functions:
- HelpPhotoCollageToolkit.jsx - Online Help
- TestCollageTemplate.jsx - Used to test a Photo Collage Template while you are making it with Photoshop.
- CollageTemplateBuilder.jsx - Can build Templates compatible with this toolkit's scripts.
- LayerToAlphaChan.jsx - Used to convert a Prototype Image Layer stack into a template document.
- InteractivePopulateCollage.jsx - Used to interactively populate Any Photo Collage template. Offers most user control inserting pictures and text.
- ReplaceCollageImage.jsx - use to replace a populated collage image Smart Object layer with an other image correctly resized and positioned.
- ChangeTextSize.jsx - This script can be used to change Image stamps text size when the size used by the populating did not work well.
- PopulateCollageTemplate.jsx - Used to Automatically populate a Photo Collage template and leave the populated copy open in Photoshop.
- BatchOneImageCollage.jsx - Used to Automatically Batch Populate Collage templates that only have one image inserted. The Collage or Image may be stamped with text.
- BatchMultiImageCollage.jsx - Used to Automatically Batch Populate Any Photo Collage template with images in a source image folder. Easier to use than the interactive script. Saved collages can be tweaked.
- PasteImageRoll.jsx - Paste Images into a document to be print on roll paper.
- BatchPicturePackage.jsx - Used to Automatically Batch Populate Any Photo Collage template with an image in a source image folder. Images Rotates for best fit.
- BatchPicturePackageNoRotate.jsx - Used to Automatically Batch Populate Any Photo Collage template with an image in a source image folder.
- PopulatePicturePackage.jsx - Used to Automatically populate a Photo Collage template Fill with the same single image and leave the populated copy open in Photoshop.
- PCTpreferences.jsx - Edit This File to Customize Collage Populating scripts default setting and add your own Layer styles.

Copy link to clipboard
Copied
Why do you need to use a smart object in the lower layer?
How are the various wallpaper images sized compared to the template and do they need resizing, cropping, repositioning etc?
This could be handled via a batch action or a script, or even using variables. Scripts and Batch actions are discussed in a similar topic thread here:
Re: Simple action to replace image from walls
Variable text is described in the following topic and images can also be used instead:
Action script that could automate quote placement via csv file?
Copy link to clipboard
Copied
because in the fixed layer there is some things for example in the wall that should appear on the wallpaper to show it natural.
and walllpaper images are various in sizes most are larger than template - larger than 4000px in width.
wallpapers just need to resize to fit to smart object layer and the just save it and export template as jpg.
Copy link to clipboard
Copied
If you replace the Smart Object layer's object. The object you replace the the original object must be exactly the same size its aspect ratio and number of pixels need to be the same so the Smart Object Layers transform will transform the replacement like it did the original. The smat Object Layet Transform is not replaced or altered by the replace Object content. Image files use for replacements must be pr-processed cropped to the corrects aspect ratio the resized to have the correct number of pixels. Because of that I do not create Templates with Smart Object Layers that will have their object replace.
Instead I just use Alpha Channels that map an Image's Size shape and location. There is an alpha channel for each image that is to be populated. My Scripts can then place in any size image. Set the Smart Objects transform to size it for the bounds of the alpha channel and align its center to the center of the Alpha Channel Then mask the smart object layer to the Alpha channels shape. Images need not be pre-processed. The Smart Object Layers object is an embedded copy of the image file. Whatever the size may be. The Transform will size the layer to the correct size and resolution and the mask will virtually crop it to shape, any shape.

Copy link to clipboard
Copied
So first off, you CAN automate this process -- however I don't think there's any way to automate the batch replacement of Smart Objects using Actions in Photoshop. Maybe there is, however I've never been able to find a way to do it this way.
Generally this kind of mockup image automation is done via one of two methods: 1) Run a Photoshop script; 2) Use a Photoshop plugin.
The Photoshop scripting approach allows you to basically add a .jsx script inside of Photoshop, which you can run on demand via the "File > Scripts" section. The script would need to specify the input folder of your images to use, the output folder you want to save to, then just the basic logic of: "Find the Smart Object in the document, and perform a 'Replace Smart Object' operation using each of the images from the input folder, then export the updated document as a JPEG image."

Additionally, I'd recommend adding a pre-processing step that auto-resizes the images from the input folder so they're all the optimal aspect ratio + resolution. Smart Object replacement operations are tricky, and if the aspect ratio AND resolution doesn't perfectly match the Smart Object, it'll often weirdly resize them so your mockup images get all messed up.
The Photoshop plugin approach allows you automate this process using via a simple interface inside of Photoshop. For example, the Batch Replace Smart Objects plugin allows you to specify the Photoshop document you want to use, the input folder of images, and the output folder to save to. You can also automatically stretch all images to fit the Smart Object, then you can select what JPEG save quality you want your final mockup images to be at. Then if needed, you can save operations, or save workflows with multiple steps, to be run on demand as needed.


Find more inspiration, events, and resources on the new Adobe Community
Explore Now
 AdChoices