- Home
- Photoshop ecosystem
- Discussions
- Re: Displacement text on a portrait
- Re: Displacement text on a portrait
Displacement text on a portrait
Copy link to clipboard
Copied
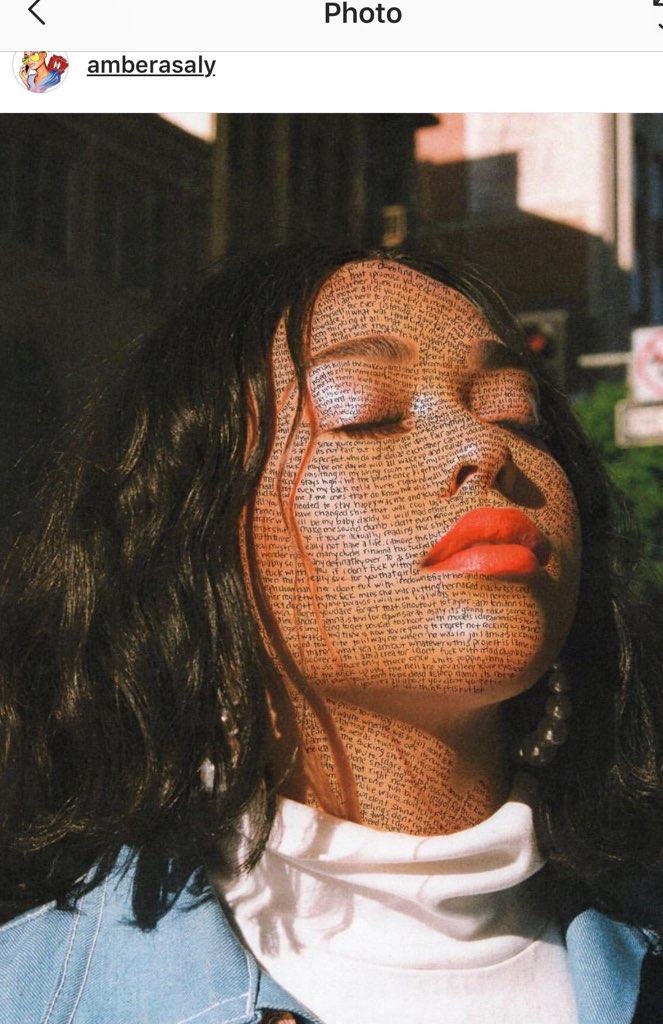
hey, i would like to do something similar to below:
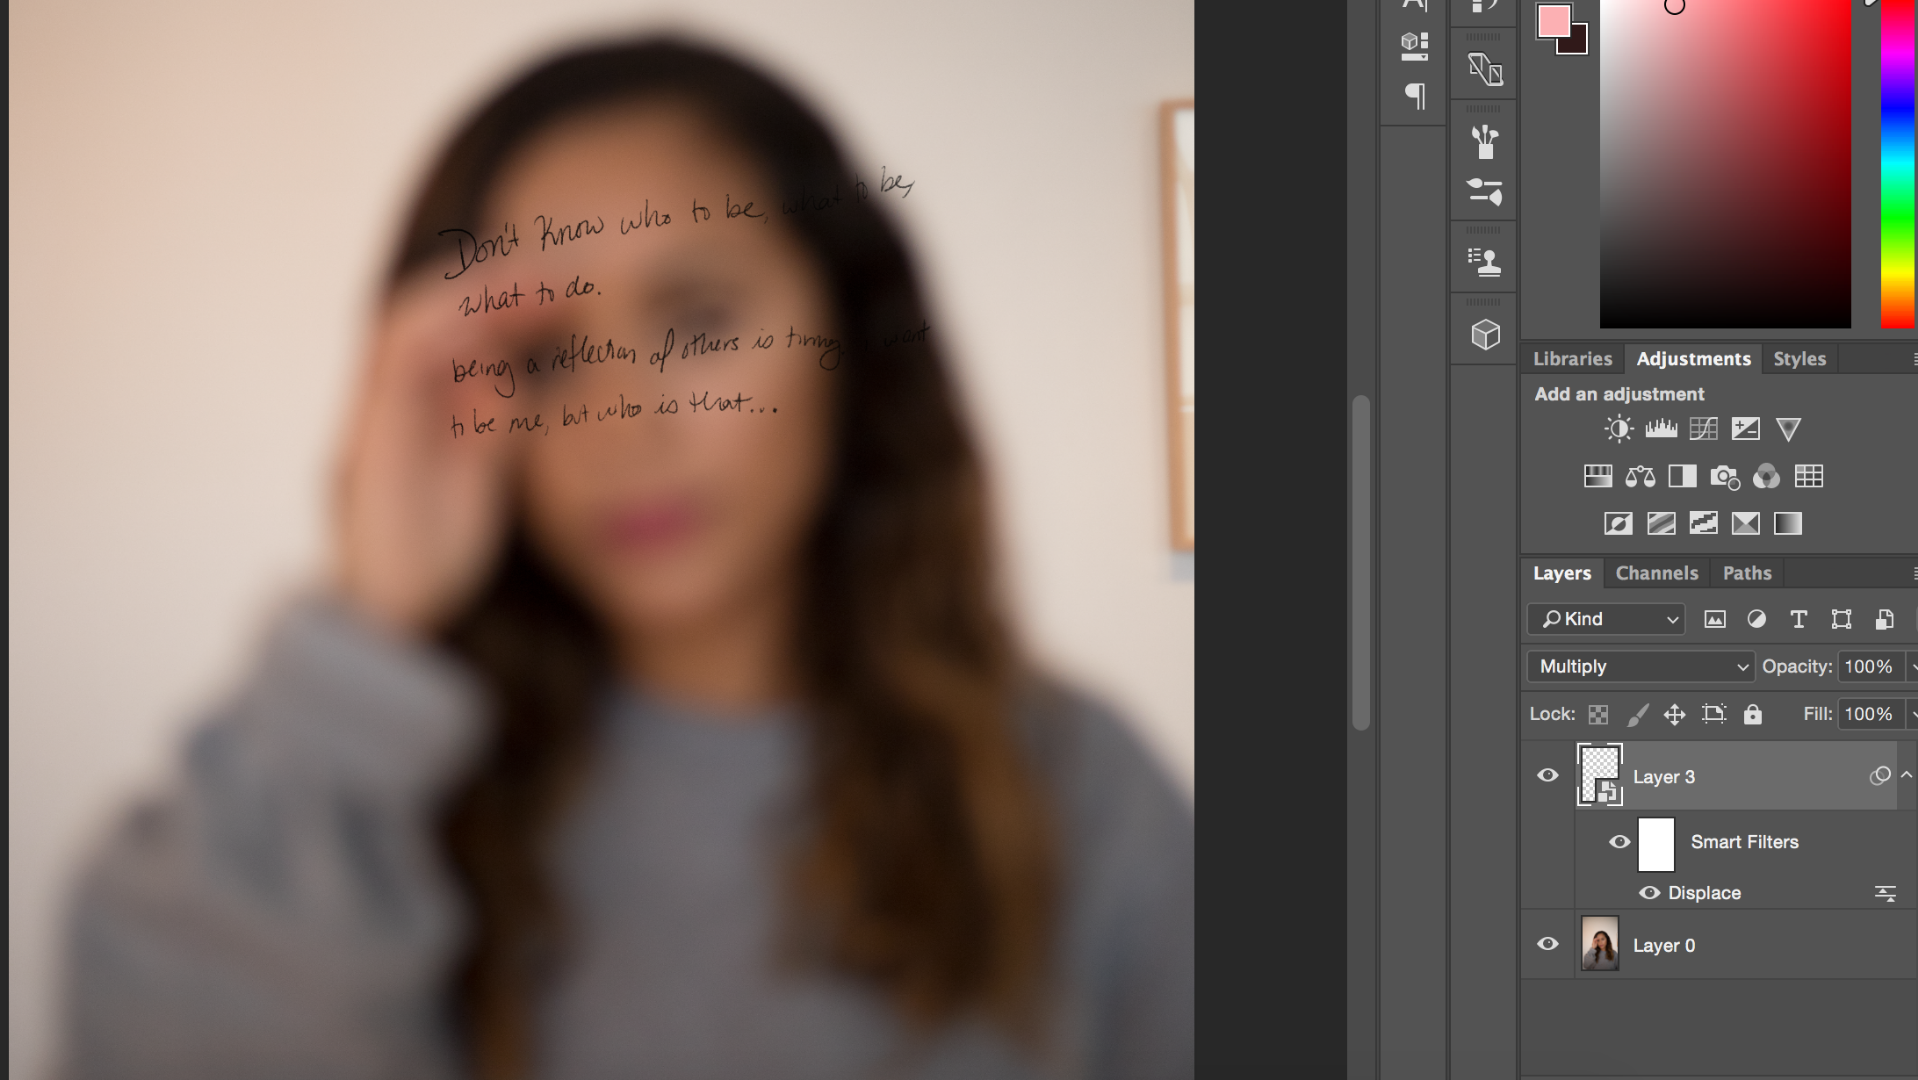
I tried displacing and various youtube vids but this is how my version came out:
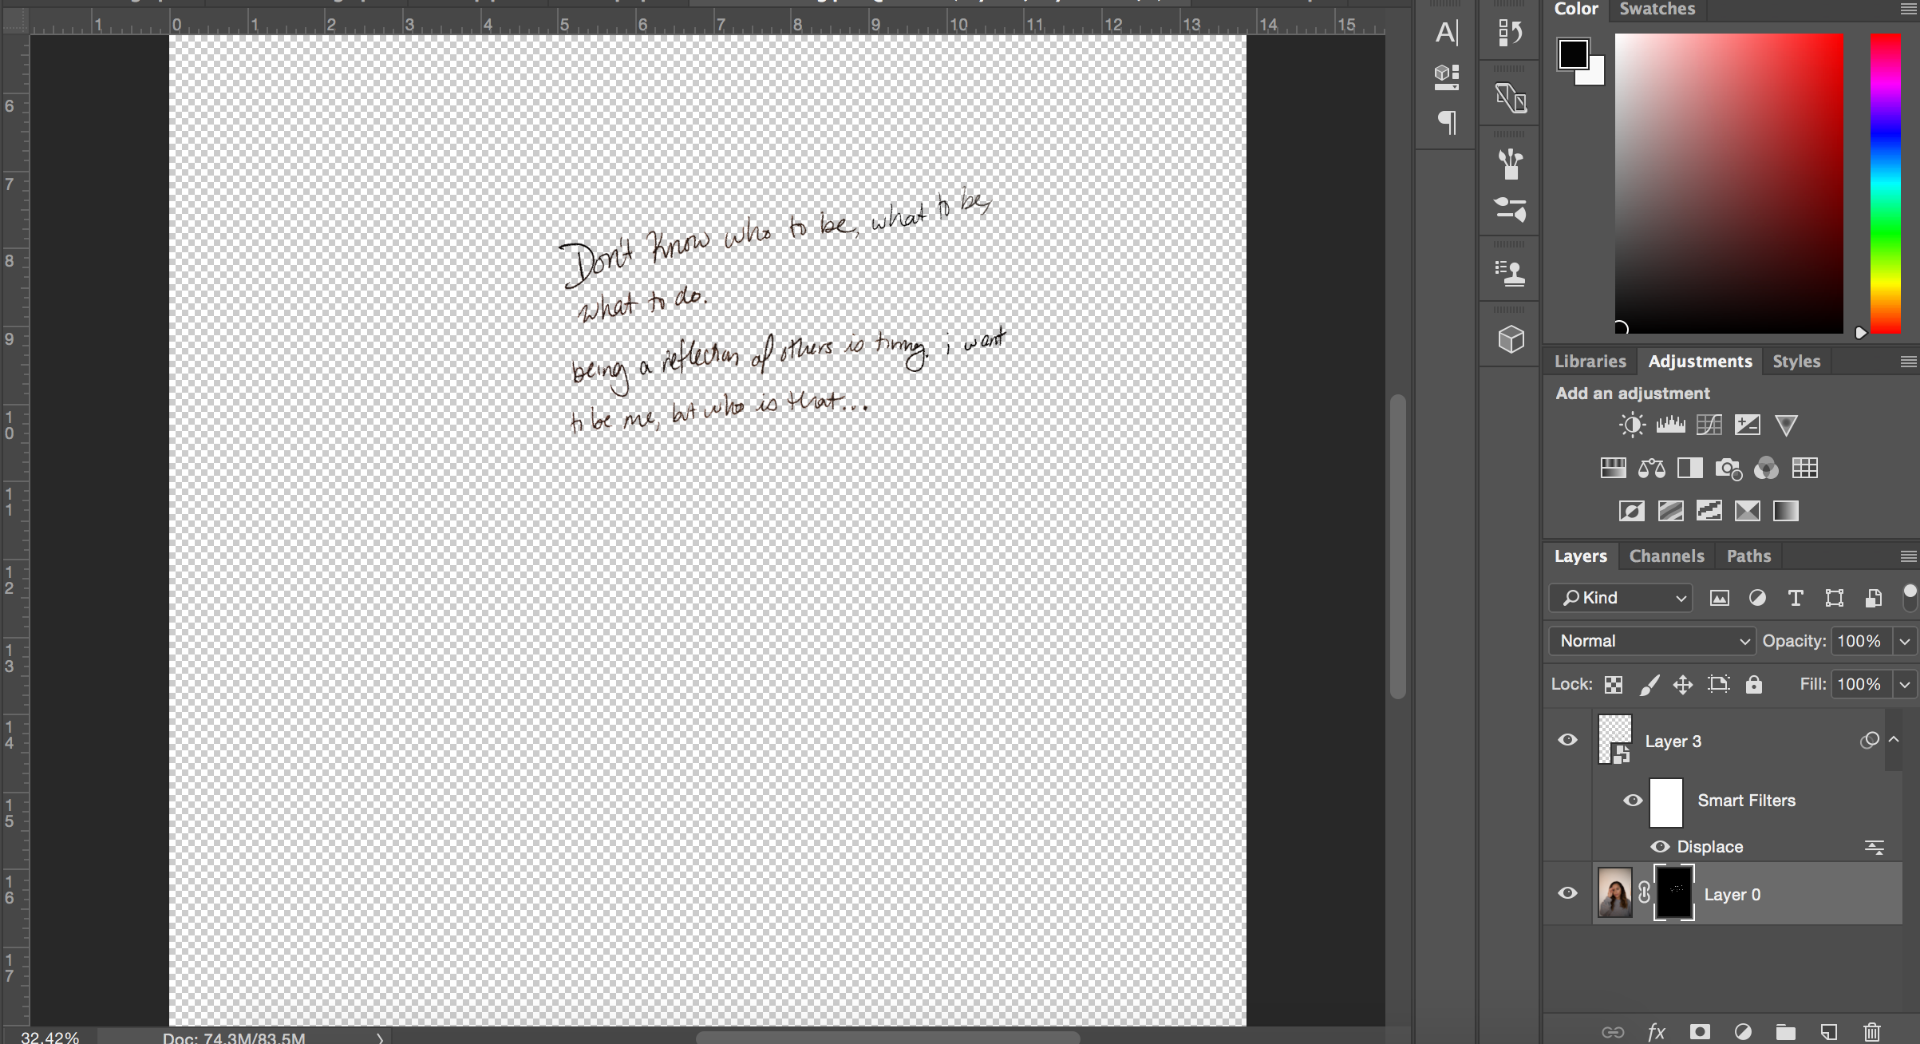
And when I command-click on Layer 3 (which has the scanned texted) and add a layer mask to Layer 0 - I get this:
Any help would be appreciated.
Thx!
Explore related tutorials & articles
Copy link to clipboard
Copied
1. Open a file
2. Choose Image > Duplicate. In the As: field enter file name as: filename_map.psd. (Example: man_map.psd). This file, which will ultimately serve as the Displacement Map must be in psd format.
3. Choose Image > Mode > Grayscale. Increase the image contrast using Curves or Levels. Since each image is unique, there is no exact setting. Then choose Filter > Blur > Gaussian Blur. Once again, there is no set amount
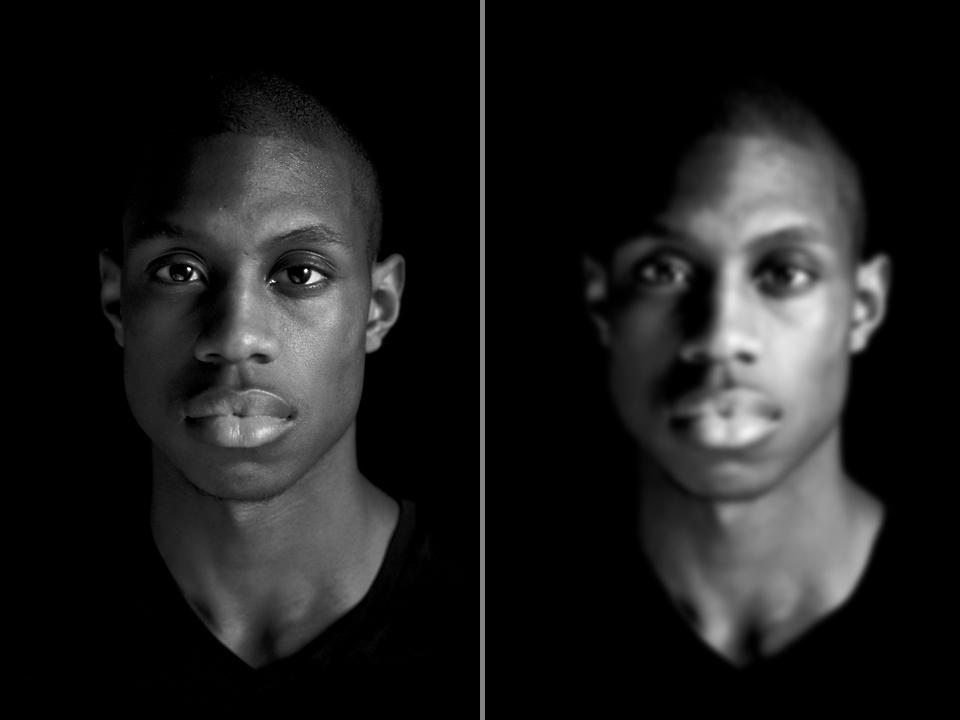
4. Save this file – filename_map.psd -- to the desktop.
5. Open another file consisting of your handwritten type on a transparent background. It will be Layer 1. (In the illustration below I used type. If type is used, it must be rasterized.)
6. Choose Filter > Distort > Displace. The default numbers of 10 for Vertical and Horizontal Scale usually work very well. For greater displacement,15 is satisfactory, as well. Radio buttons should be set to Stretch to Fit and Repeat Pixel Edges. Click OK. In its next Displace step menu, choose your map file.
7. Choose a Blend Mode of Multiply. Experiment with other Blend Modes, as well.
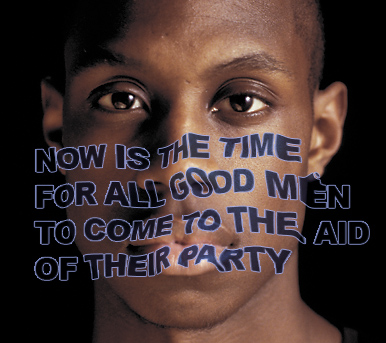
Copy link to clipboard
Copied
yes, thank you! I've followed these steps but how can I get the text to only stay within the blurred face (I don't want the text to go into her hair and it's ok if it gets cut off)? When I make a layer mask, the image disappears.
Copy link to clipboard
Copied
Than cut it off mask the layer the text is on
Copy link to clipboard
Copied
Ok but then I still have the text running into her hair when i'd like to confine it to the shape of her face. not sure what i'm missing/not understanding but any suggestions on how to achieve this would be appreciated ![]()
Copy link to clipboard
Copied
If mask off the text that is over the hair it will not blend into the hair it will not be visible.,
Copy link to clipboard
Copied
If you followed the instructions I provided, you ended up with two layers: the bottom layer is the image, The layer above it is the handwritten layer. Make a selection of the face while in the type layer (or in the face layer and then click on the type layer to move the selection there.) Then, strike the mask symbol at the bottom of the Layers panel. I will create a mask adjacent the handwritten image in that layer and the type will crop to the face area.
OR
Before beginning the Displacement sequence I described, use Edit > Transform to scale and, if desired, slightly rotate the handwritten file so that the message fits within the face area. When scaling your file, hold down the Shift key to maintain proportion. Save this smaller version of the handwriting file and then use that file when executing the steps I provided.
One thing more: Be sure to use an image of the person that has modeling in the face, such as the sample I provided.
Copy link to clipboard
Copied
This sounds like an excellent time to work with the puppet warp tool
This run down is for CS6, but it's the same idea in CC.
Copy link to clipboard
Copied
There are several ways to do this.
You can draw a path and then type directly on the path. Of course you would have to create a new path for each line. But that might be the easiest way for you to really manipulate things.
And let's say under the nowse a new line begins and part of a letter may need trimed. Then simply flatten that layer and erase the part that might be hidden under the nose.
It is something fun to do... and I know there are million tutorials of how to do this online! Just have to find the solution you like best.
Find more inspiration, events, and resources on the new Adobe Community
Explore Now

