- Home
- Photoshop ecosystem
- Discussions
- Re: Fill slider with color burn blend mode
- Re: Fill slider with color burn blend mode
Copy link to clipboard
Copied
I've had a lot of success enhancing color by using a Saturation adjustment layer (Sat set to a high value) and a blend mode of Color Burn or Color Dodge. The adjustment is controlled by lowering the Fill slider in the Layer panel down to 5 or 10%. I learned this from Unmesh Dinda on his Youtube video.
Unmesh explains how to use the method but not why it works. I’d like to understand why Fill works that way so I can control it better. Once the Fill value gets down in the 5% range, even small differences generate significant changes.
The blend modes where Fill works differently include:
Color Burn
Linear Burn
Color Dodge
Linear Dodge
Hard Light
Linear Light
Pin Light
Hard Mix
I'd appreciate any insights the Community can offer on how this technique achieves its results behind the scenes.
 2 Correct answers
Not very voluminous, but one sentence at least seems to specifically address the issue with regard to the Blend Mode Hard Mix.
»• Hard Mix – Lighter colors lighten the result. Darker colors darken the result. Lowering the fill opacity creates less posterization/thresholding.«
https://jkost.com/blog/2018/08/working-with-blend-modes-in-photoshop-cc.html
Observation on two of the Blend Modes’ Fill behaviour:
• Hard Mix: Reducing the Fill seems to increase the number of resulting values (additional to white and black) correspondingly.
So if a Fill of 100% results in two values (white and black per Channel) 90% will result in 27 values, 50% in 129 etc.
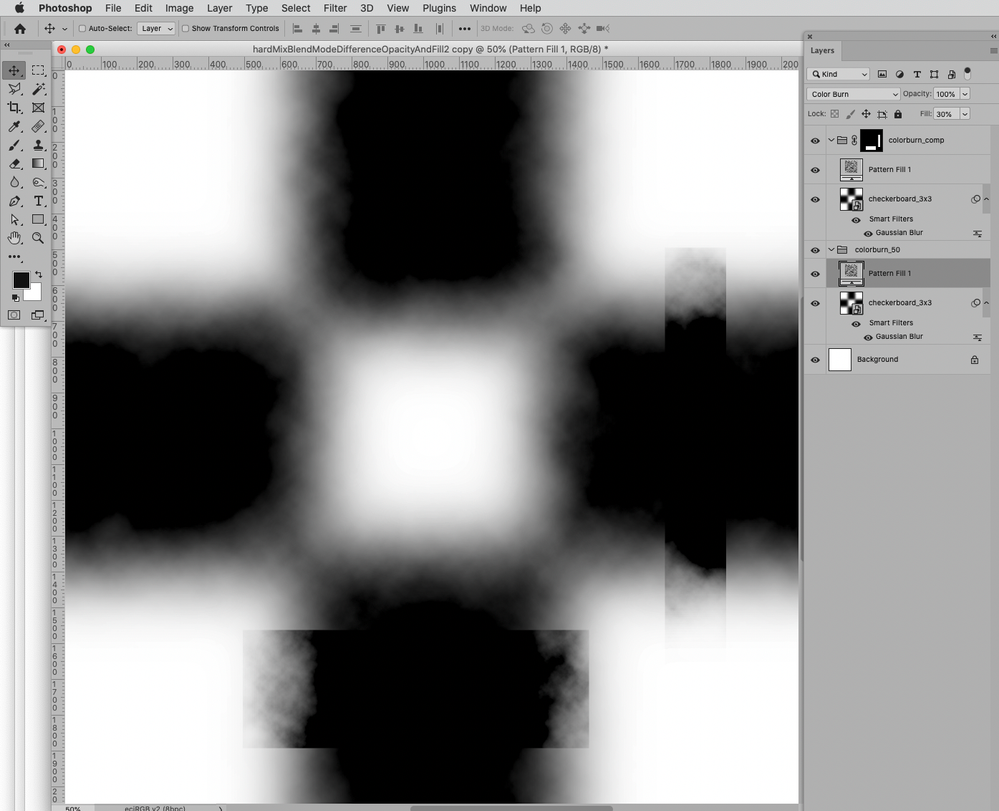
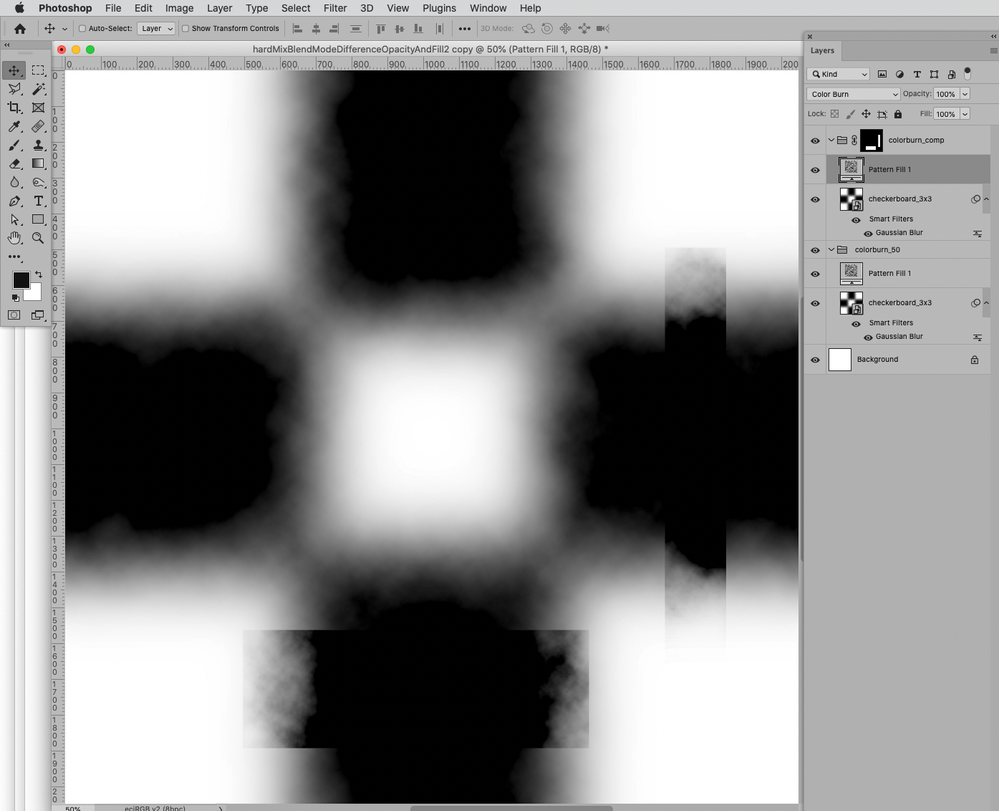
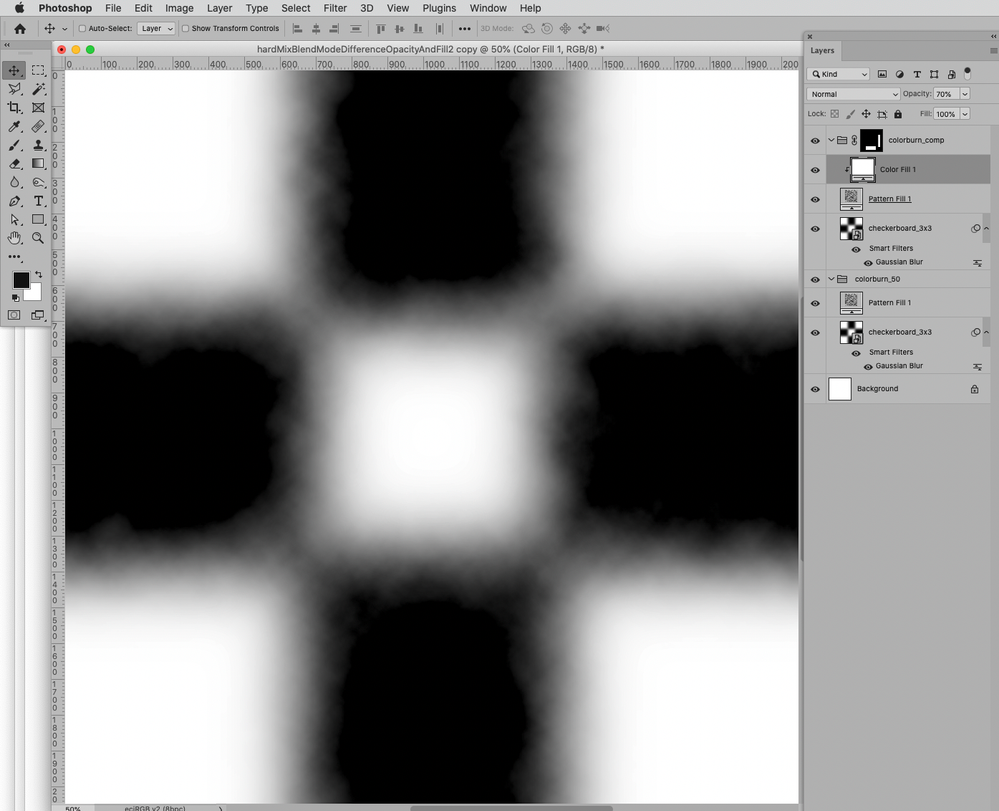
• Color Burn: Reducing the Fill to X% gives identical result to maintaing the Fill at 100% but Clipping Masking a White Layer with (100-X)% Opacity to the Color Burn Layer.
Explore related tutorials & articles
Copy link to clipboard
Copied
Not very voluminous, but one sentence at least seems to specifically address the issue with regard to the Blend Mode Hard Mix.
»• Hard Mix – Lighter colors lighten the result. Darker colors darken the result. Lowering the fill opacity creates less posterization/thresholding.«
https://jkost.com/blog/2018/08/working-with-blend-modes-in-photoshop-cc.html
Copy link to clipboard
Copied
Thanks for your post and especially the link. Julianne explains the action of the Fill slider pretty clearly. It simply reduces the effect, the same way the global effect amount slider works in Lightroom Classic adjustments. I didn't see your post until today. Sorry for the delay in responding.
Copy link to clipboard
Copied
Observation on two of the Blend Modes’ Fill behaviour:
• Hard Mix: Reducing the Fill seems to increase the number of resulting values (additional to white and black) correspondingly.
So if a Fill of 100% results in two values (white and black per Channel) 90% will result in 27 values, 50% in 129 etc.
• Color Burn: Reducing the Fill to X% gives identical result to maintaing the Fill at 100% but Clipping Masking a White Layer with (100-X)% Opacity to the Color Burn Layer.
Copy link to clipboard
Copied
Thanks very much for the additional research. Your technique to achieve the same result with a clipping layer is masterful. Alec
Copy link to clipboard
Copied
Thinking about this a bit more, the specific use case I am working on is where a Hue-Sat layer is set to a blend mode of Color Burn. Given that blend modes work on each channel in grayscale mode, how is Photoshop evaluating a saturation change? I decided to explore it using some of what I learned from your post above.
I started by taking a step gradient from one of Andrew Rodney's printer test images (thanks @digitaldog) and replicated once for each primary. I clipped a 100% color layer in Color blend mode to each. And then followed that with a Hue-Sat layer set to 30 Sat, blend mode Color Burn and Fill 5%. This is a common setting when I use this in practice.
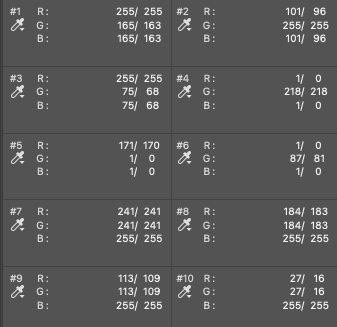
I then set measurement points, 3 for red and green (so they align side-by-side in the Info panel) and then four for blue, added left to right. The info panel below shows RGB values with the change created by the Hue/Sat color burn layer.
Both Red and Green drop in value in the darker tones as expected (Color Burn blend mode effect) but Blue doesn't change at all – the darkeing is accomplished through darkening Red and Green.
Is my technique correct here? Anything I've done that could have made the Blue adjustment different?
Copy link to clipboard
Copied
I would also love to figure out how to "spread out" the adjustment range for this technique. For Color Burn I find I'm always in the 5-10% range and the sensitivity between percentage steps is too great.
Copy link to clipboard
Copied
»Given that blend modes work on each channel in grayscale mode, how is Photoshop evaluating a saturation change?«
Some Blend Modes work Channel-per-Channel, but not all.
I am not sure I understand the issue in this case.
I am not sure the »basis« of the test actually meets your expectations; the three colors set to Blend Mode Color on the ramp already result in different luminances in the corresponding areas.
The arithmetic of the Blend Mode »Color« may not be as sophisticated as desirable.
Find more inspiration, events, and resources on the new Adobe Community
Explore Now


