
Question
Generate or remove objects using AI : 🔎 Photoshop Quick Tip

How to use Generative Fill in Photoshop
Did you know you can remove distractions from your photos quickly, try a new background, or add something just for fun? You can even remove unwanted objects and fill in the space. It’s really easy using Generative Fill. I have to warn you, it can be quite addicting! Generative Fill is an amazing new suite of AI-powered capabilities powered by Adobe Firefly that enable you to use simple text prompts to add, extend, or remove content non-destructively. It will blow your mind how Photoshop can match the colors, perspective, and shadows.
Generative Fill is also available in Photoshop for web and Photoshop on the iPad.
How to use Generative Fill in Photoshop
❶ Create or open an image in Photoshop
❷ Make a selection
- Use your favorite selection tool to make a selection. See: Make quick selections in Photoshop
❸ Generate new content
- Click on the Generative Fill button in the Contextual Task Bar that appears.

- When the text prompt box appears, use nouns, adjectives, and adverbs to describe what you want to see generated within your selection. If you are feeling adventurous, leave it blank and see what Photoshop comes up with based on what it sees in the rest of the image.

- Click Generate. Photoshop will create a new layer with the generated content. Scroll through several generated options by clicking on < and >. If you want to try again, type a new prompt and click Generate.

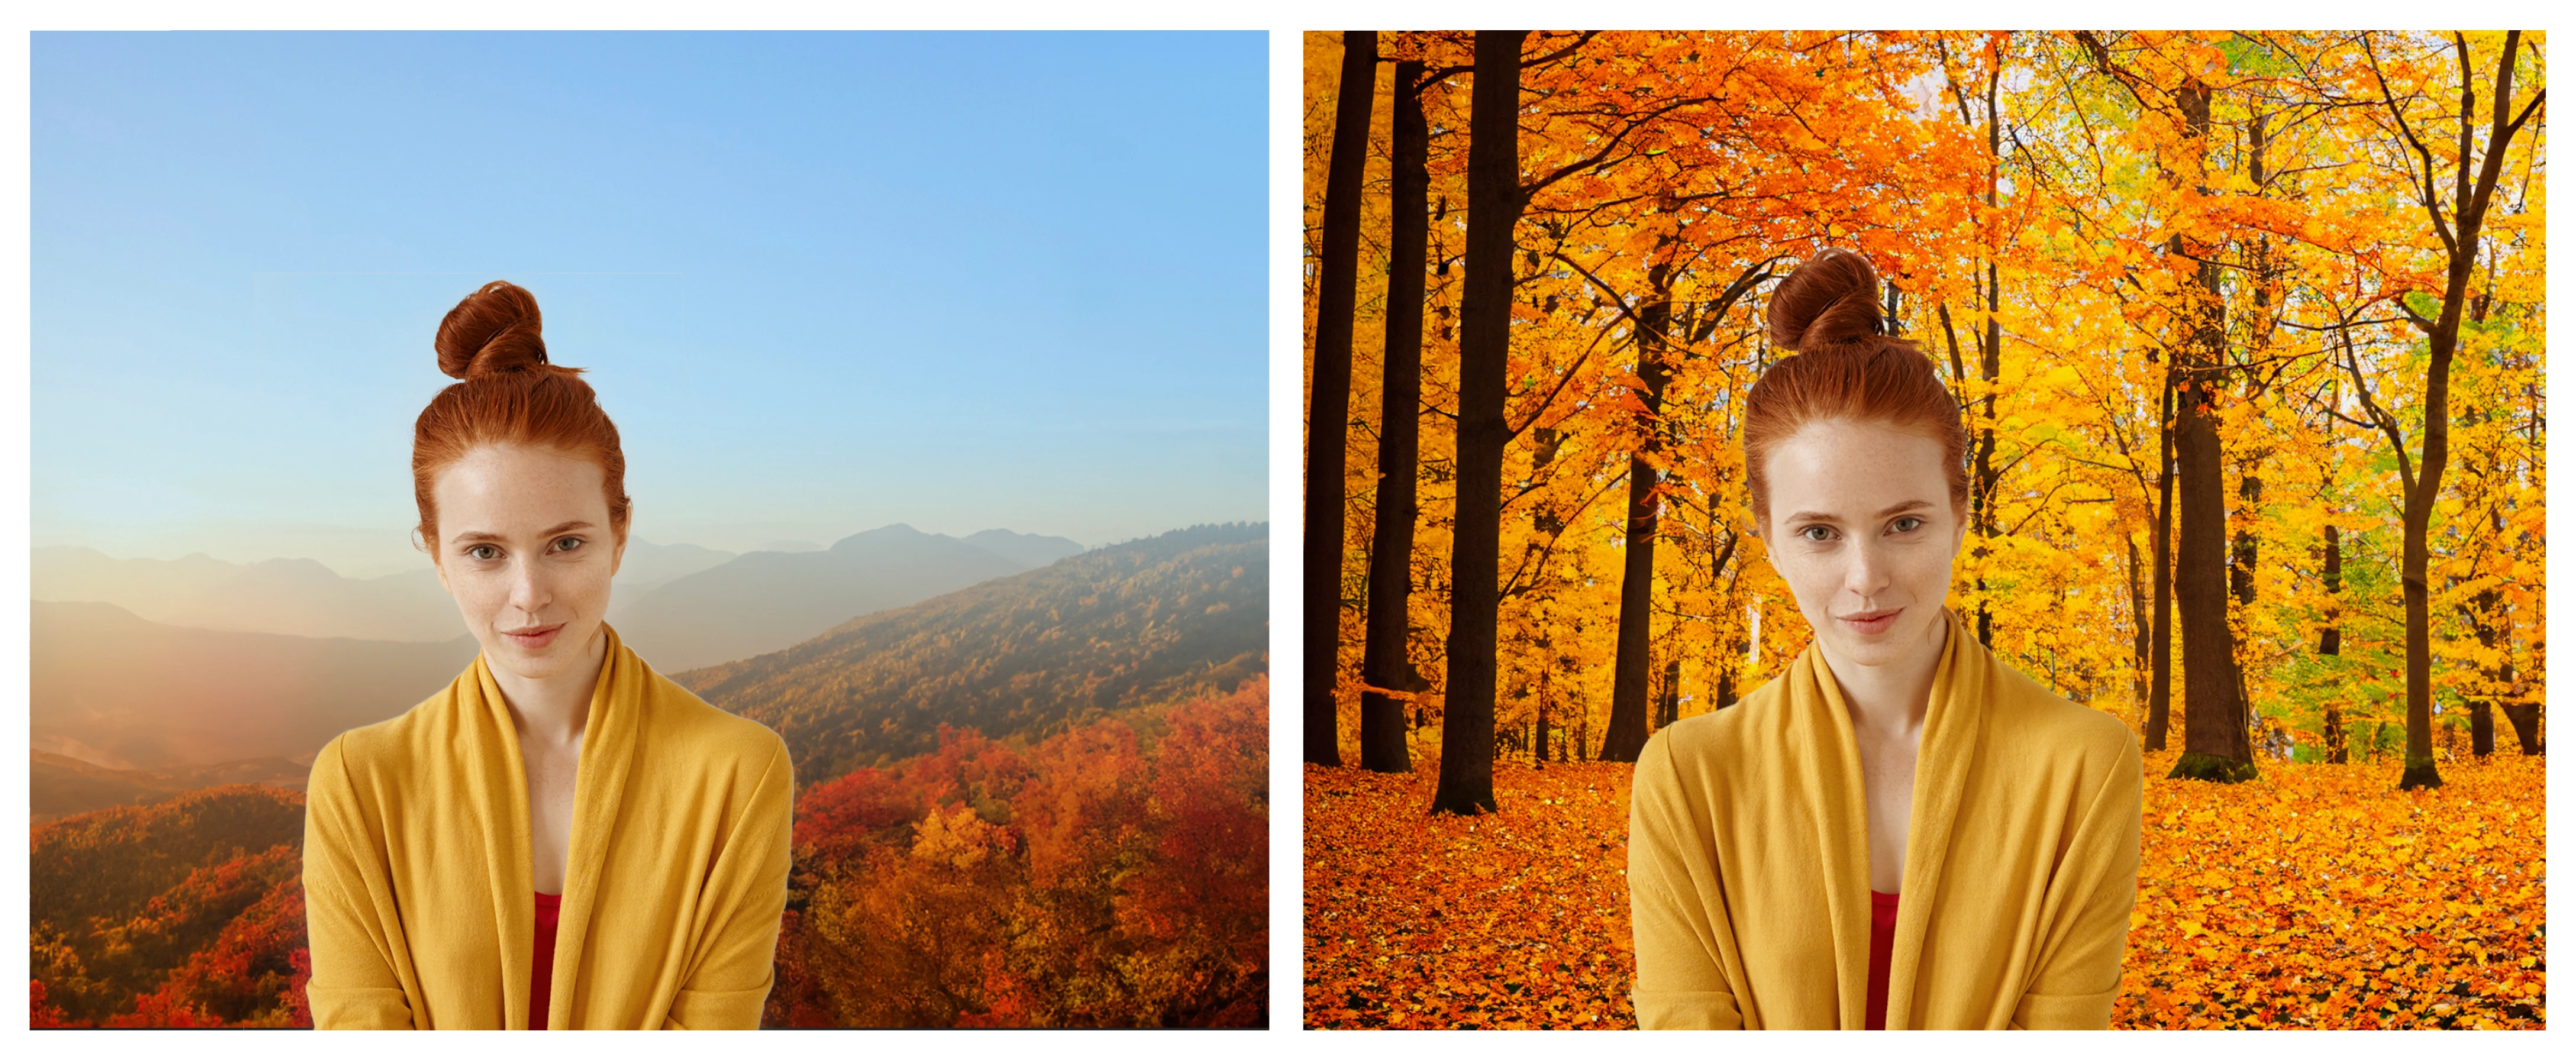
Generate a new background
- Choose Select > Subject
- Choose Select > Inverse
- Click on the Generative Fill button
- Type a short description of the scene you want Photoshop to generate, or leave it blank for a surprise
- Click Generate
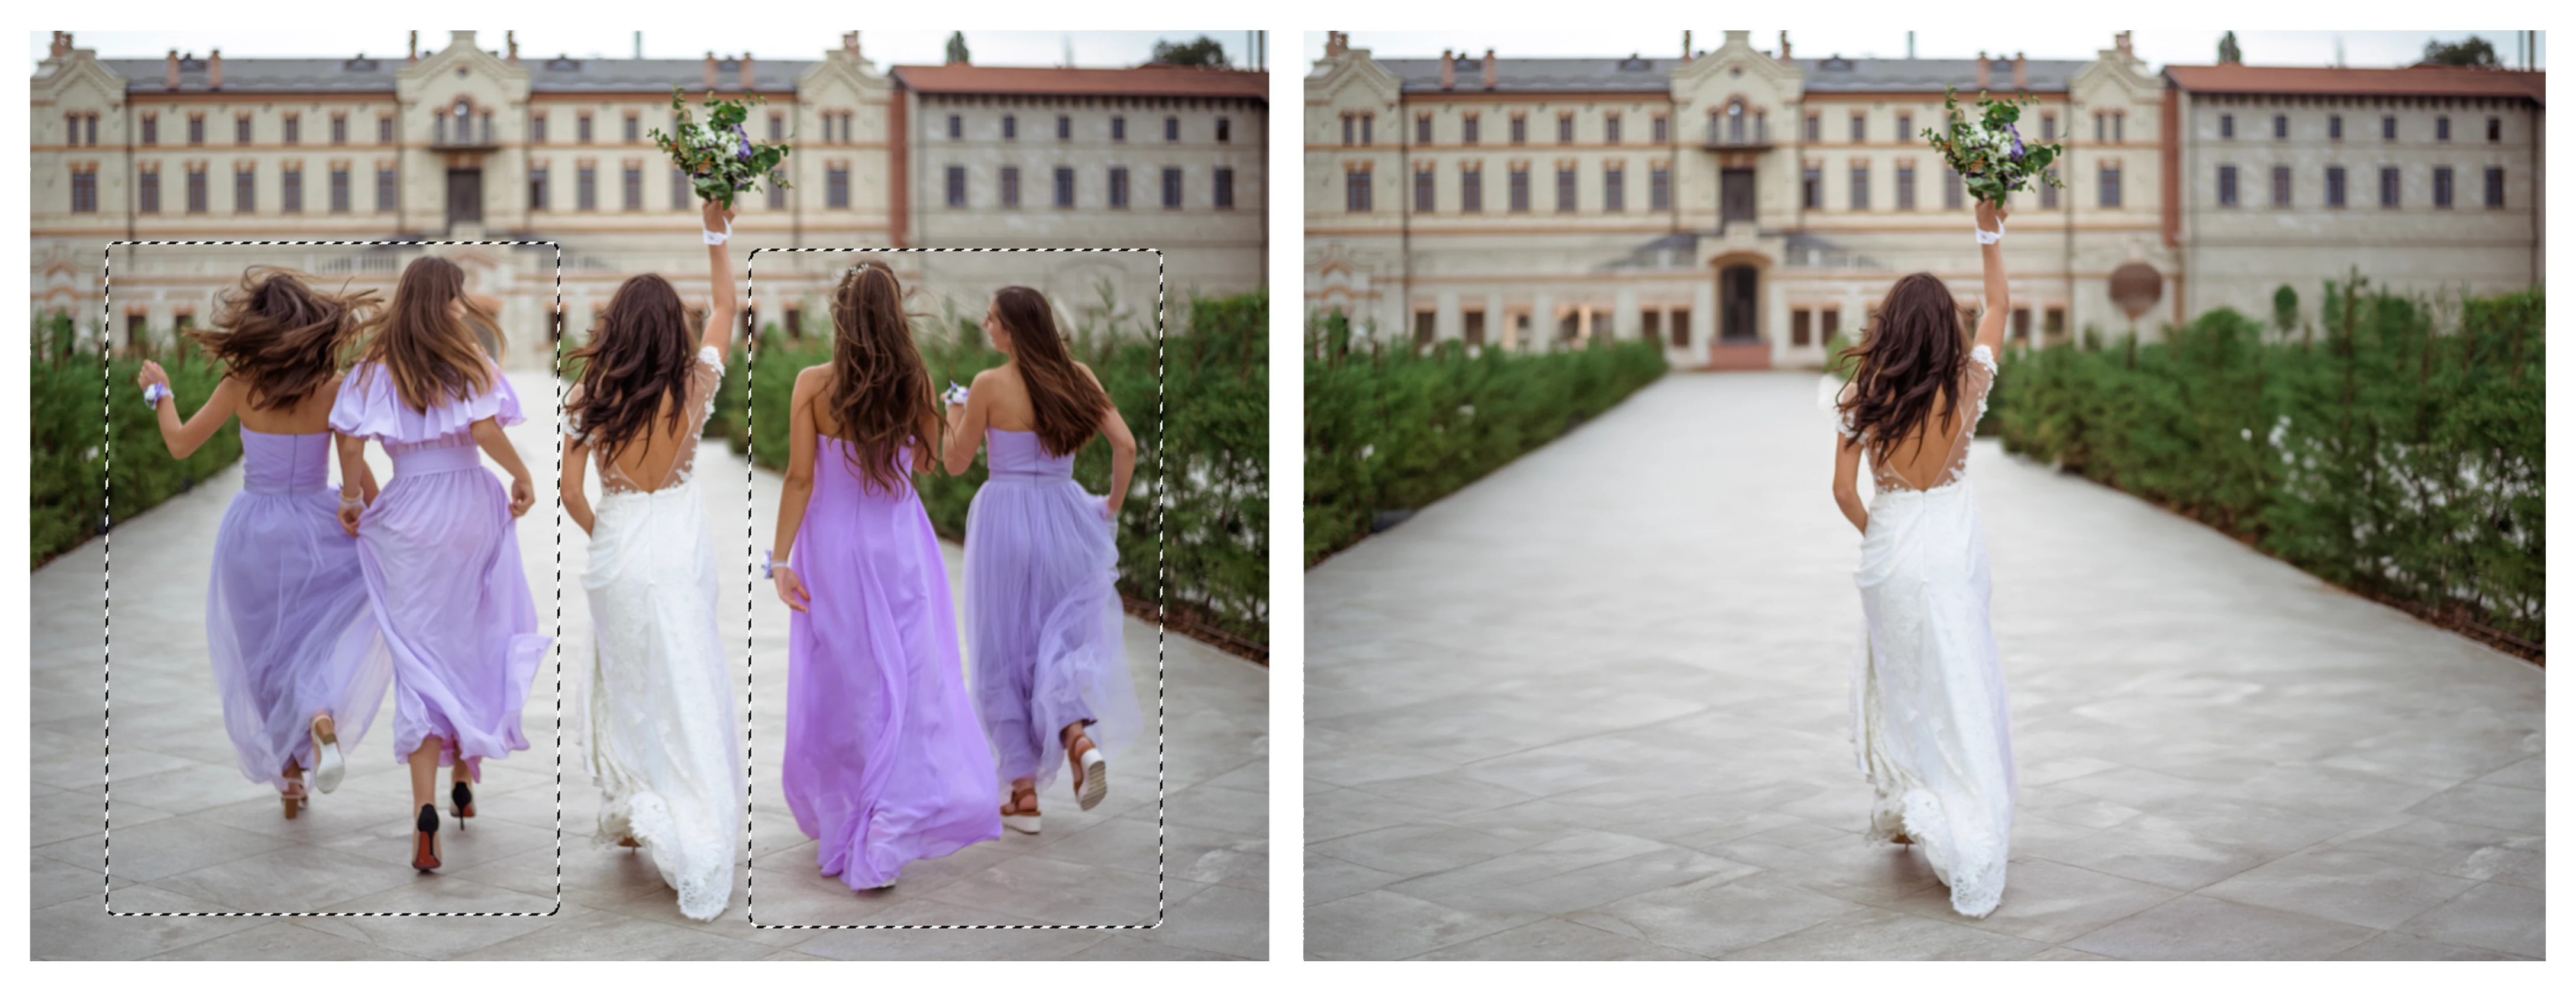
Remove an object
- Choose the lasso tool, rectangle tool, or any other selection tool to make a loose selection around the object you want to remove (include any shadow or reflection)
- Click on the Generative Fill button without entering any text
- Click Generate
Generate a new object
- Use any selection tool to select the area in the image where you want the object to appear
- Click on the Generative Fill button
- Type a short description of the object you want Photoshop to generate
- Click Generate - For this image, I selected the shirt area and used the prompt 'black jacket'

Helpful Tips
- Use simple language
Try using 3-8 words to describe what you want to see.
Include a subject with descriptive language.
Avoid commands like “add” or “remove”.
Good prompt: A red barn in a field of yellow flowers.
- Use layers and edit non-destructively
When you click Generate, the result appears on a new Generative Layer.
Try generating several images and combining them into a composition. - Select part of the original image when extending
Make sure you select part of the image along with the empty part of the canvas. This will give a better result that will blend in with the rest of your image.
Related links
Photoshop on the desktop
- How to create effective prompts for Generative AI in Photoshop
- Expand your image to fit a frame
- Experience the future of Photoshop with Generative Fill
- Explore beyond your canvas borders with Generative Expand
- Common questions about generative AI in Photoshop
Photoshop on the iPad
Photoshop on the web
Adobe Firefy
