- Home
- Photoshop ecosystem
- Discussions
- Re: Guides don't adjust when adding a bleed
- Re: Guides don't adjust when adding a bleed
Copy link to clipboard
Copied
Hi! I've been trying to adjust an image using instructions I've searched and found. All seem fairly simple: snap guides to your document bounds (my document is 5x7 inches) and then resize canvas to bleed size (for me it would be 5.25 x 7.125 inches). They go on to say that the guides will remain and anything outside those guides will be the bleed area and may be cropped off. My issue is that when I resize, my canvas resizes but the guides snap to the new bounds on the left and top margin. Instead of being at .25/.125 respectively, the guide is at 0 for both. Help! Am I missing something? Is there an easier way? I'm using Photoshop CC 20.0.3 I know I can adjust manually but I want to make sure the rest of the image size is correct (and also figure out why this isn't working....).
Thank you.
 1 Correct answer
Hi
Uncheck "lock guides".
I've just tried it here. With lock guides checked they lock in place to the new canvas 0,0 point, although your image is no longer there.
Unlocked, they stay with the image edge i.e. move to the new image position.
Dave
Explore related tutorials & articles
Copy link to clipboard
Copied
Are you using the image in InDesign?
Copy link to clipboard
Copied
No, just Photoshop.
Basically I'm trying to create a 5x7 card/invitation, which I've done before (it will be saved as a png file). But I noticed when I checked the website where I'll upload to create the card to print it says "5x7 Flat Double Sided — Design Details: 5.125" x 7.25", 300ppi, 0.125" bleed on both short sides, 0.25" bleed on both long sides" — which I understand, but getting Photoshop to add the bleed space seems to be an issue for me.
When I take my 5x7 image with the snapped to document bounds guides (even if I lock them) when I expand the size of the canvas, the top and left margin guide move to 0 while the 5" and 7" guide stay at 5 and 7. I must be missing a step or a setting. Here are two images. One at canvas size of 5x7 and one at canvas size of 5.125 x 7.25.
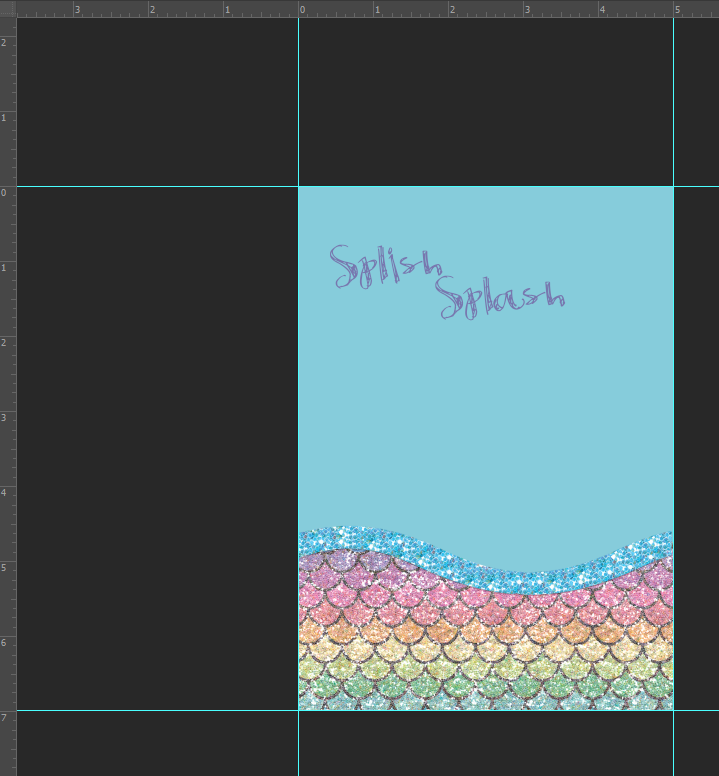
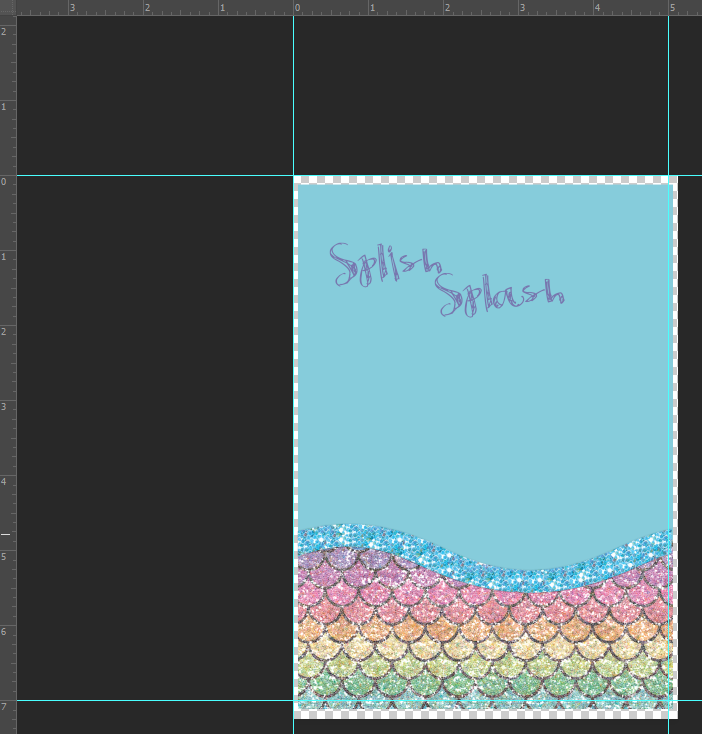
Copy link to clipboard
Copied
Hi
Uncheck "lock guides".
I've just tried it here. With lock guides checked they lock in place to the new canvas 0,0 point, although your image is no longer there.
Unlocked, they stay with the image edge i.e. move to the new image position.
Dave
Copy link to clipboard
Copied
THANK YOU! That did it. I must have been clicking too many spots and missed that one. Very much appreciated!!
Copy link to clipboard
Copied
You're welcome ![]()
Dave
Copy link to clipboard
Copied
I think you are missing the point of having a bleed.
You need to extend/clone/etc the image into the bleed area.
As you have it now, the bleed area is blank (except for a small part at the bottom, which however still do not extend to the edge of the bleed.
An image that is exactly 5x7 and the same image with an empty bleed are not what is needed to print & trim this correctly.
In fact, for the cutter/trimmer they are exactly the same!
Every press or digital printer will shift the image/paper in a slightly different position on each sheet as it runs through the press/printer.
That is why the bleed was developed.
When extending the image into the bleed, the bleed will cover up this slight shifting because when cutting/trimming you are cutting on the trim size of the paper 5x7. This means that the cutter will cut slightly into the image that has been extending into the bleed.
Without this, you will have white slivers showing on different sides of the image when they are trimmed to 5x7
Copy link to clipboard
Copied
The Canvas Size dialog box not only has the ability to resize the canvas but also control where that resizing is centred.
If you want to resize from the centre and have space added evenly all the way around the document it should look like this.
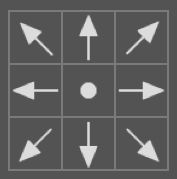
If you want it to resize from the upper left it should look like this.
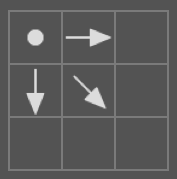
Clicking on any square within the grid will centre any changes from that point.
Copy link to clipboard
Copied
It's on the center, it was one of the first things I checked. 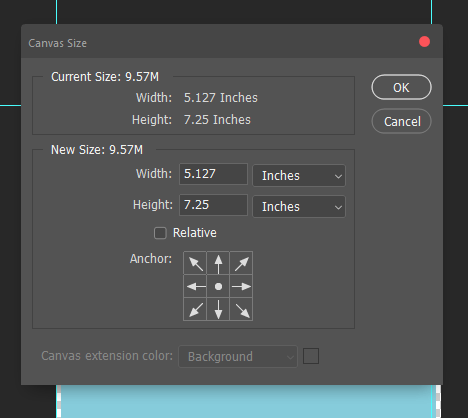
Copy link to clipboard
Copied
Create a document or image to the size that includes bleed. Ensure the resolution is between 200 and 300PPI.
Copy link to clipboard
Copied
Thank you — I was going to do that but wanted to ensure that I had the guides at the correct points. ![]() That's what I was going to do as my "give-up and do it the manual way" option.
That's what I was going to do as my "give-up and do it the manual way" option. ![]()
Find more inspiration, events, and resources on the new Adobe Community
Explore Now