His Dark Materials effect
Copy link to clipboard
Copied
Explore related tutorials & articles
Copy link to clipboard
Copied
Hi,
You would need to use Layer Masks and Clipping Mask along with A dispersion effect.
This link below should help you:
https://www.youtube.com/watch?v=jx-7whVtHYc
Also try www.stock.adobe.com and search for dust and sparkle images.
Thanks,
Sim
Copy link to clipboard
Copied
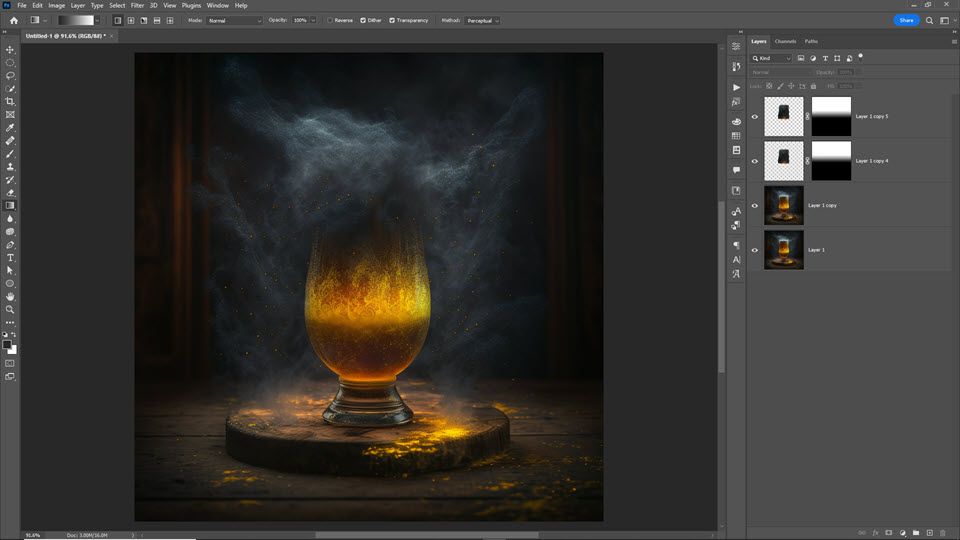
Here's one approach you could take where you use Content Aware Fill to fill in the top part of the glass and add a layer mask that uses a gradient to blend the glass into the replaced background:
- Duplicate the image layer
- Use the Lasso tool to make a selection around the top part of the glass that you want to appear as if it's disapearing
- Go to Edit > Content Aware Fill
- You may need to remove the stem of the glass or other parts of the image that you don't want sampled. Set Output to New Layer. Click OK when the filled in area looks like the background around it.
- With that new layer selected, at the bottom of the Layers panel, click the 3rd icon from the left to create a layer mask
- Select the Gradient tool and make sure that it's set from black to white (you can change it in the Options bar-if the Options bar isn't open above your image, go to Window > Options)
- With the layer mask selected (it'll show white around the thumbnail on the right), draw a gradient going from black to white with white on the top and black on the bottom. Where the white is, that Content Aware Fill area will show and the black will be hidden.
- You could duplicate that layer and set its Blend mode in the Layers panel to Dissolve to make it a little speckly and adjust how much of it shows by changing the opacity.
Copy link to clipboard
Copied
Here's a screenshot that shows the layers (I made the thumbnails larger in the panel options to help you see them), so you can get an idea of what it would look like. I also duplicated the original layer in case I needed it. You could also convert it to a Smart Object to make it non-destructive.
Copy link to clipboard
Copied
Thanks for your replies. I'll try soon

