

- Home
- Photoshop ecosystem
- Discussions
- How can i enhance faded writing?
- How can i enhance faded writing?

Copy link to clipboard
Copied
Good day all,
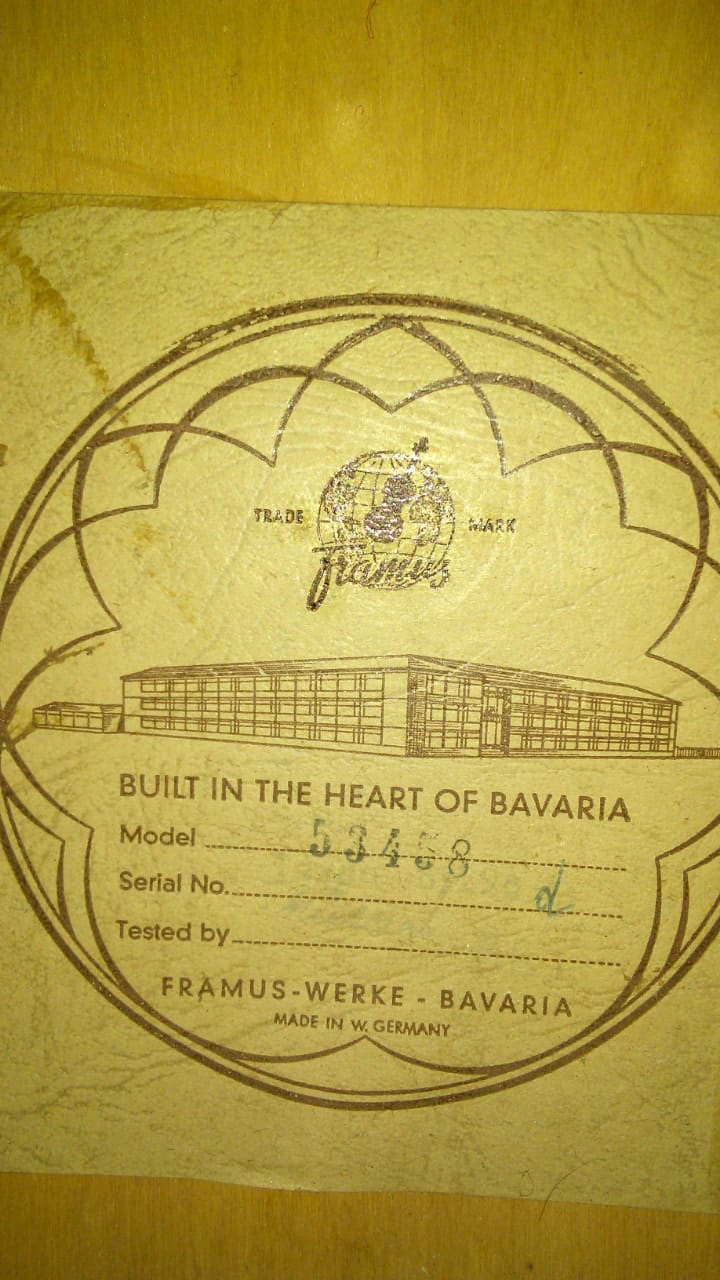
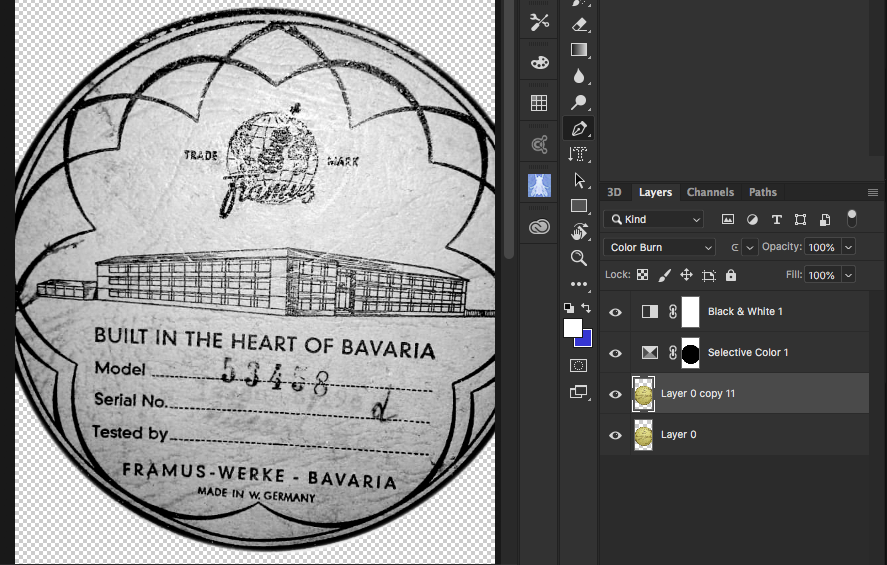
I am very new to this, and am trying my hand at enhancing faded writing. But needless to say ... no luck please can someone help me. I have tried this for about two hours now, and could not get any enhancement. On below picture, there is writing in blue pen, that has faded underneath the stamped numbers, in front of and just below the "d", I am trying to enhance, should be a signature and some number or something, I got the pic from a friend to test my skills...which seems to be zero. Any help would be highly appreciated.
Thanks


 1 Correct answer

This is about the best I could get without spending too much time on it using a few methods including curves, duplicating layers, applying the multiply blend mode, using the sliders on the black and white adjustment layer, duplicating results, and adding some more blend modes.
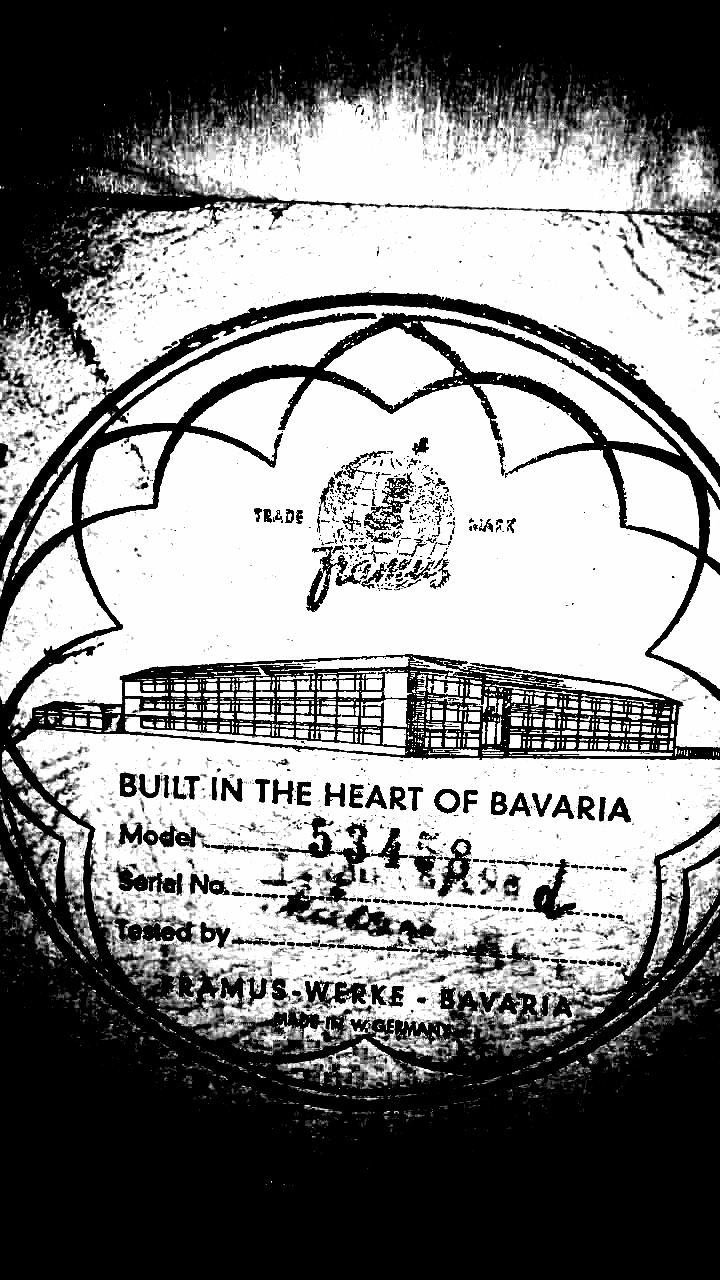
I also did some sleuthing and found similar labels. One of them had the name Miller on it which could be the signature. It looks like a similar M and a circle for the dot of the "i." I can't tell the larger characters under
...Explore related tutorials & articles
 11
Replies
11
11
Replies
11

Copy link to clipboard
Copied
Hi Traceyg,
As you're looking to enhance the text in the image above, You can use the clarity feature available in the camera raw plugin, by going to Filter > Camera Raw
You can use the adjustment brush to apply a mask in camera raw and then increase the clarity and lower the white areas, then you'll get a result like this.
Please have a look at this article to know more about this: Make local adjustments in Adobe Camera Raw
Regards,
Sahil
Copy link to clipboard
Copied
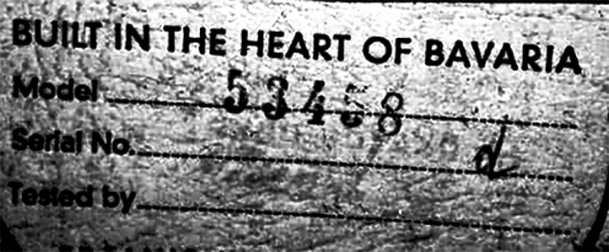
An old and tried method is to duplicate the layer until the image is as dark as you wish. Using the Camera Raw to help tame down the background would help greatly as this will also get darker and darker.
Copy link to clipboard
Copied
Thank you for the advice, I will try this and see what I can figure out. I appreciate your help. Thanks
Copy link to clipboard
Copied
Thank you for the advice, I am going to try this, I appreciate the assistance. Thanks

Copy link to clipboard
Copied
I took a look at this and I'm not so sure there is anything that can be recovered. Playing with channels in RGB, LAB, and CMYK didn't show anything there.
Copy link to clipboard
Copied
This is my finding too, but then I will try all the techniques given here and see what result I can get from that. I am determined to do this 🙂

Copy link to clipboard
Copied
Unfortunately, that information is too faded for useful recovery.
Copy link to clipboard
Copied
A quick try with blending modes and adjustment layer: (It is possible just will take time to render as you wish)
Copy link to clipboard
Copied
Thank you for the advice, I will try it and see what I can do, I appreciate the assistance. Thanks
Copy link to clipboard
Copied
This is about the best I could get without spending too much time on it using a few methods including curves, duplicating layers, applying the multiply blend mode, using the sliders on the black and white adjustment layer, duplicating results, and adding some more blend modes.

I also did some sleuthing and found similar labels. One of them had the name Miller on it which could be the signature. It looks like a similar M and a circle for the dot of the "i." I can't tell the larger characters under the d--maybe a 55E or 58E.
Copy link to clipboard
Copied
Wow, this is fantastic, thank you. I will try this, and see if I can get it as good as yours. Thank you for the advise. I really appreciate it.

 AdChoices