


Copy link to clipboard
Copied
It was so long ago, I've forgotten but I need to do it again and I can't work out how I did it. I thought I did it in photoshop but perhaps it was in illustrator.
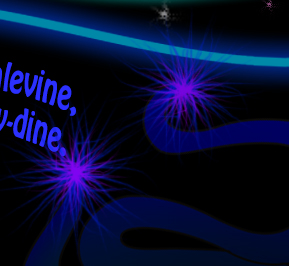
It was something that produced these electrical starburst thingies as in this image:


 1 Correct answer

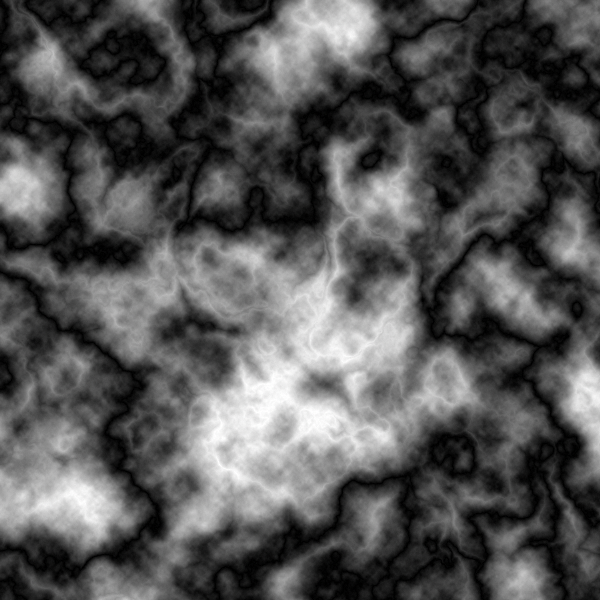
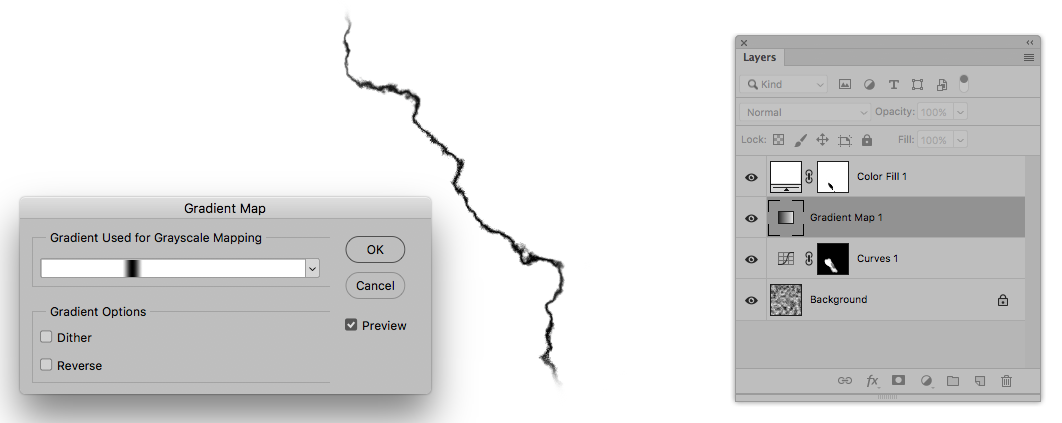
Black to white gradient

Render Difference Clouds. Repeat a few times while holding down the Alt key to get a decent effect.
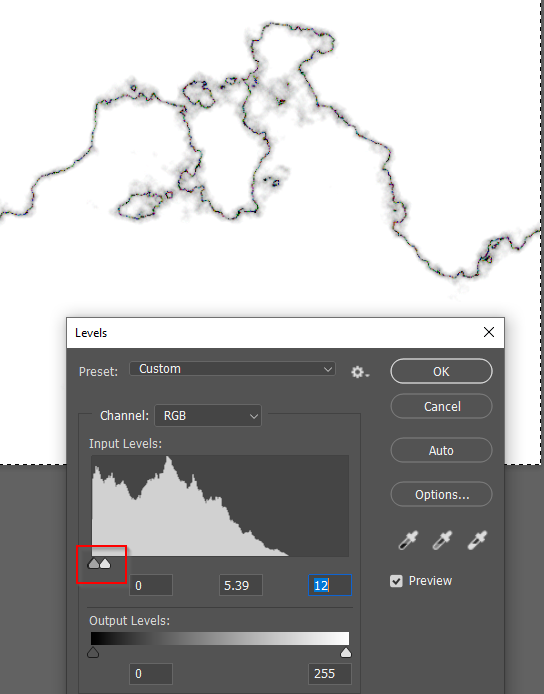
Use levels to do the Photoshop Lightning effect
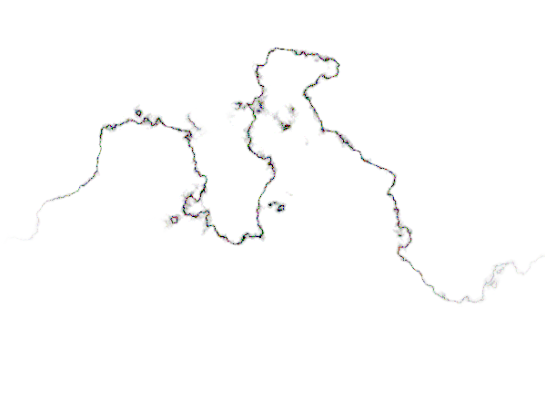
Erase the excess and feather the edges, and define brush preset
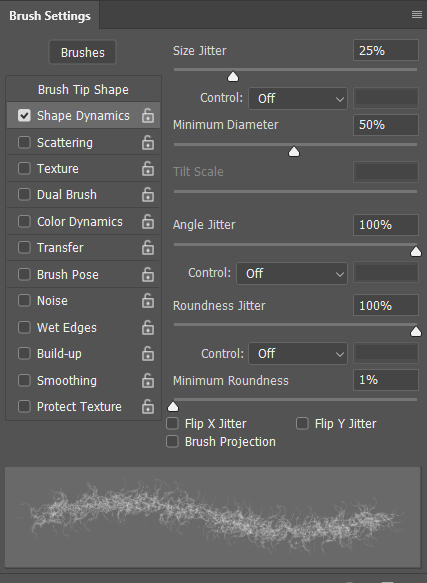
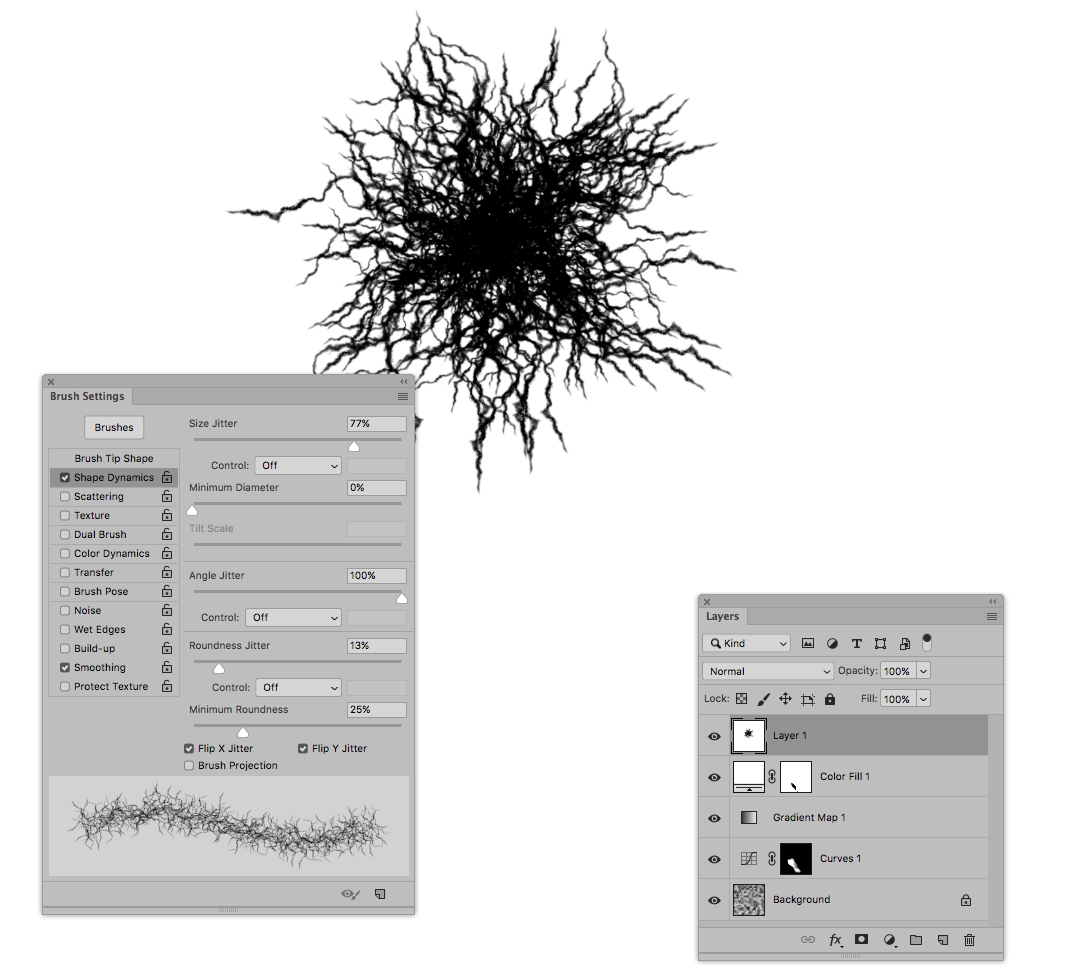
A bit of Size Jitter
Maximum Angle jitter
Maximum Roundness jitter
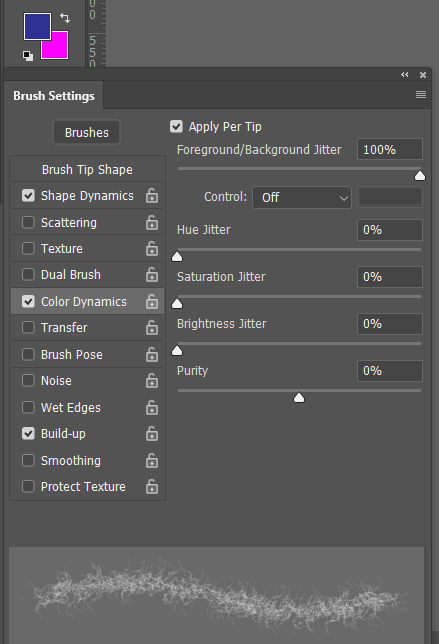
Set the foreground and background colours
And Maximum Foreground/Background jitter
Check Apply Per Tip
Check Build Up
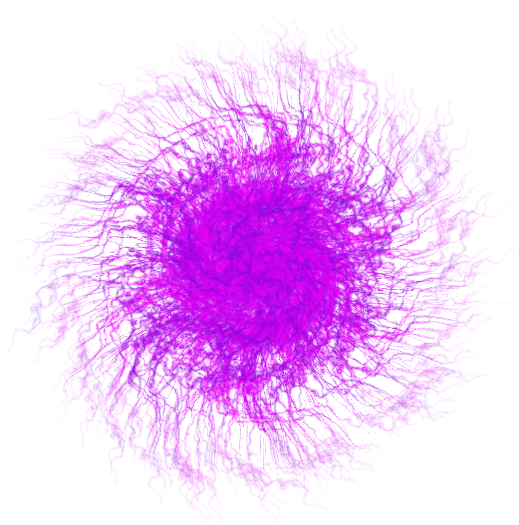
Stamp down with the mouse, and hold the left click till done
It would be good if we had f
...Explore related tutorials & articles
 11
Replies
11
11
Replies
11
Copy link to clipboard
Copied
Look like tree roots.
You could draw out one branch, then duplicate and rotate around the center.
Copy link to clipboard
Copied
I'm sure it was something far simpler than that. Like a filter or brush.
Copy link to clipboard
Copied
I wonder if it might have been a brush that I used once with one colour and then again on the same spot with another colour. If so that brush is not available now.

Copy link to clipboard
Copied
Copy link to clipboard
Copied
One can create a »frizzly« brush tip based on a part of the clouds filter and then use that to create a »knot« of those lines.

Copy link to clipboard
Copied
That's a pretty clever way to create a very cool brush 
Copy link to clipboard
Copied
That looks amazing and exactly what I wanted but I'm sure I never did anything that complicated to create it. I only do simple stuff. Just wish I could remember what I did do. I suppose it was some kind of preset brush once but has been removed from CC.

Copy link to clipboard
Copied
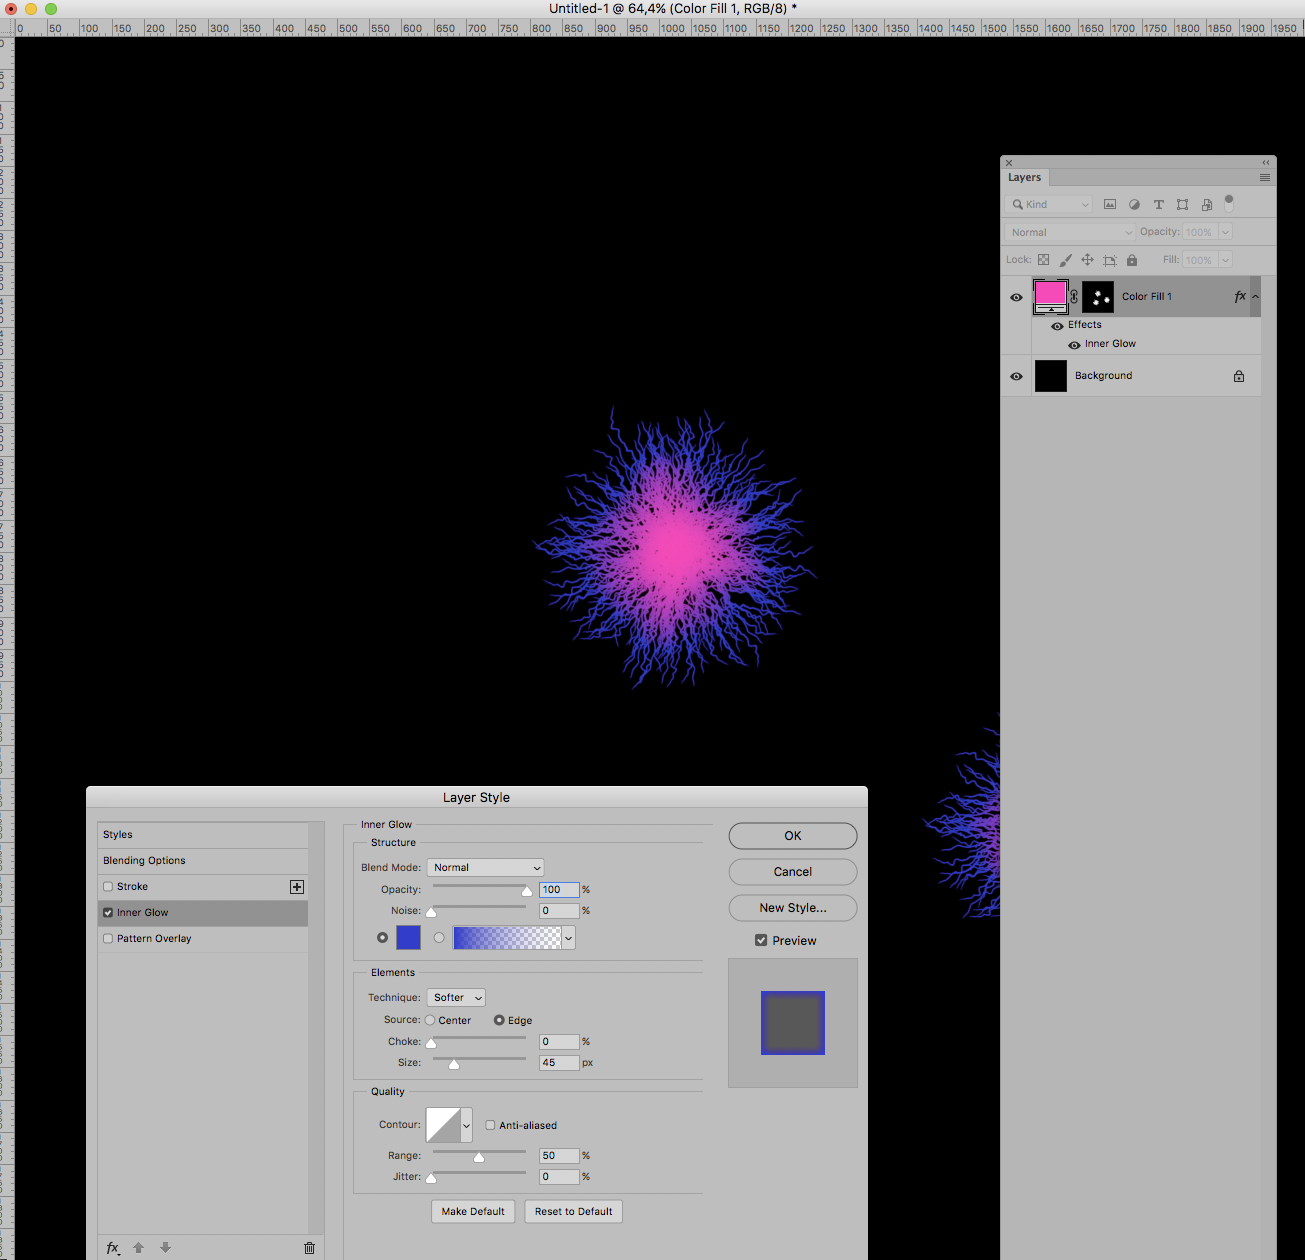
It looks to me like a magenta brush with a deep blue inner shadow applied.
Copy link to clipboard
Copied
Well one good thing that's come of this. I made myself do a few tutorials about creating a custom brush and I made one of my signature. Next step is to try that thing with the clouds.
Copy link to clipboard
Copied
Black to white gradient

Render Difference Clouds. Repeat a few times while holding down the Alt key to get a decent effect.

Use levels to do the Photoshop Lightning effect

Erase the excess and feather the edges, and define brush preset

A bit of Size Jitter
Maximum Angle jitter
Maximum Roundness jitter

Set the foreground and background colours
And Maximum Foreground/Background jitter
Check Apply Per Tip
Check Build Up

Stamp down with the mouse, and hold the left click till done

It would be good if we had flip jitter, to flip the brush on a 'per tip' basis, but I don't know ho to do that.
If you wanted a radial gradient, just clip it on a layer above.
This is a bit better. I added a wee bit of Scatter jitter, and Checked Both Axis, and that seems to have broken the pattern repetition.

Copy link to clipboard
Copied
Gosh! Thank-you Trevor.Dennis for going to all this effort. I will follow every step. I'm up to this.

Get ready! An upgraded Adobe Community experience is coming in January.
Learn more
 AdChoices