- Home
- Photoshop ecosystem
- Discussions
- Re: How do I add a melting effect to this image?
- Re: How do I add a melting effect to this image?
Copy link to clipboard
Copied
In this picture, you can see it has ice at the top 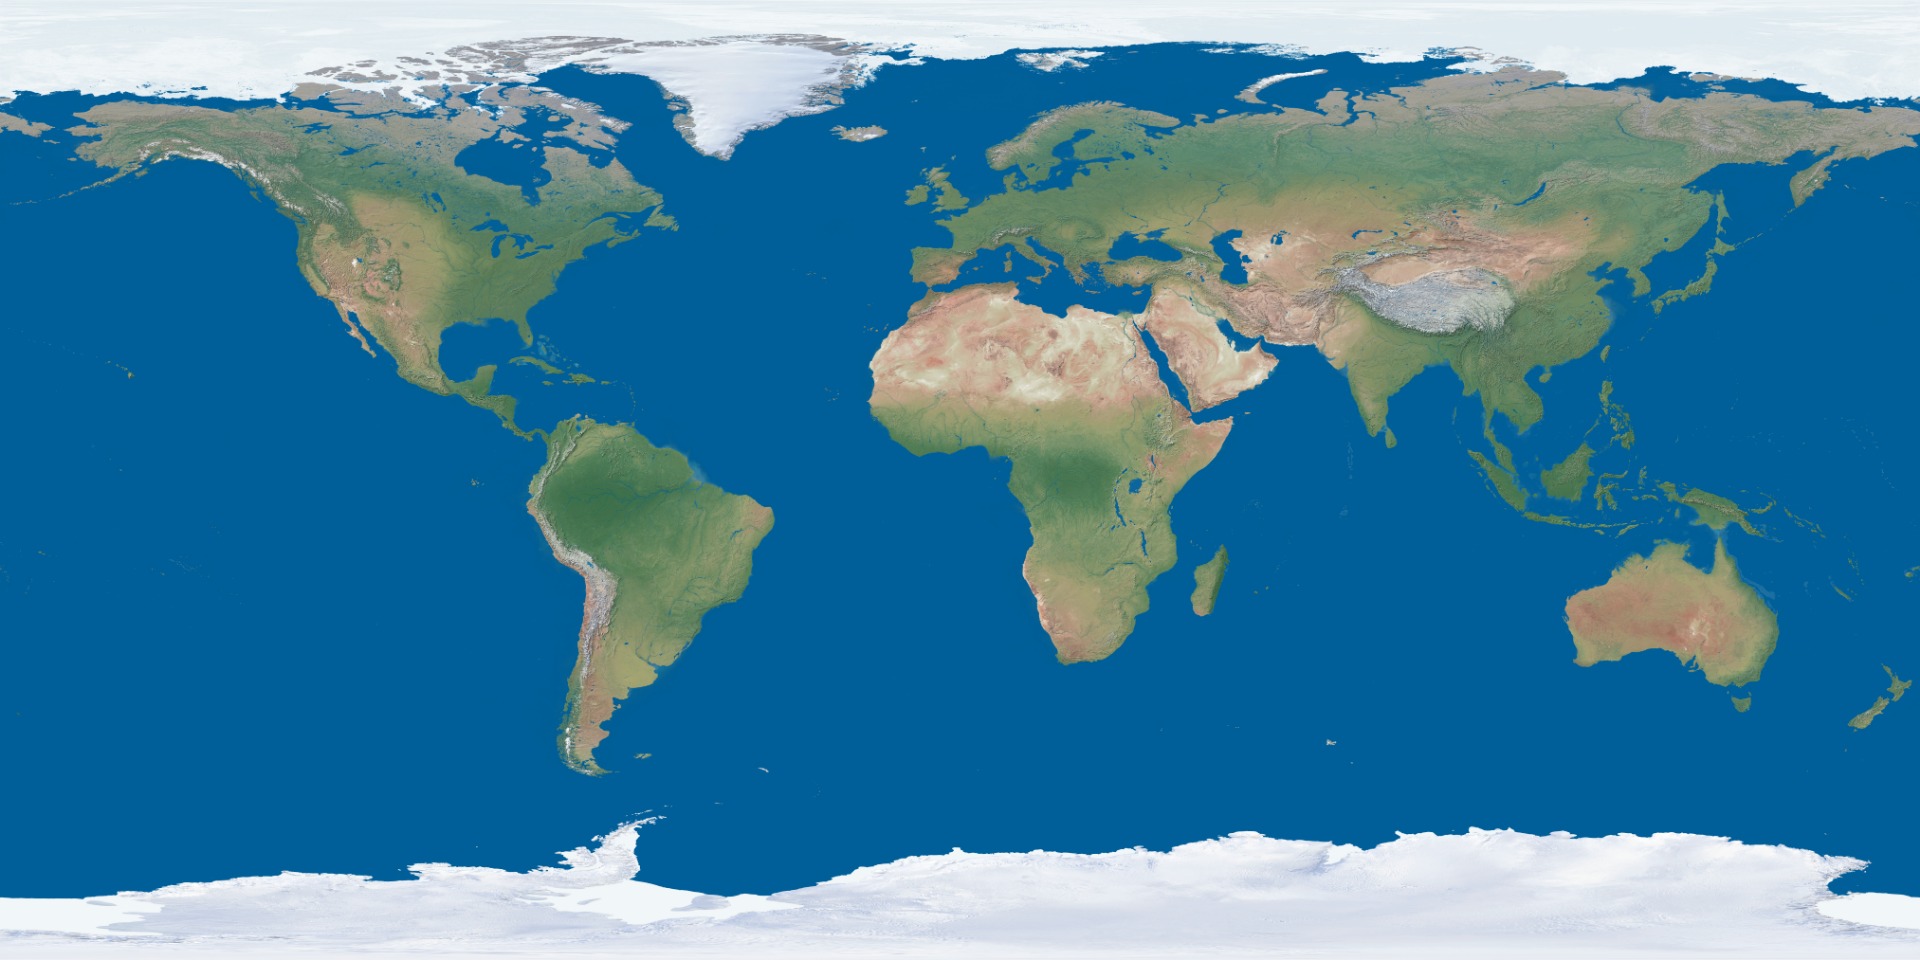
In this one there is no ice at the top  I want to do something like the 2nd one, except I dont want to remove all the ice. I want to remove only some of it, as if it got melted. How can i do this?
 1 Correct answer
Select the ice and copy to a new layer

I'm going to ignore the land beneath the ice, and fill that area with sea blue on a new layer
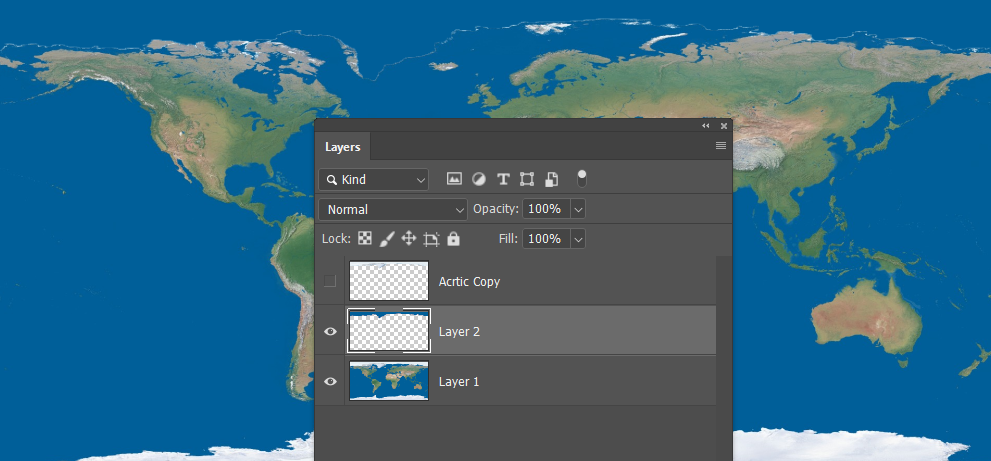
Ctrl click the ice layer and go Select > Modify > Contract (you decide how much)
Add a layer mask.

I used Alien Skin > Eye Candy 7 to do the drip and melt, but you can do it manually.
This is Eye Candy 7

If I had to do it manually, and I wanted lots of drips, I'd make a brush preset.
Give it some size jitter, and increase spacing. Unfortunately, you can't use scatter be
...Explore related tutorials & articles
Copy link to clipboard
Copied
I have no idea how you were able to upload a 16,200 X 8,100 pixel image to this forum. I'd have bet good money that it was impossible. I don't if you understand image size, but for future reference, it would be good if you could keep your uploads to sensible sizes. 1500 pixels on the long side is usually plenty.
Anyway, I can see that I missed that you did have arctic ice in your first image. I only played with the Antarctic, so I'll have another go.
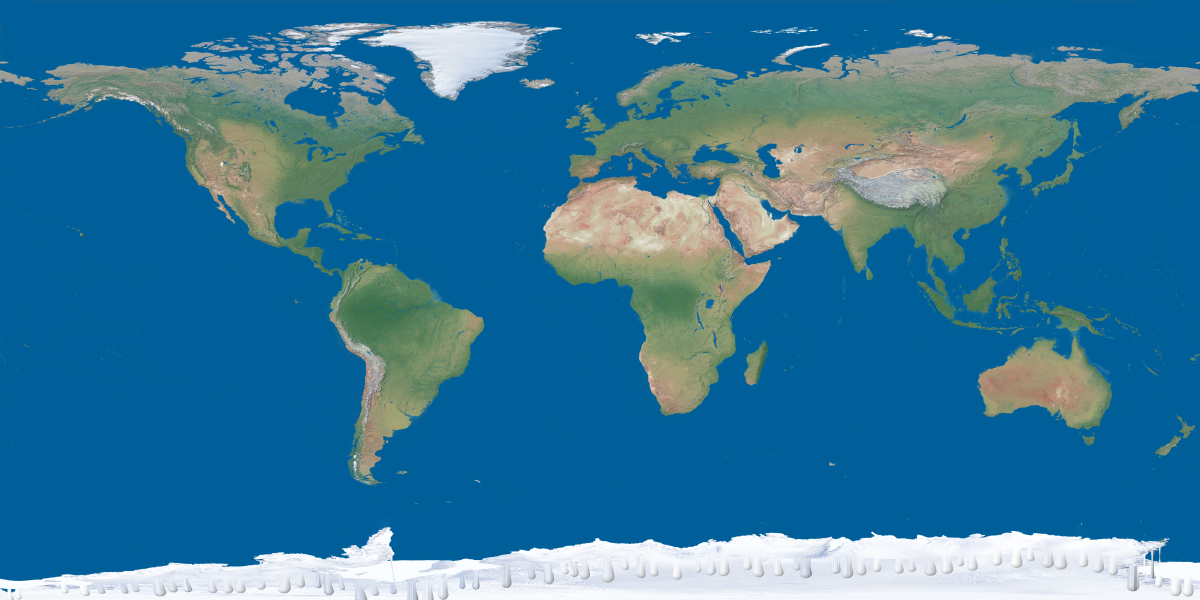
The Arctic is actually problematic, because there is more obvious land mass under the ice, and I don't know what would be left behind if the ices was gone. I can fin plan views of the Antarctic, but not the north pole, and definitely not a Mercator projection without the ice.
Did you have a strategy for dealing with the land under the ice?
Copy link to clipboard
Copied
I will just edit out the land on the edges that could be problematic before i add the effect, however I want to learn the method you used to do that effect on the Antarctic so I can replicate it (I will do many frames )
However, I am stuck on how to add that effect.
Copy link to clipboard
Copied
Also, the image you attached is exactly what I want except I want the whole ice sheet to get smaller because of the melting. This is pretty easy on the Antarctic side, but on the top it is difficult
Copy link to clipboard
Copied
Select the ice and copy to a new layer

I'm going to ignore the land beneath the ice, and fill that area with sea blue on a new layer

Ctrl click the ice layer and go Select > Modify > Contract (you decide how much)
Add a layer mask.

I used Alien Skin > Eye Candy 7 to do the drip and melt, but you can do it manually.
This is Eye Candy 7

If I had to do it manually, and I wanted lots of drips, I'd make a brush preset.
Give it some size jitter, and increase spacing. Unfortunately, you can't use scatter because you can't scatter on the x axis without the y axis, so you'll have to live with regular spacing.
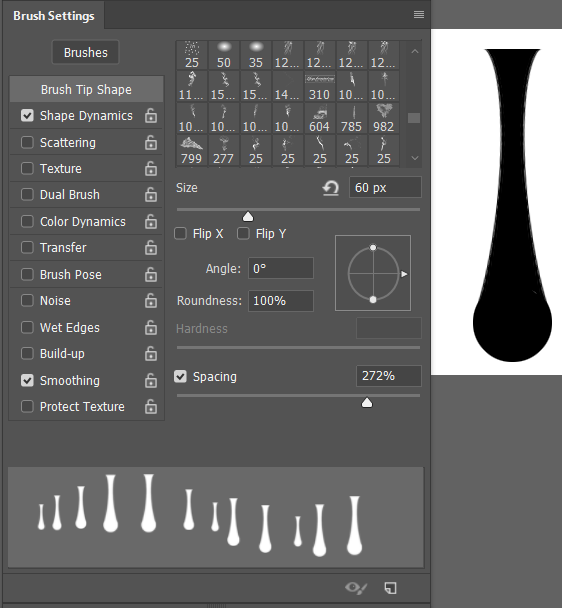
Sample the Arctic ice colour and brush thew drips on a new layer
You'll need to nude some of them up a bit by selecting and moving.

Then use Layer Style Bevel & Emboss to give thew drips some depth
The settings below are for a layer 1000 pixels wide.

This is actual pixel size after increasing the image to 2000 pixels and using Smart Sharpen to harden the outlines.
I'v also move the drips below the ice layer.
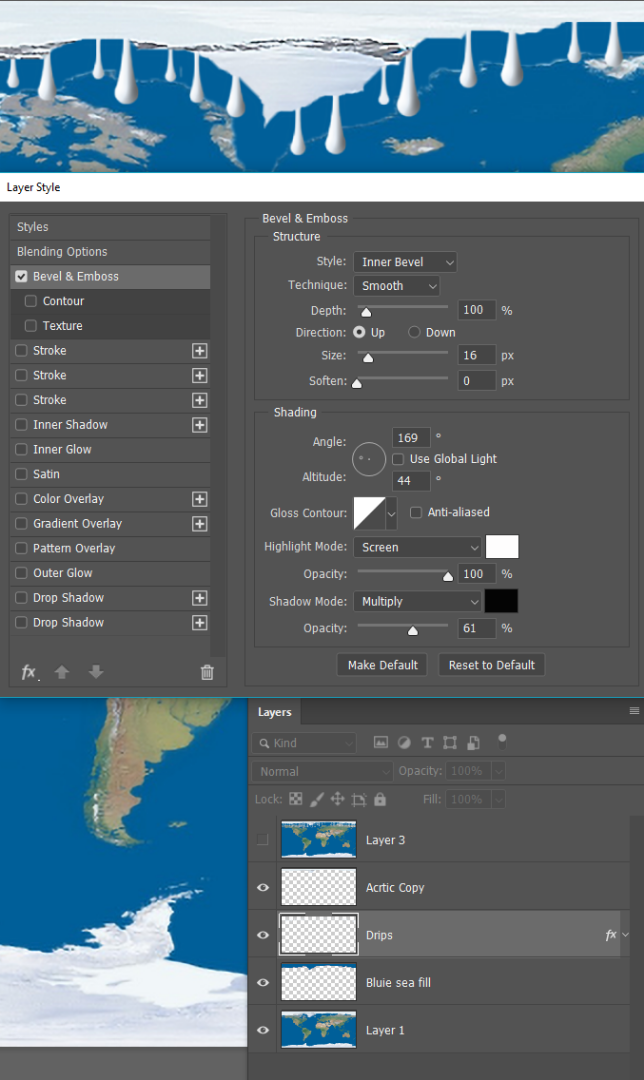
I hope that helps, but ask if you need more help.
Copy link to clipboard
Copied
Copy link to clipboard
Copied
Thanks

