Copy link to clipboard
Copied
I am VERY new to this. VERY. I am needing to build a template that holds 2 pics on a 4x6 for a photo booth event. I have no idea where to start. Please advise
Copy link to clipboard
Copied
First: This depends if it is to be used in an automatic way by the photo booth. Then you need to look at the requirements for the booth. This link gives you an idea on how to do that: Photobooths | How To Create a Photo Booth Template | Photobooths (just to say that we do not endorse any product presented there. All booth systems have similar requirements/procedures).
If you want creating a Photoshop template, so that you can manually insert your data, look at above link to get an idea on how it could be and create a Photoshop file with 3+ layers:
Look here for the layer basics (Learning layer basics in Photoshop ) and come back if you have specific questions.
Copy link to clipboard
Copied
Thank you
Copy link to clipboard
Copied
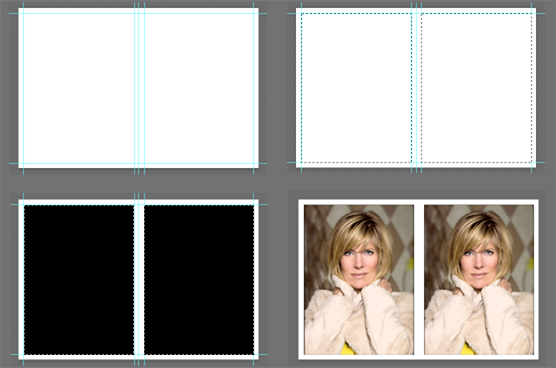
Assume the area is 4 x 6. If you provide a 1/8" margin around each image, the images, each one is 2.75" x 3.75"
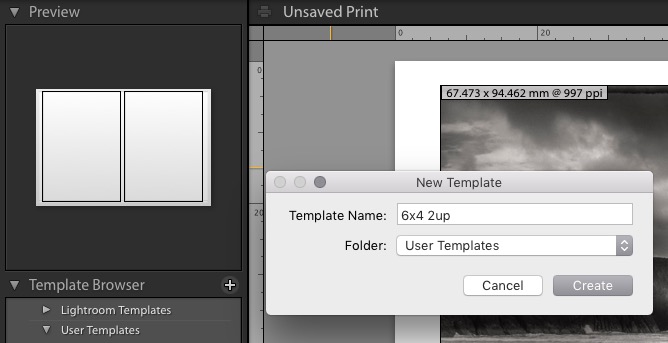
File > New: 6" x 4" 240 ppi RGB Color, Background: white
Checkmark: View > Rulers
Click and drag out reference lines 1/8" from the four sides and 1/4" down the middle (Fig, 1)
Use the Rectangular Marquee tool the draw a marching ants Selection to the reference lines. (Fig 2)Edit > Fill and fill each box with black. (Fig 3)
Select > Deselect the marching ants. Drag the reference lines whence they came. (I love the word "whence")
Open an image and crop to a final Image > Image size of 2.75" x 3.75 240 ppi
Select > All
Edit > Copy
Return to the template and use the Magic Wand to click on the first black rectangle.
Edit > Paste Special > Paste into
Repeat for the second template rectangle (Fig 4)
Deselect marching ants
Note: If your inkjet requires a larger than 1/8" margin, adjust your layout for it before calculating margins and image sizes
Copy link to clipboard
Copied
If you ever end up needing the strip, I have a template I can provide. The company I work for has a photo booth company for weddings and such
Copy link to clipboard
Copied
Thank you!!
Copy link to clipboard
Copied
Lightroom might do a pretty good job for you here too, if you go to the print module then you can set up a custom template to your specifications. As you shoot your images can be retouched and cropped to the size you need then via the print module, sent to your printer which is loaded with 6x4 paper.
here's how I setup the template. First go to the print module and go to page setup and make a 6x4 page, assuming you don't already have one. I set mine up with a 3mm bleed all round but it will depend upon your printer.
Then on your blank 6x4, add a custom size cell. It really doesn't matter what you add as the picture box had bounding boxes so you can drag the image area to suit your needs.
Save the template in your user presets folder and it can be used whenever you require. Lightroom will handle your colour management in exactly the same way as Photoshop so if you printer is already handling your colour you can set that up in the same way.
The benefit of LR in this scenario is that you could potential shoot, edit and organise in LR, then go straight to the Print module and have all the files ready in the film strip to drag and drop.
Remember that Lightroom is part of the CC Photographers package so if you subscribe then you are good to go. If you don't have access to lighroom then the post from norman.sanders​ as above will work equally as well in photoshop.
Hope that is useful.
Butch