

- Home
- Photoshop ecosystem
- Discussions
- Re: How do I create this skin effect?
- Re: How do I create this skin effect?

Copy link to clipboard
Copied
Hey guys,
Im trying to recreate this effect, but I have no idea how this is done. Can somebody point me in the right direction? I tried searching for 'porcelain' skin.. but thats just lighter skin. This is almost like a diffuse plastic skin.. Any pointers will be appreciated...!


 1 Correct answer

To do it properly one would have to additionally address the edges, but I think a lot can be achieved with frequency separation and a few Adjustment Layers.
Explore related tutorials & articles
 12
Replies
12
12
Replies
12
Copy link to clipboard
Copied
Please post (a section of) the image you want to edit thusly.
Frequency separation might have been used, but with certain details manual masking or even painting could be necessary.
Copy link to clipboard
Copied
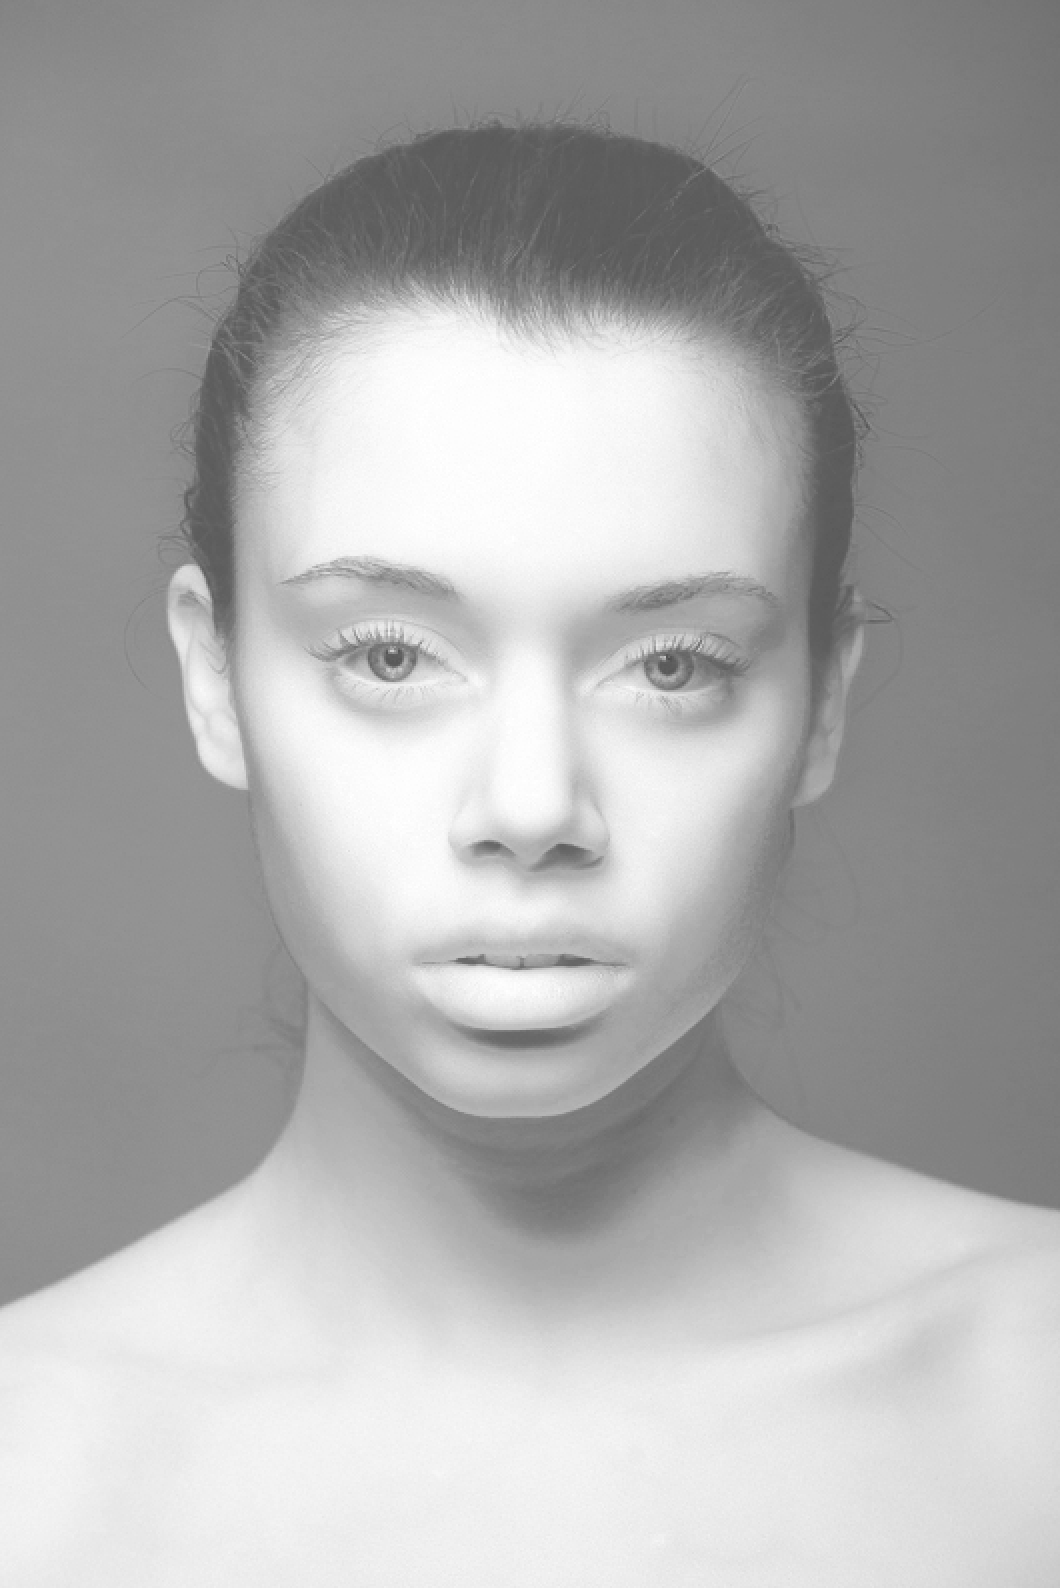
This is a portrait I shot last week. I would like to use the effect from the example on this portrait. So I want the skin and lips and stuff to become as the example I provided.
.jpg)
Copy link to clipboard
Copied
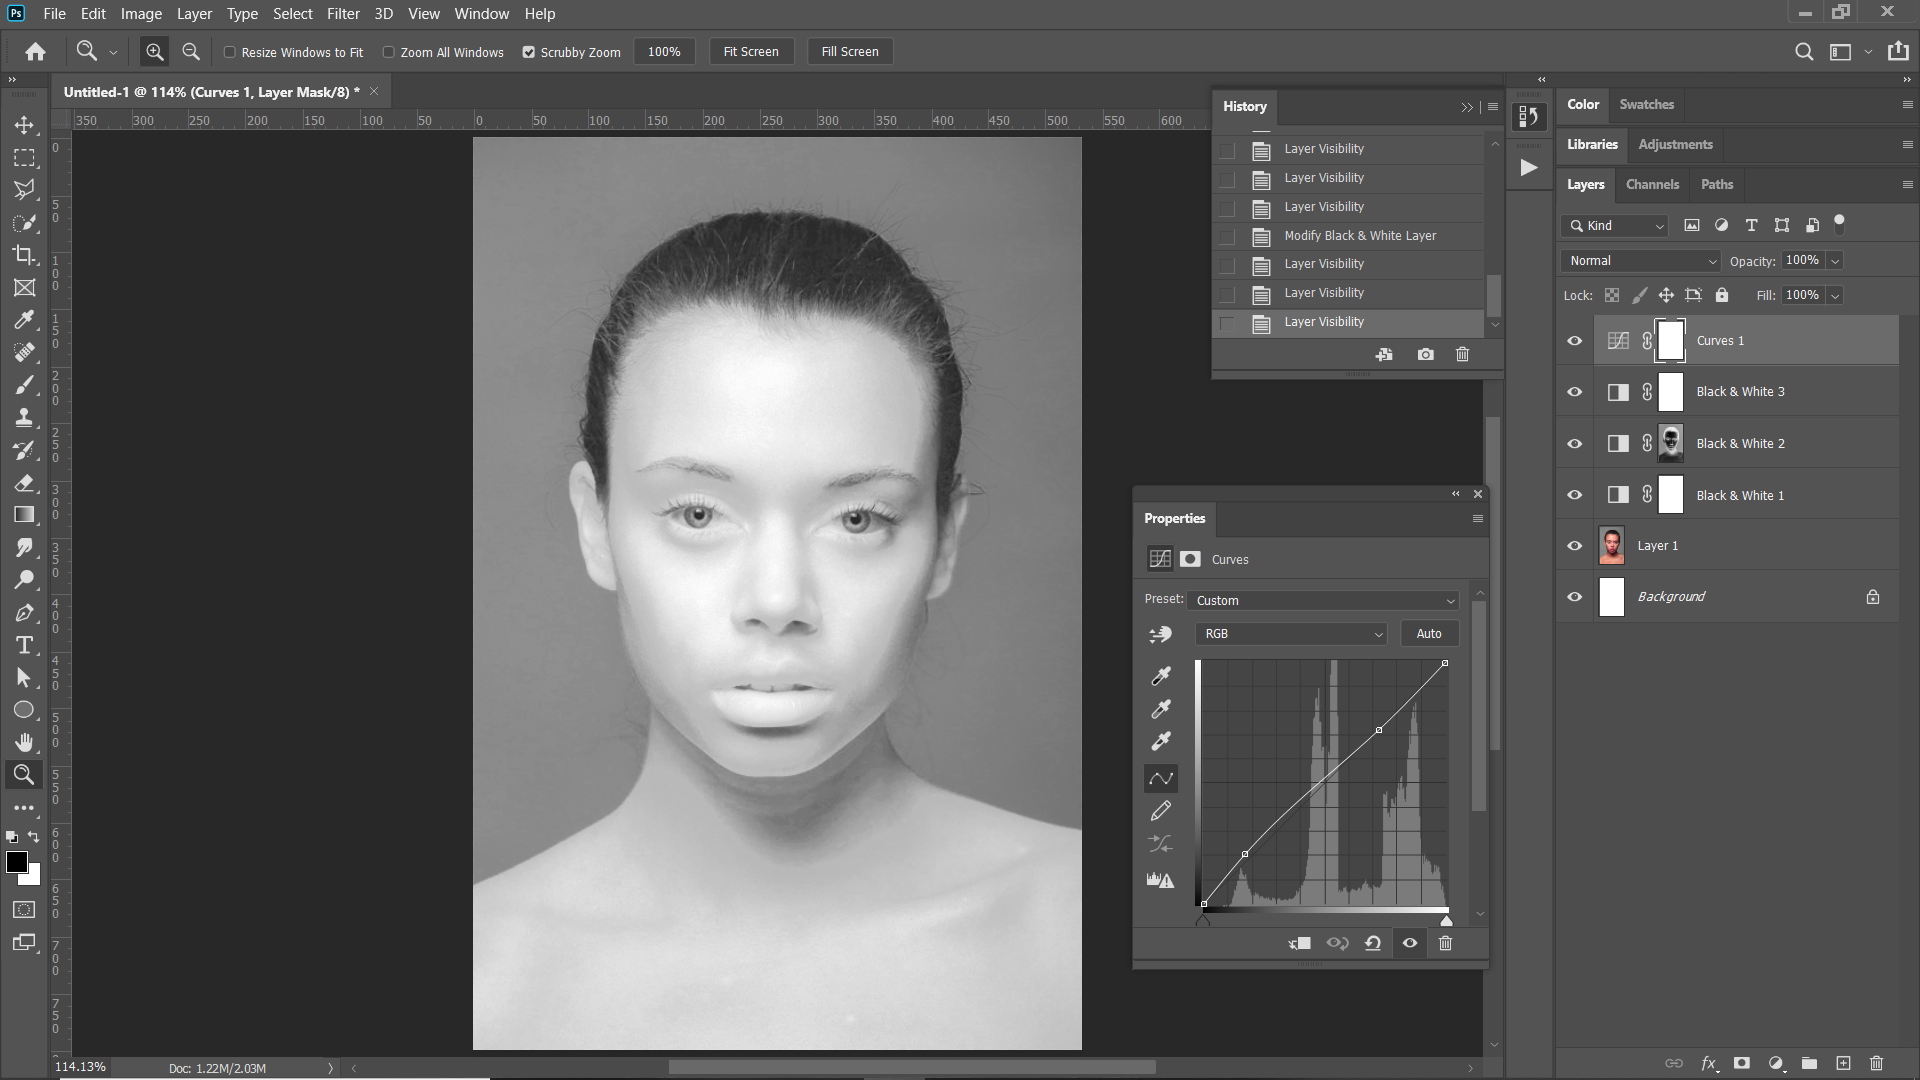
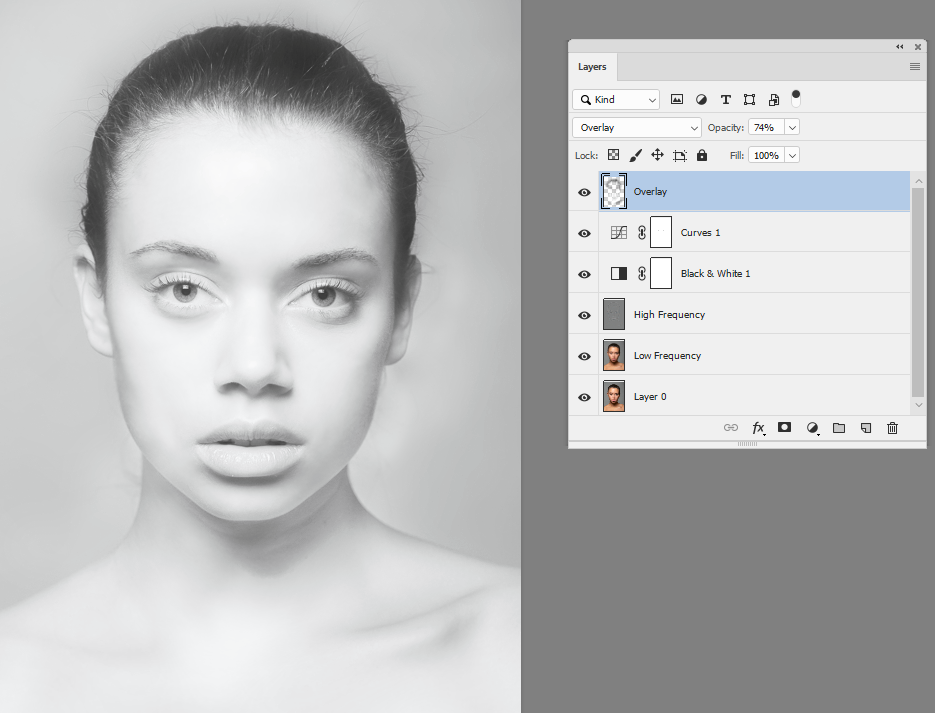
To do it properly one would have to additionally address the edges, but I think a lot can be achieved with frequency separation and a few Adjustment Layers.

Copy link to clipboard
Copied
That looks like its really close to what I want!
I dont use FS that often though, so im not quite sure what you did there with it. Could you elaborate a bit on what im seeing in your layer setup?
thank you so far!
Copy link to clipboard
Copied
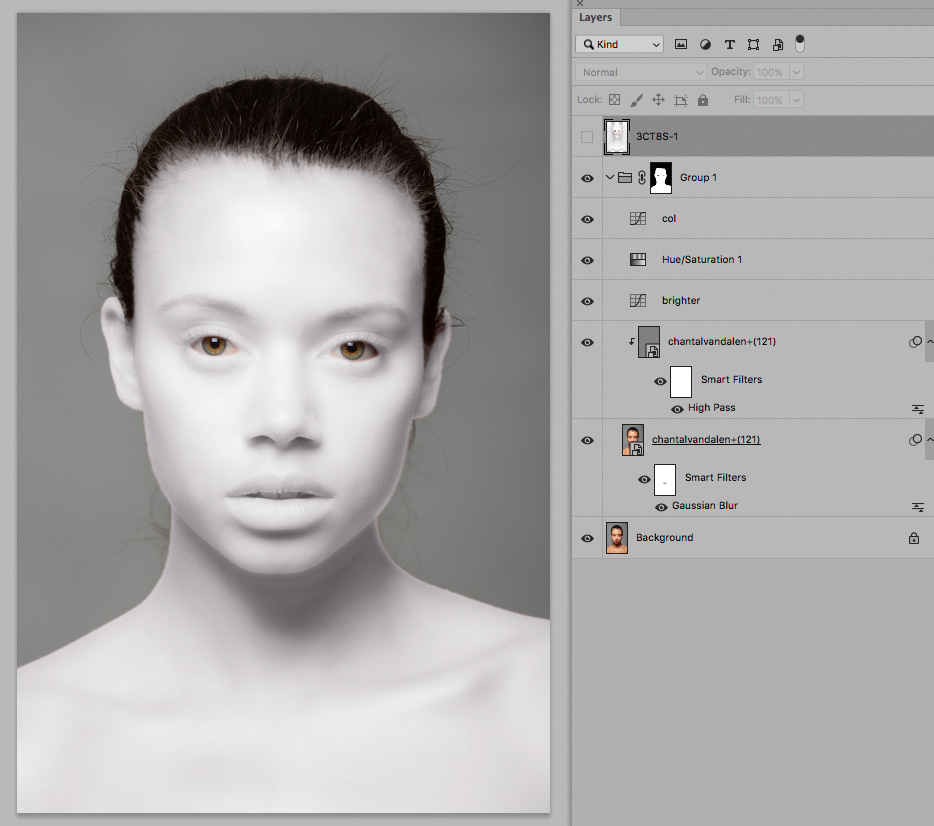
• one Smart Object instance has Filter > Blur > Gaussian Blur applied (teeth and nose orifices are masked to for the Filter)
• the mother has Filter > Other > High Pass applied and is set to the Blend Mode »Linear Light«
• the lower Curves Layer brightens a lot
• the Hue/Saturation Layer is set to Saturation 0%
• the upper Curves Layer is set to Blend Mode »Color« and is used to get a slight purple tone
Alll these Layers are in a Group that has a Layer Mask applied to it.

Copy link to clipboard
Copied
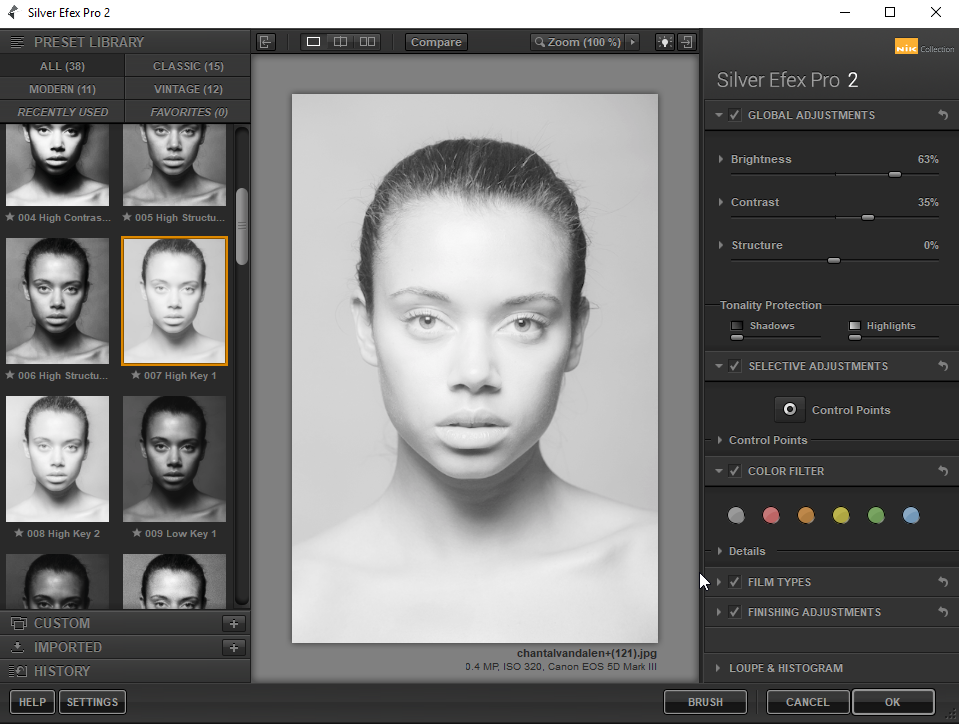
If you have Nik Collection you could use the Silver Efex pro 2 filter

Copy link to clipboard
Copied
Another way might be to use B&W adjustment layers.
Create a copy of the red channel to use as a mask.

Use a B&W ajustment layer set to luminosity to lighten the reds.

Add another B&W layer with the red channel reversed as a mask:
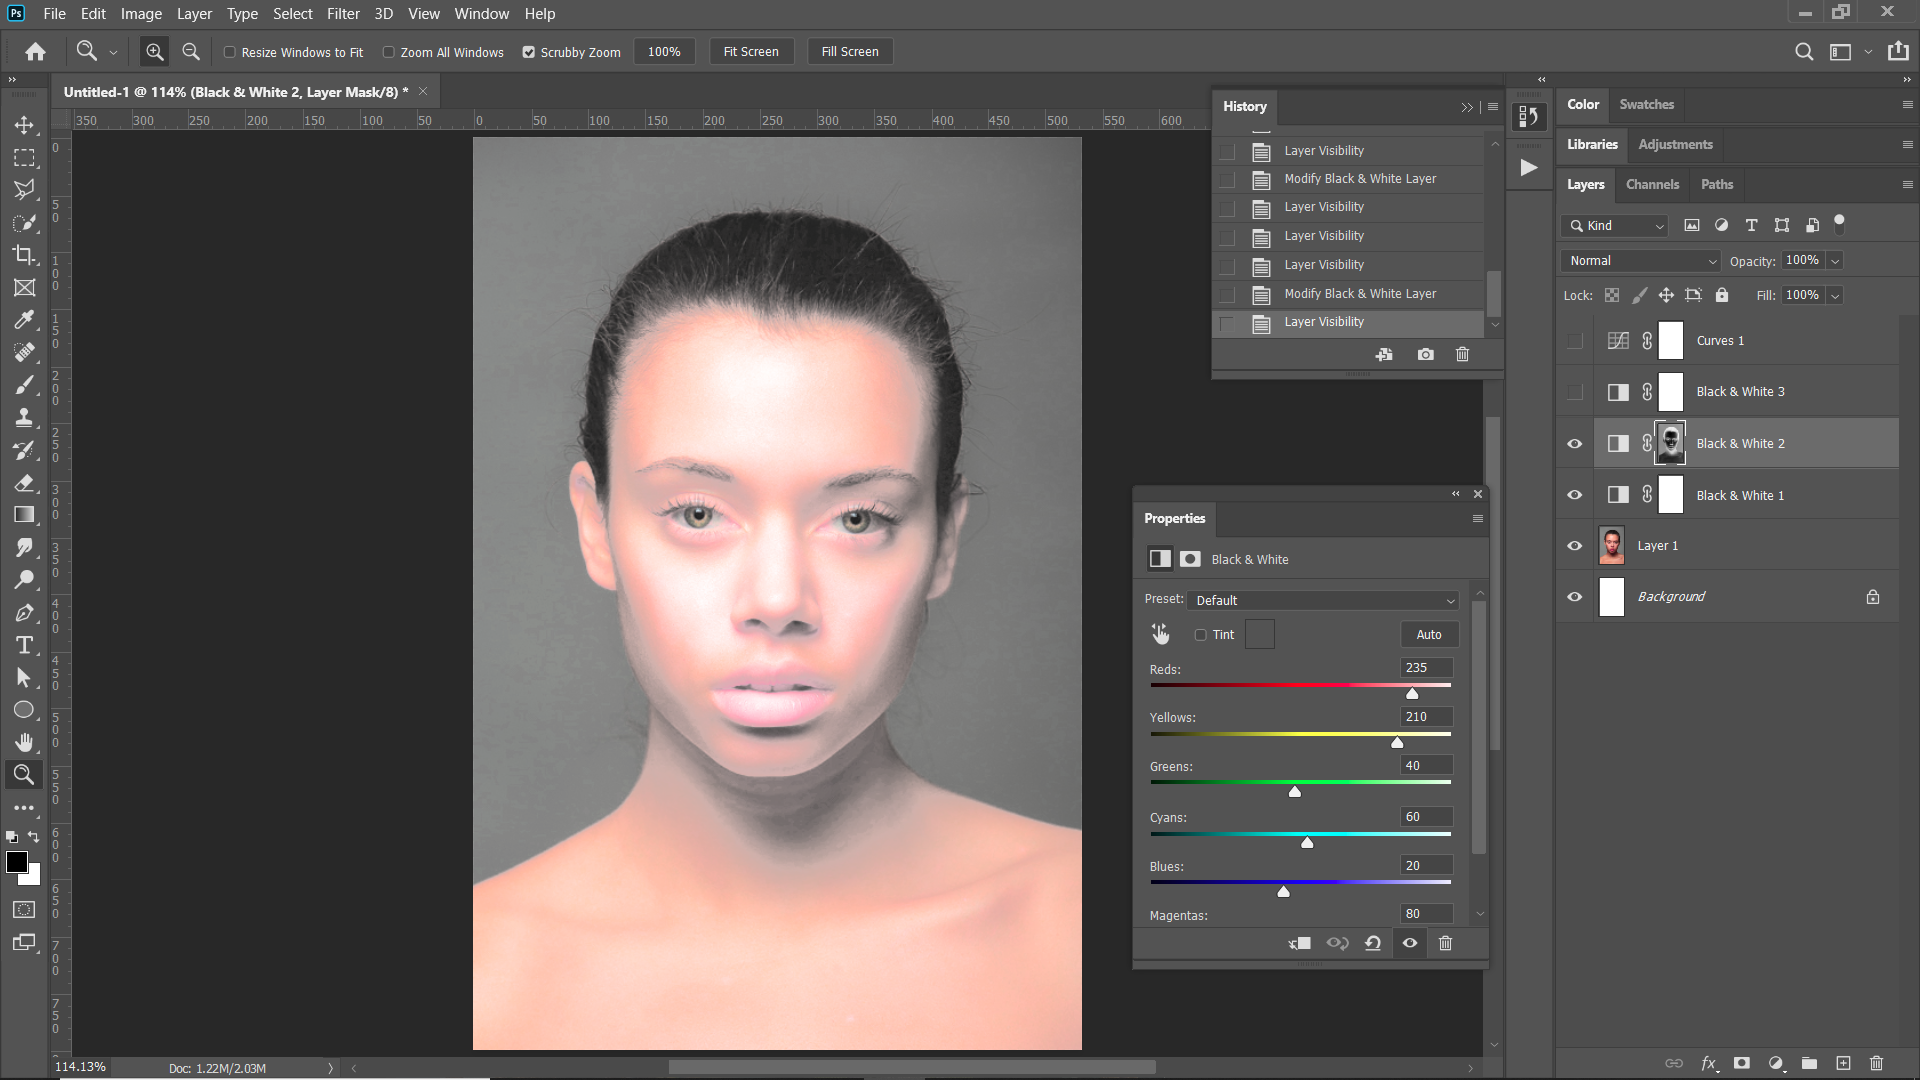
Add a third B&W ajustment layer to convert all to B&W
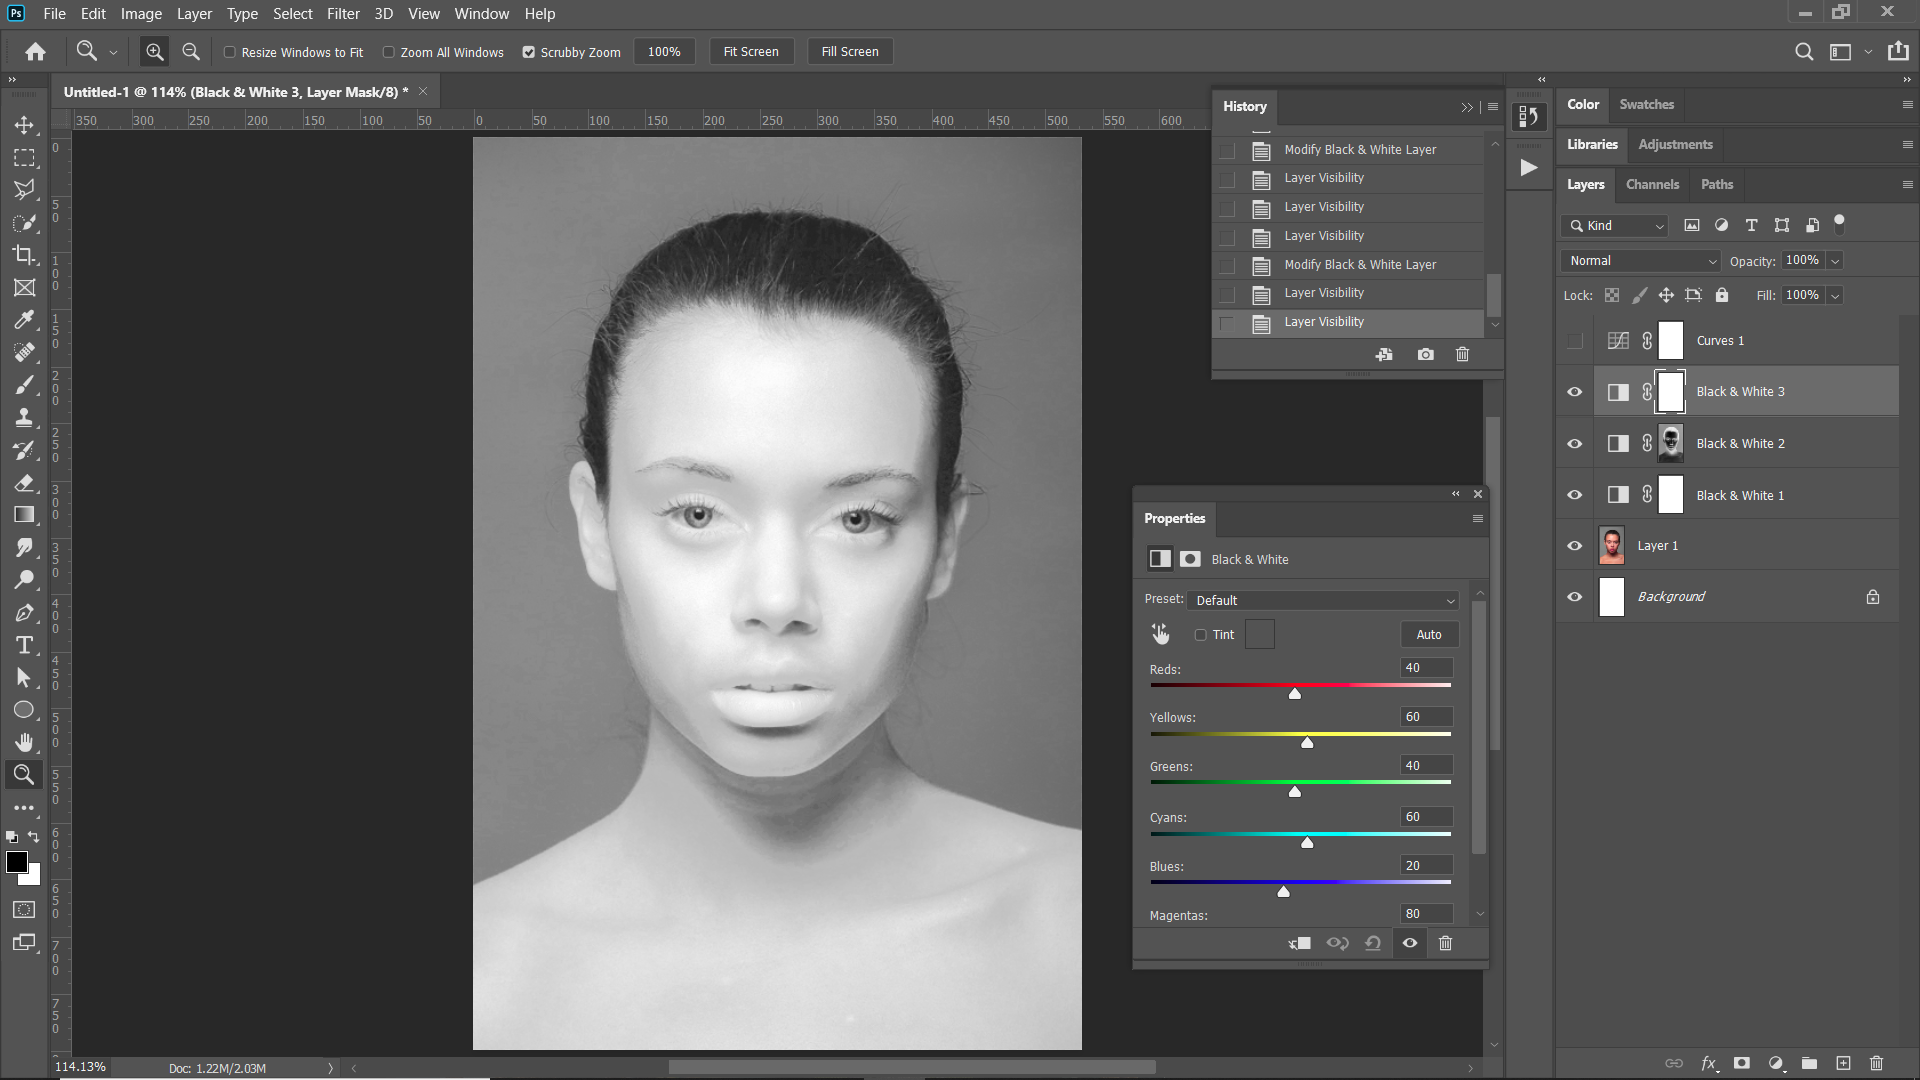
Add curves to adjust the shadows.

Copy link to clipboard
Copied
High
You could experiment with a combination of frequency retouching to soften the skin, a black and white adjustment layer set to lighten the reds/oranges curve to lighten and then painting with black/white brush on a layer set to overlay blend mode to bring out the glow
Dave

Copy link to clipboard
Copied
I'm not sure what you want to do with her hair, but I got the skin to look pretty smooth with these settings using the Camera Raw filter


Copy link to clipboard
Copied
This is the untouched Cyan channel in the CMYK set (Displayed darker here, for some reason.)

Copy link to clipboard
Copied
When Adobe did the 'I Am The New Creatives' campaign a few years ago, they asked artists to create a portait similar to theirs and to submit it.
I did this and was featured on their page. They had a guide on how to do it.....
http://www.iamthenewcreative.com/index.html#p/join-us
Look at step 2, create your portrait.... there is a tutorial to download.
Granted you can skip the part where you add artwork to your face. But this general idea is quite fun. So just do the part of creating a white face.
The other part with image projecting on the face you can skip.
Then you can work on making the portait more plasticy... erase marks on the face, etc. Create additional highlights and smooth everything.
MY GUESS IS THAT THE ORIGINAL IDEA THAT YOU SHARE WAS A 3D GRAPHIC and not a photograph.
Copy link to clipboard
Copied
Thanks a lot everybody! I will try out those techniques and see how far I can come. Its definately been very helpfull so thank you all!

Find more inspiration, events, and resources on the new Adobe Community
Explore Now
 AdChoices