Here are the step-by-step instructions you requested:
1. Open the flower file and, in the Layers panel, drag the layer down to the Create New Layer symbol to create a duplicate layer.
2. Choose Image > Mode > Lab Color … don’t merge.
3. In the Cannels panel choose the Lightness channel,

4. Return to the Layers panel and choose Image > Adjustments > Curves
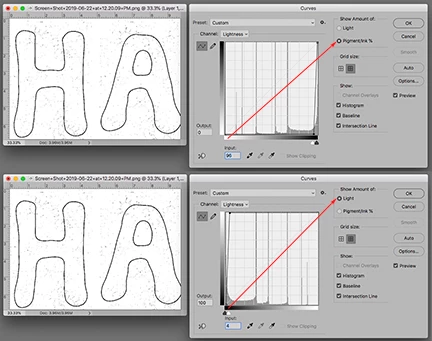
5. As shown above, the Curve will appear as either a light-to-dark or dark-to-light grayscale at the base of the Curves grid. In each case drag the light slider to the dark end of the scale to create the black outline letter shown in the image above. It does not have to be pure white. OK
6. Choose Image > Mode > RGB Color … don’t merge
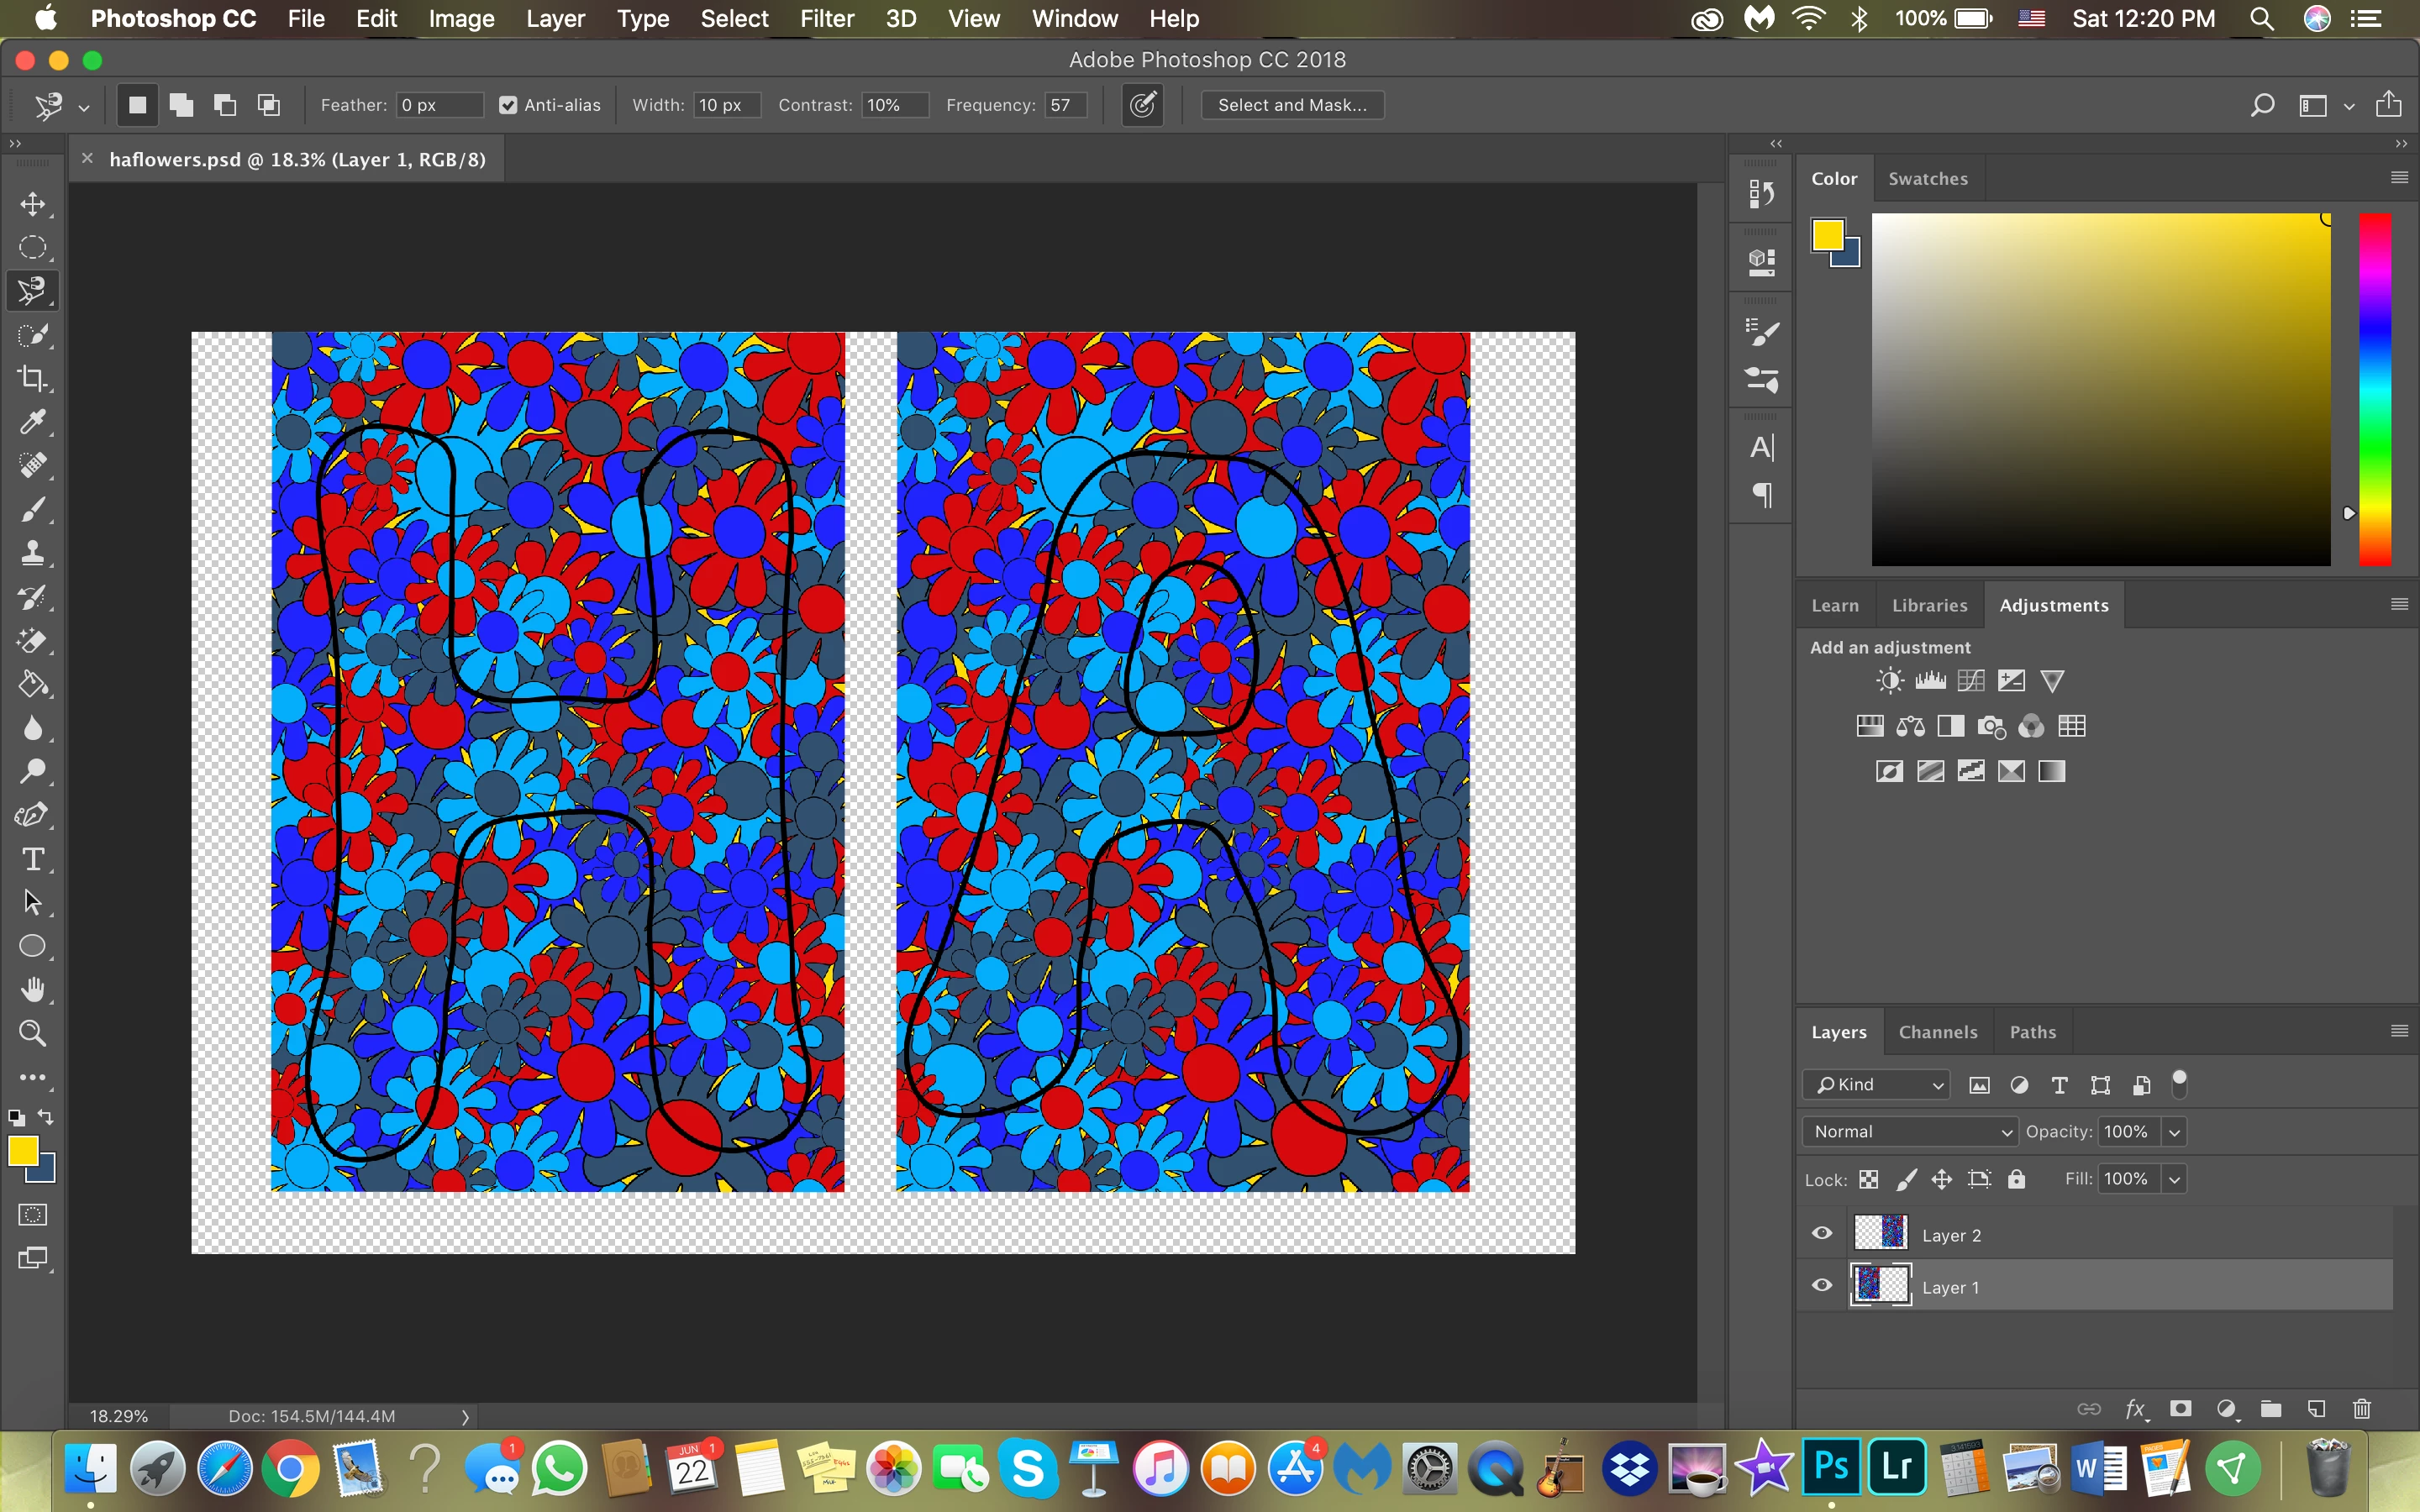
Refer to my original Post illustration.
7. Use the Quick Selection tool to make a selection of the inside of the letters and then Edit > Fill with white.
8. Choose Select > Inverse to inverse the Selection and Edit > Fill with black. It will look like the image alongside the outline image in the original Post
9. Select > Deselect the marching ants
10, Still in the HA layer choose Select > All followed by Edit > Copy
11. Choose the flower layer and add a mask by first clicking on the Mask symbol at bottom of the Layers panel
12. Hold down the Opt (Alt) key and click on the Mask in the flower panel. The screen will go white. Fear not.
13. Choose Edit > Paste. Turn the eye off in the HA layer and turn the eye on in the flower layer.
You may add a blank layer at the bottom of stack as shown in the original post and add a flat color, pattern or image surrounding the flowered HA