 Adobe Community
- Home
- Photoshop ecosystem
- Discussions
- Re: How do I make a 'editable' (change size/color)...
- Re: How do I make a 'editable' (change size/color)...

Copy link to clipboard
Copied
I have just been using a layer with my name in type to put on my photos, and that has been easy enough to size and 'fill' by highlighting and changing the fill color. But now, I have a shape, my name signature, and have made it into a vector path. I would like to move this as a layer onto any of my photoshop photo documents and be able to highlight it to change the fill color so it will be appropriate for any photo where it is used. I'm not sure if I want to make it a shape layer, which I've tried and I don't know how to make a shape layer from a path... I don't even know if that is what I want. Image shows screen and where I am now, you can see the path as the path is highlighted in the paths palette... Where to go from here to get a layer I can 'move' onto my photoshop photos?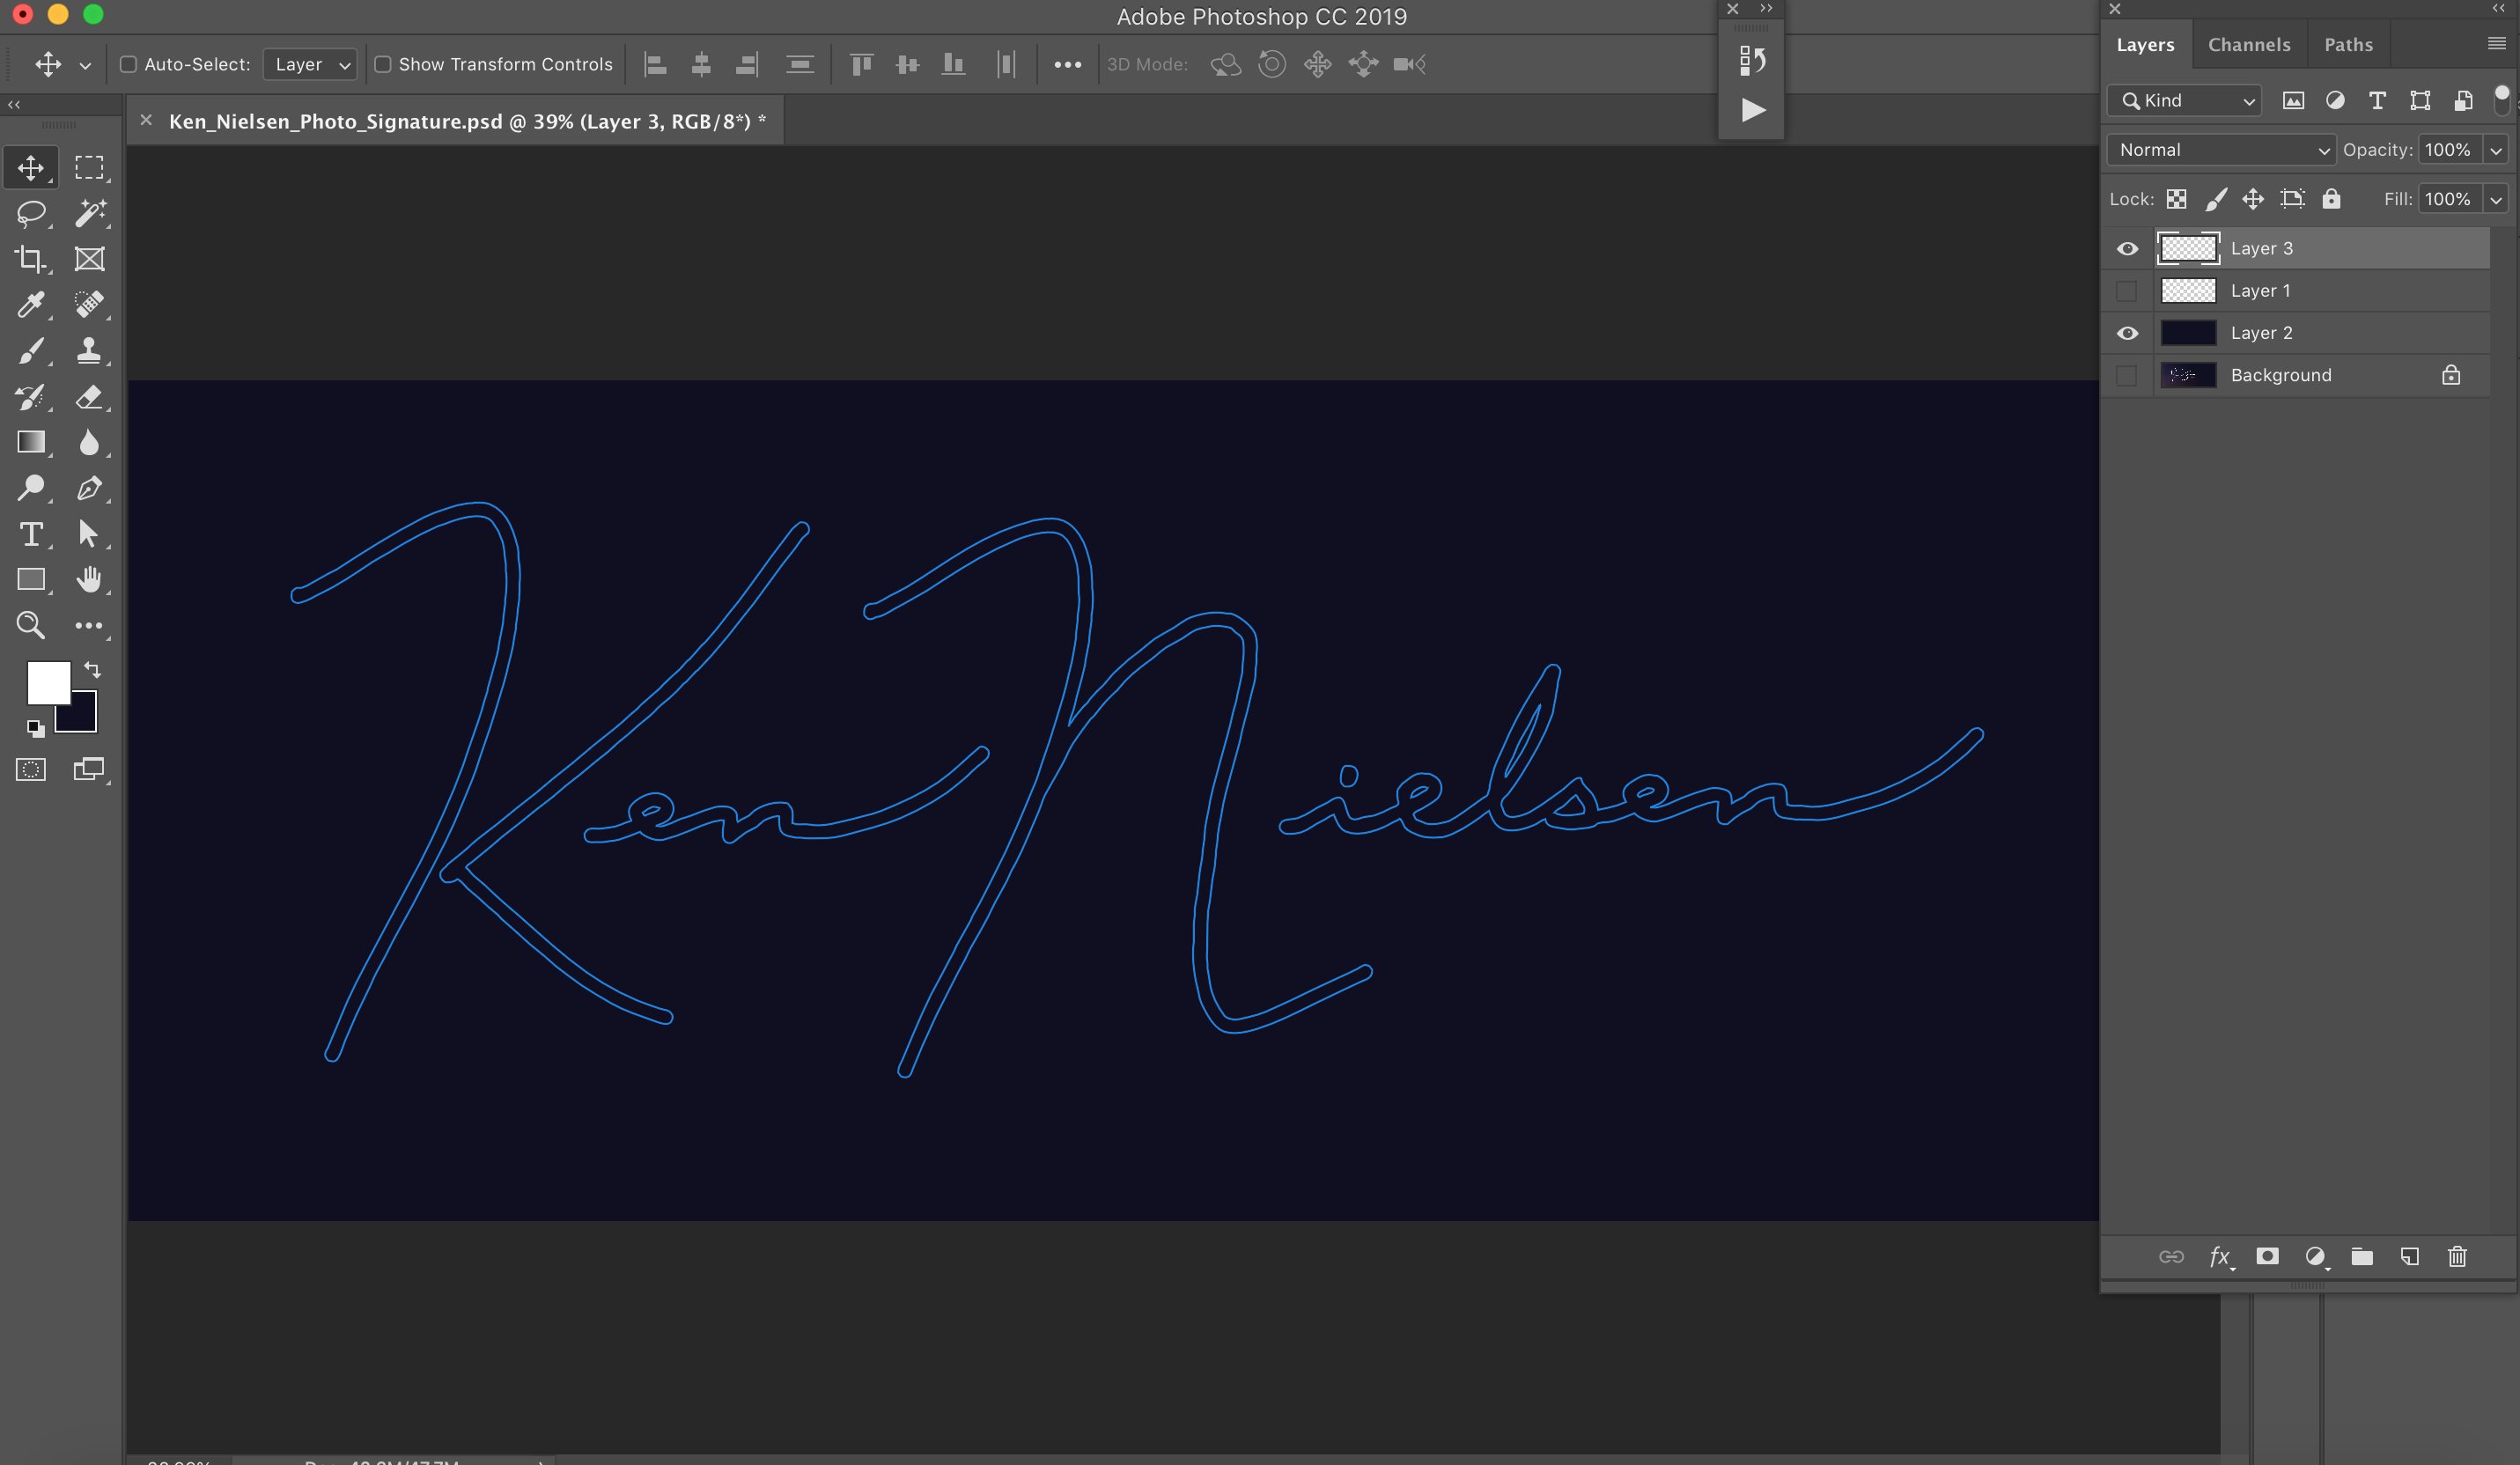
Thanks for your help with this...


 1 Correct answer

I’d go with a solid fill layer with the path as a vector mask. You can than drag and drop this layer to another file and resize/recolour or save it as a PSD and place it as a smart object and then edit the smart object.
You can also save the shape as a custom shape tool preset:
Explore related tutorials & articles
 17
Replies
17
17
Replies
17

Copy link to clipboard
Copied
I remember a video that used Place Linked to make a watermark like your signature so you could change it anytime to any photo or photos you want. I don't know if this will help with the kind of signature you created, but I hope it will steer you to what you want to achieve
Copy link to clipboard
Copied
That's interesting gener7, shows linking and embedding, but would like to drag a 'layer' with the art as a vector, like 'type.' Is a shape layer like type? can the shape be sized and filled with a different color? This is what I am looking to do. I suppose I could just drag the path over to a new document, make a selection and fill, but having a vector or 'shape' on a layer is more direct. This is new territory for me so not quite sure how shapes work but I do think they are resolution independent like vector art... is that true?

Copy link to clipboard
Copied
Do you mean you've been doing "fill path" to change the color? Anyway, you can choose the pen tool, then right-click and choose "Define Custom Shape." Then you will have a custom shape that you can make any size.
You can:
1. Fill Path with black, then Pen tool/right-click on path/Define Custom Shape. With this way, you can change the color each time, but it will be solid without the outlines
and
2. Take the path outline you show here and: Select the pen tool/right-click on the path/choose Define Custom Shape. Now the outline will be the custom shape.
The custom shape is vectorized and can be made any size you want.
Is this what you mean?
Copy link to clipboard
Copied
Wait the outline will not be the custom shape! I can do some screen shots of making the shape into an outline, but I don't think that's what you want, right? I think you need it to be filled in.
Copy link to clipboard
Copied
Yes, no outline, just fill.
Copy link to clipboard
Copied
For my signature, I write it in different sizes and at various angles and make them into Photoshop brushes. I do the same for copyright notices.
Copy link to clipboard
Copied
Dear ponytail1414, I'm not very well acquainted with shapes yet but so far you can see I now have a shape layer with my name vector shape on it but it is filled with black in the lower right corner of the pic... I would like to fill it with a lighter color or white... I need to find out how to do that next and I'm on the right path thanks to help here... Thanks to you also...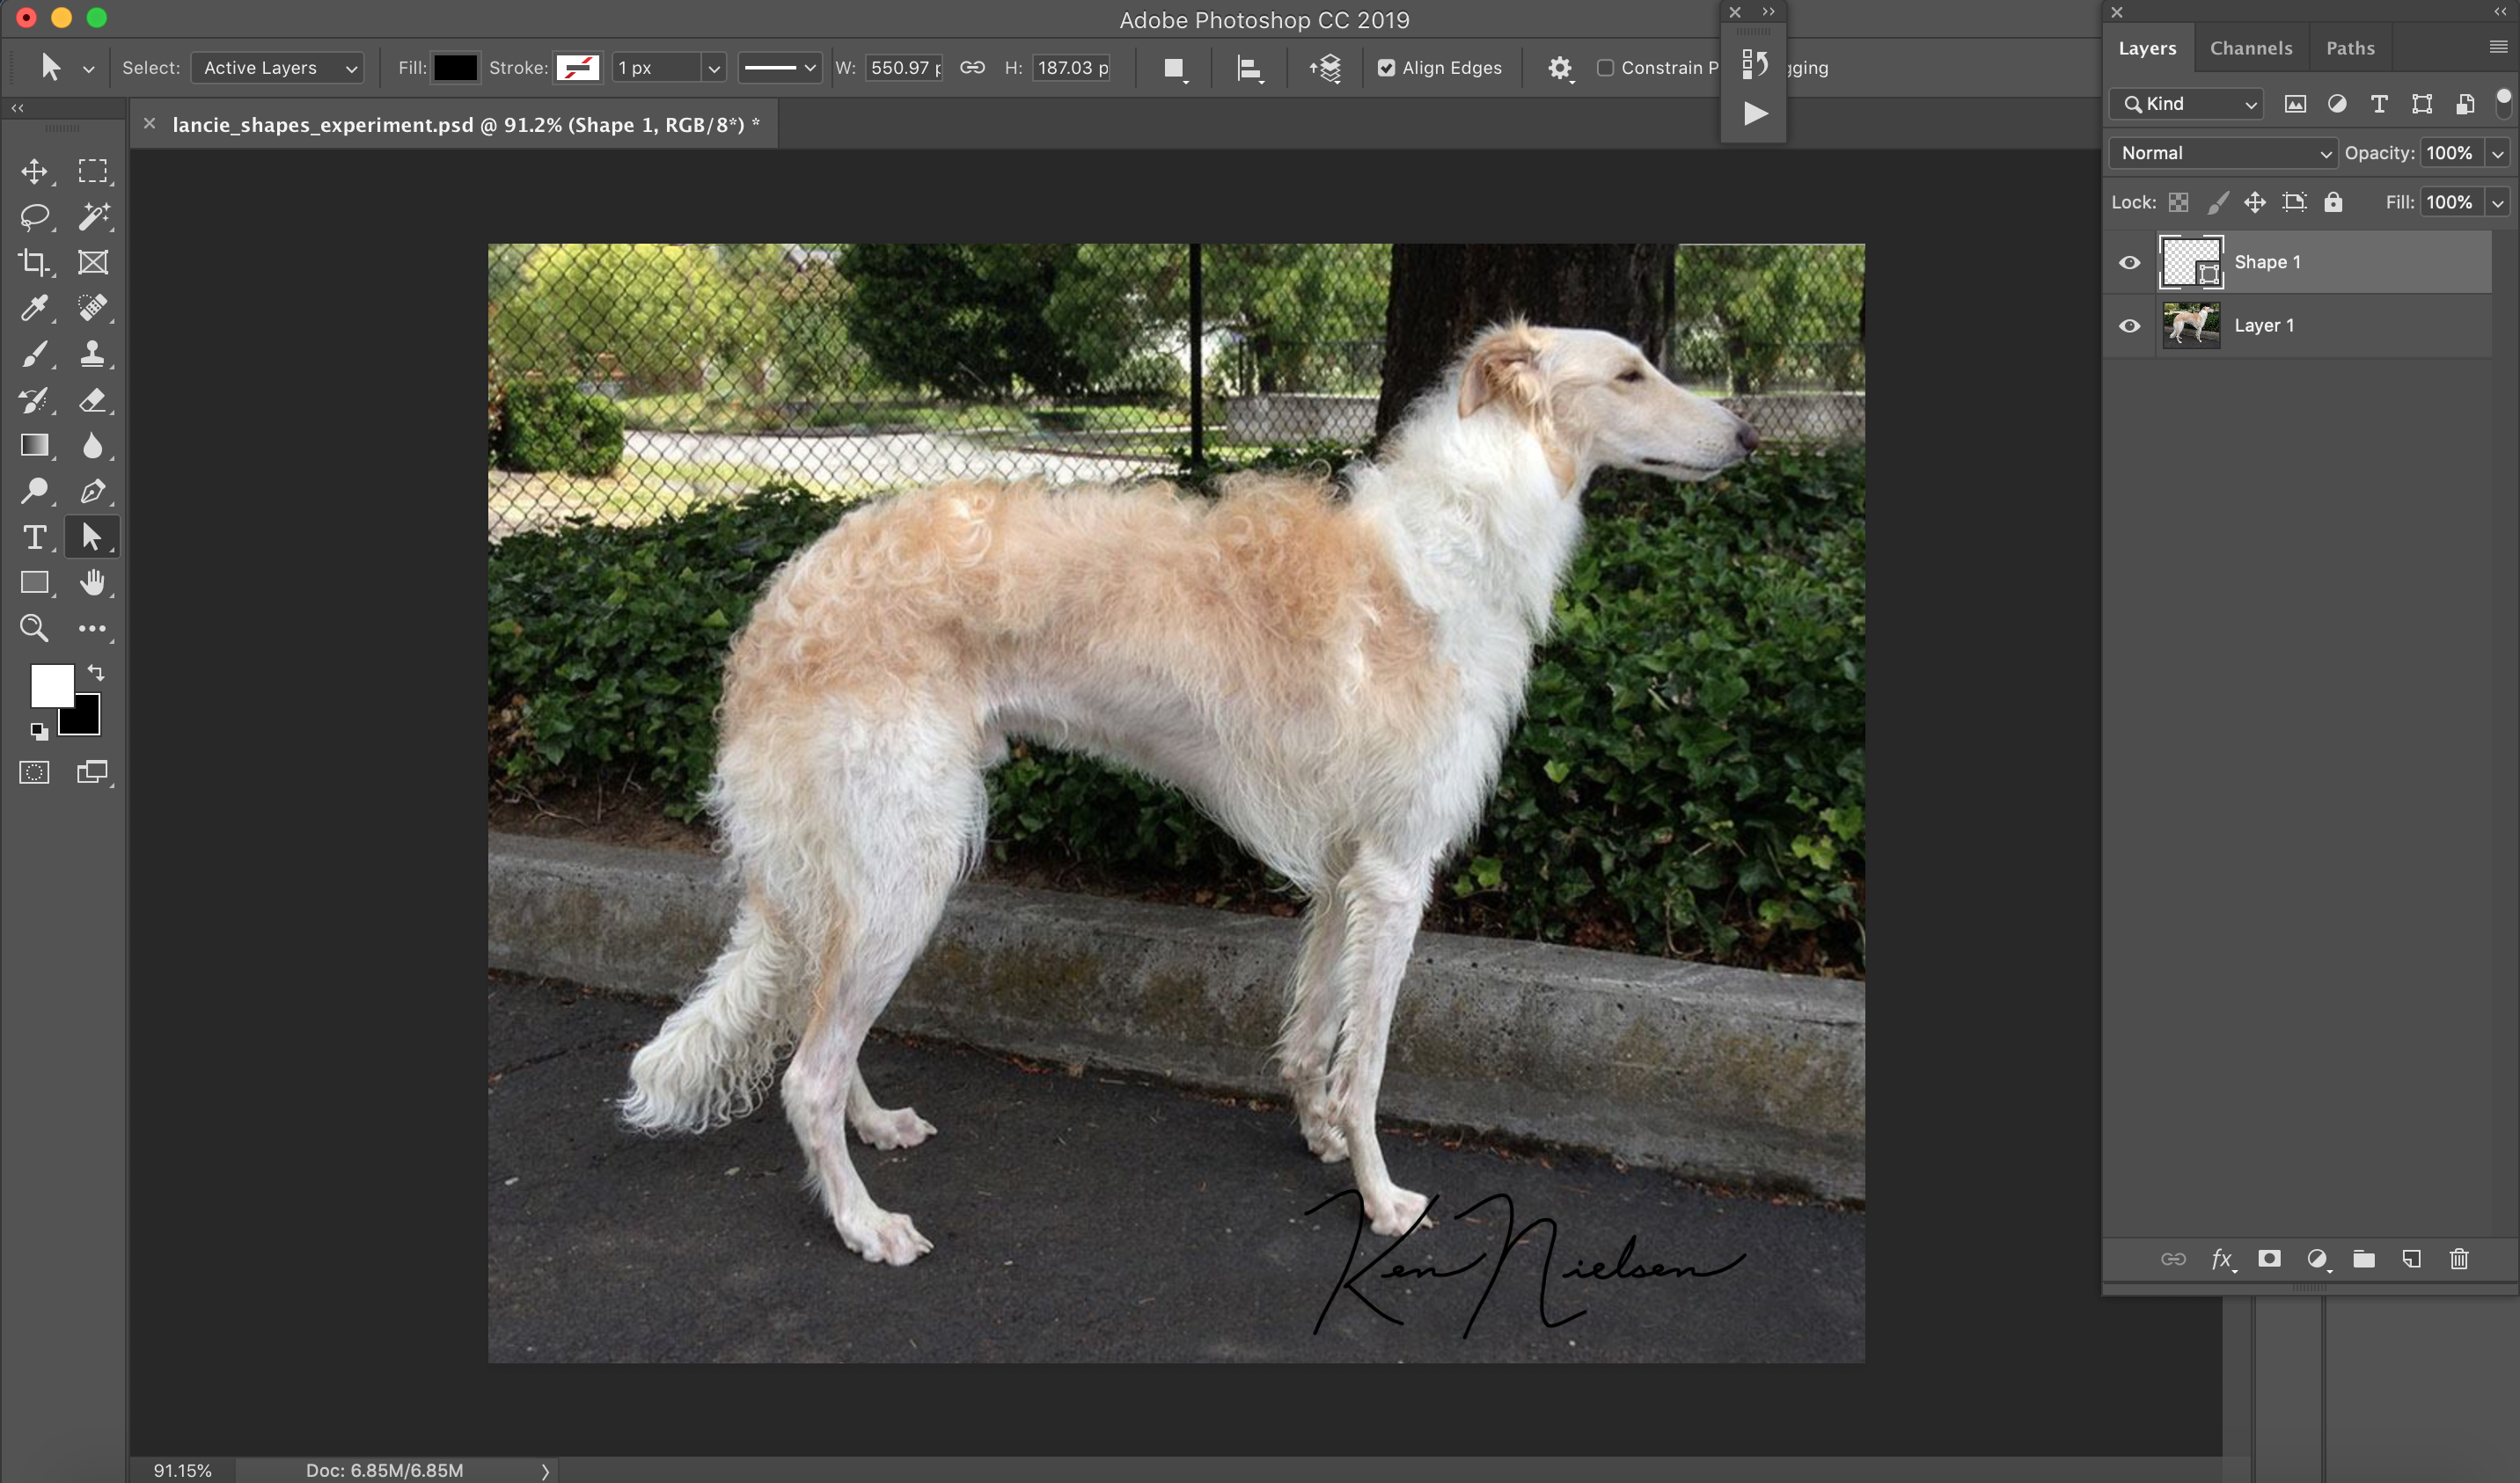
Copy link to clipboard
Copied
Yes! You are on the right path! Haha! "Path"!
Copy link to clipboard
Copied
Well, I don't get to play with shapes, and especially as signatures for my photos. It seems a few of those who do have shown up and can give better advice.
Gene
Copy link to clipboard
Copied
gener7, we are a community and rely on each other through the years... Your help is no less valuable than someone who 'hits the nail on the head' because each of us has invaluable help for the other and that's what we're here for. Thank You and I appreciate your help.
Copy link to clipboard
Copied
Thanks Ken and glad to see you were able to get it sorted out.
Gene
Copy link to clipboard
Copied
I’d go with a solid fill layer with the path as a vector mask. You can than drag and drop this layer to another file and resize/recolour or save it as a PSD and place it as a smart object and then edit the smart object.
You can also save the shape as a custom shape tool preset:
Copy link to clipboard
Copied
Much Thanks Stephen_A_Marsh
I was able to 'paste' the vector path onto a shapes layer I had created by simply drawing on it with the pen tool.. then deleted what I had drawn and had the shape left which is sharp at any size... that is what I wanted... I have reading and learning to do now but could you tell me how I can change the color of the shape. when I select the shape layer and change the foreground or 'fill' color while the shape is selected... nothing happens. Like I said, it's time for me to study and learn about this. Very Nice and thank you for steering me into learning about shapes.
Copy link to clipboard
Copied
Make your shape, If it doesn't automatically fill with the foreground color, go to the panel above it as shown and choose the color from the dropdown menu, or you can right-click on the shape and choose the color from there.
Copy link to clipboard
Copied
ps/ When you right-click on the shape, have the pen tool selected.
Copy link to clipboard
Copied
Hmm... I had the pen tool selected an then right-clicked on the shape layer which was selected in the layers palette and the resulting menu had nothing about fill color in it... maybe I was supposed to cluck on the path in the paths palette or on the actual artwork on the screen...
Copy link to clipboard
Copied
HI Ken, If using a solid fill layer, then just double click the layer and the colour picker will then allow you to change the colour of the solid fill layer. The vector mask just limits what is visible.
If you placed as a smart object, then double click the smart object layer and do the same as above, saving the changes to the PSB file and the main file will update with the new colour.

 AdChoices