- Home
- Photoshop ecosystem
- Discussions
- Re: How do I remove white background for an image ...
- Re: How do I remove white background for an image ...
How do I remove white background for an image when the object also has white?
Copy link to clipboard
Copied
Hi,
I am a new user of Photoshop and need help with removing a background and making the object transparent. I am trying to remove the white background for the image below but her dress is very close to white so when I use the selection tool, it selects her whole body. I am also having difficulty creating the background layer. Could someone please tell me how I can do this? Thank you!

Explore related tutorials & articles
Copy link to clipboard
Copied
For a nice clean edge on that image, use the pen tool to create a path then use that path to make a selection.
Draw with Pen tools in Photoshop
Dave
Copy link to clipboard
Copied
davescm is right. Here we need to make the paths with our own eyes. So manual action is perfect on such image. Or you could try to apply the channel masking formula on that image that you have already been shown. 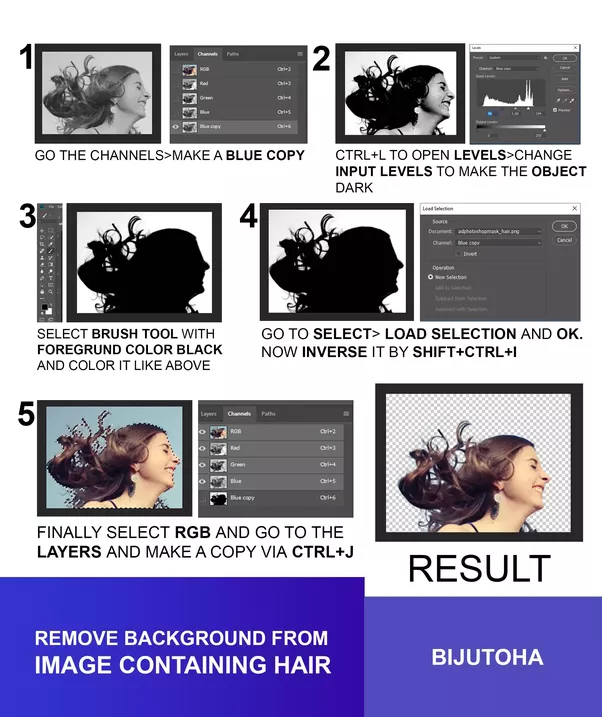
Source: Quora
Copy link to clipboard
Copied
Hi!
So, what I would do is go to Select < color range. A dialogue box should pop up and you can click on the background color of the image (white) and then adjust the fuzziness bar to exclude the dress and only select the white (eveything but the background should show up as solid black ideally)
You may have some issues around the eyes, which may be closer to a pure white than the dress, so you may want to go in after the background is selected and remove selection around the eyes or any other area by using the lasso tool (and holding down option as you trace around it) to subtractive select.
Once just the background is selected, make sure the layer is unlocked and delete!
Copy link to clipboard
Copied
If you are not happy using the pen tool to cut out. Copy the layer with the figure on it and change the levels so the colours become mor exagerated. You can then use the magic wand tool to select the white areas on the exagerated layer and delete the white. CTRL click on the thumb nail of the exagerated levels layer and click on your original colour layer. Go to select - inverse and press delete. Now drag your exagerated layer into the garbage.
Copy link to clipboard
Copied
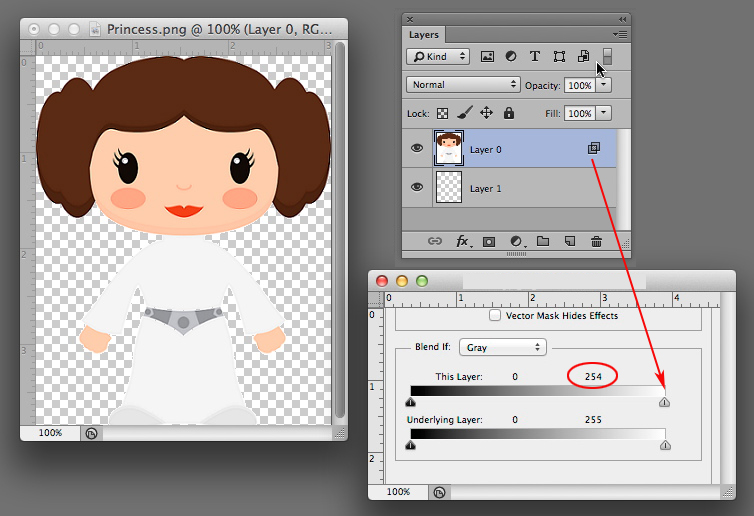
Add a blank layer below the illustration. (Hold down Cmd key (Ctrl key on PC) and click on the Create New Layer symbol)
Double click on the image layer to bring up Layer Styles
In the Blend If section move the top right triangle to the left so that it registers 254 rather than 255
Choose Layer > Flatten Image
Copy link to clipboard
Copied
Good grief! Where have you been all my life Norman? Great tip!
Copy link to clipboard
Copied
Norman, can you explain a little bit further how you then get to delete the background layer after you flatten them? It may be obvious, but I am stomped. thank you, Katharina
Copy link to clipboard
Copied
Hi Katharina. There is no flattening involved. When you perform Steps 4 & 5 you will see the result that looks like the one in the picture but with a white surround. Do Step 6: Use the pen tool to outline the image. Then go to Paths and click on the third symbol at the bottom of the Paths panel to convert your path into a Selection. Then choose Select > Inverse so that now you have selected the white surrounding area. Then do Step 7 and with the bottom layer chosen, tap the delete key. I hope this helps. Good luck.
Copy link to clipboard
Copied
I didn't know that Norman. Great.
Copy link to clipboard
Copied
Another technique would be to use the Magic Wand. If the image is a Background layer, first click the padlock icon to the right of the layer to unlock it.
Select the Magic Wand.

Set the tolerance to zero.

Click in the white background area. Hold down Shift to click and add the other white areas.

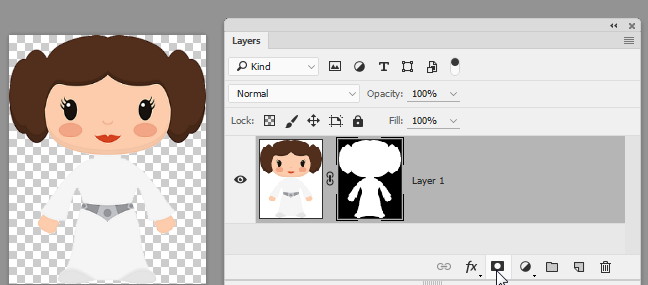
You could then either hit the Delete key to delete the white background, or you could Select> Inverse and create a layer mask to hide the background. Layer mask icon is on the bottom of the Layers panel.
Copy link to clipboard
Copied
What if I'm trying to do the same thing to a logo but some of the logo is the exact same white color. Anyone have an easy fix to keep the white that's in the "G" but make all the background transparent? Thanks
Copy link to clipboard
Copied
For the G logo, use the pen tool to draw a path. Then either set it to a clipping path or make a selection to delete the background.
Copy link to clipboard
Copied
Was the "G" a letter on a text layer? Then this text layer can help you to create the selection.
If the original text layer has been deleted it's not so hard to create a new one - provided you remember the font name.
Fenja
Copy link to clipboard
Copied
You may find that, even with guides, it would not be easy to pen an accurate diagonal, especially in the lower left corner.
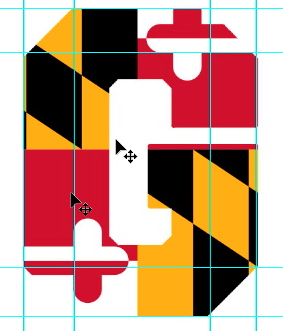
You may consider this before using the pen tool or the Polygonal Lasso tool to make your selection:
1.Make a duplicate layer
2, Magic Wand to select and delete the white on the dupe layer, Then Cmd+D to deselect the marching ants.
3 Edit > Transform > Flip Vertical
4, Set the Blending Mode to Multiply
5, Use the North Keyboard Arrow key to align the two layers
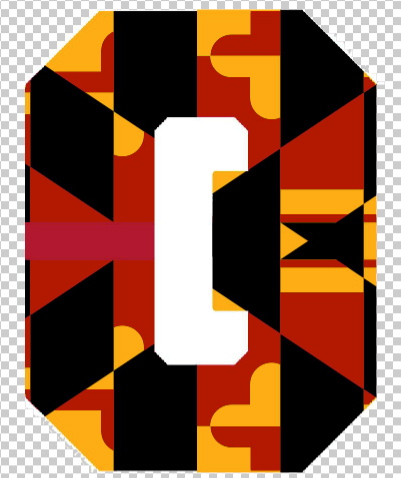
Then, because the design is not perfectly symmetrical*:
6 Use the pen tool to outline, then convert to selection
7,Turn off the eye on the top layer and trash the lock on the bottom layer
8. With the Background layer chosen, tap the delete key
--
If is was symmetrical, you could use a composite of the layers as the basis for a Magic Wand selection.
The illustration above shows both layers after deletion of the white, for clarity.
Copy link to clipboard
Copied
I AM MAD AT ADOBE!!! If you right-click on a layer, you can bring up blending modes and bring down a drop-down menu. There are many choices, BUT CLICKING THE "SCREEN" OPTION, THE WHITE BACKGROUND WOULD GO AWAY!!!!!!!!!! NOW IN PHOTOSHOP 2018 THE SCREEN OPTION DOES PRETTY MUCH >NOTHING< TO THE WHITE!!!
ADOBE, I am mad. Please change this feature back to what it was before, as what used to just be one step, is now many!!!
Copy link to clipboard
Copied
Screen blending mode has not changed. Screen with black leaves the underlying image unchanged , with white it turns the underlying image white. Colours between lighten the image. It has always worked that way and has never removed white.
Dave
Copy link to clipboard
Copied
Here's an idea that would only work in this particular situation, but it never hurts to have too many tools in your Photoshop toolbox.
Use the Rounded Rectangle tool with is set to Path in the options bar.
It would be best to set up Guides as Norman suggested.
Increase the radius until it exactly matches the chamfer ends. They will default to being the same on each corner, so no problem with the top right that has a chamfer end on white.
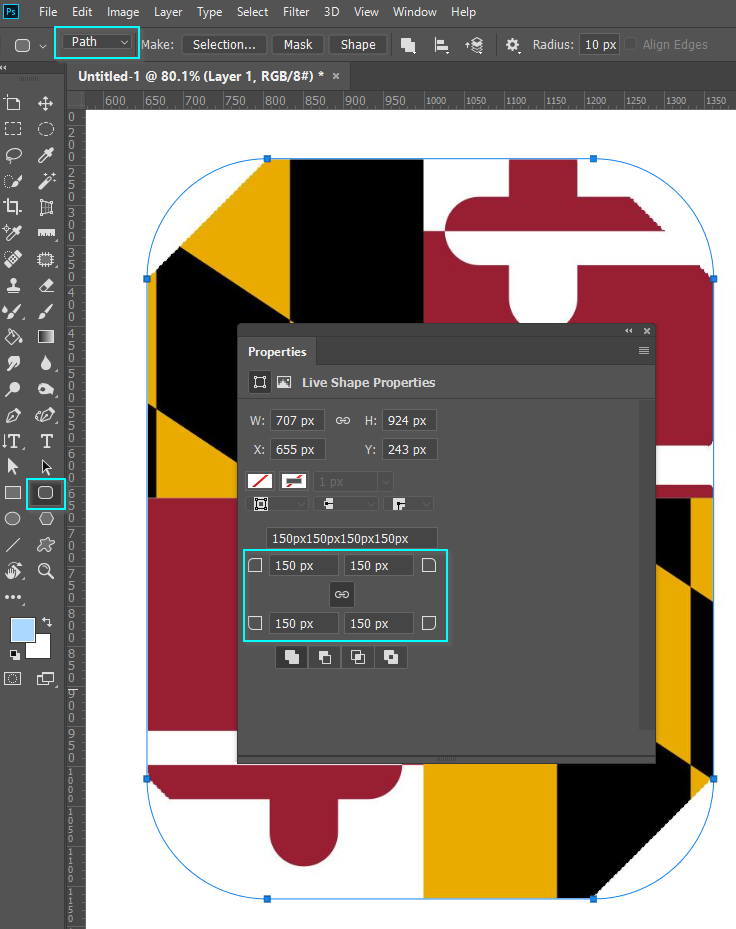
Now for the clever bit ![]()
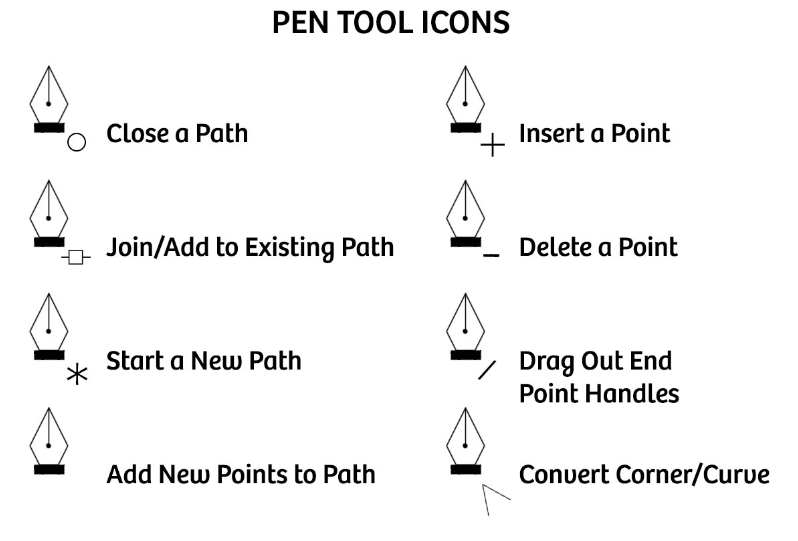
Select the Pen tool and Alt click on all of the points which change them from curve points to corner points.
Can you see that the cursor has changed to the little pointer? That means it will change the point to a corner point.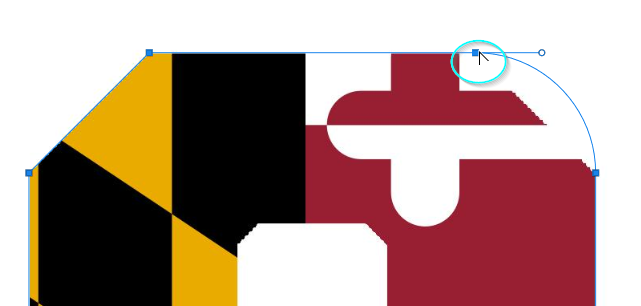
This might be useful going forward. (I hate that phrase, but it is too darn useful to ignore! ![]() )
)
Copy link to clipboard
Copied
I prefer using pen tool to make a clipping path on that dress, it will help you to cut out that area properly. Then select the area and soften its edge using refine edge technique. This will help you remove the white background easily and perfectly. You can see this tutorial to know how to use clipping path to remove white background -
https://www.youtube.com/watch?v=GtX5nlGklv0
You can also see this one to know how to edit clothing photos in Photoshop -
https://www.youtube.com/watch?v=vNqwzT2rLSs&t=6s
Or you can see this article -
Hope that you will get all your answers from here
Find more inspiration, events, and resources on the new Adobe Community
Explore Now


