- Home
- Photoshop ecosystem
- Discussions
- Re: How do you remove a part of a photo and replac...
- Re: How do you remove a part of a photo and replac...
Copy link to clipboard
Copied
I am trying to remove a pole with a road sign that is in the middle of my photo. I'd like to remove it and replace it with another part of the photo.
Is that possible and how is it done?
 1 Correct answer
This can be either very easy or very hard to do depending on your image. If the image is fairly straight forward you can do it this way
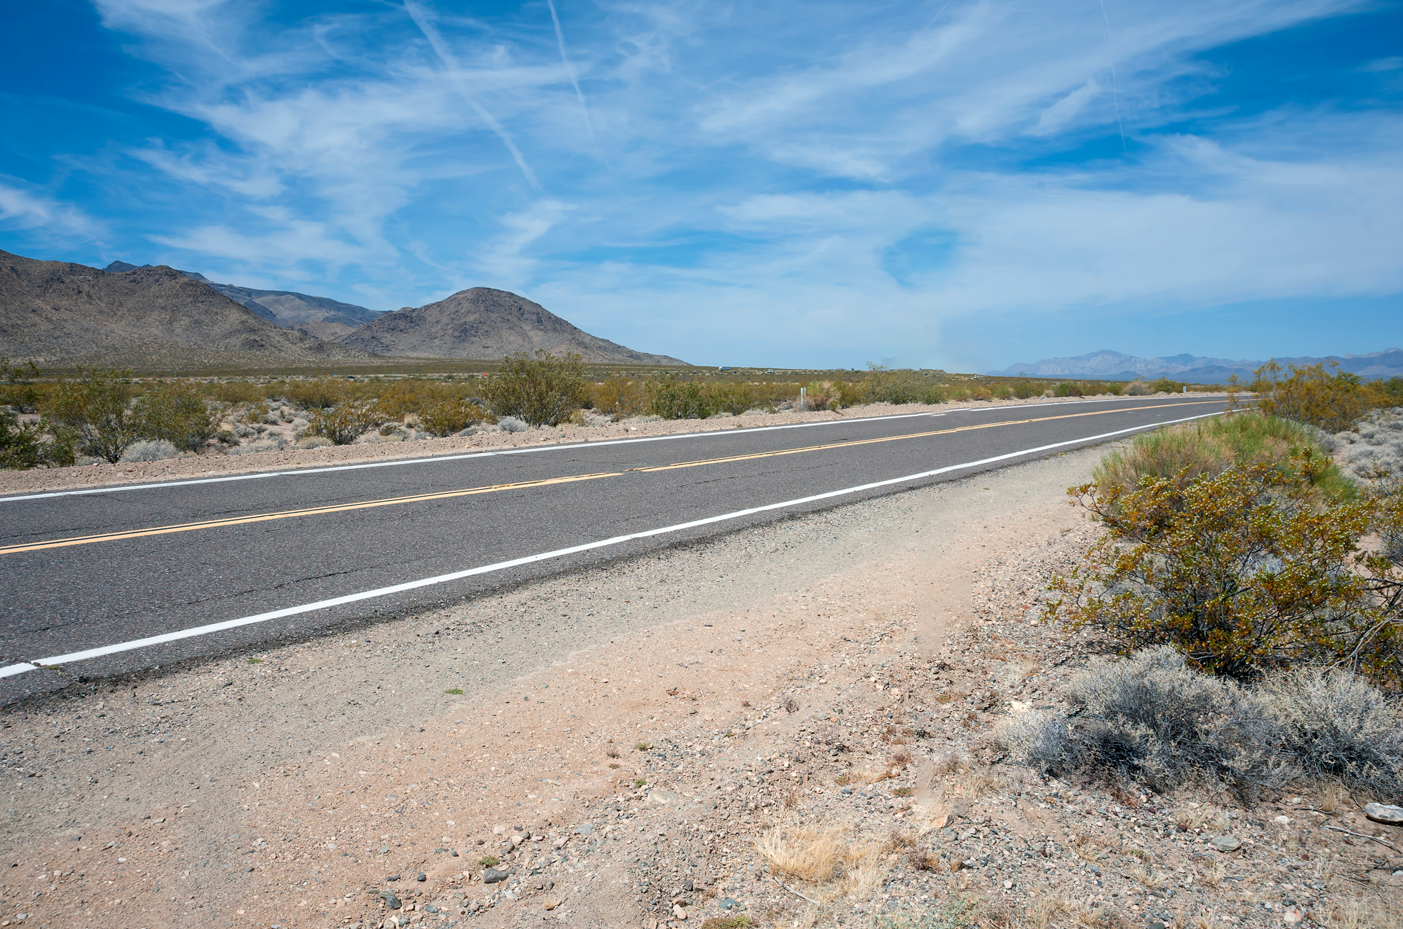
1) Below is an Adobe Stock image with a nicely isolated sign
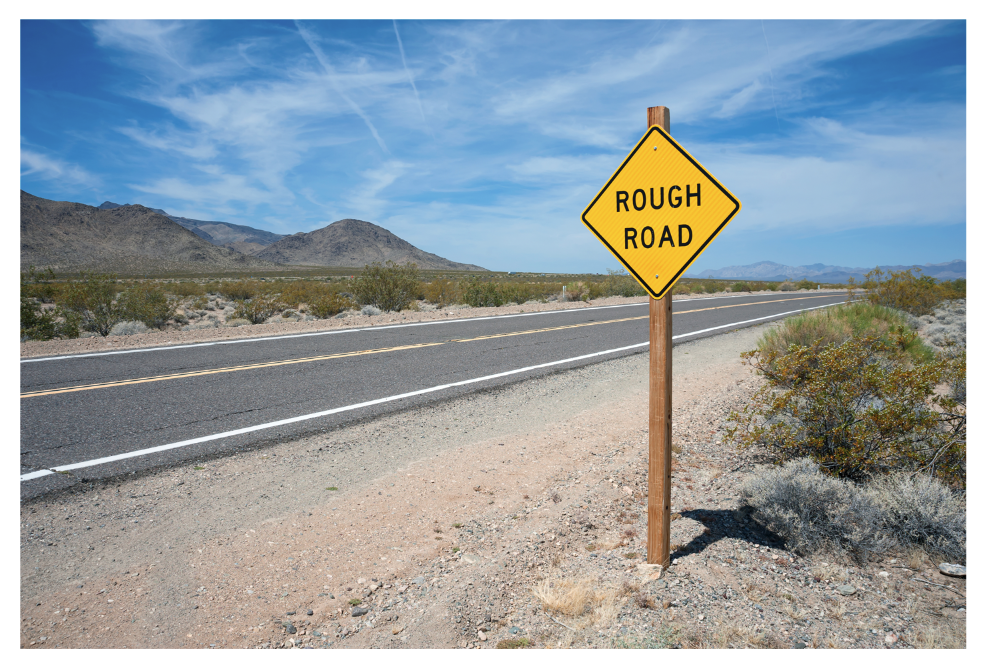
2) Create a selection around the sign. I used the polygonal selection tool. It must me fairly loose not a tight fit.

3) Select 'Fill' from the 'Edit' menu
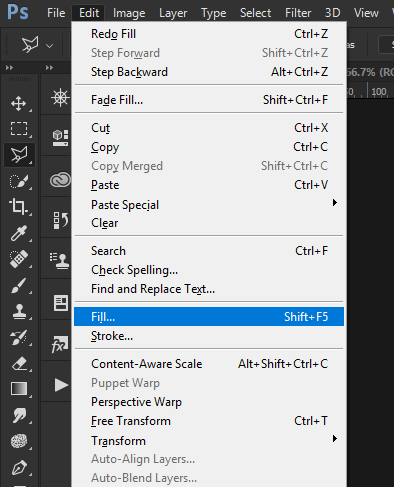
4) Choose 'Content Aware' and check the 'color adaptation ' box and press OK
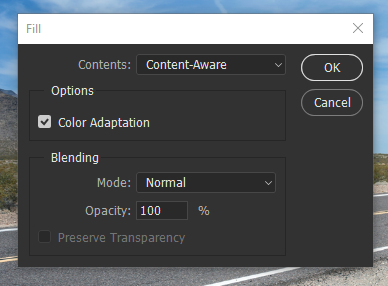
5) Photoshop will assess the selection and attempt to remove the sign using
...Explore related tutorials & articles
Copy link to clipboard
Copied
Would you be willing to post the image?
There are several ways to do this (clone stamp, content aware, healing brush, etc..)
Maybe check out Retouch and repair photos
Copy link to clipboard
Copied
This can be either very easy or very hard to do depending on your image. If the image is fairly straight forward you can do it this way
1) Below is an Adobe Stock image with a nicely isolated sign

2) Create a selection around the sign. I used the polygonal selection tool. It must me fairly loose not a tight fit.

3) Select 'Fill' from the 'Edit' menu

4) Choose 'Content Aware' and check the 'color adaptation ' box and press OK

5) Photoshop will assess the selection and attempt to remove the sign using information from outside the selection. It usually will not be perfect. I've marked the problem areas
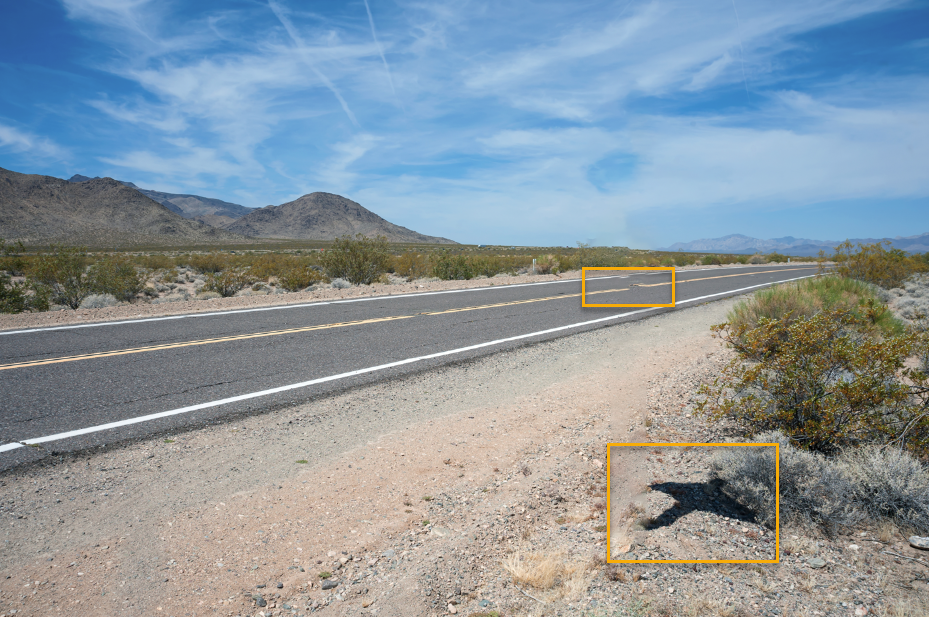
6) You then clean up the problem areas. I just used the 'patch' tool but the healing brush tools or the clone tool could be used just as easily. To be honest I only spent 5 minutes here and if you want a seamless result it takes longer, but maybe this gives some idea of what can be done.
Copy link to clipboard
Copied
I recommend Teri's excellent advice.
I thought you would also be helped by the following. It is based on shifting vantage points.
If, at the time you take the photograph, you know that there is an obstruction you plan to remove from the final image, you may consider the following technique, pictured in a book by Martin Evening, a noted photographer and author.
Take the first off two photographs. Move sideways so that the obscured area in the image (hidden by the bus stop) now appears in the viewfinder and a neighboring area is obscured. Take the second photograph, as shown in the images below:

(Edit: A longer than normal focal length lens seems to work best.)
Then, in Photoshop:
1. Open both picture files. Put one image over the other by clicking on one image in the Layers panel and dragging the layer over the other image.
2. You will notice that the top layer is highlighted in the Layers panel. Highlight both by holding down the Shift key and clicking on the layer below.
3. Choose Edit > Auto-Align Layers > Auto and click OK. (Extra goodie: If, in making the two exposures, the zoom lens on the camera moved, Photoshop will recognize the difference in object sizes and automatically adjust them to coincide.)
4. Click on a clear area in the Layers panel and then click on Layer 1 to highlight only Layer 1. Then add a layer mask to Layer 1 by clicking on the symbol to the right of the fx at the bottom of the Layers panel.
5. With a hard edged brush, paint in black on the obstruction in the image in this case, the bus sign and pole. (You are actually painting on the mask.)
6. Choose Layer > Flatten Image. The end result is shown below.
Copy link to clipboard
Copied
That method works beautifully, Professor. Hope you and Jo are well-will write you soon.
Terri
Find more inspiration, events, and resources on the new Adobe Community
Explore Now