- Home
- Photoshop ecosystem
- Discussions
- Re: How to change the color of a house paint?
- Re: How to change the color of a house paint?
How to change the color of a house paint?
Copy link to clipboard
Copied
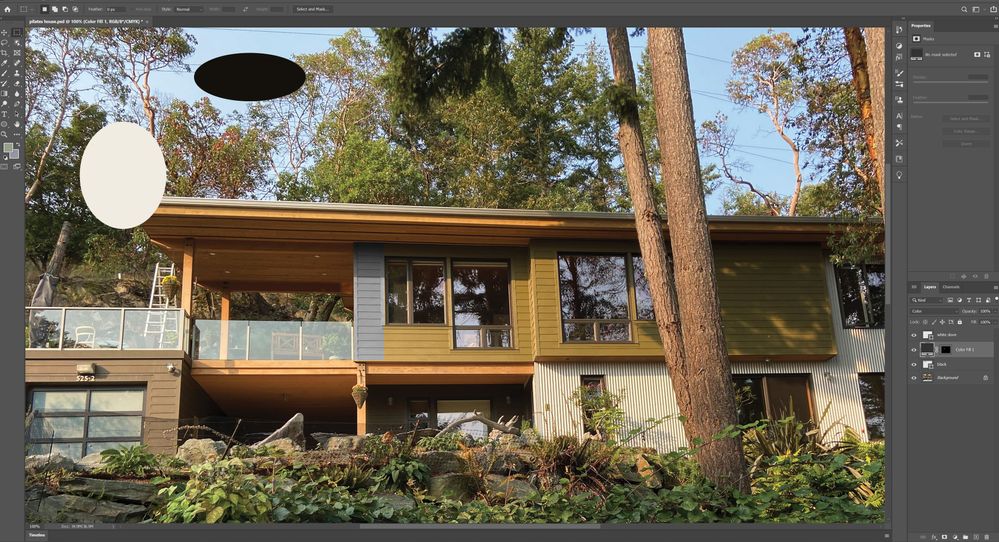
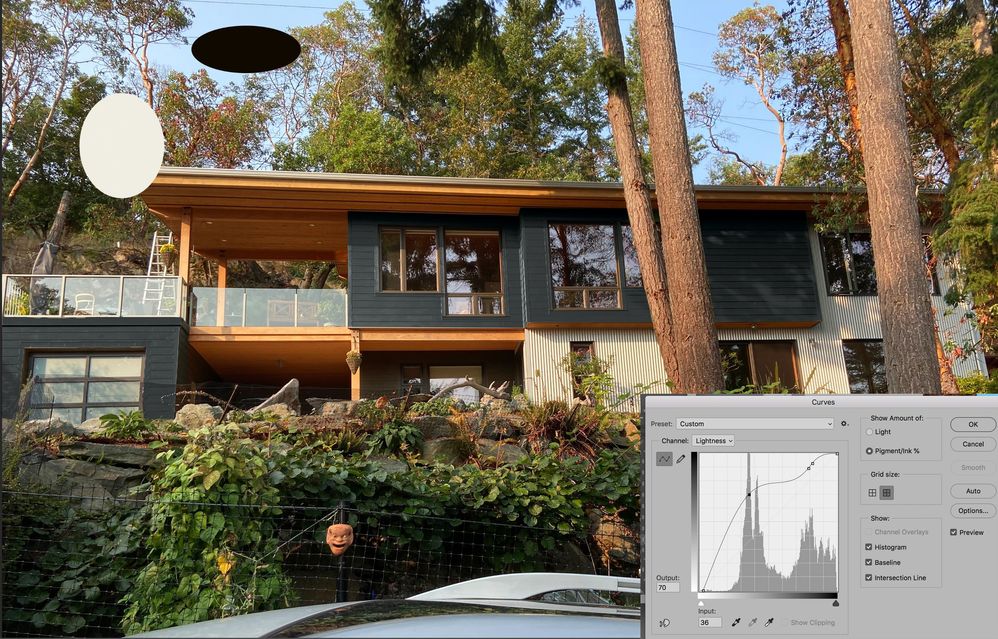
Hi gang, new to photoshop and was wondering how to change the colr of a house paint? I have been watching the tutorials on how to use certain select tools, but its not working to well ARGH!! What would be the best way to change the color of this house? I am trying to make the colors black and white similar to the color swatches I created. The black does not look black? Like the one I created in an elipse shape.
Also, what would be the best tool to select the areas I want? Since the original phot is at an angle its hard to make the selction tools work properly?
Any and all help would be greatly apreciated!! Thank you so much!!
Jay
Explore related tutorials & articles
Copy link to clipboard
Copied
Most likely you must use some of the selection techniques with manual work included. I think that automated options can not make perfect selection in your case.
After isolating area you can use Hue/Saturation adjustment for your task: remove Saturation entirely, drag slider to the far left then drag Lightness slider to the left to achieve dark look or black color paint.
For white coor paint drag Lightness slider to the right.
Copy link to clipboard
Copied
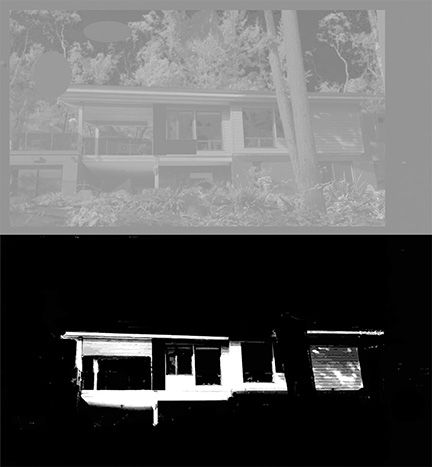
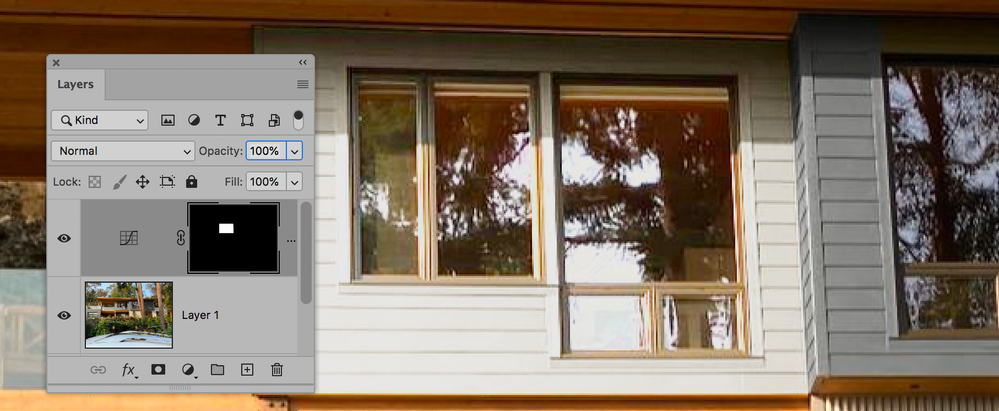
Your first job would be to create an accurate mask. That might involve the Polygonal Lasso Tool or a Curves modification of a copy of the * b * channel of Lab Color as seen in the very rough sample above. Both require additional patient brushwork.
I see that you marked off an area and Filled with Black with the Blending Mode set to Color, and it produced a gray rather than the Black you expected. The reason is that when the Blending Mode is set to Color, the tone level of the existing color is unchanged -- a lighter value, lighter than maximum black. To change both color and tone while maintaining modeling requires another approach. I find it convenient to make that adjustment in Lab Color mode where color and tone level reside in different channels. There are other ways to achieve the same result.
Copy link to clipboard
Copied
Oldcyclingguy wrote:
I am trying to make the colors black and white similar to the color swatches I created. The black does not look black?
Getting colors like black and white to look right in a photo often goes beyond just knowing Photoshop. You have to apply a knowledge of how light interacts with it, like how a fine art painter would be trained to. For example, black paint is not absolute solid black. In reality it’s going to be slightly color-tinted shades of very dark gray, depending on the reflectivity of the paint.
In the original photo, look at the black part of the first floor and the black framing on the garage doors. Measure the color values there in Photoshop with the Info panel. You will notice that what looks “black” actually varies quite a lot and is often not even neutral, depending on what the reflective elements in the black paint are reflecting from the ambient light and the color of surrounding surfaces.
White is the same way. Even though very light area of the building on the first floor was painted with a single color, you will find that the color values on various parts of it vary greatly depending on whether it’s in light of shadow, and what colors in surrounding areas are being reflected by the paint.
To “apply” simulated paint over the house realistically but quickly, you can still add a solid color on another layer, but you will probably want to apply a layer blending mode such as Color, Darken/Multiply (for white), or Lighten/Screen (for black), so that the color you apply can look more convincing by blending in with how the light in the scene interacts with the surfaces of the real building.
As for masking it, that will probably require a mix of manual and semi-automatic methods that are combined. It looks it could be done with some passes with the Quick Selection tool combined with some fast straight lines drawn with the Pen tool that are converted to selections.
Copy link to clipboard
Copied
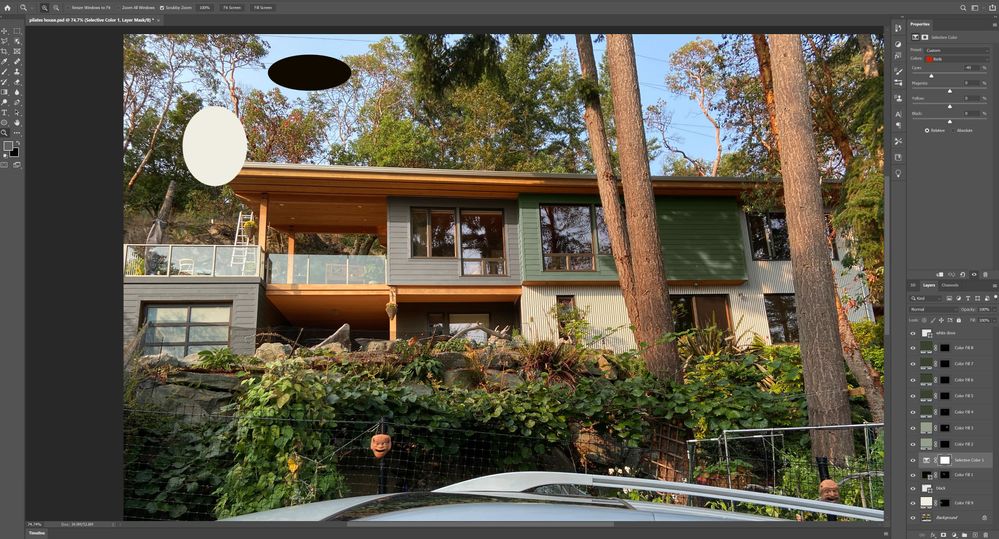
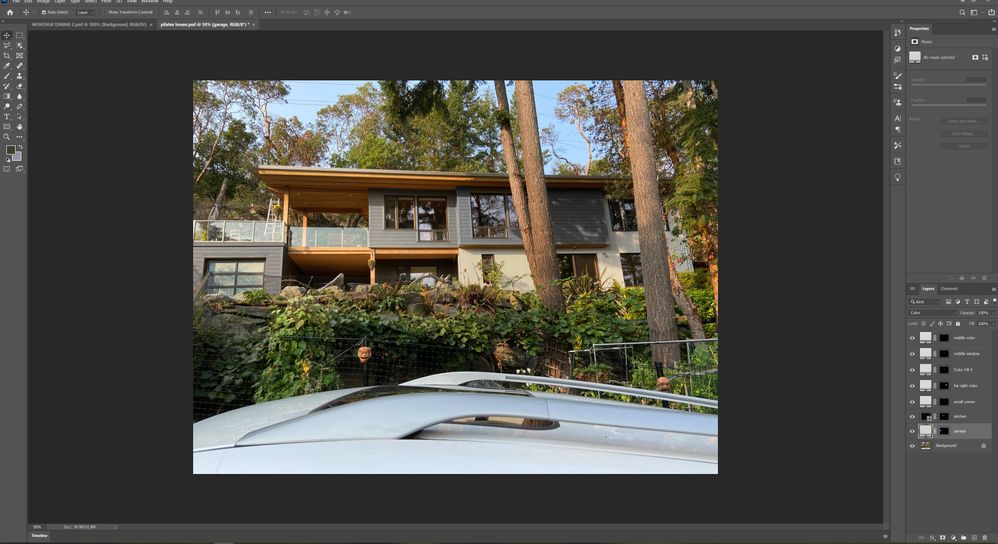
Thanks for all your help guys! As I am such a newbie I am stiil struggling with understanding how to get the colors or at least close to what I want? I have attached another screen shot of the house. The upper part of the house where the colors look green and grey are suppossed to be a darker black similar to the swatch color. I know they wont be that dark a black due to the light, but can I somehow change that color a little to darker? The area where the garage is, is suppossed to be similar to the white colr in the swatch.
I just dont understand the steps I need to take really? Or, this is just to hard to do for me with my being so new to photoshop. Any help or where I should at least start to learn how to do this would be great! There are so many tutorials its just a little overwhelming!! 🙂
Thank you!
Jay
Copy link to clipboard
Copied
Just put a darker green in that area, or multiply the same green at a lighter percentage to get the look you are trying to achieve.
Copy link to clipboard
Copied
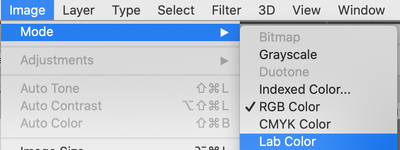
If this is the result you would like to create, then after masking the area and creating a common gray, rather than green and gray, change the Mode to Lab Color.
Choose Curves and change Show Amount of: and Grid Size as indicated.
Choose Channel a and bisect the grid…a horizontal line across the middle. Repeat with Channel b. Now throughout the masked area’s tonal range the area will remain a value of gray.
Choose the L channel and bend the curve as shown. Although you can make the gray value darker than shown it would be at the sacrifice of contrast with the horizontal lines in the masked area of the house. Of the three points added to the grid, the one on the left controls the overall grayness and the two on the right create greater separation in the rightmost masked panel.
To experiment, move any of those points vertically. To do that, tap the + key to move from point to point and then, when the point turns black, use the north or south keyboard arrow key to bend the curve. Then return the Mode to RGB.
Copy link to clipboard
Copied
Thank you sooooo much for the help!!! I think I did what you advised and changed all the colors to a pantone cool grey 1C . I am just not sure how to change the mode to lab color? I am useing windows.
I have attached another screen shot. Again,, thank you! I know I have sooo much to learn and have to start more with the basics of photoshop, but my wife asked if I could do this to this house :):)
Jay
Copy link to clipboard
Copied
Hi Jay,
Image > Mode > Lab Color
~ Jane
Copy link to clipboard
Copied
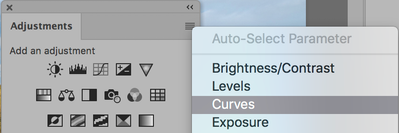
Thanks jane-e! Much appreciated. Iam just not sure now how to change the grey colr I have on the house to just a little darker? Norman, mentioned above to go to "curves" but not sure how to do bring thaat up in my properties window?
Thank you!
Jay
Copy link to clipboard
Copied
Hi Jay,
Adjustments panel > Curves (panel menu or 3rd button in the top row). The Adjustment layer will appear in the Layers panel. Then make the adjustment in the Properties panel.
To make edits, select the Curves adjustment layer in the Layers panel and make the edits in the Properties panel.
https://helpx.adobe.com/photoshop/using/curves-adjustment.html
~ Jane
Copy link to clipboard
Copied
Thanks Jane! Is there a way to select certain parts of the Grey in the house? When I selected certain areas I had to do them in separate areas, if that makes sense? I was able to select curves but then when I went to darken thee grey areas a little it changed the whole photo? I know I am missing a step or something ACK!!
Kind Regards,
Copy link to clipboard
Copied
Hi Jay,
See Norman's first reply, starting with "Your first job would be to create an accurate mask." When you make a selection first, then add the Adjustment layer, the adjustment is limited to what is masked.
https://helpx.adobe.com/photoshop/using/masking-layers.html
~ Jane
Copy link to clipboard
Copied
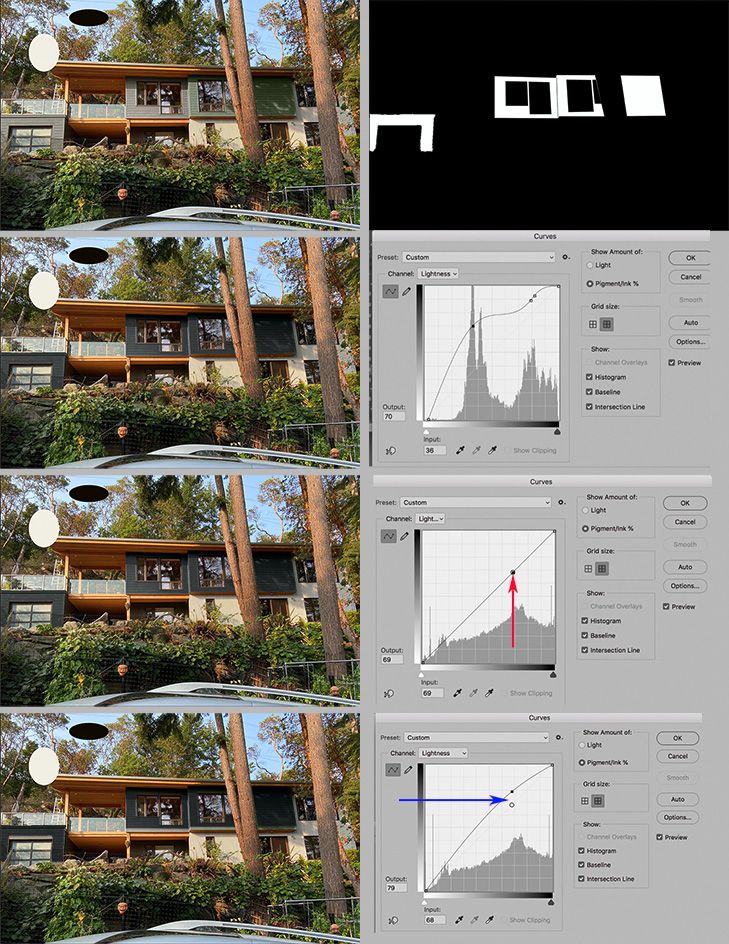
The eight images above should make the Lab sequence of steps a bit easier to understand.
- Your image with gray and green sections
- A mask was created so that only part of the image would be affected, represented by white on the mask.
- The chosen area is changed to a common gray of Image 1 (rather than gray and green and…
- A Curve was applied to the Lab Lightness channel to darken the color and adjust contrast.
Job done.
You asked how to make the affected area a bit darker.
- Opened the file. As a psd file the layers and mask are in place
- Chose Image > Adjustments > Curves, chose the Lightness channel, chose the Eyedropper and Cmd clicked on the existing gray. It put a mark on the Curve (See red arrow)
- Shows the result of using the up keyboard arrow to drag that value to a darker black tone. See blue arrow for before and after position of the tone.
