Answered
How to create this pattern in Photoshop or Illustrator
Hi, does anyone know how to create this pattern in Photoshop or Illustrator? I need to use it to create a bump map in another program. Thanks
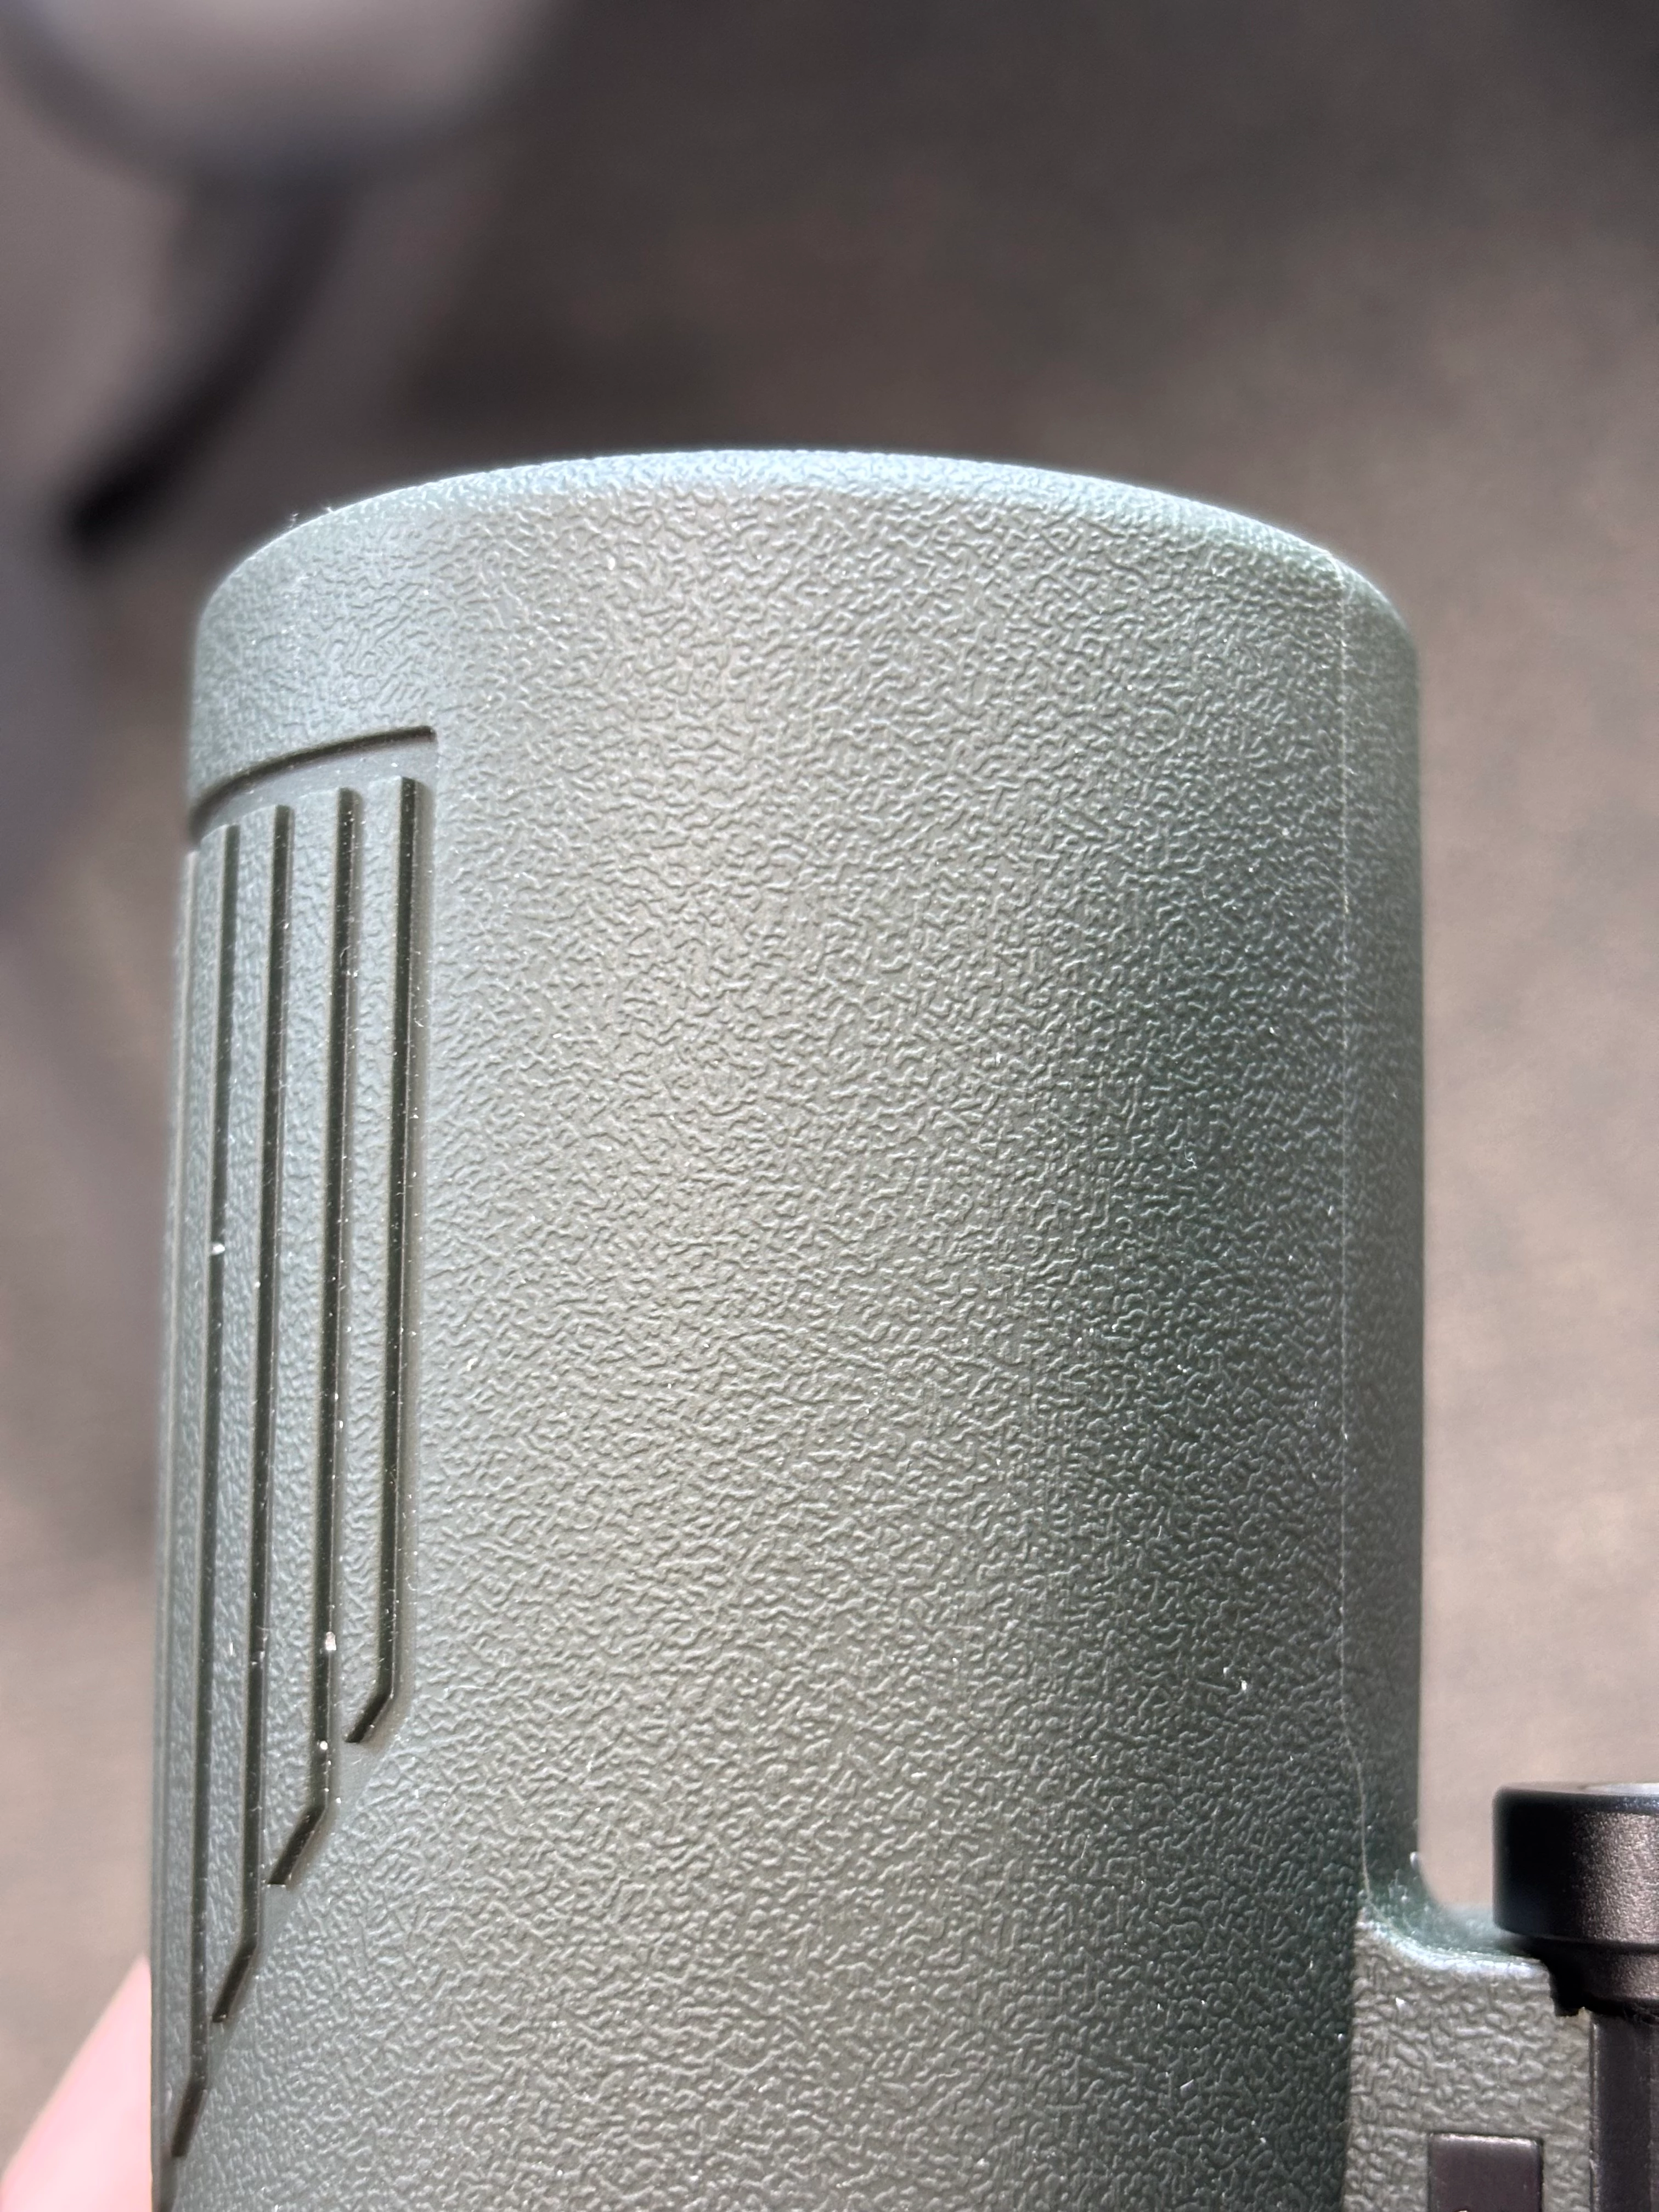
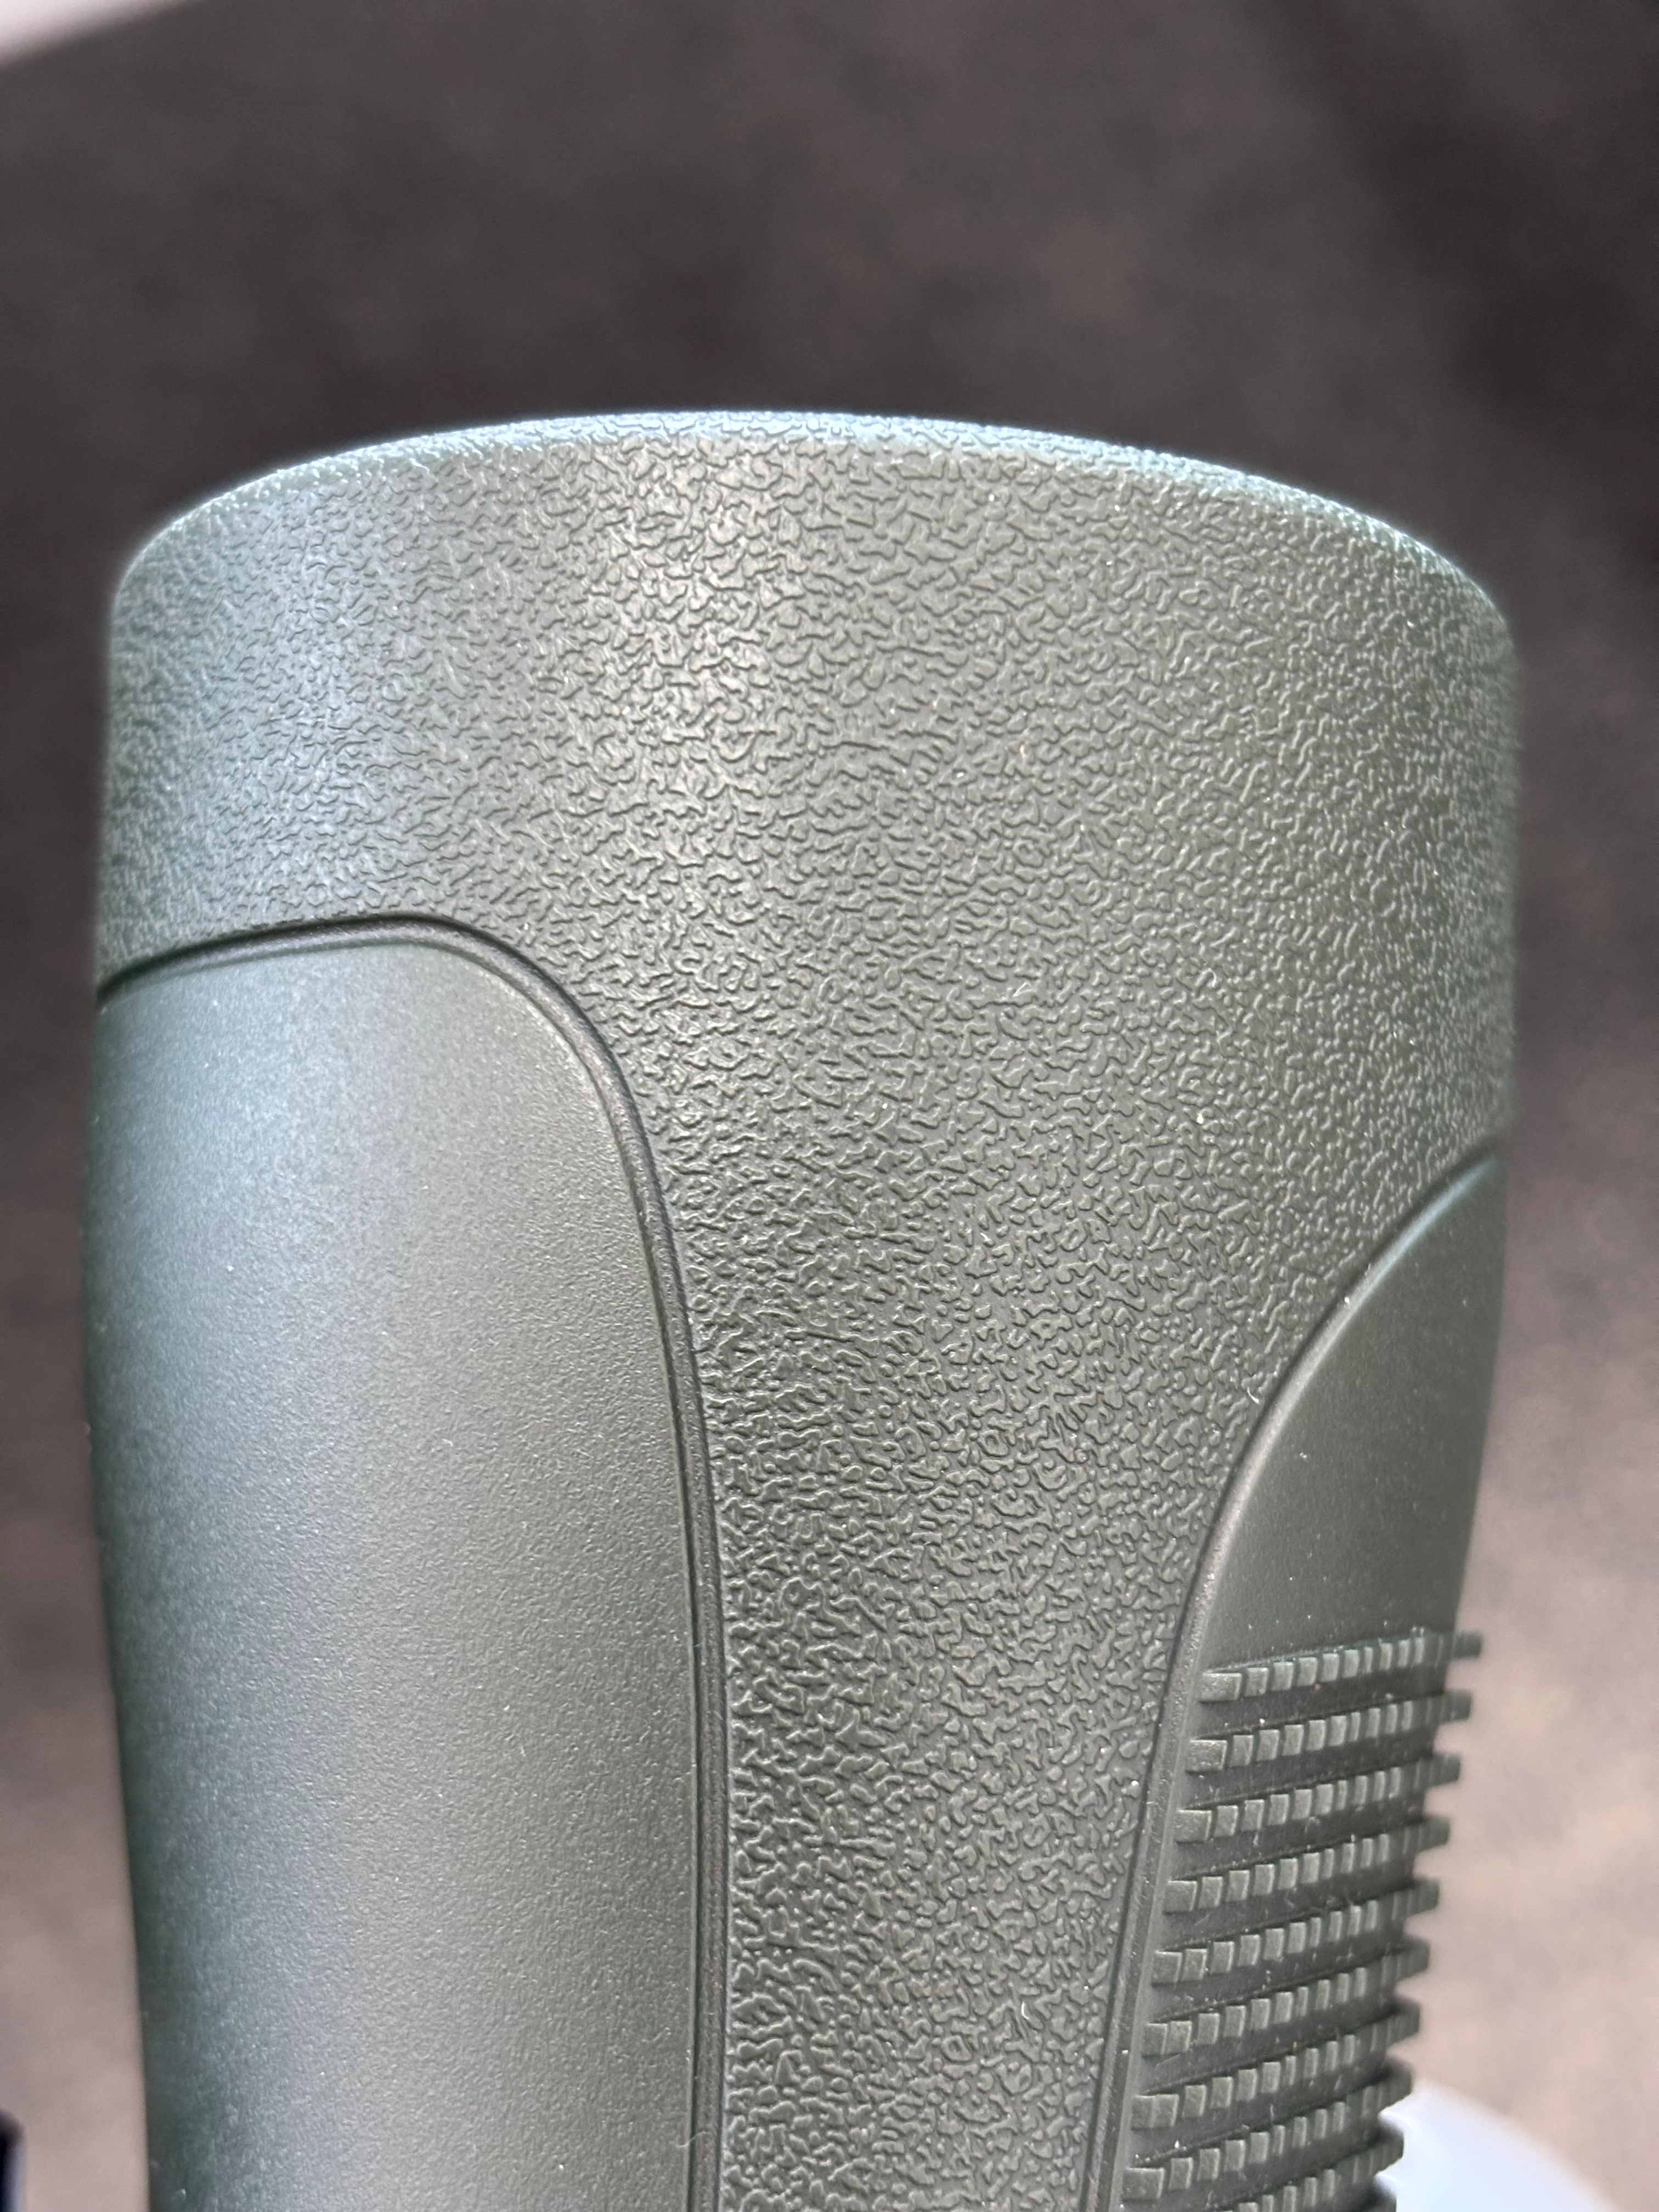

Hi, does anyone know how to create this pattern in Photoshop or Illustrator? I need to use it to create a bump map in another program. Thanks
I had a few minutes so I tried both methods.
The first is Photoshop and uses the Add Noise, Blur and Find Edges filters. Note tje Find edges Filter is set to Exclusion blend mode. The resulting pattern is here :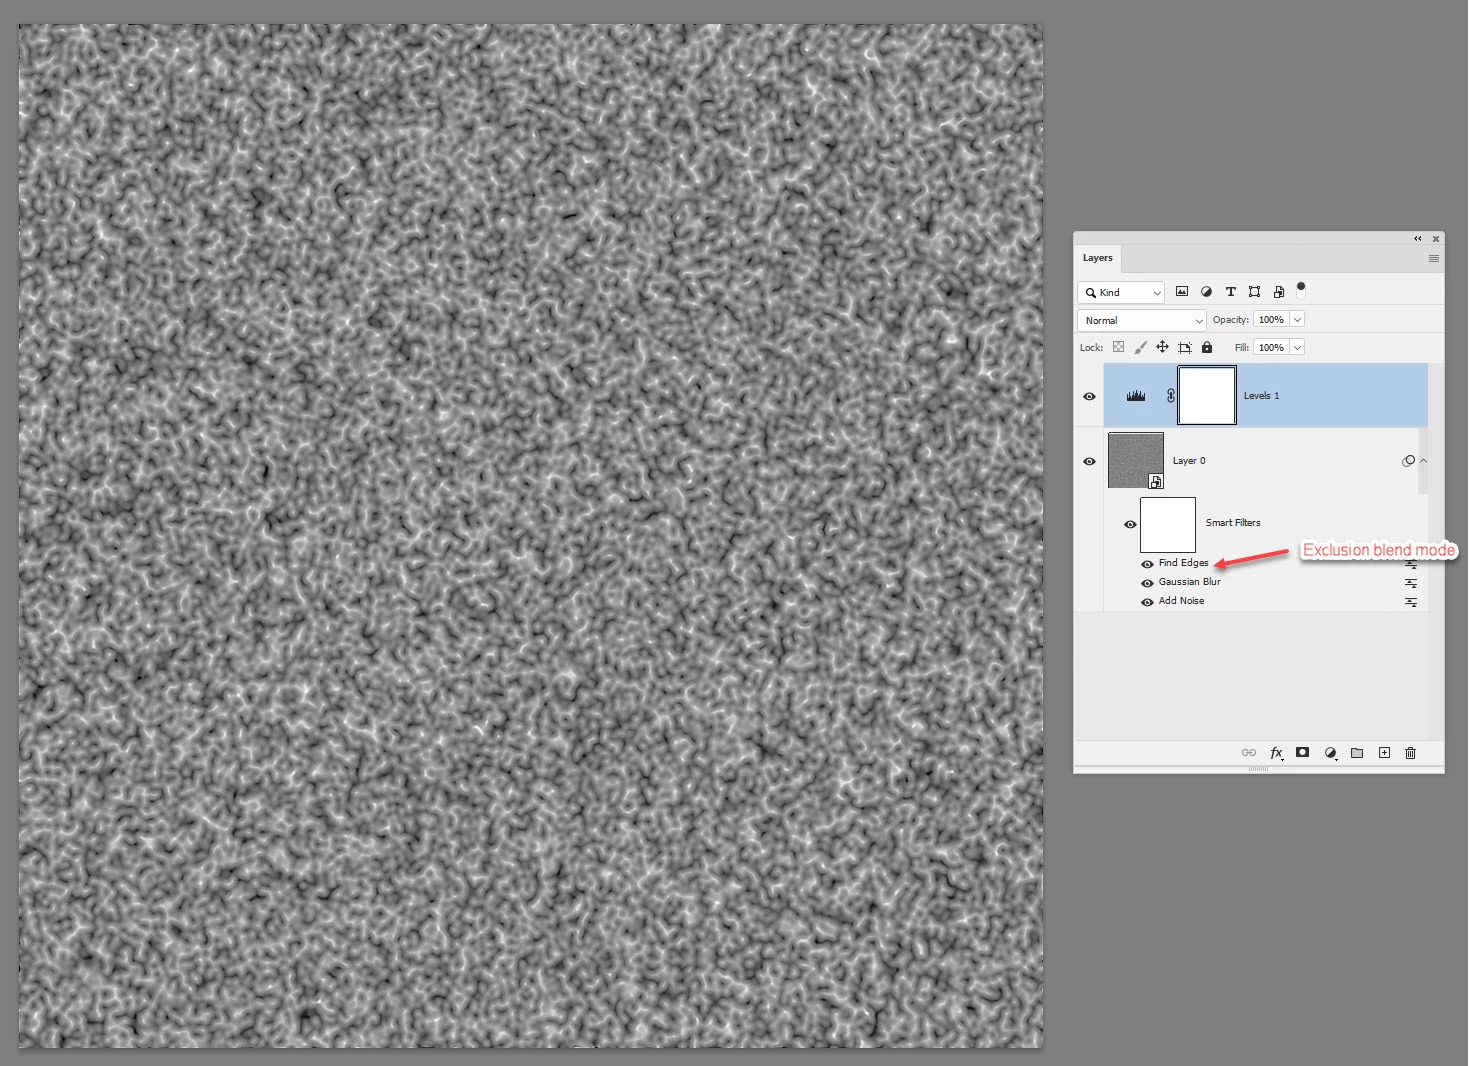
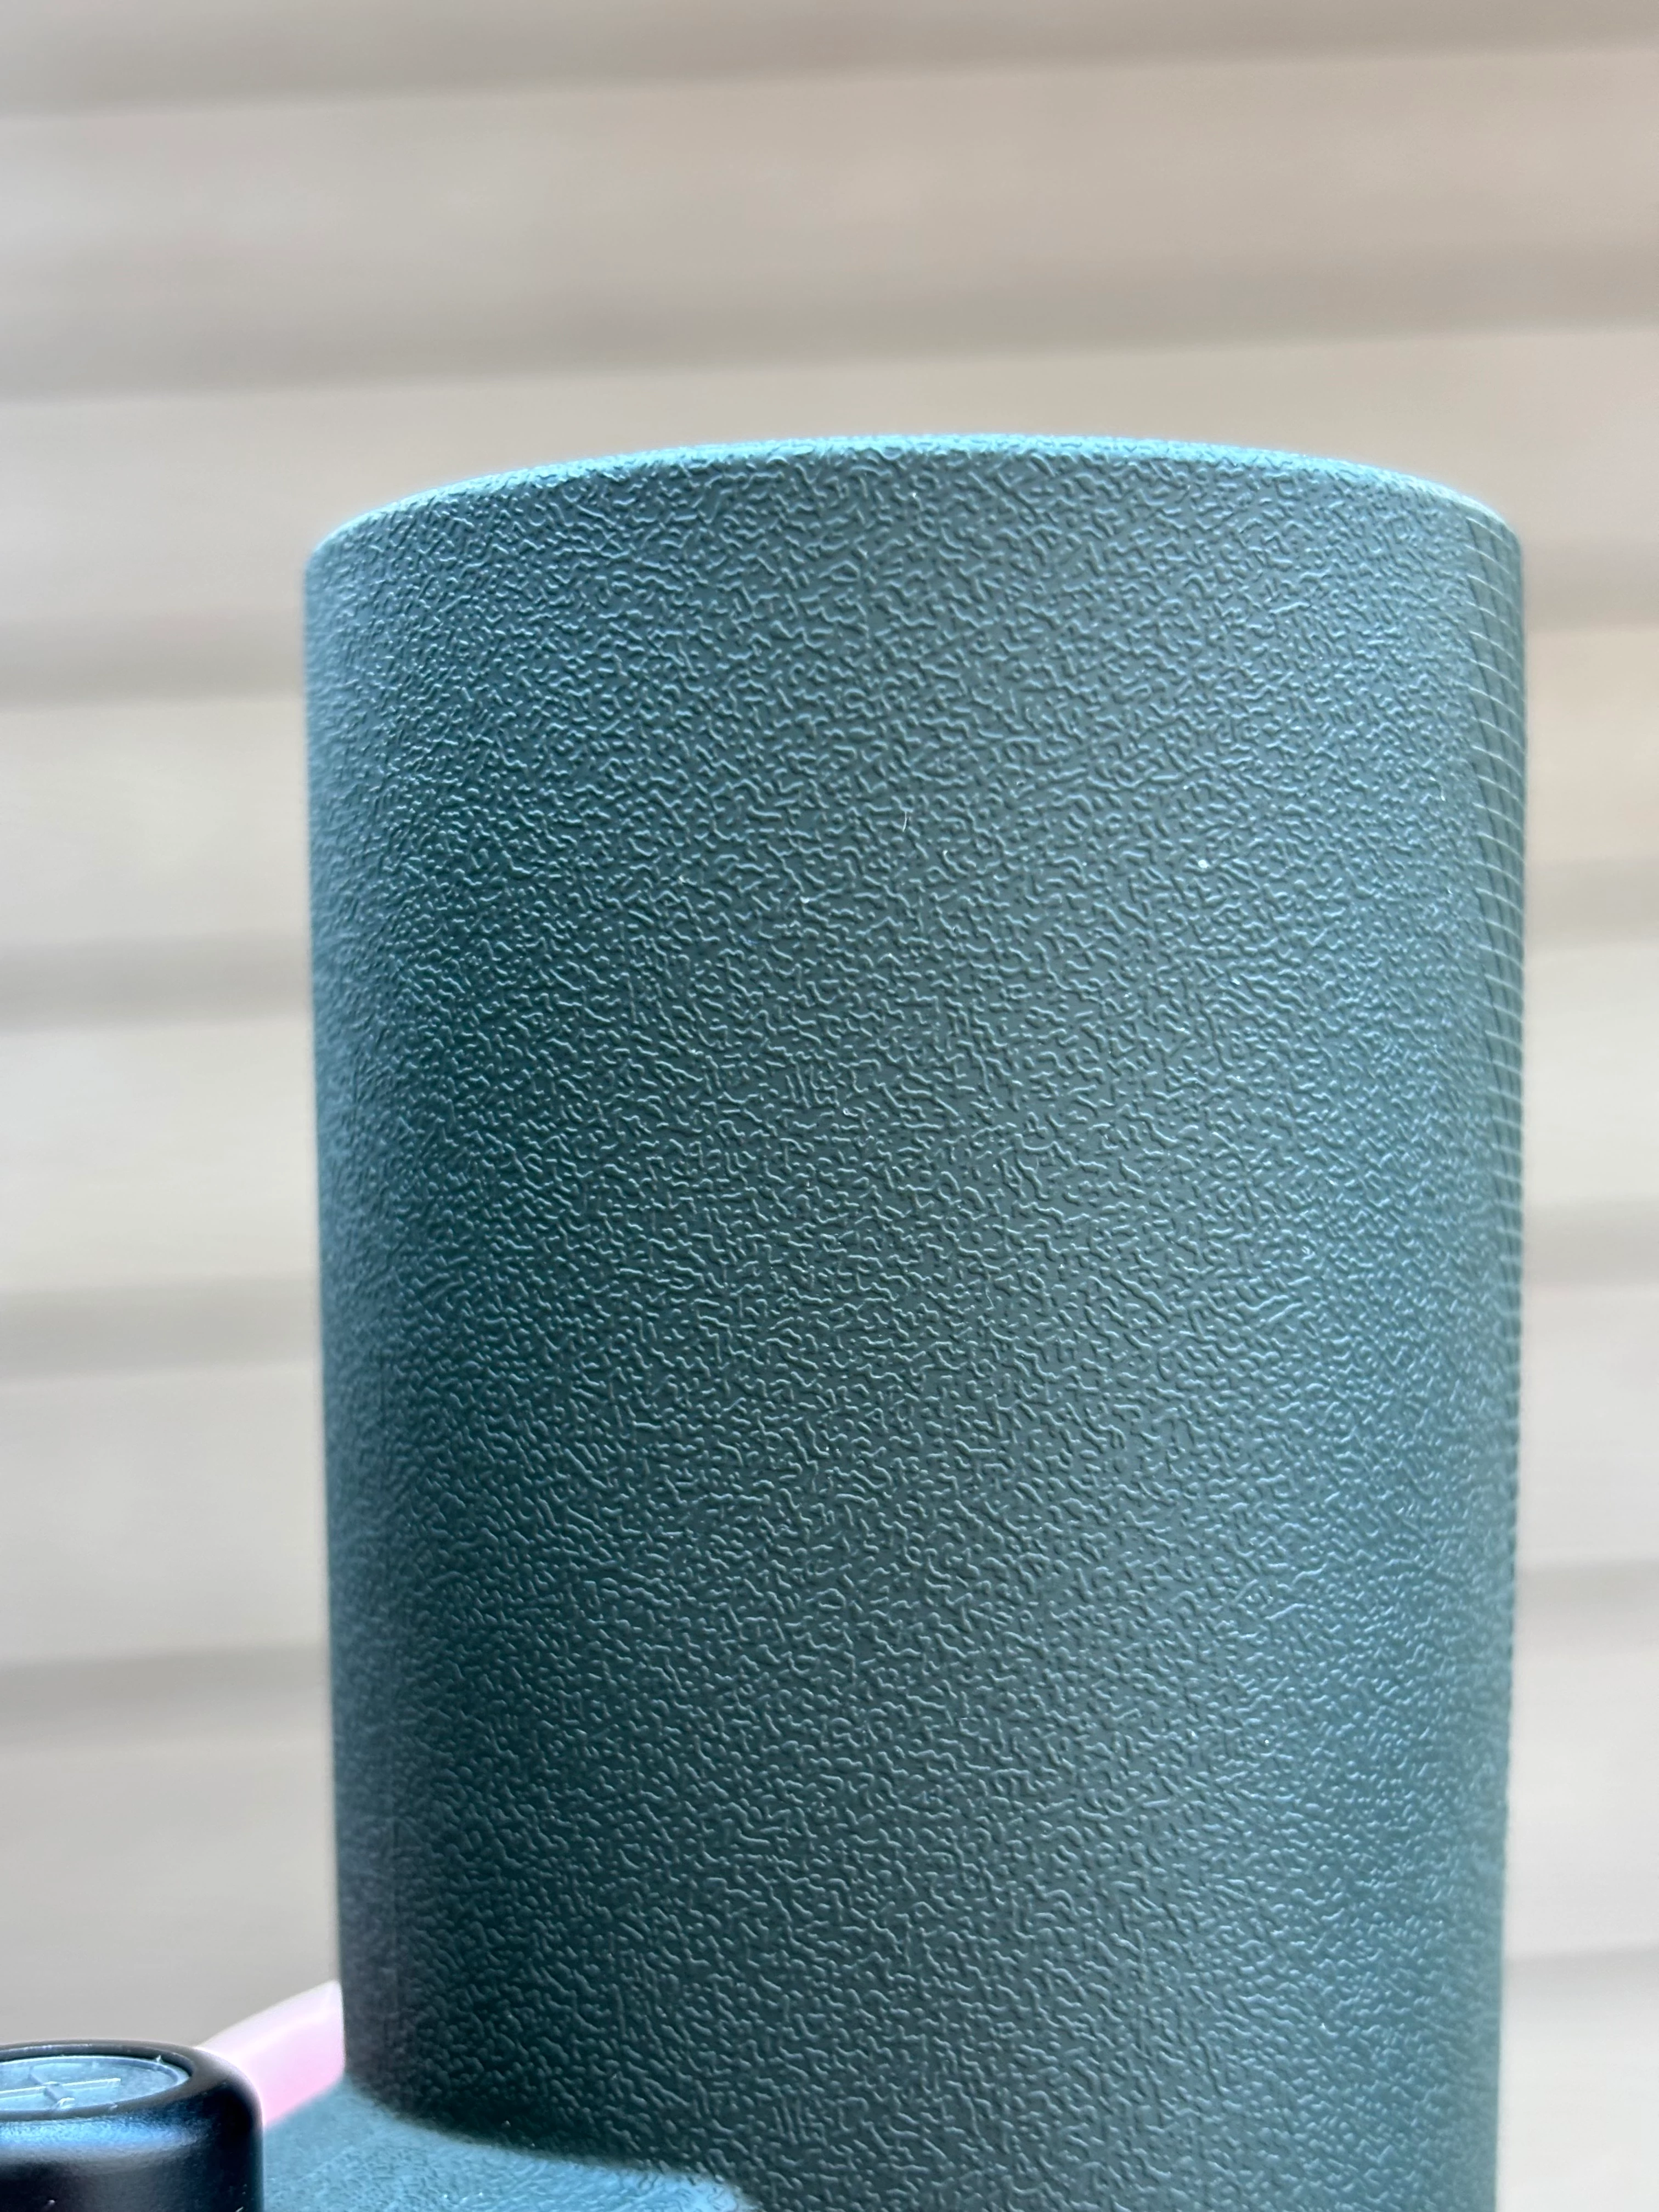
The second is Substance 3D Designer and the texture is based on a Perlin Noise node, plugged into the Height and Normal outputs. The top left window shows the tiled material on a cylinder.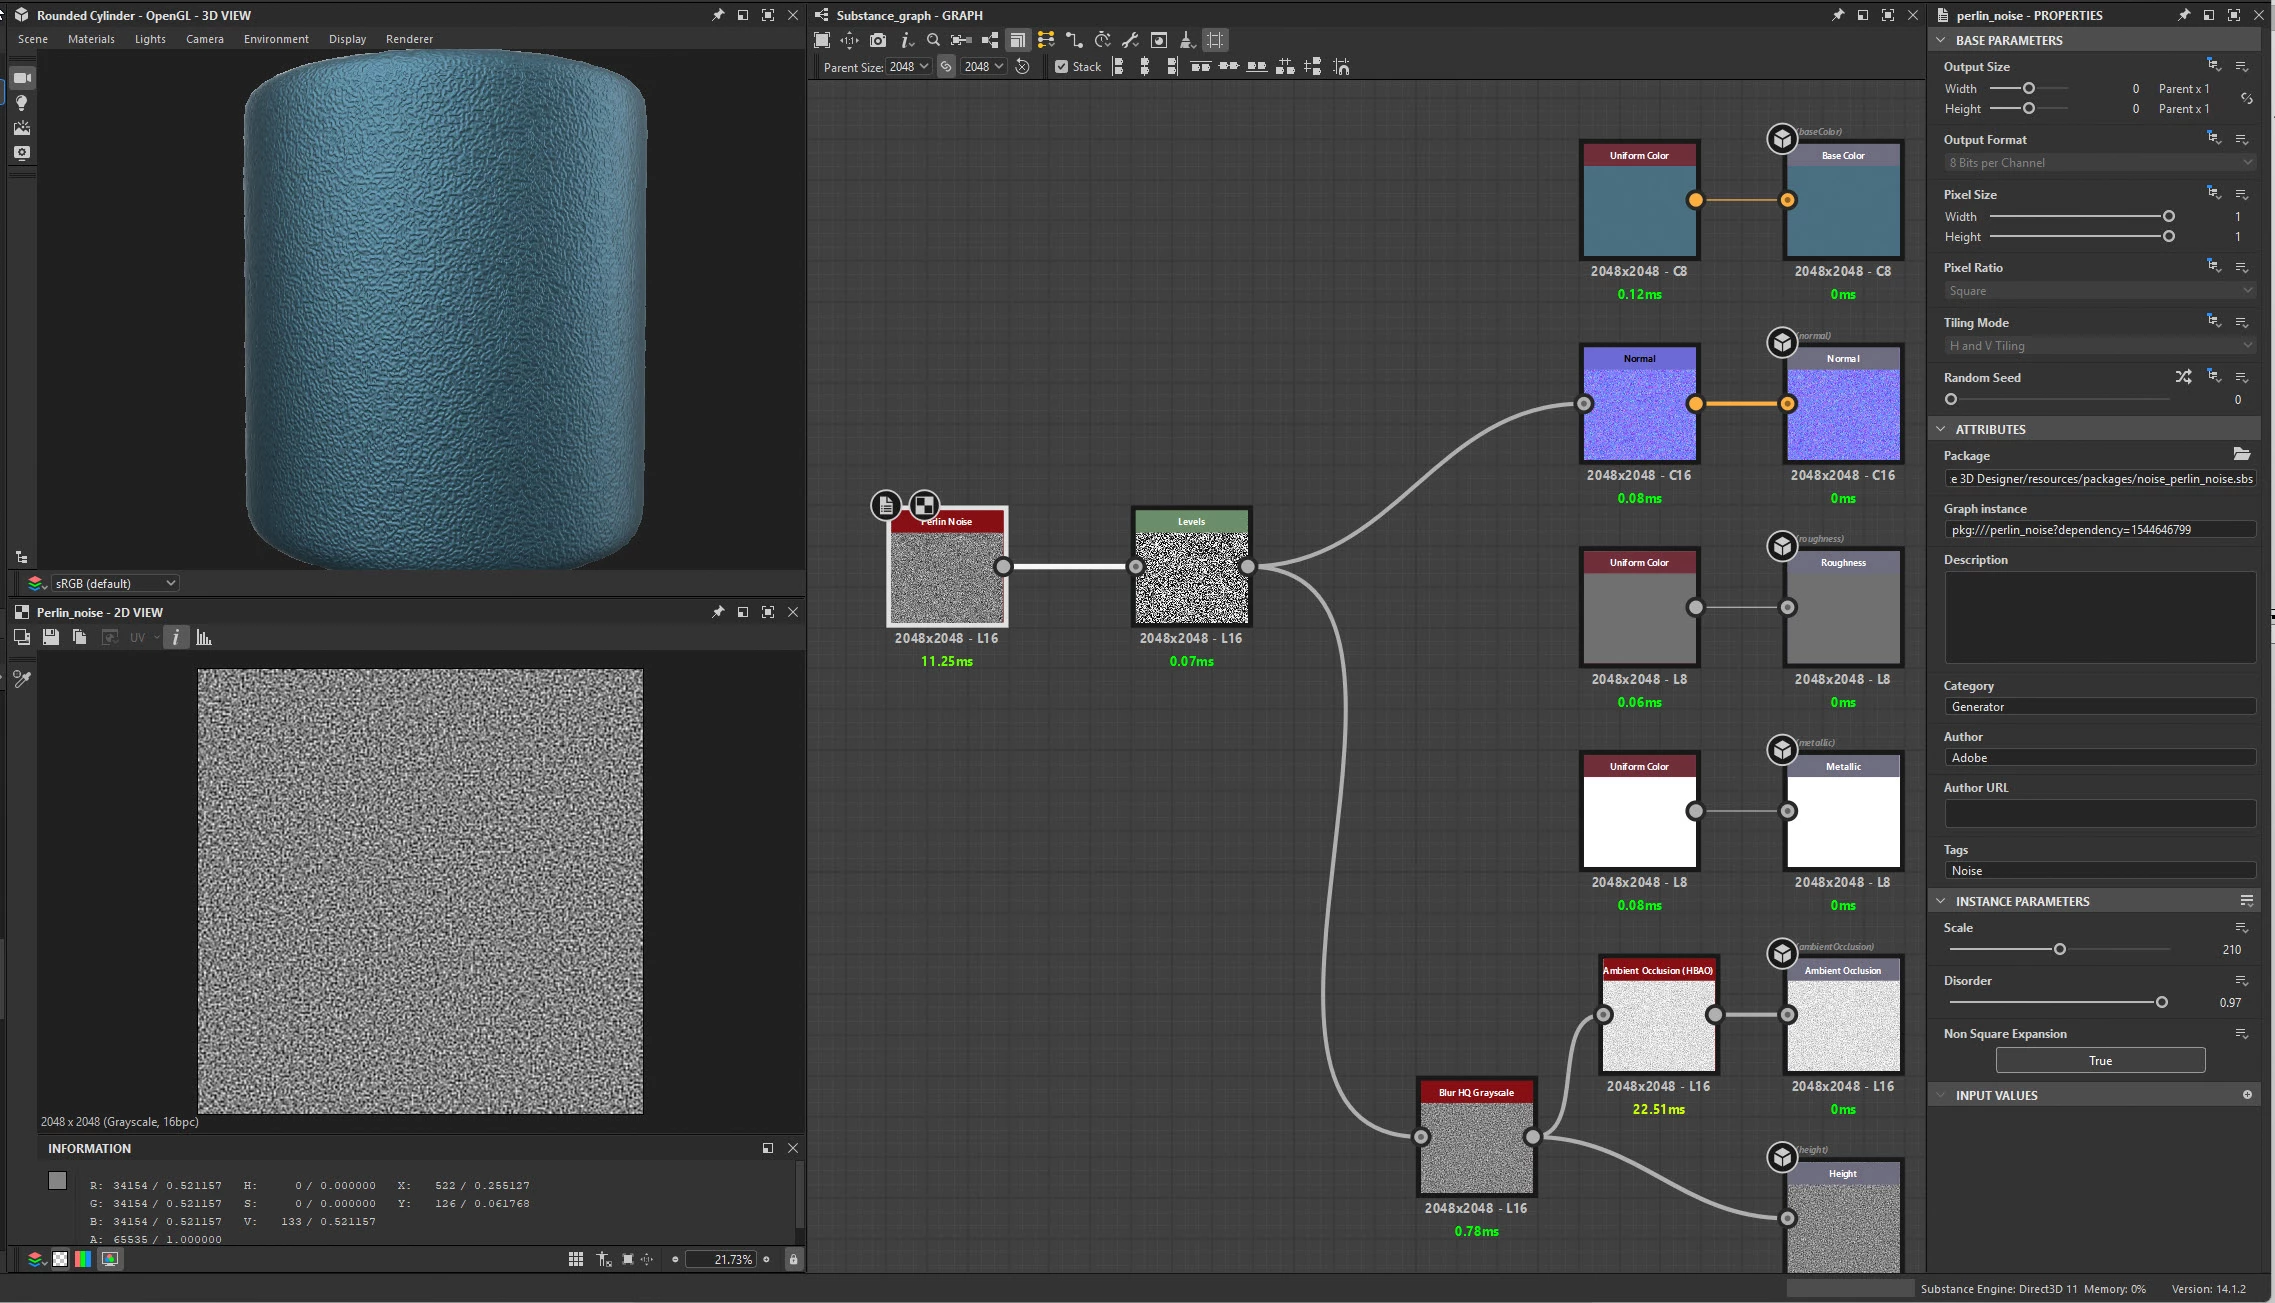
The Substance Designer Method is closer and is also tileable.
Dave
Already have an account? Login
Enter your E-mail address. We'll send you an e-mail with instructions to reset your password.