Copy link to clipboard
Copied
Good morning,
After using the quick selection tool to create the area that I want to work on, I want to darken that area, but am not finding the correct tool/procedure or to get that done.
Any ideas appreciated.
 4 Correct answers
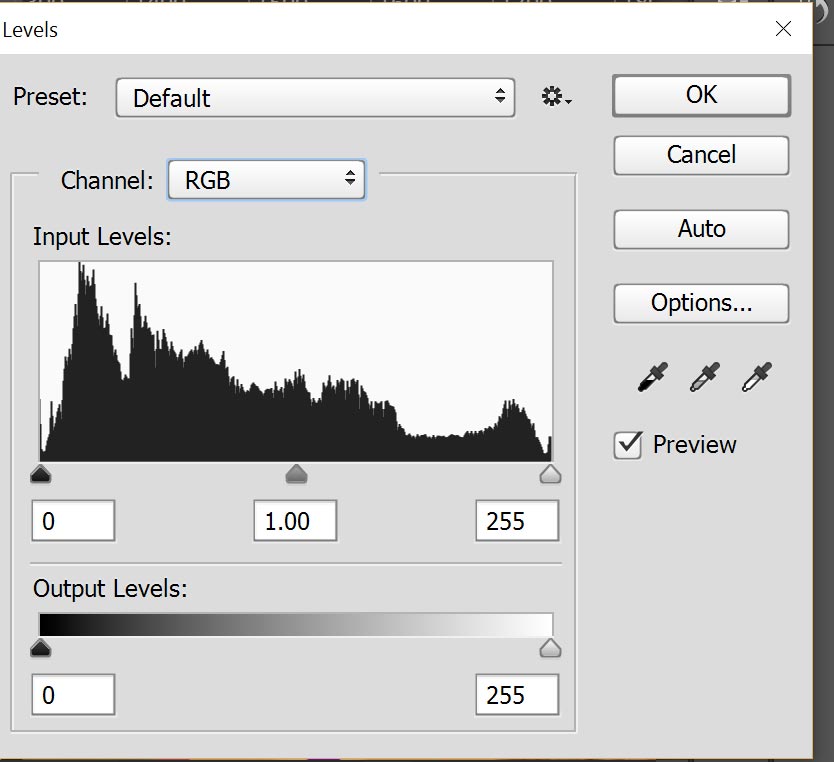
Another very easy way to do that is use levels.Press Ctrl+L and levels window will pop-up.Like i have done it.

I almost never use Brightness/Contrast.
Try Image > Adjustments > Levels.
Levels give you much greater control.
Nancy O.
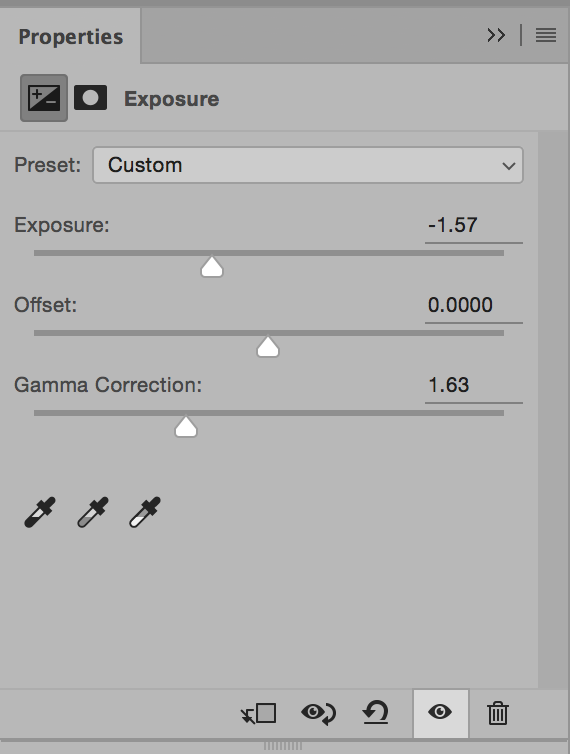
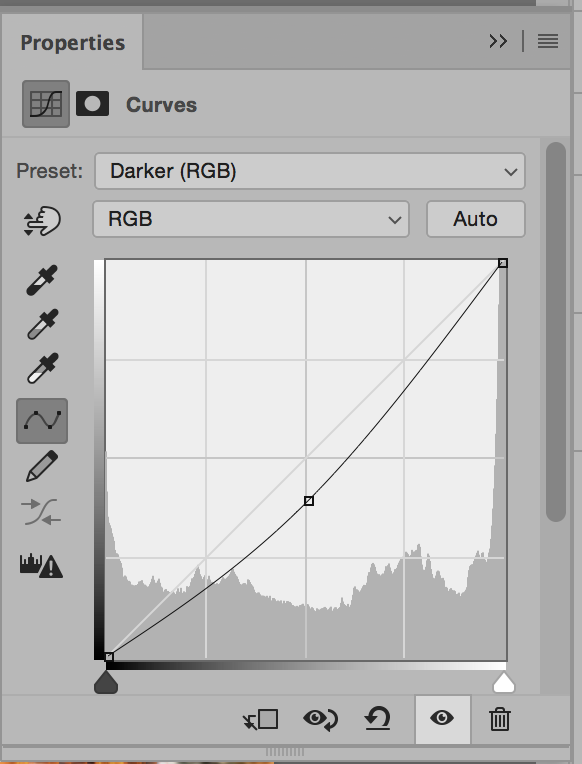
Two more ways are to use an Exposure Adjustment layer or a Curves Adjustment layer.
You'll need to test these to see which works best for you and for your image.
Adjustment layers can be deleted.
If you would like a totally different method that gives you possibly greater control visually than the analytical methods you could try this.
1) just make your selection, in this case a beach rock and copy it to a new layer. Ctrl or Command J
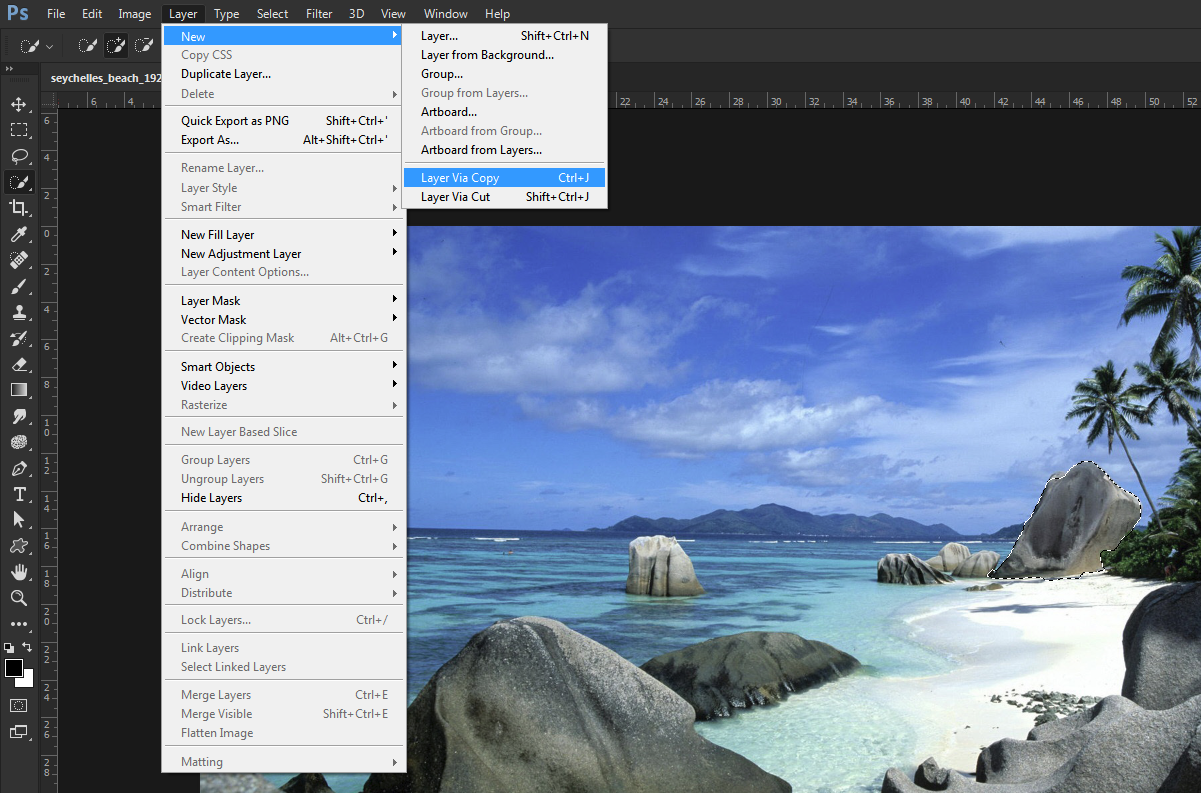
2) Create a new layer directly above the layer containing the rock and choose Fill from the Edit Menu
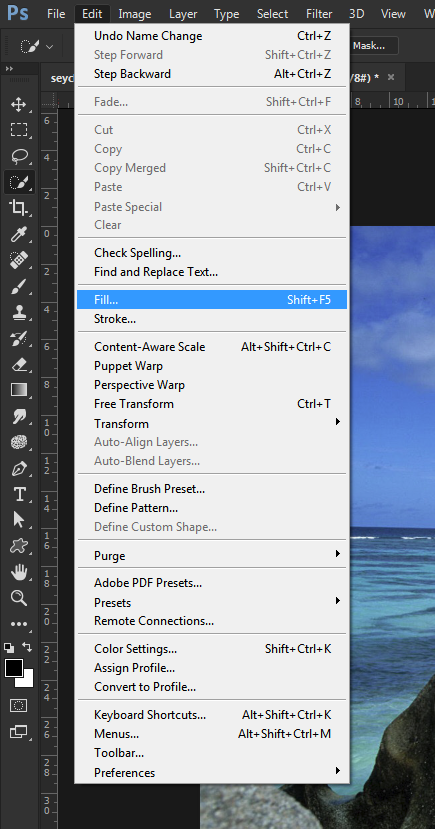
When the dialog appears choose to fill with 50% Grey and set the blend mode of the 50% grey layer to overlay or soft light
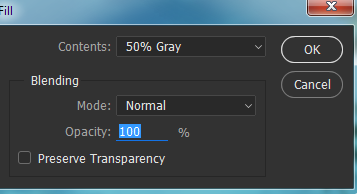
3) Clip the Grey layer to the underl
...Explore related tutorials & articles
Copy link to clipboard
Copied
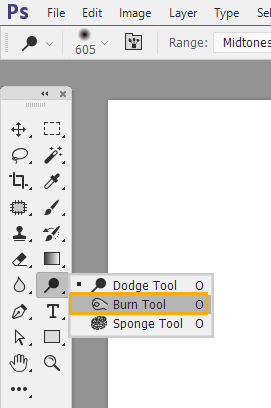
one way, you may use the burn Tool
Copy link to clipboard
Copied
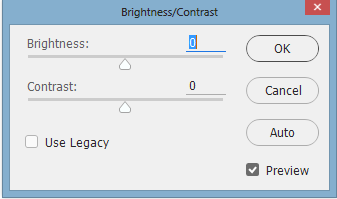
Another Quick Command:
image -> adjustment -> Brightness and Contrast
Copy link to clipboard
Copied
Another very easy way to do that is use levels.Press Ctrl+L and levels window will pop-up.Like i have done it.

Copy link to clipboard
Copied
I almost never use Brightness/Contrast.
Try Image > Adjustments > Levels.
Levels give you much greater control.

Nancy O.
Copy link to clipboard
Copied
Two more ways are to use an Exposure Adjustment layer or a Curves Adjustment layer.
You'll need to test these to see which works best for you and for your image.
Adjustment layers can be deleted.


Copy link to clipboard
Copied
...and all the examples here are a correct answer to your question.
Now which one to choose: I never worked with the burn tool, even that it is the original tool from my earliest Photoshop.
Mostly, I use the Level adjustment or the Curves adjustment as a adjustment layer. Best for non-destructive work. Exposure is too new to for me, and I'm used to the 2 above.
The brightness/contrast adjustment was not working very good in early versions of PS (legacy!), so I use that one only for special adjustments.
Copy link to clipboard
Copied
If you would like a totally different method that gives you possibly greater control visually than the analytical methods you could try this.
1) just make your selection, in this case a beach rock and copy it to a new layer. Ctrl or Command J

2) Create a new layer directly above the layer containing the rock and choose Fill from the Edit Menu

When the dialog appears choose to fill with 50% Grey and set the blend mode of the 50% grey layer to overlay or soft light

3) Clip the Grey layer to the underlying layer containing the rock alt-control-G or option-command-G on a Mac or from the menu

The layers will look like this
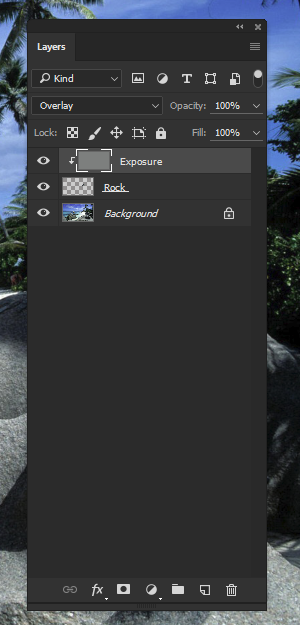
4) Now with the 50% Grey layer selected, here called exposure, select a soft brush with a foreground color of 'black' and the opacity set at about 20%, flow is optional and paint over the area to be darkened. (if the foreground color was white it would lighten) . You will find only the selection will be affected due to the clipping mask. If you go too far press X on the keyboard to make the foreground color white and repaint which will lighten the selection. When you are finished you can further refine the dodge and burning by changing the opacity of the 50% grey layer.
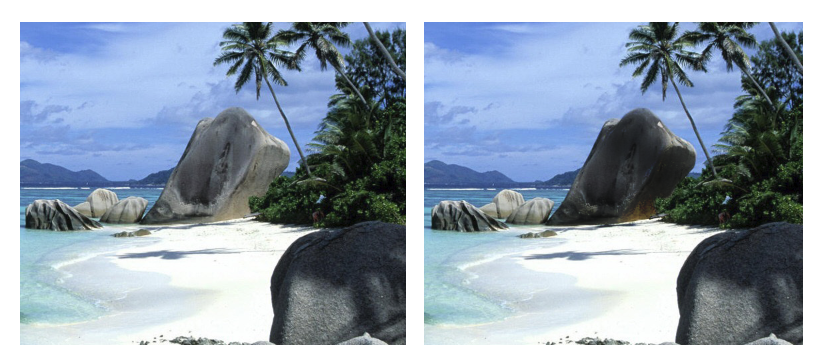
Below on the right is what I got using the technique. Sounds hard but just looks that way in print and takes less than a minute to do.
Find more inspiration, events, and resources on the new Adobe Community
Explore Now

